- Microsoft Cluster Network Load Balancing with Autonomous Storage Failover
- Microsoft Network Load Balancing Configuration
- Create New NLB Cluster
- Adding Additional Member Server to the Cluster
- Application Server : Microsoft Internet Information Services (IIS) Configuration
- Storage Configuration
- SMB Share on PowerScale Cluster
- DFS Folder Target
- Procedure to configure IIS
- Eyeglass DR
- Eyeglass DFS Mode Failover
- Creating Eyeglass REST API Token
- Using Curl Command to Retrieve IDs Related to Failover
- PowerShell Code
- Allowing Security Certificate
- Failover Code
- Best Practices
- Passwordless SSH Configuration
- OpenSSH for Windows : Allowing SSH connection using public ssh key
- Module Codes
- Main Python Code
- Locally Stored Commands
- On Linux Server
- On Windows Servers
- Eyeglass SSH config File
Microsoft Cluster Network Load Balancing with Autonomous Storage Failover
Microsoft Network Load Balancing Configuration
Reference
Microsoft Document
https://learn.microsoft.com/en-us/windows-server/networking/technologies/network-load-balancing
Create New NLB Cluster
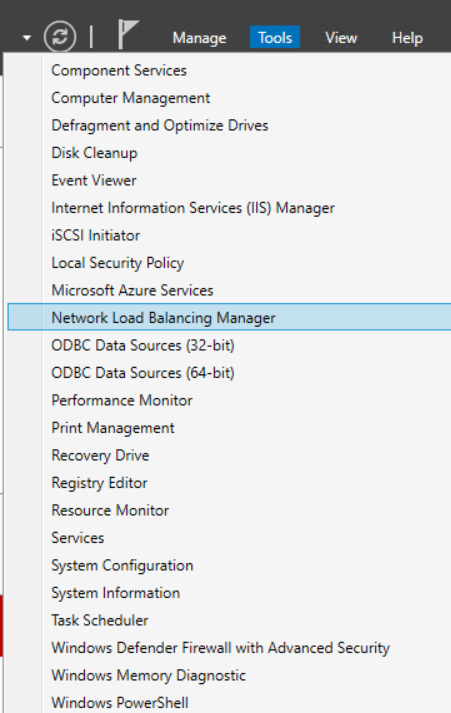
- On the Server Manager console of one of the member servers, click Tools and select Network Load Balancing Manager
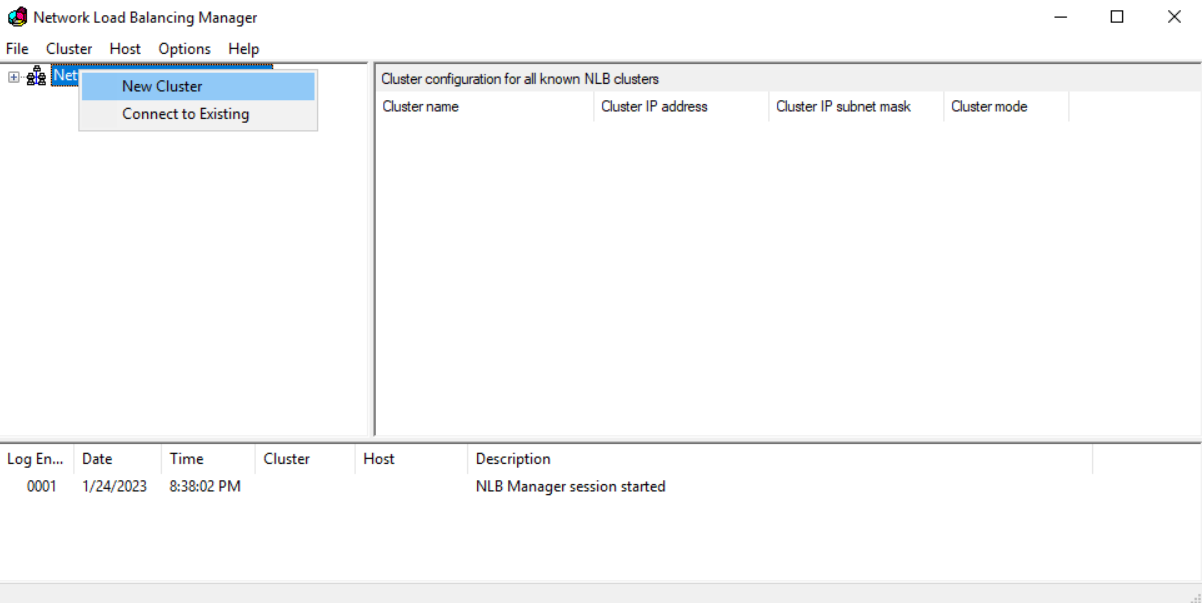
- Select and right-click Network Load Balancing Clusters and then click New Cluster.
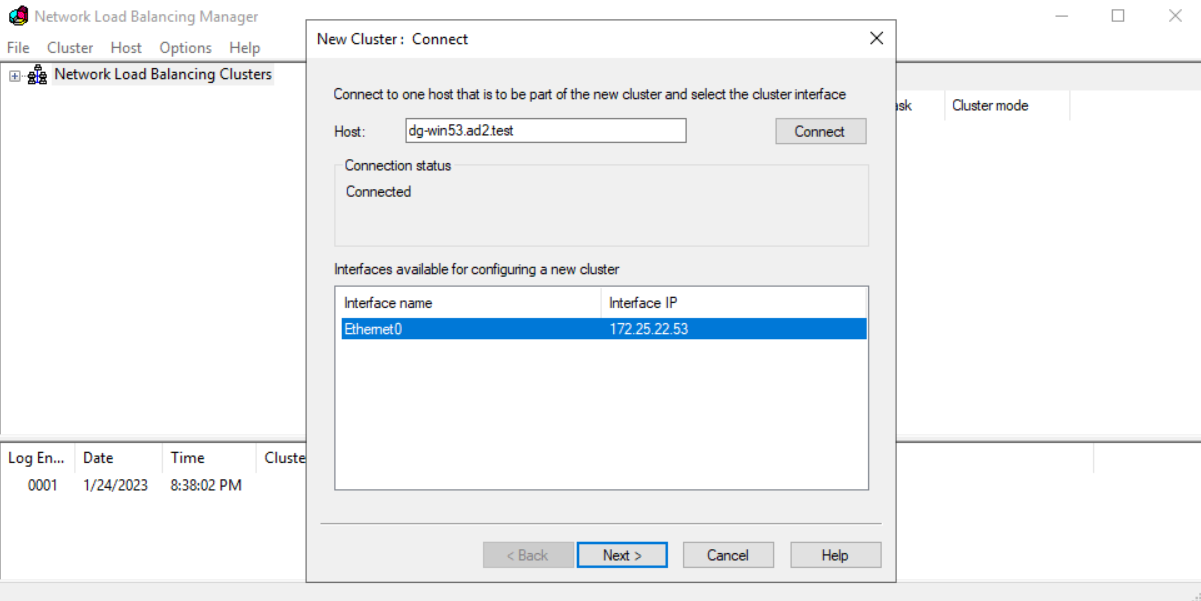
- Type the IP address or name of the member server that we want to add to the Cluster, in the Host field and then click Connect. Verify that the Interface name is listed and then click Next to proceed.
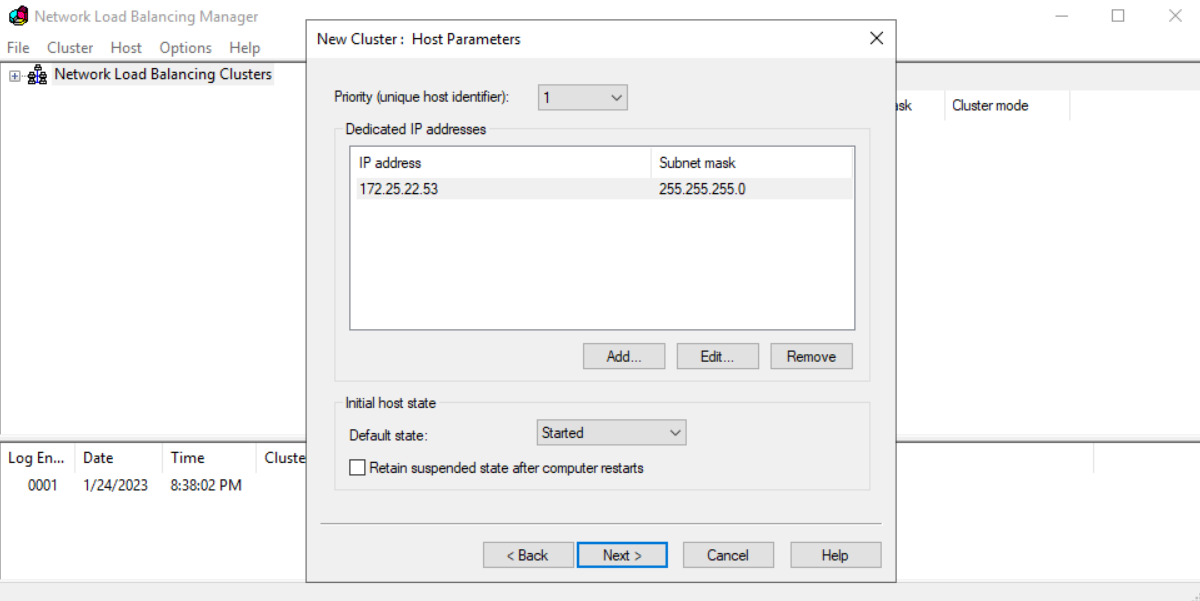
- On the New Cluster: Host Parameters page, adjust the priority value as per requirement. Also, ensure that the Default state is set as Started. Then click on Next button to proceed
- On the New Cluster: Cluster IP Addresses page, click Add to add a new Cluster IP address.
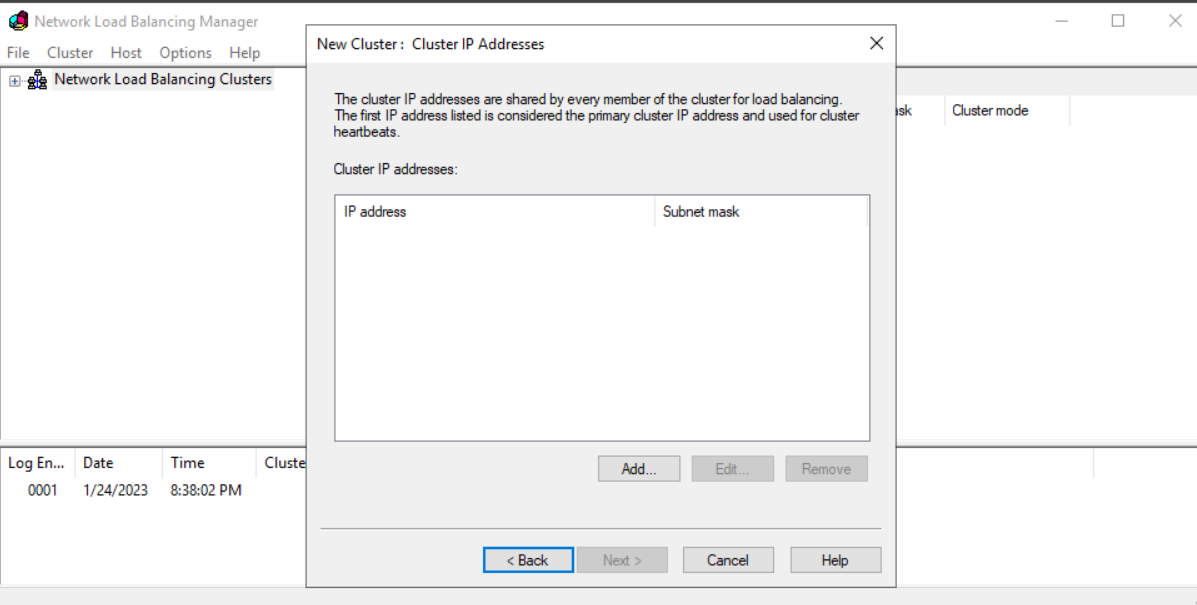
- Specify a Cluster IP Address, and click OK. Note: This IP address is a new NLB Cluster virtual IP address on which the host service will run.
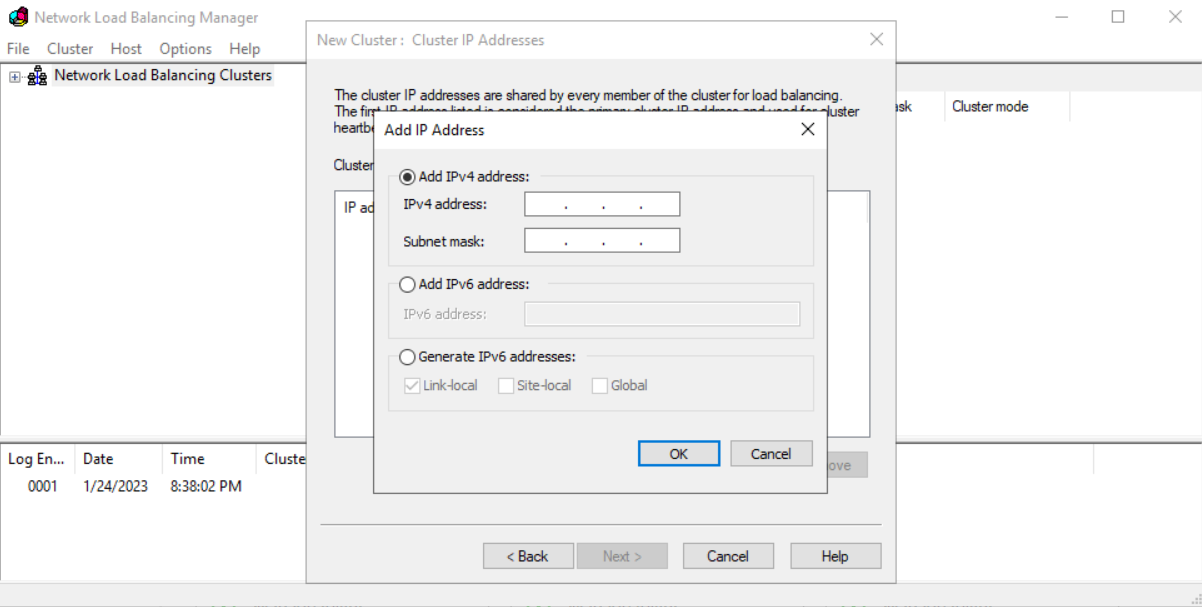
If required, we can add more than one IP address by performing the same steps. Click Next.
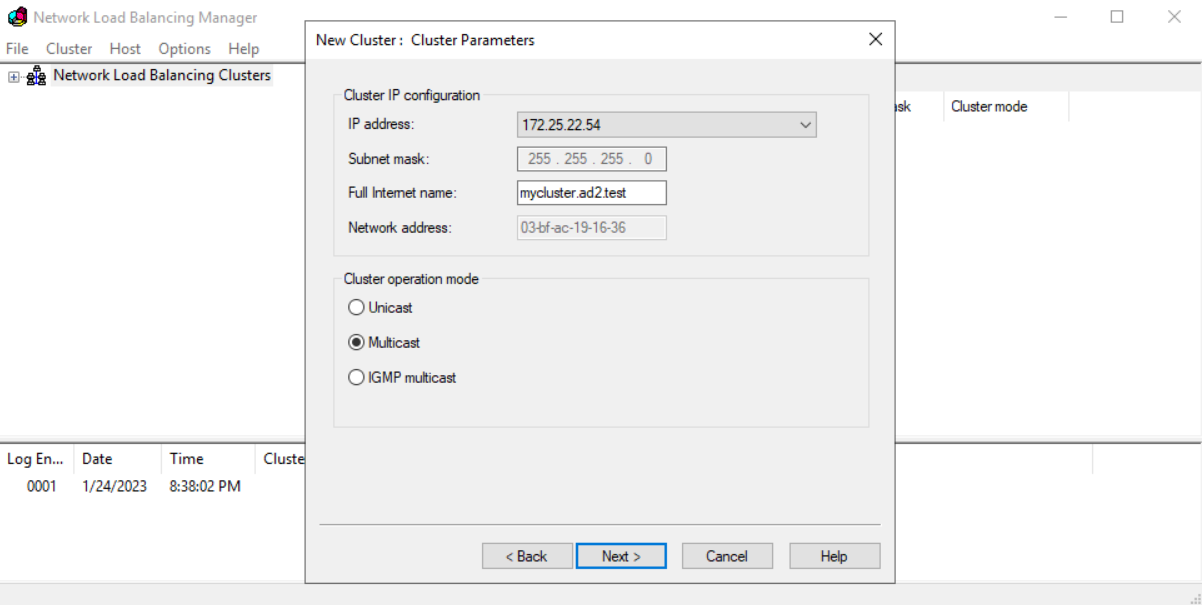
- On the New Cluster: Clusters Parameters page, select an NLB Cluster Operation Mode. (example: Multicast) . We can also specify the FQDN name for the NLB cluster in the Full Internet name field. Click Next.
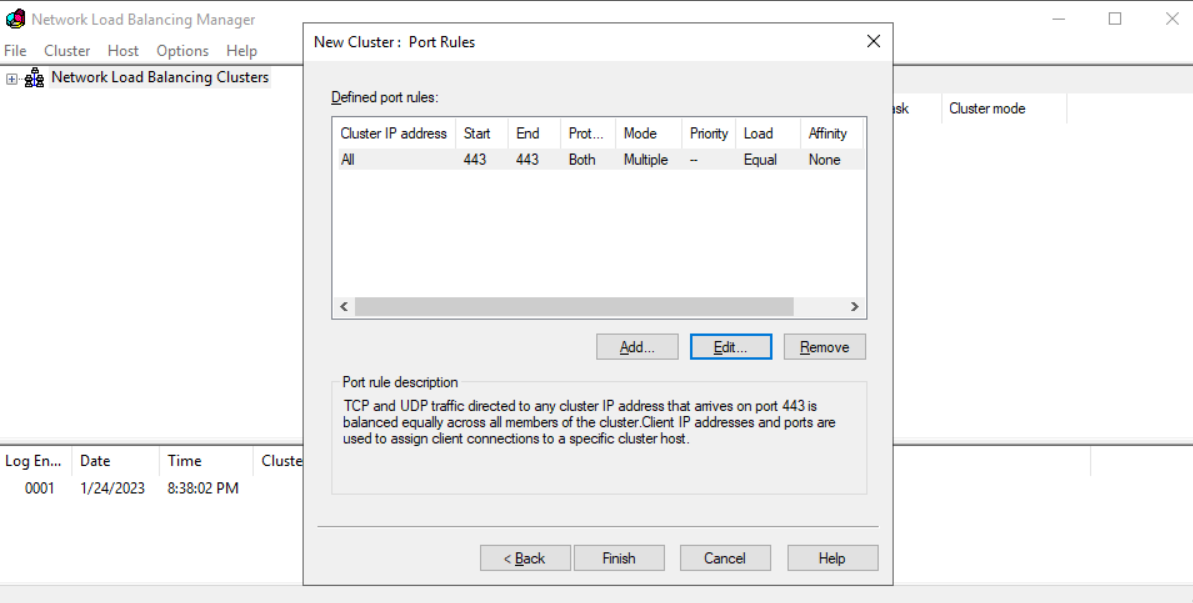
- On the New Cluster: Port Rules page, Edit or Add port rules according to our requirements.
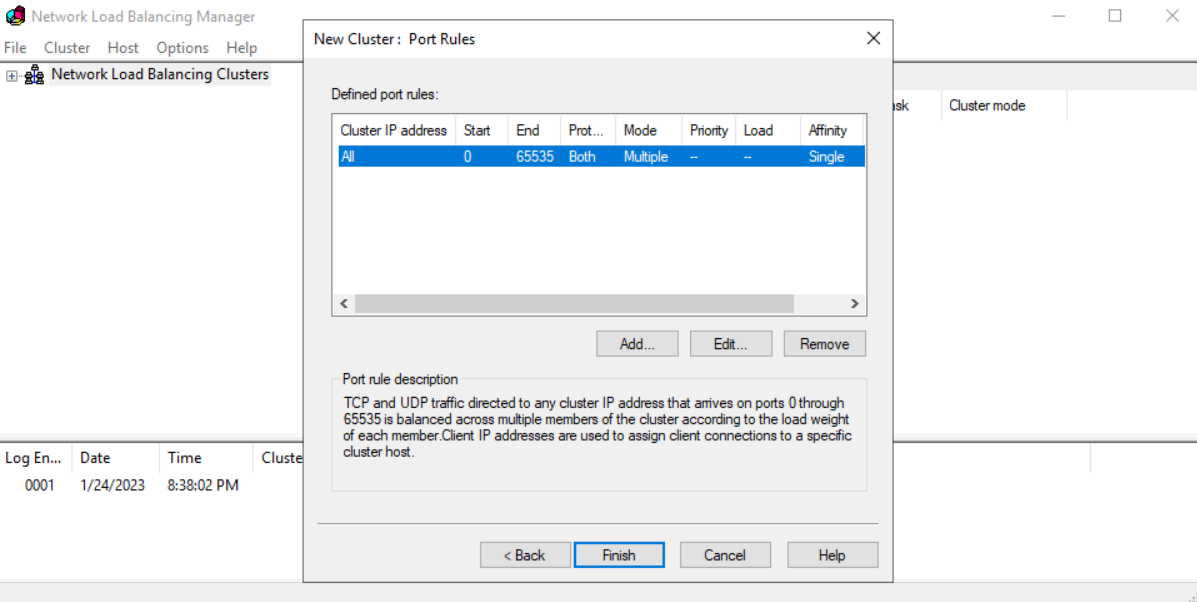
Example
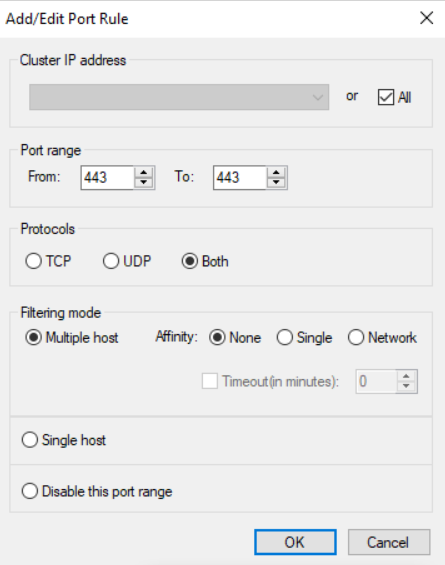
For more information regarding the Network Load Balancing Parameters (including Filtering Mode in Port Rule’s settings page) refer to this Microsoft Document https://learn.microsoft.com/en-us/previous-versions/windows/it-pro/windows-server-2003/cc778263(v=ws.10)?redirectedfrom=MSDN
- Once completed, click Finish button
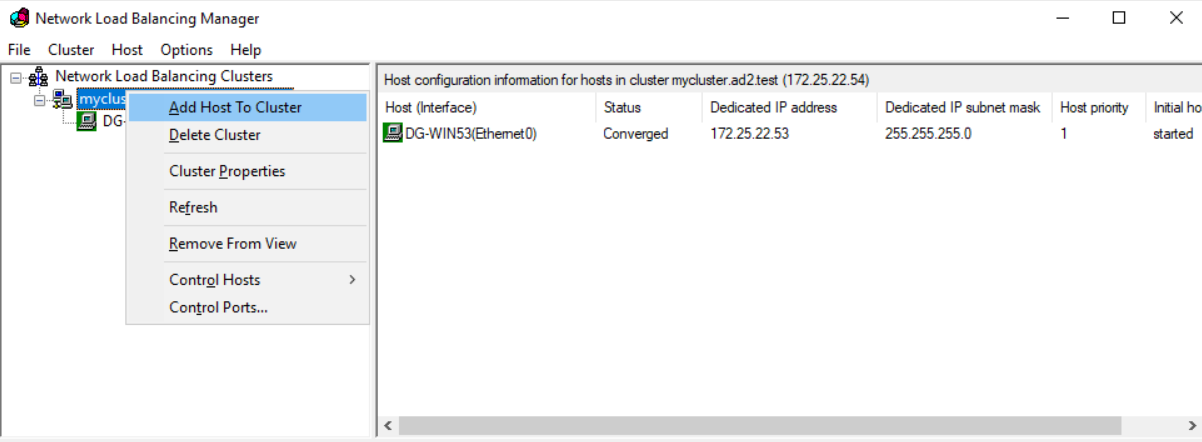
Adding Additional Member Server to the Cluster
1, Right-click on the existing NLB cluster and select Add Host To Cluster.
2. Type the IP Address or Name of the Member Server that needs to be added to the Cluster, in the Host field and then click Connect. Verify that the Interface name is listed and then proceed to next.
3. On the New Cluster: Host Parameters page, adjust the priority value of this node as per requirement. Also, ensure that the Default state is set as Started. Click the Next button.
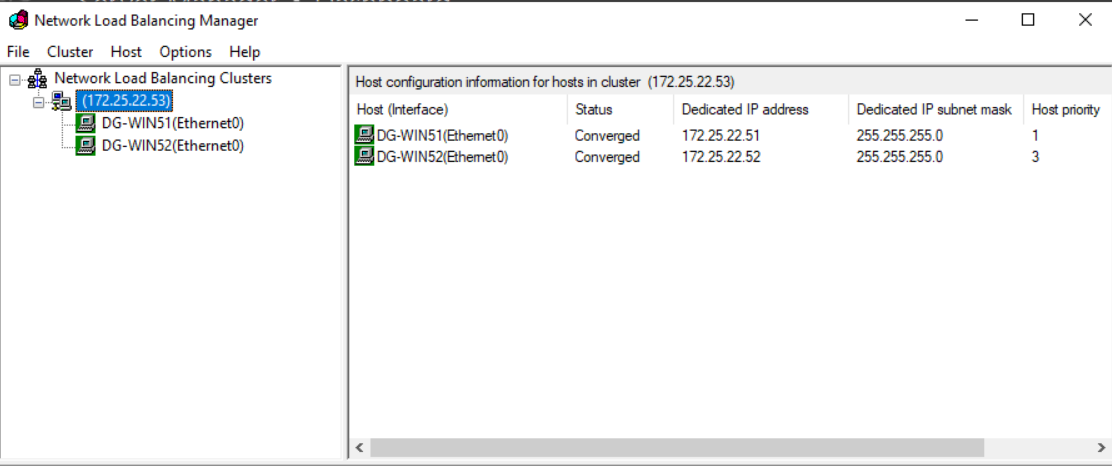
4. Click the Finish button to complete the process of adding the second NLB node to an existing NLB cluster.
5. Verify that the second NLB node is added successfully. The icon color should be displaying green and the Status is shown as Converged.
Example:
Application Server : Microsoft Internet Information Services (IIS) Configuration
Storage Configuration
SMB Share on PowerScale Cluster
- Configure SMB Share on the Production PowerScale with the required permissions . Refer to PowerScale OneFS configuration documentation for more information.
DFS Folder Target
- Configure DFS Folder Target for accessing the data by using DFS namespace UNC format. Notes for Eyeglass DFS Mode Failover, we configure the DFS Folder target as Dual Folder Targets. Refer to this document for detail procedure Example

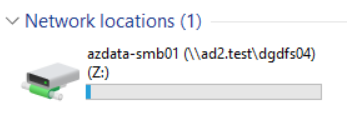
- Map network drive to Windows Server by using DFS namespace UNC. Example
Procedure to configure IIS
Refer to Microsoft Document for further information - https://learn.microsoft.com/en-us/iis/get-started/getting-started-with-iis/create-a-web-site
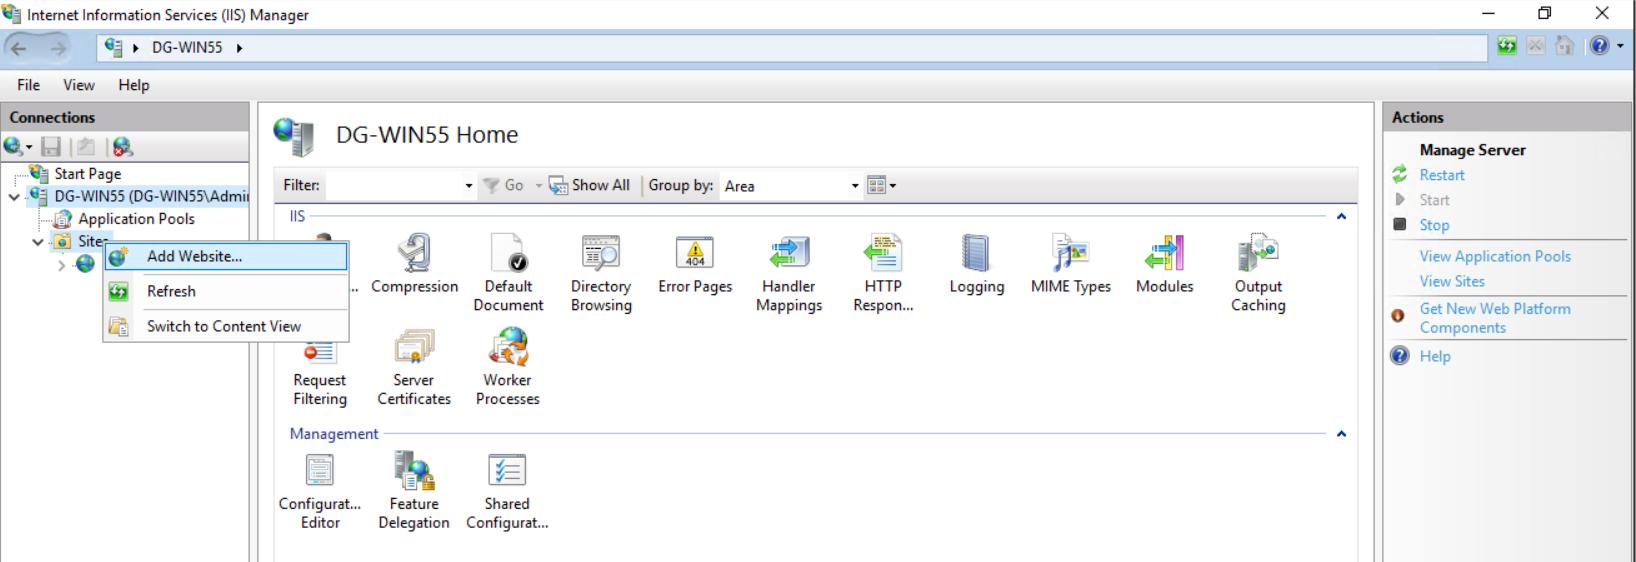
- Open IIS Manager.
- In the Connections pane, right-click the Sites node in the tree view, and then click Add Web Site.
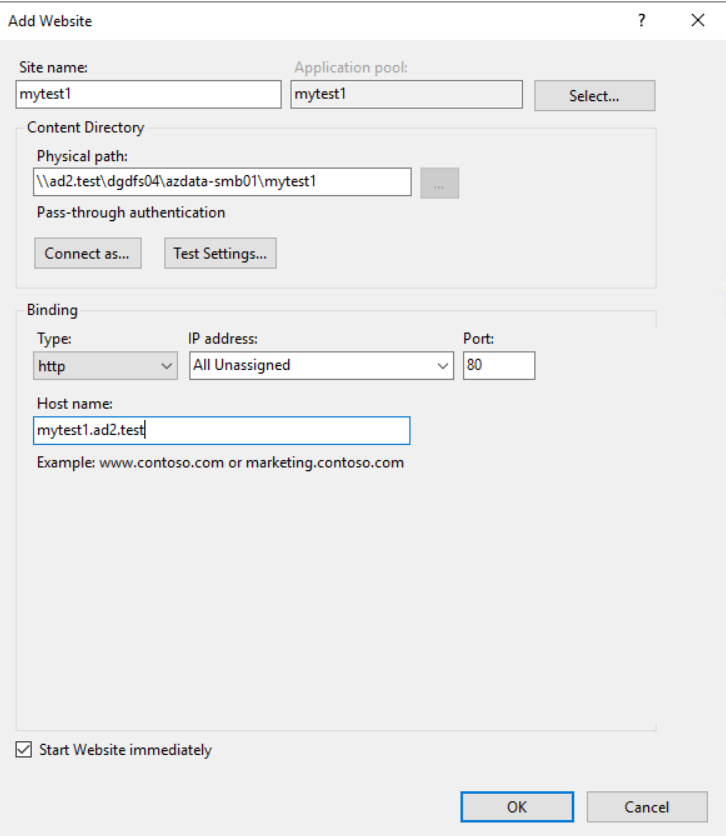
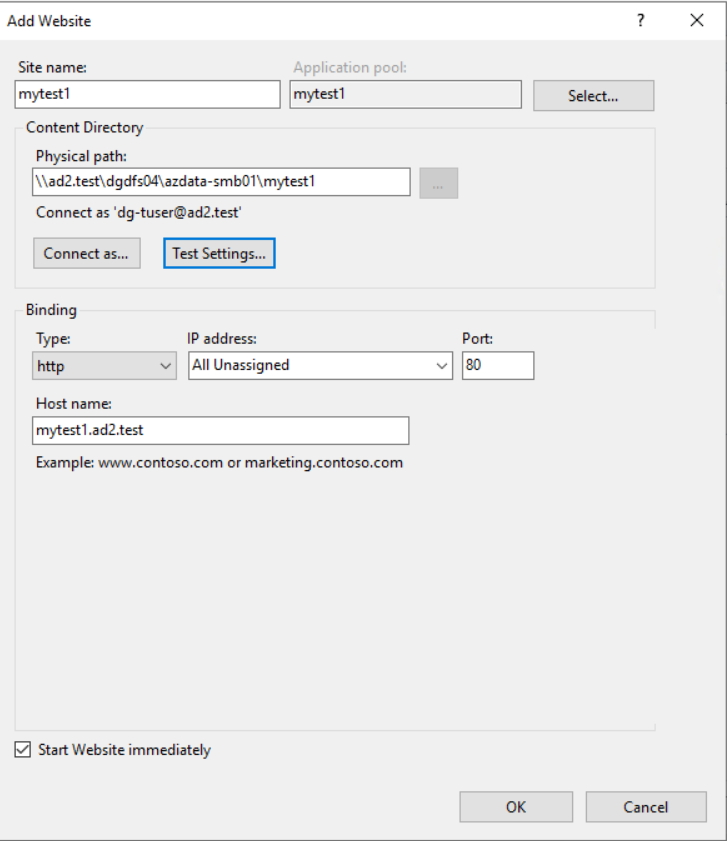
- In the Add Website dialog box, type a friendly name in the Web site name box. We can use the default application pool or select a different application pool than the one listed in the Application Pool box.
- In the Physical path box, type the path in the DFS namespace UNC format. Example: \\ad2.test\dgdfs04\azdata-smb01\mytest1
Example
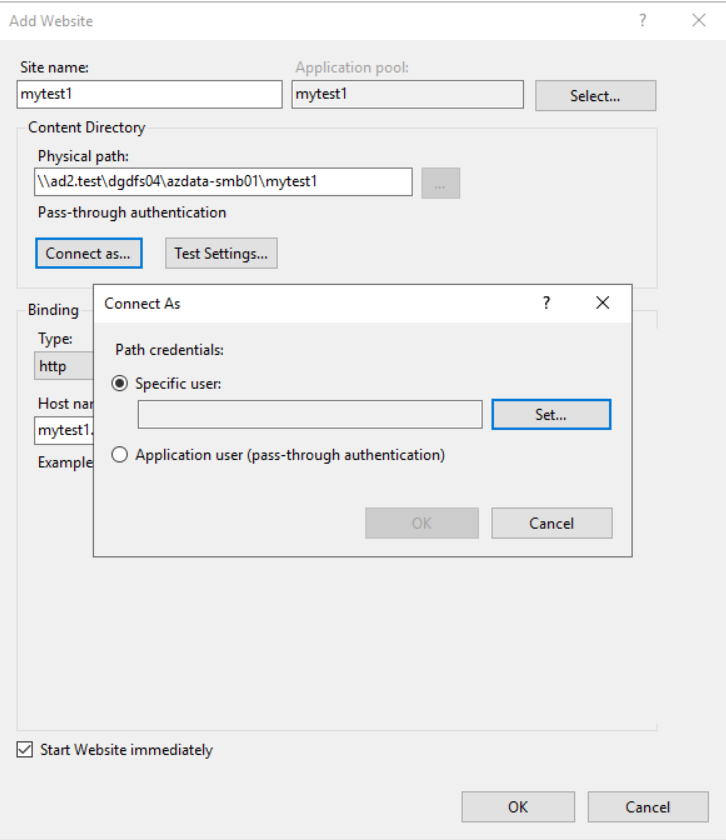
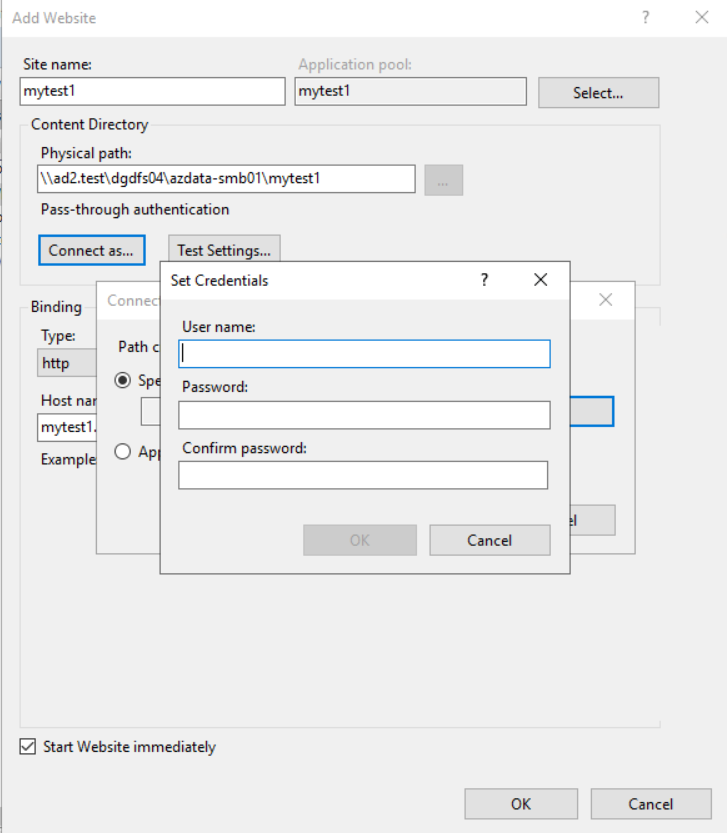
- Click Connect as button to specify credentials that have permission to access the path. .
Example for setting Connect As Specific User. Specify user and password.
- Select the protocol for the Web site from the Type list (http / https).
- The default value in the IP address box is All Unassigned. If you must specify a static IP address for the Web site, type the IP address in the IP address box.
- Type a port number in the Port text box.
- Click OK.
Eyeglass DR
Eyeglass DFS Mode Failover
Refer to Eyeglass DFS Mode Failover configuration document link
Creating Eyeglass REST API Token
Reference:
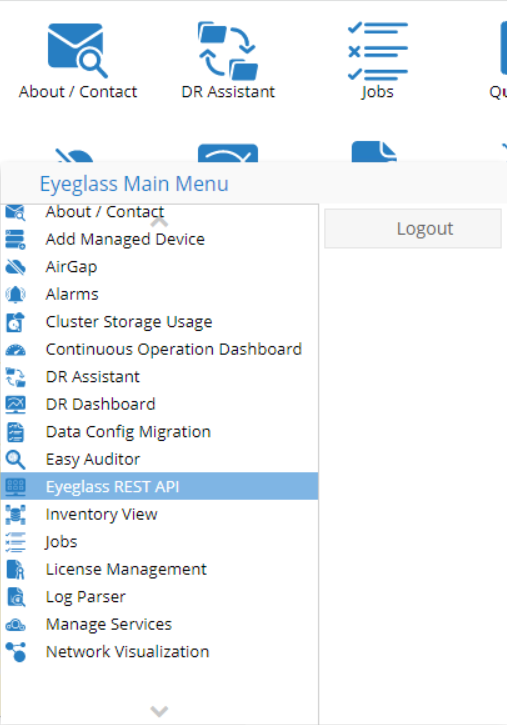
- Open the Superna Eyeglass REST API settings from the Eyeglass Main Menu
- Click on Create New Token button and enter a name to reference the token
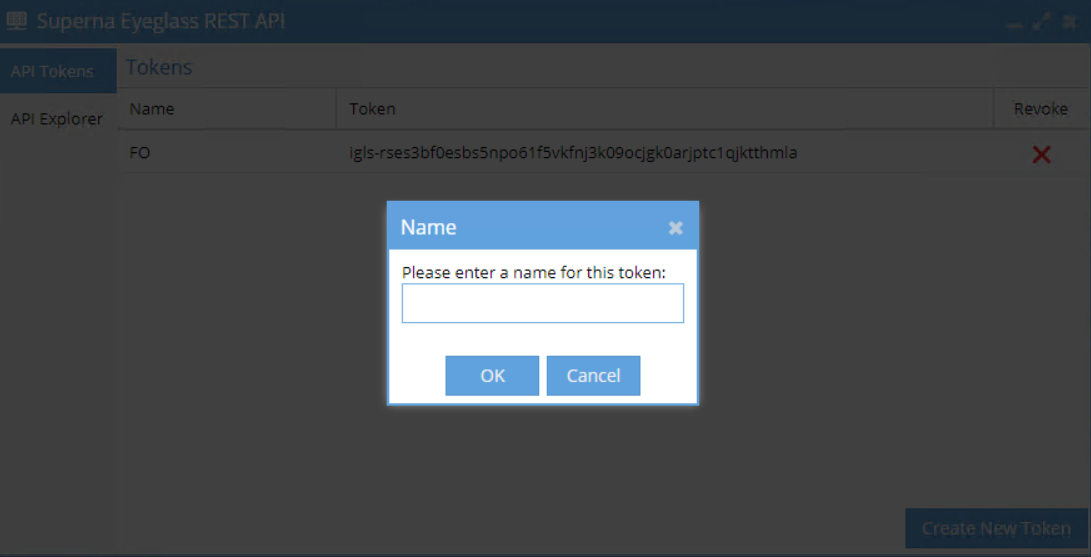
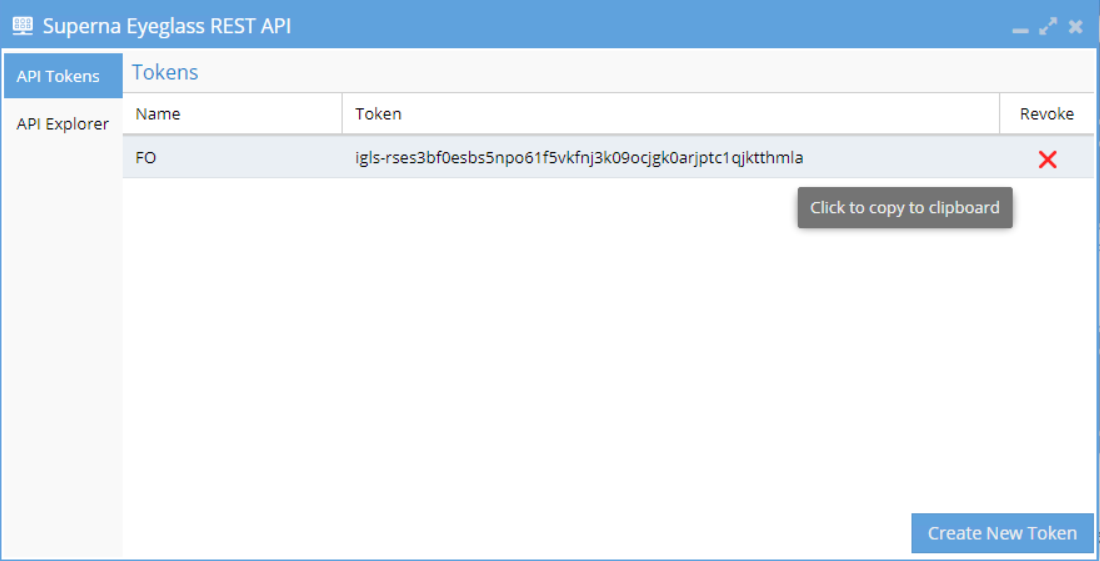
- Click OK and the new token will be shown in Tokens list
- Click the Token from the list to copy to clipboard and we can paste to our code for connection to Eyeglass
Using Curl Command to Retrieve IDs Related to Failover
Run the following curl command from Eyeglass appliance
- To retrieve PowerScale ID (Source Cluster ID and Target Cluster ID)
curl -X GET --header 'Accept: application/json' --header 'api_key: igls-xxxxxxxxxx' -k 'https://xx.xx.xx.xx/sera/v1/nodes'
Replace igls-xxxxxxx with the API token
Replace xx.xx.xx.xx with the IP Address of Eyeglas Appliance
Example of the output
[{"id":"dg-isi34_005056a46190d0a99a634405e3a211305c49","ip":"dg-isi34-aa.bb.cc.dd.igls.local","name":"dg-isi34"},{"id":"dg-isi38_005056a4885736b19a6389001550ffc12935","ip":"dg-isi38-ee.ff.gg.hh.igls.local","name":"dg-isi38"}]
Source Cluster ID = dg-isi34_005056a46190d0a99a634405e3a211305c49
Target Cluster ID = dg-isi38_005056a4885736b19a6389001550ffc12935
- To retrieve Failover Target ID (ID for the policy to be failed over)
curl -X GET --header 'Accept: application/json' --header 'api_key: igls-xxxxxxxxxx' -k 'https://xx.xx.xx.xx/sera/v1/nodes/dg-isi34_005056a46190d0a99a634405e3a211305c49/policies/<name-of-synciq-policy>'
Replace igls-xxxxxxx with the API token
Replace xx.xx.xx.xx with the IP Address of Eyeglas Appliance
Replace <name-of-synciq-policy> with the name of SyncIQ Policy that needs to be failed over.
Example of the output
{"failoverReadiness":{"status":"INFO"},"id":"policy-dg-isi34_azdata-policy1","name":"azdata-policy1","readinessDetail":[{"name":"OneFS SyncIQ Readiness","status":{"status":"INFO"},...
Failover Target ID: policy-dg-isi34_azdata-policy1
PowerShell Code
Place the following PowerShell Code on the Secondary NLB node.
Allowing Security Certificate
Run the following PowerShell Command to allow certificate handling for executing Eyeglass failover curl command from the Windows Server PowerShell
if (-not("dummy" -as [type])) {
add-type -TypeDefinition @"
using System;
using System.Net;
using System.Net.Security;
using System.Security.Cryptography.X509Certificates;
public static class Dummy {
public static bool ReturnTrue(object sender,
X509Certificate certificate,
X509Chain chain,
SslPolicyErrors sslPolicyErrors) { return true; }
public static RemoteCertificateValidationCallback GetDelegate() {
return new RemoteCertificateValidationCallback(Dummy.ReturnTrue);
}
}
"@
}
[System.Net.ServicePointManager]::ServerCertificateValidationCallback = [dummy]::GetDelegate()
Failover Code
We need to have the following information to set some variables in this code.
Variable | Description |
| $IGLS_SERVER_IP | Eyeglass Appliance IP Address |
| $IGLS_API_KEY | Eyeglass API Token - Refer to this step for creating Eyeglass API Token |
| $SOURCE_ID | Specify PowerScale Cluster Source ID - refer to this step |
| $TARGET_ID | Specify PowerScale Cluster Target ID - refer to this step |
| $FAILOVER_TARGET | Specify PowerScale Failover Target - refer to this step |
| $PRIMARY_SERVER | Specify Primary Windows Server |
| $SECONDARY_SERVER | Specify Secondary Windows Server |
| $SMTPServer | Specify SMTP Server |
| $SMTPPort | Specify SMTP Server Port> |
| $From | Specify Sender E-mail Address |
| $To | Specify Recipient E-mail Address |
| $Password | Specify E-mail App password For gmail, refer to this document for creating app password |
| $TIMER | Specify the interval of checking status (in seconds). Example for 30 seconds interval, set $TIMER = “30” |
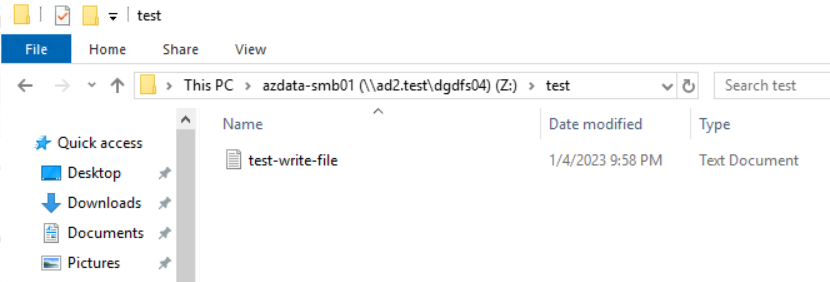
| $Outfile | Specify the path of the test file for storage accessibility check. Set the test file on the network drive mapped from PowerScale SMB Share (through DFS Namespace UNC). Example: $Outfile = "z:\test\test-write-file.txt"
|
===
cls
Import-Module NetworkLoadBalancingClusters
#IP Address & API Key of Eyeglass
$IGLS_SERVER_IP = "<#Specify Eyeglass IP Address>" #Specify Eyeglass IP Address
$IGLS_API_KEY = "<#Specify Eyeglass API Token>" #Specify Eyeglass API Token
#Failover Source & Target
$SOURCE_ID = "<#Specify PowerScale Cluster Source ID>" #Specify PowerScale Cluster Source ID
$TARGET_ID = "<#Specify PowerScale Cluster Target ID>" #Specify PowerScale Cluster Target ID
$FAILOVER_TARGET = "<#Specify PowerScale Failover Target>" #Specify PowerScale Failover Target
#Primary Server & Secondary Server
$PRIMARY_SERVER = "<#Specify Primary Windows Server>" #Specify Primary Server
$SECONDARY_SERVER = "<#Specify Secondary Windows Server>" #Specify Secondary Server
#CURL Command
$URI1 = "https://$($IGLS_SERVER_IP)/sera/v2/jobs/failover?sourceid=$($SOURCE_ID)&targetid=$($TARGET_ID)&failovertarget=$($FAILOVER_TARGET)&controlled=true&datasync=true&configsync=false&resyncprep=true&disablemirror=false"async=true&blockonwarnings=true&rollbackrenameshares=true&smbdataintegrity=false"
#E-mail Settings
$SMTPServer = "<#Specify SMTP Server>" #Specify SMTP Server
$SMTPPort = "<#Specify SMTP Server Port>" #Specify SMTP Server Port
$From = "<#Specify Sender E-mail Address>" #Specify Sender E-mail Address
$To = "<#Specify Recipient E-mail Address>" #Specify Recipient E-mail Address
# E-mail App Password
$Password = "<#Specify Password>" | ConvertTo-SecureString -AsPlainText -Force
#Message & Subject for Primary Server Fault Detection
$message2 = "Detect Primary Storage is not Accessible.Storage Failover to Secondary PowerScale is started"
$Subject = "Detect Primary Storage is not Accessible.Storage Failover to Secondary PowerScale is started"
#Timer in seconds
$TIMER = "30"
#Test File
$Outfile = "z:\test\test-write-file.txt"
function FailoverPriToSec {
#Initiate Failover from Primary to Secondary PowerScale
$failovercmd = Invoke-RestMethod -Method POST -Uri $URI1 -Verbose:$false -Headers @{
'Accept' = 'application/json'
'api_key' = $IGLS_API_KEY
'Content-Type' = 'application/json'
}
$failoverstatus = $failovercmd.id.ToString()
$URI2 = "https://$($IGLS_SERVER_IP)/sera/v2/jobs/failover/$($failoverstatus)"
Invoke-RestMethod -Method GET -Uri $URI2 -Verbose:$false -Headers @{
'Accept' = 'application/json'
'api_key' = $IGLS_API_KEY
}
Start-Sleep -Seconds $TIMER
Do {
$fostatus = Invoke-RestMethod -Method GET -Uri $URI2 -Verbose:$false -Headers @{
'Accept' = 'application/json'
'api_key' = $IGLS_API_KEY
}
$fostatus.jobStatusDetails
$fostatus.jobStatusDetails.state
$fostatus.jobStatusDetails.status
$jobstatus = $fostatus.jobStatusDetails.status
$jobstate = $fostatus.jobStatusDetails.state.ToString()
Write-Host "Failover is $jobstate ! with Status $jobstatus"
$message2 = "Failover is $jobstate ! with Status $jobstatus . Please check Eyeglass Failover Log for further information"
$Subject = "Failover is $jobstate ! with Status $jobstatus"
if ($jobstate -eq "FINISHED") {
SendEmail
$response = "F"
}
else {
SendEmail
Start-Sleep -Seconds $TIMER
}
}
until ($response -eq "F")
}
function SendEmail {
$Body = $message2
$Credential = New-Object -TypeName System.Management.Automation.PSCredential -ArgumentList $From, $Password
Send-MailMessage -From $From -To $To -Subject $Subject -Body $Body -SmtpServer $SMTPServer -port $SMTPPort -UseSsl -Credential $Credential
}
function CheckNLB {
$message2 = "Detect Primary Server issue. Check Cluster NLB Status for alert details"
$Subject = "Detect Primary Server issue. Check Cluster NLB Status for alert details"
try {
$nodeStatus1 = Get-NlbClusterNode -hostname $SECONDARY_SERVER -NodeName $PRIMARY_SERVER
$status1 = $nodeStatus1.State.ToString()
$flag = 1
# Take action
if ($status1 -match "converged")
{
$message = "good"
}
else {
$flag = $flag + 1
}
if ($flag -igt 1) {
Write-Warning "Detect Primary Server is not Converged. Sending Email Alert. Check Primary Server for further investigation"
sendEmail
}
else {
Write-Host "Primary Server is Converged"
Start-Sleep -Seconds $TIMER
}
}
catch {
Write-Warning "Primary Server is no longer part of NLB! Check Primary Server for further investigation"
SendEmail
}
}
do {
Try {
[io.file]::OpenWrite($outfile).close()
Write-Host "Primary Storage is accessible"
checkNLB
Start-Sleep -Seconds $TIMER
}
Catch {
Write-Warning "Primary Storage is NOT accessible. Failover to Secondary Storage is started!"
SendEmail
FailoverPriToSec
$response = "A"
}
}
until ($response -eq "A")
=============
System Information Gathering Module
System Information gathering module is configured by allowing Eyeglass appliance to establish passwordless SSH connections to various remote machines.
Best Practices
Use the following user accounts for the setup
Machine | User account |
Eyeglass | sca (default eyeglass user for running services) |
PowerScale | eyeglass - refer to this Eyeglass minimum permission configuration document to create this service account on PowerScale |
Linux | root - or other user account with sufficient permission to run the administrative commands |
Windows | administrator - or other user account with sufficient permission to run the administrative commands |
Passwordless SSH Configuration
- ssh to Eyeglass appliance as admin user.
- sudo -s (to switch to root). Enter admin password.
- cd /opt/superna (this is the home directory for the sca user used by Eyeglass processes).
- Create directory /opt/superna/.ssh
- Type ‘ssh-keygen -t rsa’ do not set a password and accept all default prompts but enter a path of /opt/superna/.ssh/id_rsa.
- su sca
- ssh user@remotehost (creates known_hosts file for target host, answer yes to accept ssh ID).
- Exit (you are now root again).
- cd /opt/superna/.ssh
- chown sca *
- chgrp users *
- ssh User@remotehost mkdir -p .ssh (User is the user that has access to the script that must execute, remotehost is dns or host name of remote linuxhost ) - this will create .ssh if it does not already exist.
- cat /opt/superna/.ssh/id_rsa.pub | ssh User@remotehost 'cat >> .ssh/authorized_keys' (this places pub ssh keys into the remote users .ssh authorized keys file to allow passwordless login from a script).
- Enter password for User on remote host.
- Test SCA remote ssh:
- su sca
- ssh user@remotehost (if no pwd requested the setup is complete) .
- Done.
For Windows to copy public ssh keys:
- cat /opt/superna/.ssh/id_rsa.pub (to get the content of the id_rsa.pub file)
- Copy the content of id_rsa.pub file to .ssh/authorized_keys file on windows server (this places pub ssh keys into the remote users .ssh/authorized keys file to allow passwordless login from eyeglass). We can use text editor to copy the content of id_rsa.pub file to the authorized_keys file
OpenSSH for Windows : Allowing SSH connection using public ssh key
Edit sshd_config file (default path: C:\ProgramData\ssh\sshd_config) and set this parameter to yes
PubkeyAuthentication yes
Module Codes
Main Python Code
This main python code is stored and executed from Eyeglass.
As the user on Eyeglass used for establishing passwordless SSH to remote machines is sca, we can place the main python code under /opt/superna folder that is owned by sca user.
Example
| Path | Purpose |
| /opt/superna/mycode | Place the main python code in this directory |
| /opt/superna/mycode/mylogs | Create the sub-directory for placing the gathered logs |
===
#!/usr/bin/python3
import urllib3, subprocess
urllib3.disable_warnings()
import sys
#Linux Commands
LINCMD1 = "cat"
LINCMD2= "/etc/os-release"
LINCMD3 = "python3 -V"
LIN_SCRIPT_DIR = "/<direcgtory-path>" # Specify the directory path where we store the script on a remote linux machine. Example: /home/myadmin/
LIN_SC1 = "script1.sh" # Specify the script file name
LIN_SC2 = "script2.sh" # Specify the script file name
LINCMD4 = LIN_SCRIPT_DIR + LIN_SC1
LINCMD5 = LIN_SCRIPT_DIR + LIN_SC2
#Windows Commands
WIN_SCRIPT_DIR = "/mytest1/" # Specify the directory path where we store the powershell script on remote windows machine
WIN_PS1 = "gather.ps1" # Specify the powershell script file name
WIN_PS2 = "compress.ps1" # Specify the powershell script file name
PS = "powershell.exe "
WINCMD1 = PS + WIN_SCRIPT_DIR + WIN_PS1
WINCMD2 = PS + WIN_SCRIPT_DIR + WIN_PS2
#PowerScale OneFS command
OFS1 = "isi version"
OFS2 = "isi status -v"
#ZIP Path
REMOTE_ZIP_PATH = ":/var/mytest*.zip" # Specify the remote zip path from linux machine
LOCAL_ZIP_PATH = "/opt/superna/mytest/testlogs" # Specify the local path in Eyeglass to store copy zip file
WIN_ZIP_PATH = ":/Users/Administrator/*_diagnostics.zip" # Specify the remote zip path from windows machine
#List of Machines refer to .ssh/config file
host = ['linserver1','linserver2' ] # linux servers
winhost = ['winserver1','winserver2'] # windows servers
isilon = ['isilon1','isilon2'] # PowerScale /Isilon clusters
def onefs_gather():
for i in range(len(isilon)):
result1 = subprocess.check_output(['ssh', isilon[i], OFS1])
print ("OneFS version : ", isilon[i], result1.decode("utf-8"), sep = "\n")
result2 = subprocess.check_output(['ssh', isilon[i], OFS2])
print ("OneFS Status : ", isilon[i], result2.decode("utf-8"), sep = "\n")
def lin_gather():
for i in range(len(host)):
result = subprocess.check_output(['ssh', host[i], LINCMD1 , LINCMD2])
print ("Host : ", host[i], result.decode("utf-8"), sep = "\n")
result2 = subprocess.check_output(['ssh', host[i], LINCMD3])
print ("Python version : ", host[i], result2.decode("utf-8"), sep = "\n")
result3 = subprocess.check_output(['ssh', host[i], LINCMD4])
print ("Network Info : ", host[i], result3.decode("utf-8"), sep = "\n")
result4 = subprocess.check_output(['ssh', host[i], LINCMD5])
print ("System Info : ", host[i], result4.decode("utf-8"), sep = "\n")
result5 = subprocess.run(['scp', host[i] + REMOTE_ZIP_PATH , LOCAL_ZIP_PATH])
def win_gather():
for i in range(len(winhost)):
result = subprocess.check_output(['ssh', winhost[i], WINCMD1])
print ("WinServer : ", winhost[i], result.decode("utf-8"), sep = "\n")
result2 = subprocess.check_output(['ssh', winhost[i], WINCMD2])
print ("WinServer : ", winhost[i], result2.decode("utf-8"), sep = "\n")
result3 = subprocess.run(['scp', winhost[i] + WIN_ZIP_PATH , LOCAL_ZIP_PATH])
def main():
onefs_gather()
lin_gather()
win_gather()
main()
Locally Stored Commands
On Linux Server
The following scripts are placed on the remote Linux servers. The main code on the Eyeglass appliance will call and execute these scripts on Linux servers.
The path location and the name of the scripts should also be reflected in the main code
LIN_SCRIPT_DIR = "/<direcgtory-path>" # Specify the directory path where we store the script on a remote linux machine. Example: /home/myadmin/
LIN_SC1 = "script1.sh" # Specify the script file name
LIN_SC2 = "script2.sh" # Specify the script file name
Example:
Folder location: /home/myadmin/
Script #1 : /home/myadmin/script1.sh
Script #2 : /home/yadmin/script2.sh
script1.sh
This script is stored in the Linux server to be run remotely to gather the network information and also to zip the /var/log directory
===
ifconfig
cd /var
zip -r "mytest-$(hostname)-$(date +"%Y-%m-%d-%T").zip" log/
===
script2.sh
This script is stored in the Linux server to be run remotely to gather some other system information.
===
#!/bin/bash
echo -e "-------------------------------System Information----------------------------"
echo -e "Hostname:\t\t"`hostname`
echo -e "uptime:\t\t\t"`uptime | awk '{print $3,$4}' | sed 's/,//'`
echo -e "Manufacturer:\t\t"`cat /sys/class/dmi/id/chassis_vendor`
echo -e "Product Name:\t\t"`cat /sys/class/dmi/id/product_name`
echo -e "Version:\t\t"`cat /sys/class/dmi/id/product_version`
echo -e "Serial Number:\t\t"`cat /sys/class/dmi/id/product_serial`
echo -e "Machine Type:\t\t"`vserver=$(lscpu | grep Hypervisor | wc -l); if [ $vserver -gt 0 ]; then echo "VM"; else echo "Physical"; fi`
echo -e "Operating System:\t"`hostnamectl | grep "Operating System" | cut -d ' ' -f5-`
echo -e "Kernel:\t\t\t"`uname -r`
echo -e "Architecture:\t\t"`arch`
echo -e "Processor Name:\t\t"`awk -F':' '/^model name/ {print $2}' /proc/cpuinfo | uniq | sed -e 's/^[ \t]*//'`
echo -e "Active User:\t\t"`w | cut -d ' ' -f1 | grep -v USER | xargs -n1`
echo -e "System Main IP:\t\t"`hostname -I`
echo ""
echo -e "-------------------------------CPU/Memory Usage------------------------------"
echo -e "Memory Usage:\t"`free | awk '/Mem/{printf("%.2f%"), $3/$2*100}'`
echo -e "Swap Usage:\t"`free | awk '/Swap/{printf("%.2f%"), $3/$2*100}'`
echo -e "CPU Usage:\t"`cat /proc/stat | awk '/cpu/{printf("%.2f%\n"), ($2+$4)*100/($2+$4+$5)}' | awk '{print $0}' | head -1`
echo ""
echo -e "-------------------------------Disk Usage >80%-------------------------------"
df -Ph | sed s/%//g | awk '{ if($5 > 80) print $0;}'
echo ""
echo -e "-------------------------------For WWN Details-------------------------------"
vserver=$(lscpu | grep Hypervisor | wc -l)
if [ $vserver -gt 0 ]
then
echo "$(hostname) is a VM"
else
cat /sys/class/fc_host/host?/port_name
fi
echo ""
echo -e "-------------------------------Oracle DB Instances---------------------------"
if id oracle >/dev/null 2>&1; then
/bin/ps -ef|grep pmon
#then
else
echo "oracle user does not exist on $(hostname)"
fi
echo ""
if (( $(cat /etc/*-release | grep -w "Oracle|Red Hat|CentOS|Fedora" | wc -l) > 0 ))
then
echo -e "-------------------------------Package Updates-------------------------------"
yum updateinfo summary | grep 'Security|Bugfix|Enhancement'
echo -e "-----------------------------------------------------------------------------"
else
echo -e "-------------------------------Package Updates-------------------------------"
cat /var/lib/update-notifier/updates-available
echo -e "-----------------------------------------------------------------------------"
fi
===
On Windows Servers
The following scripts are placed on the remote Windows servers. The main code on the Eyeglass appliance will call and execute these scripts on Windows servers.
The path location and the name of the scripts should also be reflected in the main code
WIN_SCRIPT_DIR = "/mytest1/" # Specify the directory path where we store the powershell script on remote windows machine
WIN_PS1 = "gather.ps1" # Specify the powershell script file name
WIN_PS2 = "compress.ps1" # Specify the powershell script file name
Example:
Folder location: C:/mytest1, we specify the variable as WIN_SCRIPT_DIR = "/mytest1/"
Script #1 : C:/mytest1/gather.ps1
Script #2 : C:/mytest1/compress.ps1
gather.ps1
This powershell script is to gather event logs, system information and network information of Windows Server.
===
# clean previous outfile
$folder = Test-Path -PathType Container -Path "c:\$env:computername"
if ($folder -eq $true) {
Remove-Item -Path "c:\$env:computername" -Force -Recurse | Out-Null
}
Write-Host ""
# Event Logs in evtx format
New-Item -Path "c:\$env:computername\eventlogs" -ItemType "directory" | Out-Null
Set-Location -Path "c:\$env:computername\eventlogs"
Write-Host "Retrieving Event Logs unfiltered." -ForegroundColor Yellow
wevtutil epl System "systemlog.evtx"
wevtutil epl Setup "setuplog.evtx"
wevtutil epl Security "securitylog.evtx"
wevtutil epl Application "applicationlog.evtx"
Write-Host " Completed .evtx log files." -ForegroundColor Green
# system information
Set-Location -Path "c:\$env:computername"
Write-Host "Retrieving MSInfo32 information. This will take some time to complete. Please wait..." -ForegroundColor Yellow
msinfo32 /report msinfo32.txt | Out-Null
Write-Host "Completed MSInfo32 information." -ForegroundColor Green
Write-Host ""
# Network information
New-Item -Path "c:\$env:computername\network" -ItemType "directory" | Out-Null
Set-Location -Path "c:\$env:computername\network"
Write-Host "Retrieving Network information..." -ForegroundColor Yellow
Get-NetAdapter | Format-Table Name,ifIndex,Status,MacAddress,LinkSpeed,InterfaceDescription -AutoSize | Out-File "Get-NetAdapter.txt"
Get-NetAdapterAdvancedProperty | Format-Table DisplayName, DisplayValue, ValidDisplayValues | Out-File "Get-NetAdapterAdvancedProperty.txt" -Width 160
Write-Host "Completed Network information." -ForegroundColor Green
Write-Host ""
===
compress.ps1
This powershell script is to compress the collected data on the Windows Server into a zip file.
===
Get-Module
$ProgressPreference = "Ignore"
$compress = @{
Path = "c:\$env:computername"
CompressionLevel = "Optimal"
DestinationPath = $env:computername + (get-date -Format -yyyyMMdd-hhmmss) + "_diagnostics.zip"
}
Compress-Archive @compress -Force
Write-Host "Completed folder compression." -ForegroundColor Green
===
Eyeglass SSH config File
SSH config file that contains the list of remote machines is stored in the Eyeglass appliance with the path: /opt/superna/.ssh/config
Populate this config file with the list of PowerScale cluster, Linux Server, Windows Server for passwordless SSH connections. Follow this procedure to configure passwordless SSH connections to those machines
The following example is based on this list
Machine Type | Server | Configured User for passwordless SSH |
| Linux | linserver1 | root |
| linserver2 | root | |
Windows | winserver1 | administrator |
| winserver2 | administrator | |
PowerScale | isilon1 | eyeglass |
| isilon2 | eyeglass |
===
Host linserver1
HostName <IP address of Linux Svr1>
User root
Host linserver2
HostName <IP address of Linux Svr1>
User root
Host winserver1
HostName <IP address of win Svr1>
User administrator
Host winserver2
HostName <IP address of win Svr2>
User administrator
Host isilon1
HostName <IP address of Isilon 1>
User eyeglass
Host isilon2
HostName <IP address of Isilon 2>
User eyeglass
===
© Superna Inc