- Security CLI Commands
- Change cluster service account password CLI Command
- Appliance Management
- Disk Management Monitoring
- Alarm Database Table Compression Enabled or Disabled
- Easy Auditor CLI commands
- Robot Audit
- Event result percent for Robot Audit
- Where did My Folder Go Query Event Limit
- Easy Auditor And Ransomware Defender common CLI commands
- Easy Auditor and Ransomware Queue Reset to process only recent events versus backlog in the queue
- Ransomware CLI commands
- General Ransomware Settings
- Default Snapshot Expiry
- Security Guard Delay Detection
- SMB & NFS Comparision
- NFS Event Processing and lockout
- Extensions Allow list
- False Positive Override per user
- Restore a locked out User when Security Event in Error State
- Ransomware Defender Banned file Version Commands
- AirGap CLI commands
- Multi Vault CLI commands
- Airgap state change
- Procedure to update the new passwords in the Vault Agent
- Temporary Maintenance Commands Airgap Enterprise
- Temporary Maintenance Command Airgap Basic
- Advanced CLI Commands
- Eyeglass Reports
- igls config settings
- igls adv diffclusterreport
- Configuration Replication
- Runbook Robot Schedule Interval
- Failover Readiness for Access Zones and IP Pools
- Runbook Robot Mount Export Enable Disable
- Advanced Commands
- igls adv requesttimeout
- igls adv spndelay
- Role Based Authentication Authentication CLI Commands
- Cluster Storage Monitor CLI commands
- Cluster Storage Reports Schedule CLI Commands
- Quota collection Job Schedule for Large Quota Clusters Scheduling CLI Commands
- Advanced Quota Failover and Inventory collection CLI commands
- Cluster Storage Monitor automation quota commands (Cluster Storage Monitor Feature)
- Active Directory Group based Quota Management (Cluster Storage Monitor Feature)
- High-level requirements to use this Feature
- How to configure AD group quota scheduled job (Required)
- How to start an onDemand AD Quota scan of AD and Quota creation
- User quotas or group quota templates
- igls csm tier help
- igls csm template help
- igls csm tier
- igls csm template
- igls csm template update
- Home Share AD Managed quota Configuration example
- Group Share AD managed quota Configuration example
- igls adv adgroupmode
- RPO Reporting CLI Commands
- CSM Reporting CLI Commands
- igls adv runreports --report_type=csm
- Advanced Commands Use if directed by support
- Memory watch dog on Eyeglass
- Database insertion validation
- AD User/group to SID or SID to user/group (Easy Auditor, Ransomware Defender)
Eyeglass CLI Commands
The following Eyeglass CLI commands are available and can be executed directly from the Eyeglass shell or any ssh session to the appliance.
Security CLI Commands
This section covers security-related CLI commands.
Change cluster service account password CLI Command

|
The command igls adv changepwd is deprecated from Onefs 9.5 and above
|
- (2.5.6 or later required) igls adv changepwd --cluster T-A8200 --password 1 --restart true
After using this command, login to the UI, open the jobs icon, and verify configuration sync jobs are completed successfully. If restart true is not used, the SCA will need to be restarted at a later time using the command sudo systemctl restart sca.
NOTE: --restart true is required for the password to take effect, and will restart the SCA process to have the password change take effect. - The Eyeglass service account must be used. AD accounts are not supported and are not best practice since they reduce the availability of the system with dependency on AD DCs.
igls adv changepwd help .
Appliance Management
Disk Management Monitoring
- This command and configuration file allows increasing the support backup disk monitor alarm from the default of 800 MB to a higher value. The CLI command below re-loads the new monitoring threshold.
Edit this file to change the 2nd rule to a higher value in MB /opt/superna/sca/conf/DiskSpaceMonitorConfig.xml; save the file, and run the command below, to allow storing more backups before the alarm will be triggered.
- If you get this alarm you can delete old backup files located in /srv/www/htdocs/archive.
- igls adv reloaddiskspacemonitorrules (this command will update the monitor to use the new limits configured in ).
Alarm Database Table Compression Enabled or Disabled
igls adv managealarmdatacompression (this command checks if alarm data compression is able to store in the database, contact support before attempting to change this).
Easy Auditor CLI commands
These commands are used for Easy Auditor configuration changes.
When a cluster has had auditing enabled, a history of audit logs is stored on the cluster. This CLI command can be used to ingest old audit messages for searching. It can also be used to ingest data while the ECA cluster was down or unable to reach a cluster to process audit messages.
igls rswsignals bulkLoadTAEvents --file= /opt/superna/sca/tmp/bulkLoadTAConfig.json
A JSON file is used to specify the cluster, the node names and the compressed files on PowerScale that should be ingested.
Sample file exists on the appliance to edit /opt/superna/sca/tmp/bulkLoadTAConfig.json
Example JSON file below
JSON |
|
igls admin eaCsvArchivePath show
Use this to show the current location that CSV reports are stored or change this location.
The location can be changed to an NFS mount on the Eyeglass appliance to allow centralized reports to be stored automatically as they are generated by users. This keeps a secondary copy of all reports or searches executed with Easy Auditor.
Robot Audit
This feature performs continuous auditing by creating user events as an SMB-connected user. The events are created, ingested and stored in the database. The Robot audit process runs reports, counts file and directory events, and logs success or failure. This offers the highest level of confidence that audit data is being processed and stored. The audit lag is the time from when an event is created to when the data is searchable. This sets the time lag value to a value that avoids robot audit failures for a particular environment where the event rate may require an increased value. Value is in minutes.
igls easyauditor roboaudit (shows current value)
igls easyauditor roboaudit set --eventlag=15 (sets the new value to 15 minutes)
Event result percent for Robot Audit
Use only directed by support
igls easyauditor roboaudit set --reportpercent=60
Where did My Folder Go Query Event Limit
This command will set the limit of the number of events returned with a Where did my folder go search.
|
|
NOTE: The feature has been tested to return 5000 events; over this limit may overwhelm the browser's ability to display the data. |
igls easyauditor folderquerylimit set --limit=2500
Easy Auditor And Ransomware Defender common CLI commands
Easy Auditor and Ransomware Queue Reset to process only recent events versus backlog in the queue
If a large backlog occurs from an Easy Auditor or user activity flagged by Ransomware Defender, the following command can be used to skip to the end of the queue, to effectively ignore all previous detections and start processing from the end of the queue.
igls adv eventTriggers set --operation=reset --topic=ea (will reset the processing on the Real-time Active audit triggers Queue for Easy Auditor)
Ransomware CLI commands
Convert Ignored list to Monitor Only Settings list (> 2.5.7)
This command will convert all ignored list entries for path, user or ip address to the monitor list in 2.5.7 or later releases. This is the preferred method to protect data without a lockout applied. The same matching behavior works with the monitor mode list entries.
This command will convert all previous entries on the ignored list to monitor only list:
igls rsw convertignoredlist set
|
|
NOTE: All existing Ignored List entries are deleted and moved to Monitor Mode |
General Ransomware Settings
Use this command to see general Ransomware Defender settings.
|
|
NOTE: some settings are managed in the GUI. |
igls rsw generalsettings
Sample output :
{
"snapshot_expiry_hours": 48,
"escalate": false,
"critical_on": true,
"monitor_only": false,
"snapshotOn": "WARNING",
"lock_root": false,
"root_sids": [
"S-1-1-1-0",
"S-1-22-1-0"
]
}
Default Snapshot Expiry
Use this command to set the expiry default time on pro-active snapshots.
igls rsw generalsettings set --snapshot_expiry_hours 72
Security Guard Delay Detection
Use this command to change security timer to delay failure message when audit events are behind on the cluster.
igls rsw securityguardsettings help
demo2:/opt/superna/sca/conf # igls rsw securityguardsettings help
show(default):
Provides the following options:
1. Set security guard wait for event timer in seconds.
2. Set security guard restore timer in seconds.
set --<option>=<value>
Valid Options: sg_waitforevent_timer_seconds and sg_restore_timer_seconds
Example - set event timer :
igls rsw securityguardsettings set --sg_waitforevent_timer_seconds=600
Example - set restore permissions timer :
igls rsw securityguardsettings set --sg_restore_timer_seconds=60
SMB & NFS Comparision
igls rsw nfsevents set --enabled=monitor
1. Both Snapshot options checked
Type | Detector Mode | Critical Snapshots | User snapshots | Pass/Fail/Need To discuss |
|---|---|---|---|---|
NFS | Enforcement | Yes | No | Expected -Pass |
SMB | Enforcement | yes | Yes | Expected -Pass |
SMB | Monitor | Yes | Yes | Need To Check |
NFS | Monitor | Yes | No | Expected -Pass |
2. Both are Unchecked
Type | Mode | Critical Snapshots | User snapshots | Pass/Fail/Need To discuss |
|---|---|---|---|---|
NFS | Enforcement | No | No | Expected -Pass |
SMB | Enforcement | No | No | Expected -Pass |
SMB | Monitor | No | No | Expected -Pass |
NFS | Monitor | No | No | Expected -Pass |
igls rsw nfsevents set --enabled=true
1. Both snapshot options Checked
Type | Detector Mode | Critical Path Snapshots | User snapshots | Pass/Fail/Need to review |
|---|---|---|---|---|
NFS | Monitor | Yes | Yes | Need to take Critical Path snapshots only as per My POV & also by considering implementation in the task |
|
SMB > Works fine as per setting
igls rsw nfsevents set --enabled=false
NFS > No event > No snapshots
SMB > Works fine as per setting
NFS Event Processing and lockout
This section shows how to enable NFS IO processing and enable lockout for Ransomware events. This single command will process NFS IO and apply lockouts based on thresholds configured in the GUI.
The lockout function will remove the client IP address from the export definition to lockout the NFS host. It will not check host names to map them to IP addresses in this release.
Consult the documentation for Lockout configuration.
To set the value from the default of disabled to enabled:
igls rsw nfsevents set --enabled=true
To check the value that is currently set for NFS lockout:
igls rsw nfsevents
Extensions Allow list
The file extension list tracks over 2000 well known extensions used in Ransomware incidents. Sometimes these are valid extensions in customer environments or applications. These CLI commands can be used to allow extensions by adding them to an allowed list.
igls rsw allowedfiles add --extensions=’*.ext1’ (add an extension to the list)
igls rsw allowedfiles (list all allowed files)
igls rsw allowedfiles remove --extensions=’*.ext1’ (remove an extension from the list)
False Positive Override per user
Contact support to enter values. Commands are provided as a reference, but support should be involved to provide values to modify user threat level settings. These command use SID to add or delete. The side cache file can be used to find the user name for a given SID. To read this file login to Eyeglass VM via ssh and run this command "cat /opt/superna/sca/data/ad_principal_cache.json" to see the SID and user names.
Add an override for a user
igls rsw RSWUserOverride post --user=S-1-5-21-826284354-1834749432-1846952604-4825 --tdid=03 --parameter=X --multiplier=16.008001000000004
Delete an override for a user
igls rsw RSWUserOverride delete --sid=S-1-5-21-826284354-1834749432-1846952604-4825 --tdid=03 --parameter=X --multiplier=16.008001000000004
View the current overrides set by flag as false positive
igls rsw RSWUserOverride get
Restore a locked out User when Security Event in Error State
This command would be used only when a locked out user security event has an error due to cluster reachability, or some shares were not unlocked. This command will re-attempt the recovery of a user’s share access.
|
|
NOTE: do not use this command if you assigned users directly to shares versus using AD groups. |
igls rsw RSWRestoreAccess set --user=<value> (where value is domain\user, note use uppercase domain name and quotes)
Example: igls rsw RSWRestoreAccess set --user="TESTDOMAIN\usera"
|
|
NOTE: Restoring access to a user who happened to be in a group added to this share. And not for a user who is directly added to this share. |
Ransomware Defender Banned file Version Commands
- These commands require 2.5.7 update 1 release.
- These commands allow apply a new version of the banned file lists from the Eyeglass Ransomware Defender or compare two versions for differences. The mode can be set to auto-switch to the latest as well.
- Note The Eyeglass VM requires Internet access to download and apply new versions of the banned file list.
- igls rsw filefiltersettings - list current settings.
- igls rsw filefiltersettings --diff=<version1,version2> - run this command to see the differences between the two versions, it will show new extensions added to the file and extensions removed from the list.
- igls rsw filefiltersettings --version=<version> - select an available version to switch Eyeglass to the new version of the banned file.
- igls rsw filefiltersettings set --mode=Latest - sets Eyeglass Ransomware Defender to check for new versions and automatically switch to the new version.
- igls rsw filefiltersettings set --mode=Fixed --version=<version> - sets Eyeglass Ransomware Defender to use a specific version of the file.
AirGap CLI commands
Airgap check and change schedule
- To check the existing schedule:
igls airgap changeschedule --job=<job-name> where --job=<job-name> is required.Example:
igls airgap changeschedule --job=isi-prod_rw-airgap-testshare.Output: Cron String for job isi-prod_rw-airgap-testshare is */10 * * * *
2. To set a new schedule using cron string:
Syntax: igls airgap changeschedule set --job=<job-name> --cronstr=<5-fields-cron-string> where --job and --cronstr parameters are required.
Example: igls airgap changeschedule set --job="isi-prod_rw-airgap-testshare" --cronstr="*/15 * * * *"
The above command will set the airgap job isi-prod_rw-airgap-testshare to run every 15 mins.
Once the new schedule is set using the cron string, go to the Eyeglass Airgap GUI to check it or use the above igls airgap changeschedule --job= <job-name>
Valid cron strings?
- Any cron string can be generated by changing airgap GUI schedule options supported through CLI.
Multi Vault CLI commands
This command is for listing the registered vault agent vm's for customers with multiple cyber vaults.
igls airgap checkvaults
Airgap state change
igls airgap enable (quick enable all policies).
Procedure to update the new passwords in the Vault Agent
After changing the protected cluster and vault cluster passwords, use the command below to update the same in the Vault Agent.
ecactl isilons modify --name <protected-or-vault-cluster-name> --update-password
Temporary Maintenance Commands Airgap Enterprise
These commands only work if the variable for remote maintenance is enabled on the vault agent. It is disabled by default.
- igls airgap vaultaccessrequest --interval=x --vault=xxx (x is minutes, and vault xxx is the eca ID of the vault agent found in /opt/superna/eca/eca-env-common.conf)
- Sets a request in eyeglass that will be picked up by the vault agent vm. The vault agent checks in every 2 hours for requests. If the request is set the airgap will open for x minutes for maintenance and will auto close after x minutes
- igls airgap vaultaccessview [--vault=xxx] ( vault xxx is the eca ID of the vault agent found in /opt/superna/eca/eca-env-common.conf)
- This command lists any requests that have been set and the interval requested
- --vault tag will filter based on the vault agent
- igls airgap vaultaccesscancel
- This command will cancel any pending requests that have been set.
Temporary Maintenance Command Airgap Basic
igls airgap connect help
igls airgap disconnect help
igls adv failovermode
This command is for a large number of policy failovers. It changes the default behavior of sequential make writable and resync prep commands to allow up to 10 parallel make write commands, or resync prep commands to be issued to the cluster at once. If a job on the cluster finishes, another is sent with the goal of keeping 10 jobs always running on the cluster until failover is complete.
High Speed Failover - Parallel Failover Flag Notes:
- Allows make write step and resync prep to run in parallel with up to 10 threads, ensures that 10 policies are submitted to be processed at all times.
- Testing has shown these steps for large quantity policy failover can improve failover times 3x to 4x.
- Risk of a policy failure increases, and new flag will NOT stop the failover in progress. The process will continue to issue api calls to submit all SyncIQ policies in the failover job until all have been submitted. This runs the risk of more complex recovery if more than one policy fails to complete its step (Allow Writes OR resync Prep).
igls adv failoverSettings set --parallel=true (defaults to true as of 2.5.5 release), not recommended to disable this contact support.
igls adv failovertimeout
Display the per step timeout for failover tasks. Advanced setting. Default 45 minutes. For very large policies (see Eyeglass and PowerScale DR Best Practices), igls adv failovertimeout can be increased to suggest the value of 180 minutes.
igls adv failovertimeout get (returns current value)
igls adv failovertimeout set --minutes 180 (sets)
Failover script timeout
To retrieve the current failover script timeout value:
igls adv failoverscriptstimeout To change/update:
igls adv failoverscriptstimeout set --seconds=<time-in-seconds>Example: to set it to 400 seconds
igls adv failoverscriptstimeout set --seconds=400
igls adv full sync
|
|
This advanced option should be enabled only after consulting with Superna support first |
It overcomes a scenario where NFS exports are created with FQDN for client lists, and the FQDN values are NOT resolvable by the DR or target cluster. This scenario happens when DHCP leases expire DNS resolution OR if FQDN values do not resolve any longer, and it's impossible to clean up this condition. OneFS 8 API behaviour denies the creation of exports with unresolved FQDN client list entries and requires the force flag to override cluster rules on export creation. The force creates override flag is disabled by default in Eyeglass to avoid conditions where duplicate exports are created.
Behaviour
This sync mode will delete all shares and exports found on the target cluster that DO NOT exist on the source. This creates a full sync. The default option in Eyeglass will leave any shares or exports found that do not exist on the source. With this option enabled, all extra config will be deleted to make an exact copy on the DR/target cluster.
igls adv fullsync set --fullsync=<true/false>
The default is false
igls adv runbookrobot
Allows a mode where the export auto create and update is disabled and can be manually created on the Robot policy path, set the export settings with Eyeglass appliance IP address as root client, and other settings can be enabled manually. Each robot run will no longer create or update the export.
The default is true.
igls adv runbookrobot set --createExport=false
igls admin ignoreunresolvablehosts
This command can be used to enable or disable config sync of exports to allow client lists with unresolvable DNS or Netgroup entries. It is best practice to allow the DR cluster to resolve host names, or data will not be mountable after a failover.
The default setting is disabled and will raise and configuration sync error when attempting to create an export on the DR cluster when the DR cluster cannot resolve the client list host name or Netgroup.
igls admin ignoreunresolvablehosts set --value=true (use this command to allow unresolvable hosts on exports to sync).
igls admin ignoreunresolvablehosts set --value=false (use this command to disable it).
igls admin ignoreunresolvablehosts (use this command to see current value).
igls admin health
Display the overall health status of the Eyeglass appliance.
igls admin health
{
"success": true
}
igls admin appid
Display the appliance id of the Eyeglass appliance.
igls admin appid
{
"applianceCode": [
""
]
}
igls admin version
Display the Eyeglass component versions.
igls admin version
[
{
"release": [
"38"
],
"version": [
"1.3"
],
"name": [
"eyeglass_ui"
]
},
{
"release": [
"34"
],
"version": [
"1.3"
],
"name": [
"eyeglass_rest"
]
},
{
"release": [
"64"
],
"version": [
"1.3"
],
"name": [
"eyeglass_sca"
]
}
]
igls alarm active
Retrieve the current active alarm list.
igls alarm active
{
"sync_key": "Share3-SystemZone",
"code": "SCA0002",
"severity": "Critical",
"timestamp": 1430350806854,
"source": "Share3-SystemZone",
"message": "Found a replication job where either the source or destination is not a managed network element.",
"extra_data": "{\"info\":\"The replication job for policy 'Share3-SystemZone' cannot be created because the target hostcannot be identified.\"}"
}
|
|
NOTE: To view this list incrementally, you can use the command: |
igls alarm active | more
igls alarm all
Display the total alarms received in “results”.
igls alarm all
{
"rows": [],
"alarmsPerPage": "50",
"results": "889"
}
igls alarm settings
This new command allows controlling the severity of any alarm and can be used to disable an alarm completely. Use with caution.
--raise= false (disables the alarm).
--severity= (sets the severity of the alarm to the value entered here).
--email= (sends alarm true or false, if false, it will display in the GUI but no email or other method of alarm notification will be executed).
A list of alarm codes can be found here.
igls appliance upgrade
Use for online upgrade of the appliance software.
Usage: igls app upgrade [OPTIONS].
Download Eyeglass installer - update Eyeglass appliance.
Options:
--url TEXT URL of an Eyeglass installer (optional).
--help Show this message and exit.
igls appliance restore
Restore Eyeglass data and configuration from Eyeglass Archive.
|
|
NOTE: must be logged in as admin or root user. |
igls app restore
Release 2.5.5 or below
- Usage: igls app restore [OPTIONS].
- --anyrelease (this allows a version mismatch between the backup file appliance version and the target appliance version, this will skip restore of many items, check the upgrade guide for details. Retains licenses, and clusters and passwords).
Release 2.5.6 or later
- igls app restore/srv/www/htdocs/archive (pass in a path, and all available files are scanned to list the most recent backup found and presents the file name with yes no option to proceed).
- Or igls app restore /srv/www/htdocs/archive/backupfile.zip (This option allows the full path to the file you want to restore).
igls appliance rediscover
This command should be used when directed by support. It will rebuild the Eyeglass database and preserve job status in the jobs icon with release 1.8 or later. The “igls appliance rediscover command” will prompt yes to continue.
|
|
NOTE: It will preserve the quota request, and data recovery databases. |
Upon completion, refresh the UI login screen. Go to running jobs to see initial discovery job is running to repopulate cluster information in the database inventory icon.
Once completed, the job definition screen will show the jobs in the previous state and show as pending. The jobs will run again on the next scheduled interval, or you can force them to run with the “run now” option.
igls appliance report
(diagnostic log parsing tool run command) This command is for dark or secure sites where on site log analysis is required. The report summarizes all api, ssh and other errors, config sync analysis, failover analysis of each attempt and success or failure.
- Run command: igls appliance report.
- Wait for the report to complete.
- See logs report on: https://<eyeglass IP address>/report/ .
Please refer to document: Eyeglass Backup and Restore .
Advanced CLI Commands
igls adv adserver
This command is used to build a user-to-SID cache information used by Eyeglass, Ransomware Defender, the Storage cluster monitor and Easy Auditor. This avoids API lookups for the user and AD information. In very large AD environments with 10 000 of thousands users and groups, it is more efficient to collect this information directly from AD domain controllers. This is also a more reliable method to collect this information. This command can be used for an AD provider and configure a user to collect this information using LDAP from the domain controller.
igls adv adserver help -- displays help of the command
Examples:
Example command
- Add AD configuration - see example below change yellow values:
- igls adv adserver set --server=AD1.TEST --basedn=DC=ad1,DC=test --logindn=CN=Administrator,CN=Users,DC=ad1,DC=test --domain=AD01 --loginhost=172.16.80.6 --ssl=false --port=389 --password=3y3gl4ss!
- Example when users are stored in a different OU:
- igls adv adserver set --server=RNSM04-05.SUPERNA.NET --basedn=OU=t11543,DC=rnsm04-05,DC=superna,DC=net --logindn=CN=Administrator,CN=Users,DC=rnsm04-05,DC=superna,DC=net --domain=RNSM04-05 --loginhost=172.22.4.155 --ssl=false --port=389 --password=3y3gl4ss!
- igls adv adserver set --server=RNSM04-05.SUPERNA.NET --basedn=OU=t11543,DC=rnsm04-05,DC=superna,DC=net --logindn=CN=Administrator,CN=Users,DC=rnsm04-05,DC=superna,DC=net --domain=RNSM04-05 --loginhost=172.22.4.155 --ssl=false --port=389 --password=3y3gl4ss!
- Delete AD configuration:
- igls adv adserver delete --server=AD1.test
- igls adv adserver delete --all
- List all AD configurations:
- igls adv adserver list
igls adv initialstate
Display and update the initial state when Eyeglass creates a new Job. This command supports changing the initial state for the following Eyeglass Job types: ZONES, AUTO, CUSTOM, QUOTAS.
igls adv initialstate help
show(default):
Displays the initial states for new jobs.
set --<type>=<state>:
sets a job type to have a specific initial state.
Valid states are: enabled, disabled.
Valid types are: ZONES, AUTO, CUSTOM, QUOTA
Default: is shown below
Examples:
igls adv initialstate show
{
"ZONES": "USERDISABLED",
"AUTO": "ENABLED",
"QUOTA": "ENABLED",
"CUSTOM": "ENABLED"
igls adv initialstate set --custom=disabled
{
"success": true
}
igls adv PolicyFailover
Enable and disable Eyeglass Configuration Replication task during SyncIQ Policy Failover.
igls adv PolicyFailover set --disablereplication=<state>
Valid states are: true, false
Examples:
Disable Eyeglass Configuration Replication task during SyncIQ Policy Failover:
igls adv PolicyFailover set --disablereplication=true
{
"success": true
}
Enable Eyeglass Configuration Replication task during SyncIQ Policy Failover:
igls adv PolicyFailover set --disablereplication=false
{
"success": true
}
Igls adv rundedupe
Disable dedupe setting process while allowing LiveOPS snapshot jobs to execute. All clusters global command.
igls adv rundedupe set --rundedupe=true/false (default true)
igls (disable new validations)
Prerequisite: 2.5.6 or later
This command will disable SPN AD delegation and dual DNS delegation validations if they cannot execute in a specific environment or of SPN's or dual DNS is not configured.
To display settings:
igls adv readinessvalidation
|
|
NOTE: if nothing is returned, then default settings are in effect |
To modify settings:
igls adv readinessvalidation set --[spnsdelegation|dualdelegation]=[true|false]
Example
igls adv readinessvalidation set --spnsdelegation=false
igls adv readinessvalidation set --dualdelegation=false
igls adv readinessvalidation set --spnsdelegation=false --dualdelegation=false
igls admin schedules
Display and update the schedule for Eyeglass tasks. This command supports enabling, disabling and updating the schedule for the following tasks: Configuration Replication, Eyeglass Reports, Zone Readiness, and Runbook Robot.
igls admin schedules list
[
{
"interval": "*/1 * * * *",
"enabled": true,
"id": "EventAuditProgress",
"label": "Event Audit Progress Monitoring" NOTE: Used with Easy Auditor to check audit lag
},
{
"interval": "0 0 * * *",
"enabled": true,
"id": "InventoryReport",
"label": "Eyeglass Reports" NOTE: Used with DR product configuration reports
},
{
"interval": "*/15 * * * *",
"enabled": false,
"id": "PrintInventoryToSyslog",
"label": "Print Inventory to Syslog" NOTE: Used with DR product
},
{
"interval": "0 0 * * *",
"enabled": true,
"id": "QuotaRequestsReport",
"label": "Quota Requests Report" NOTE: Used with cluster Storage Monitor product
},
{
"interval": "*/1 * * * *",
"enabled": true,
"id": "RSWEventsMonitor",
"label": "Ransomware Events Monitoring" NOTE: Used with Ransomware Defender
},
{
"interval": "*/1 * * * *",
"enabled": true,
"id": "RSWHbaseScan",
"label": "Ransomware Hbase Scanning" NOTE: Used with Ransomware Defender to check DB health at an interval
},
{
"interval": "*/15 * * * *",
"enabled": true,
"id": "Readiness",
"label": "Zone Readiness" NOTE: Used with Dr product assess one and pool readines
},
{
"interval": "0 0 * * *",
"enabled": true,
"id": "RecoveryShareCleanUp",
"label": "Recovery Share Clean Up" NOTE: Used with cluster storage monitor data recovery share deletion check
},
{
"interval": "*/5 * * * *",
"enabled": true,
"id": "Replication",
"label": "Configuration Replication" NOTE: Used with DR product to sync config
},
{
"interval": "0 0 * * *",
"enabled": true,
"id": "RunbookRobot",
"label": "Runbook Robot" NOTE: Used with DR product to ruh continuous DR feature
},
{
"interval": "0 * * * *",
"enabled": true,
"id": "SecurityGuard",
"label": "Security Guard" NOTE: Used with Ransomware Defender to test end to end detection
},
{
"interval": "*/1 * * * *",
"enabled": true,
"id": "ServicesScan",
"label": "Services Scanning"
},
{
"interval": "0 0 * * *",
"enabled": true,
"id": "StorageMonitorReport",
"label": "Storage Monitor Report" NOTE: Used with Cluster storage monitor report
}
]
Eyeglass Reports
The cluster diff report is now run from an igls command. If the cluster has a large configuration, this report can run for hours. The daily report will not have different configurations and will only send the basic report.
To execute an on-demand difference report from today's cluster report to yesterday's use this cli command.
igls config settings
To return the list of tags in system.xml, run this command:igls config settings
To return the value of the tag, run this command:igls config settings --tag
To update the value of the tag, run this command:igls config settings set --tag --value
To show a help message, run this command:igls config settings help
Examples:
igls config settings --tag syncIsilonsToZK
igls config settings set --tag syncIsilonsToZK --value true
igls adv diffclusterreport
Enable/Disable
To enable/disable the schedule for the Eyeglass Reports, use this command:
igls admin schedules set --id InventoryReport --enabled <true|false>
Examples:
igls admin schedules set --id InventoryReport --enabled false
{
"success": true
}
igls admin schedules set --id InventoryReport --enabled true
{
"success": true
}
Update Schedule
To change the schedule for the Eyeglass Reports, use this command. Valid intervals for reporting are: 1M, 2M, 3M, 4M, 5M, 6M, 10M, 15M, 20M, 30M, 1H, 2H, 3H, 4H, 6H, 8H, 12H, 1D, 7D, 31D.
igls admin schedules set --id InventoryReport --interval <interval>
Example:
igls admin schedules set --id InventoryReport --interval 7D
{
"success": true
}
Configuration Replication
Enable/Disable
To enable/disable the schedule for Configuration Replication, use this command:
igls admin schedules set --id Replication --enabled <true|false>
Examples:
igls admin schedules set --id Replication --enabled false
{
"success": true
}
igls admin schedules set --id Replication --enabled true
{
"success": true
}
Update Schedule
To change the schedule for Configuration Replication, use this command. Valid intervals for replication are: 1M, 2M, 3M, 4M, 5M, 6M, 10M, 15M, 20M, 30M, 1H, 2H, 3H, 4H, 6H, 8H, 12H, 1D, 7D, 31D.
igls admin schedules set --id Replication --interval <interval>
Example:
igls admin schedules set --id Replication --interval 10M
{
"success": true
}
Runbook Robot Schedule Interval
Use this CLI command to change the interval from once per day.
Enable/Disable
To enable/disable the schedule for Runbook Robot, use this command:
igls admin schedules set --id RunbookRobot --enabled <true|false>
Examples:
igls admin schedules set --id RunbookRobot --enabled false
{
"success": true
}
igls admin schedules set --id RunbookRobot --enabled true
{
"success": true
}
Update Schedule
To change the schedule for RunbookRobot, use this command. Valid intervals for Configuration Replication are: 1M, 2M, 3M, 4M, 5M, 6M, 10M, 15M, 20M, 30M, 1H, 2H, 3H, 4H, 6H, 8H, 12H, 1D, 7D, 31D.
igls admin schedules set --id RunbookRobot --interval <interval>
Example:
igls admin schedules set --id RunbookRobot --interval 10M
{
"success": true
}
Failover Readiness for Access Zones and IP Pools
Enable/Disable
To enable/disable the schedule for the Zone Readiness job, use this command:
igls admin schedules set --id Readiness --enabled <true|false>
Examples:
igls admin schedules set --id Readiness --enabled false
{
"success": true
}
igls admin schedules set --id Readiness --enabled true
{
"success": true
}
Update Schedule
To change the schedule for the Zone Readiness job, use this command. Valid intervals for reporting are: 1M, 2M, 3M, 4M, 5M, 6M, 10M, 15M, 20M, 30M, 1H, 2H, 3H, 4H, 6H, 8H, 12H, 1D, 7D, 31D.
igls admin schedules set --id Readiness --interval <interval>
Example:
igls admin schedules set --id Readiness --interval 2H
Runbook Robot Mount Export Enable Disable
Default is enabled to mount the cluster and create the test file:
igls adv runbookrobot show (show current value).
igls adv runbookrobot set --mount=true (default).
igls adv runbookrobot set --mount=false.
Advanced Commands
igls adv requesttimeout
Description: Sets rest API timeout when cluster or wan responses take longer to return; this value can be increased.
igls adv requesttimeout (displays the timeout value)
igls adv requesttimeout set --inventory <time> (sets the timeout value to <time>)
Example:
igls adv requesttimeout set --inventory 300
igls adv spndelay
Description: used to increase the delay between SPN failover commands, that require domain controller to replicate the delete before the add spn can succeed. Release 1.8.3 removes the need for this command, by pinning spn failover commands to a single node and domain controller.
igls adv spndelay (displays the current setting)
igls adv spndelay set --seconds=<seconds> (set a delay between delete and create SPN during failover)
Example:
igls adv spndelay set --seconds=10
Role Based Authentication Authentication CLI Commands
When proxy login is used to login using pass through authentication to AD an ip address is needed to send an SMB authentication request for the users AD user id and password. This is done using the SMB protocol to a share on PowerScale using the SmartConnect FQDN to a share discovered in the zone. To provide a list of SmartConnect FQDN's to test the user's password, use the CLI commands below. The authentication will use the ordered list below until the password test succeeds to allow the user to log in.
During the process, the AD groups are also retrieved to map the user to a role defined in the Users icon. If the user matches an AD group role or a user is added directly to a role, then the icons or permissions assigned to the role will display on the Eyeglass desktop.
These commands are used to add SmartConnect FQDN to the Access Zone, where the users should authenticate to the AD provider assigned to the Access Zone.
- For checking fqdn list: igls admin auth
- For adding a new fqdn: igls admin auth add --fqdn <name>
- For changing a fqdn: igls admin auth modify --fromfqdn <name> --tofqdn <newName>
- For deleting a fqdn: igls admin auth delete --fqdn <name>
- For deleting all fqdn's: igls admin auth delete --all true
Cluster Storage Monitor CLI commands
Cluster Storage Reports Schedule CLI Commands
See setting and getting schedules in the CLI section above to specify job id, get and set functions, and enable and disable actions on scheduled reports.
igls admin schedules (lists schedules)
Used to enable or disable the daily report for cluster disk usage and quotas:
{
"interval": "0 0 * * *",
"enabled": true,
"id": "StorageMonitorReport",
"label": "Storage Monitor Report"
}
Quota collection Job Schedule for Large Quota Clusters Scheduling CLI Commands
Use this CLI command to set a different collection interval for clusters with > 1000 quotas to avoid long configuration sync jobs that detect share, exports for DR syncing. It is best practice to always enable quota job to remove the quota collection from normal configuration sync. This will also remove quota collection from the inventory job on during SCA restart, normal configuration sync jobs and failover inventory step.
|
|
NOTE: 2.5.7 update 2 this job will be enabled by default. |
How to Enable Dedicated Quota Inventory Collection Job and Quota pre-sync
- igls admin schedules set --id QuotaInventoryCollection_2_5_8 --enabled true (this enables the schedule, and default is every 12 hours)
- Note: igls admin schedules command will not display QuotaInventoryCollection when it is not enabled
- Then restart the Eyeglass sca service following the steps below for the change to take effect:
- SSH to Eyeglass appliance
- Type: sudo su - (to elevate to root - enter admin user password)
- Type: systemctl restart sca
- Type: systemctl status sca (to verify sca service active and running after the restart)
- Use igls admin schedules to change the default from twice per day at hour 6 and hour 18 to an alternate schedule. Example - to change to 10 minutes use this for testing only.
- igls admin schedules set --id QuotaInventoryCollection_2_5_8 --interval 10M
- You should see result success.
- igls admin schedules set --id QuotaInventoryCollection_2_5_8 --interval 10M
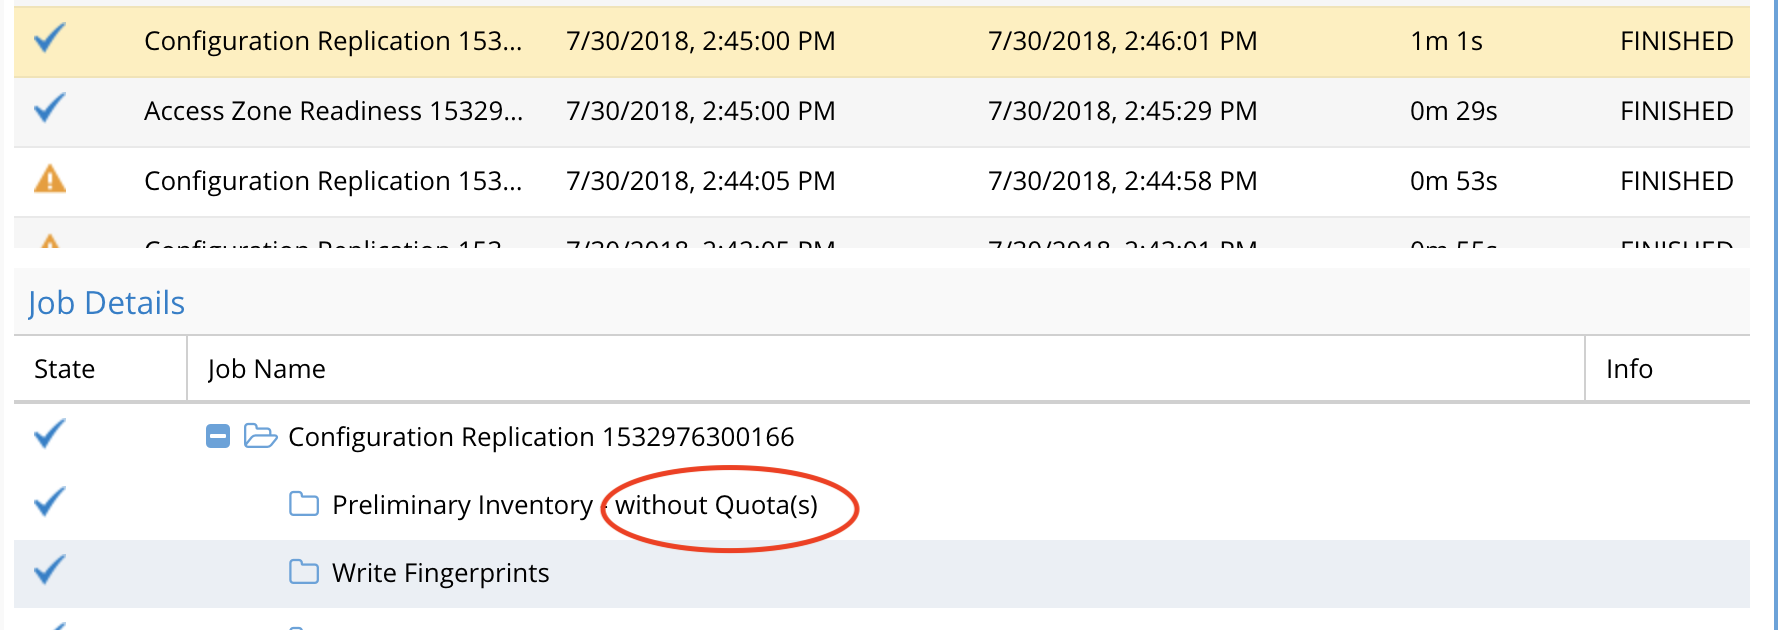
- You should now see the config job running with one of 2 options showing.
- The default config sync job for shares and exports will show -- without quotas
Advanced Quota Failover and Inventory collection CLI commands
Enable pre-sync of Quotas on Onefs 8.x clusters (DR licensed feature)
Quotas can be synced with a special configuration sync jobs to sync quotas at the same time shares and exports are synced.
|
|
NOTE: If pre-Sync is enabled, quota inventory must be enabled as well; follow the steps above to enable the dedicated quota inventory collection job. NOTE: pre-sync of quotas will impact synciq performance for replication of data; the more quotas on the target that exists, the slower synciq will replicate. Use with caution. |
To check the pre-sync status
- igls adv quotas
Quota Advisory Sync Enabled: true
Quota Advisory Sync Delete Mode: ENABLED
Pre-Sync Quota On Interval: false
- To enable pre-sync of quotas requires the separate configuration job to be enabled as per above
- igls adv quotas set --quotapresync=true
- Check that it is now set
- igls adv quotas
- Verify that pre-sync shows enabled.
- Now enable quota dedicated quota collection job following the steps in the previous section. Pre-sync is only supported using the dedicated quota collection inventory collection job.If you do not enable the separate quota collection, pre-sync will not function by design.
- Note the schedule to pre-sync quotas will be the same as the quota inventory collection schedule.
Cluster Storage Monitor automation quota commands (Cluster Storage Monitor Feature)
This section covers auto advisory quota creation, and quota templates for AD managed quotas.
Note: Requires Storage cluster Monitor license
- igls adv quotas help.
- Igls adv quotas (see current values).
- Igls adv quotas set --quotasync=true (this enables the feature, false to disable).
- Igls adv quotas set --quotasyncdelete=true (defaults disabled, valid values are enabled/disabled/advanced).
Active Directory Group based Quota Management (Cluster Storage Monitor Feature)
To use this AD group-based quota management feature and new job type needs to be enabled, that runs on a default schedule of once per day. This group will evaluate the AD to the group membership of users and auto-apply quota templates configured via the CLI.
High-level requirements to use this Feature
- A New AD Group discovery job must be enabled first to retrieve AD groups and users (instructions below)
- A separate quota inventory job must be enabled see here for instructions. (optional change schedule) and defaults to every 12 hours. NOTE: This means quotas will be only collected if any changes every 12 hours.
- Create a Storage tier to label quotas (commands and examples below)
- Create a template (commands and examples below)
- Create ad groups, add users to groups
- NOTE: Domain Users group cannot be used. A new AD group is required if the goal is a default domain-wide quota. To add all domain users to a new AD group, easily execute this command on a domain controller. Replace the object name with your domain group name.
- dsquery user -limit 0 | dsmod group "CN=newgroupname,CN=Users,DC=test ,DC=superna,DC=net" -addmbr
- Add AD groups to SMB shares.
- Run the on-demand AD group job to evaluate users groups and quotas to create.
- To troubleshoot look at the file on Eyeglass to debug
- cat /opt/superna/sca/logs/csm.log
|
|
NOTE: all references to AD domain should use uppercase characters |
How to configure AD group quota scheduled job (Required)
This task will get AD group membership to evaluate which quotas should be applied. This is the task that monitors AD group changes to determine when to apply a new quota or upgrade the quota to a new tier.
- Releases < 2.5.7
- igls admin schedules set --id ADGroupThresholds_2_5_5 --enabled true (this enables the schedule to be every 2 hours).
- Note when ADGroupThresholds_2_5_5 is not enabled, it will not be displayed using the igls admin schedules command
- igls admin schedules set --id ADGroupThresholds_2_5_5 --enabled true (this enables the schedule to be every 2 hours).
- Releases > 2.5.7
- igls admin schedules set --id ADGroupThresholds_2_5_7 --enabled=false
- Then restart Eyeglass sca service following steps below in order for change to take effect:
- SSH to Eyeglass appliance
- Type: sudo su - (to elevate to root - enter admin user password)
- Type: systemctl restart sca
- Type: systemctl status sca (to verify sca service active and running after the restart)
- Verify the schedule is enabled:
- igls admin schedules
- To change the schedule to check user to group AD membership more often than every 2 hours (the default schedule), make the following change with the IGLS command.
- Example for 10 minutes (this would be for testing only):
- igls admin schedules set --id ADGroupThresholds_2_5_7 --interval 10M
- verify with "igls admin schedules"
How to start an onDemand AD Quota scan of AD and Quota creation
Use this command to start the scan job. This should be used for testing purposes. This will evaluate shares with template AD groups applied and determine of any quotas need to b created. Then monitor the evaluation using this command from and ssh session tail -f /opt/superna/sca/logs/csm.log
igls adv ADGroupThresholds
User quotas or group quota templates
The default mode is to create user quotas on templates. A parameter can be added to a template to change the quota type to be a group quota and apply the group quota on a share where the template AD group has been applied to the permissions list. The command parameter example is shown below on the add template example using the [--quotasmode=[group|<default user>]] option on the create command.
igls csm tier help
Use this command to list storage tiers that have been created to group templates by tier.
igls csm template help
Templates define a quota (hard, soft , accounting) and and AD group is assigned to a template. Templates are assigned to a tier (a label to group templates). The Tier must exist first before assigning a template to a tier.
igls csm tier
Use this command to list the details of all tiers and the assigned template details.
igls csm template
Sample output shows tier assigned and AD group of the template.
List a specific template
igls csm template --name "AD01\testgroup"
List the template with the tier command to get details of the quota template
igls csm template --tier gold --name "AD01\gold"
List all templates in the gold Tier
igls csm template --tier gold
igls csm template add
Add new AD group template for user quota mode
Example:
igls csm template add --tier=bronze --name="AD01\bronze" --soft=200 --softunit=GB --softgrace=1 --softgraceunit=hours
Add new AD group template for group quota mode
Example:
igls csm template add --tier=bronze --name="AD01\silver" --soft=100 --softunit=GB --softgrace=1 --softgraceunit=hours --quotasmode=group
igls csm template update
Update an existing template
Example:
igls csm template update --tier=bronze --name="AD01\bronze" --soft=10 --softunit=GB --softgrace=1 --softgraceunit=days
igls csm template delete
Example:
igls csm template delete --tier=bronze --name="AD01\bronze" --quotasmode=user
Home Share AD Managed quota Configuration example
- This guide will create 3 tiers of bronze, silver and gold templates to offer 3 levels of quotas on the home folder.
- Create a tiers
- igls csm tier add --id="bronze"
- igls csm tier add --id="silver"
- igls csm tier add --id="gold"
- Create the templates and reference the tier name used above and assign a unique AD group that will be used to determine the users that will receive the quota.
- igls csm template add --tier=bronze --name="AD01\bronze" --soft=200 --softunit=GB --softgrace=1 --softgraceunit=hours
- igls csm template add --tier=silver --name="AD01\silver" --soft=400 --softunit=GB --softgrace=1 --softgraceunit=hours
- igls csm template add --tier=gold --name="AD01\gold" --soft=800 --softunit=GB --softgrace=1 --softgraceunit=hours
- Apply the Bronze, Silver and Gold AD groups (in this example, the domain is AD01) to a share with full control (or read/write permissions) and move to the bottom of the share permission list.
- NOTE: This group is not for assigning permissions to users and is only used to indicate where quotas should be applied. This is why it should be moved to the end of the share list. Security groups should be higher on the share list.
- This could be on a home directory path and will allow multiple templates to manage different tiers of quota limits for different users on the same path.
- Run the quota scan job on demand to apply quotas and tail the CSM log to see what actions are taken
- tail -f /opt/superna/sca/logs/csm.log
- igls adv ADGroupThresholds
- NOTE: Make sure to enable the Quota Inventory quota job schedule to evaluate AD group membership of users and update quotas based on your configured templates. CLI steps are posted above in this guide.
- Done.
Group Share AD managed quota Configuration example
|
|
NOTE: The default mode for group quota templates (adgroupmode false) will create a group quota for any groups that are members of the template AD group and found to be assigned to an SMB share. The Best Practice is not to use nested groups, and apply the template AD Group to SMB Shares where you want Group quotas created. |
- Create a tier: "igls csm tier add --id="bronze-group"
- Create the template and name the tier: "igls csm template add --tier=bronze-group --name="AD01\bronze-group" --soft=200 --softunit=GB --softgrace=1 --softgraceunit=hours --quotasmode=group " (notice the group mode is set now)
- Apply the AD group bronze group. To a share with full control (or read/write permissions) and move to the bottom of the share permission list. NOTE: This group is not for assigning permissions to users and is only used to indicate where quotas should be applied. This is why it should be moved to the end of the share list. Security groups should be higher on the share list.
- This could be on a group share and will allow multiple templates to manage different tiers of group quotas on the same share path.
- Run the quota scan job on demand to apply quotas and tail the CSM log to see what actions are taken
- tail -f /opt/superna/sca/logs/csm.log
- igls adv ADGroupThresholds
- NOTE: Make sure to enable the AD quota job schedule to evaluate AD group membership of users and update quotas based on your configured templates. CLI steps are posted above in this guide.
- Done.
igls adv adgroupmode
|
|
NOTE: Use this with caution, it will apply quotas based on user share access. The default is disabled. Do not change this setting unless directed by support. |
Use this command to set the AD group mode used in quota templates. The default is user mode (which means this setting will show false). When enabled (shows true) it means the AD group named in the template will get the list of users and all the users groups, then all shares detected as accessible to each user listed in the groups (based on their AD groups assigned to shares) will have a user quota created on those shares based on the template definition.
|
|
NOTE: This can create a lot of quotas and limits the user on each share they have access to based on the template definition. |
igls adv adgroupmode (show current setting) Display the working mode for group quotas sync, the user (default mode) or group mode. set --enabled=[true|false]
igls adv adgroupmode set --enabled=true (enables group mode)
igls adv adgroupmide set --enabled=false (disable group mode)
RPO Reporting CLI Commands
This section contains Eyeglass CLI commands related to the RPO Reporting feature.
igls adv runreports --report_type=rpo
Use this command to manually generate the SyncIQ Job Report and have it emailed. The time the command is run is the starting time for the report and associated calculations. Each command example below is the type option.
igls adv runreports --report_type=rpo
igls adv skipscreenshots
Use this command to enable or disable RPO chart screenshots in the RPO Report.
To disable screenshots:
igls adv skipscreenshots set --skip=true
To enable screenshots:
igls adv skipscreenshots set --skip=false
CSM Reporting CLI Commands
This section contains Eyeglass CLI commands related to the CSM Reporting feature.
igls adv runreports --report_type=csm
Use this command to manually generate CSM Report and have it emailed.
igls adv runreports --report_type=csm
Advanced Commands Use if directed by support
HBASE Query Commands
Memory watch dog on Eyeglass
get help
igls adv memorywatchdog help
get settings
igls adv memorywatchdog
Set memory threshold for memory watch dog to free up unused memory after crossing a threshold.
igls adv memorywatchdog set --forcegcthreshold=77 (sets GC to run over 77% memory used and writes debug log when this threshold has been crossed)ю
message sample
"Threshold has been reached, requesting GC to be executed if the GC is actually requested."
Database insertion validation
Default true, this removes orphaned records from db to avoid insertion errors. Do not use without direction from support.
igls adv verifydata [set] [--verify={true | false}]
AD User/group to SID or SID to user/group (Easy Auditor, Ransomware Defender)
These commands can be useful with Easy Auditor or Ransomware defender products to resolve user to SID, group to sid or the reverse.
- User command:
- igls adv resolve --user 'RNSM03\rwtest1' (NOTE: use single quotes around the user name and enter the domain in upper case).
- igls adv resolve --user ''user@domain.com'.
- igls adv resolve --user S-1-5-21-51043000-931826463-941209176-1140.
- igls adv resolve --user 'RNSM03\rwtest1' (NOTE: use single quotes around the user name and enter the domain in upper case).
- Group command:
- igls adv resolve --group 'RNSM03\rwtesting' (NOTE: use single quotes around the user name and enter the domain in upper case).
- igls adv resolve --group SID:S-1-5-21-51043000-931826463-941209176-1112 (must add SID: before the sid).
- igls adv resolve --group 'RNSM03\rwtesting' (NOTE: use single quotes around the user name and enter the domain in upper case).