Ransomware Defender Enterprise Airgap Agent VM Install Guide
- Introduction to this Guide
- System Requirement
- IMPORTANT INFORMATION REGARDING ADDING CLUSTERS TO AirGap Agent VM READ-ME FIRST
- Supported OneFS releases
- Prerequisites
- Ransomware Defender AirGap Vault Agent Firewall Port Requirements
- Download Eyeglass (Mandatory)
- Deploy the Ransomware Defender AirGap Vault Agent Appliance (Mandatory)
- Steps to Deploy the OVF with vSphere Client (Mandatory)
- Dell Apex Managed Cyber Vault Metering Software Configuration
- Upgrade Vault Agent Procedures
- Method #1 - in-band maintenance mode upgrade procedure
- Method #2 - Physical Vault VM Access
Introduction to this Guide
Use this document to get your new Ransomware Defender single VM into a secure AirGap vault ESX host.
System Requirement
-
Powerscale only
- vSphere 6.0 or higher appliance appliance requires
- 4 vCPU
- 24 GB RAM
- 158G
- ECS please see services team for sizing.
IMPORTANT INFORMATION REGARDING ADDING CLUSTERS TO AirGap Agent VM READ-ME FIRST
Supported OneFS releases
- Please refer to the Release Notes for the Ransomware Defender AirGap Vault Agent.
Prerequisites
- ESX host installed
- ensure esx host time is set correctly and time zone is correct
- Ransomware Defender AirGap Vault Agent VM should have time sync to VM checked
Ransomware Defender AirGap Vault Agent Firewall Port Requirements
- The vault agent requires
- port 8080 https from vault agent --> to the vault cluster management pool
- port 22 ssh from vault agent --> to the vault cluster management pool
- The Vault Cluster to the Production cluster
- port 8080 https API vault cluster --> prod cluster (used only for connectivity test CLI command, not used for any other purpose)
- port 22 ssh from vault cluster --> prod cluster(s)
Download Eyeglass (Mandatory)
- Download ECA zip from Superna web site following instructions here Latest ECA Download
Deploy the Ransomware Defender AirGap Vault Agent Appliance (Mandatory)
Ransomware Defender AirGap Vault Agent is delivered in an OVF format for easy deployment in your esx environment. Deploy the OVF and then follow the wizard to setup networking for this Linux appliance. You will need to know the following:
- subnet and network required so that the appliance will have IP connectivity to the PowerScale clusters that it’s managing and the users that are using it
- IP address for the appliance
- Gateway
Steps to Deploy the OVF with vSphere Client (Mandatory)
OVF Deployment steps :
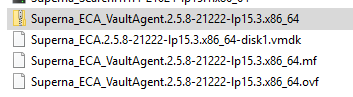
Step 1: Download an ECA OVF zip file from Latest Appliance Download.
Step 2: Unzip the contents of the zip file from Step 1 onto a computer with vSphere web URL.
Step 3: Login to the esx host with appropriate login credentials.
Step 4: Single click on the VMware vSphere client on the Desktop. Login with appropriate login credentials.
Step 5: Once logged in to VMware client, you can see different Menus on the top left of the application. Next, go to the File menu and select Deploy OVF Template.
Step 6: Browse to the location of the OVF files you’ve downloaded and unzipped in steps 1 and 2. Select OK and then Next.
Next, You will see the OVF template details. Verify the details and proceed by selecting Next. Notice download size to be under the allocated disk size limit.
Step 7: Choose a unique name for the virtual machine and select the Inventory location for the deployed template. Once done, select Next.
Step 8: Select the host/cluster where you want to run the deployed template and then Next.
Step 9: Select the Resource pool within which you wish to deploy the template.
Step 10: Select destination storage for virtual machine files, and select Next
Step 11: Select Disk Format for the datastore you selected in the previous step.
Step 12: Enter the networking properties for the Eyeglass appliance VM in the OVF properties display. Replace with the correct settings for your environment.
Step 13: When done, verify your settings and deploy the OVF
After deployment:
Step : Power On the virtual machine.
- The Ransomware Defender AirGap Vault Agent appliance is deployed with the following default admin user password:
- ssh to eyeglass vm as ecaadmin
- sudo systemctl status superna-on-boot (enter admin password and verify the first boot process completes)
- default login and password: ecaadmin/3y3gl4ss
- set the OVF mode
- ovf set-value -f mode=vault-agent
- sudo -s
- umount /opt/superna/mnt/zk-ramdisk
- remove the tmpfs /opt/superna/mnt/zk-ramdisk tmpfs nodev,nosuid,noexec,nodiratime,size=512M 0 0 line from /etc/fstab
- nano /etc/fstab
- remove the line above
- with ctrl key +k on the line
- ctrl key + x to save and exit
- done
- Can also be used to login to the SSH session
- Mandatory: It is highly recommended to reset the default password after the appliance is deployed.
- Type passwd
- enter new password and confirm password
- Setup Time zone (Mandatory)
- Follow Animated GIF below to set using YAST
- ssh as admin user,
- sudo -s
- Enter admin password
- type yast
- select menu system --> date and time
- set the time zone
- Done
- Cluster startup
- exit if you are still root user
- whoami (make sure you are ecaadmin)
- ecactl cluster up
- done
Dell Apex Managed Cyber Vault Metering Software Configuration
Upgrade Vault Agent Procedures
This section covers how to upgrade the vault agent software.
Two methods are available depending on vault operation mode.
Method #1 in-band maintenance window option requires the vault agent to have in-band maintenance mode enabled.
Method #2 requires console access or mouse keyboard access to esx host inside the vault; this requires physical access to the vault.
Method #1 - in-band maintenance mode upgrade procedure
- Requirements:
- Upgrade Procedures
- Download the vault agent upgrade file from support https://support.superna.net. Recored the md5 checksum from the download menu.
- Compute the md5 checksum after download and compare to the md5 checksum posted on the download site.
- Using winscp copy the run file to the production Powerscale connected to the vault network
- Request the vault maintenance mode window with this command for a 45 minute maintenance window
- igls airgap vaultaccessrequest --interval=45
- The vault agent checks in every 2 hour for maintenance requests on the hour example 8 am, 10 am etc..
- At the next time interval check prepare for the upgrade following steps below.
- ssh to the production cluster with the user that copied the upgrade file to the cluster. This example assumes the admin cluster user with a home directory of /ifs/home/admin.
- 1 minute after the hour, test access to the with scp /ifs/home/admin/<upgrade file name> eyeglass@x.x.x.x:<upgrade file name> (x.x.x.x is IP of the vault cluster interface). If the vault door is open, a password prompt will be presented; if a timeout message appears the vault has not opened for maintenance yet, retry the scp copy.
- Once the file is copied to the vault login to the vault over ssh
- ssh eyeglass@x.x.x.x
- scp /ifs/home/eyeglass/<upgrade file name> ecaadmin@y.y.y.y:<upgrade file name> (y.y.y.y is the vault agent VM) enter ecaadmin password to complete the copy.
- SSH to the vault agent VM
- ssh ecaadmin@y.y.y.y
- Shutdown vault agent
- ecactl cluster down
- upgrade vault agent
- chmod 777 /home/ecaadmin/<upgrade file name>
- ./home/ecaadmin/<upgrade file name>
- wait for upgrade to complete
- start vault cluster software
- ecactl cluster up
- Check remaining time for the timed maintenance before the vault network is auto closed
- ecactl airgap checkopen
- Verify upgrade
- type docker ps (verify all containers are running and none are restarting)
- Check configuration
- ecactl isilons list
- ecactl airgap list
- Close the vault to exit the ssh session
- ecactl vault close
- The ssh session will timeout once the vault closes
- Upgrade Complete
Method #2 - Physical Vault VM Access
- Requirements
- Bastion host with access to vault management switch inside the vault
- OR physical access with laptop to management switch inside the vault
- Secured vault laptop dedicated for vault access. This laptop should be physically secured when not in use with limited personnel access to the laptop. Change control to gain access to the secured laptop.
- Dedicated USB stick for up
- Upgrade Procedures
- Download the vault agent upgrade file from support https://support.superna.net. Recored the md5 checksum from the download menu.
- Compute the md5 checksum after download and compare to the md5 checksum posted on the download site.
- Copy the upgrade file to a USB stick.
- Copy the upgrade file from the USB stick to the to the management laptop.
- Winscp the upgrade file to the vault agent using the ecaadmin user
- SSH to the vault agent VM
- ssh ecaadmin@y.y.y.y (or use ssh utility)
- Shutdown vault agent
- ecactl cluster down
- upgrade vault agent
- chmod 777 /home/ecaadmin/<upgrade file name>
- /home/ecaadmin/<upgrade file name>
- wait for upgrade to complete
- Start vault cluster software
- ecactl cluster up
- Verify upgrade
- type docker ps (verify all containers are running and none are restarting)
- Check configuration
- ecactl isilons list
- ecactl airgap list
- Test Vault Connectivity to production cluster
- ecactl airgap check --prod <protected cluster name>
- Verify successful communications
- Upgrade Complete