DR Configuration Guides
Basic DR Robot Configuration
Home
Basic DR Robot Configuration
The basic option requires a non-production, Eyeglass specific SyncIQ policy to exist. The Runbook Robot will exercise the failover and failback of the data for this SyncIQ policy. This configuration does not fully exercise all automation required for failover but it’s quick and easy to setup.
Prerequisites
- SyncIQ policy in any Access Zone BUT only “EyeglassRunbookRobot” prefixed policies will execute the failover logic.
- This type of Robot policy will not failover SmartConnect names, alias, SPN’s.
- This is designed to ensure no SmartConnect Zones used by non Robot policies will be failed over in the Access Zone:
- The Basic Robot is intended to operate on non-production data. The steps below include directions to create the Runbook Robot specific SyncIQ policy on the cluster for the Basic Runbook Robot operation.
- If you create shares, exports or quotas in the path of the Robot SyncIQ policy, they will be failed over as well using normal configuration sync jobs. It's a good way to test the whole failover of the configuration. The configuration names of shares, exports can be any name.
Note: Eyeglass will modify the description, Root Client and Map Root User settings as required for Robot operation on an existing export with same path as the Robot SyncIQ Policy root path.
- Quotas will be failed over during the Robot execution and deleted on source automatically if quotas have been created within the SyncIQ policy used for the Robot.
- Eyeglass Hostname on the Network Card Setup and the Network Settings (setup using yast during initial Eyeglass appliance configuration) must be identical.
Configuration Steps for Basic DR Robot
The steps are the following:
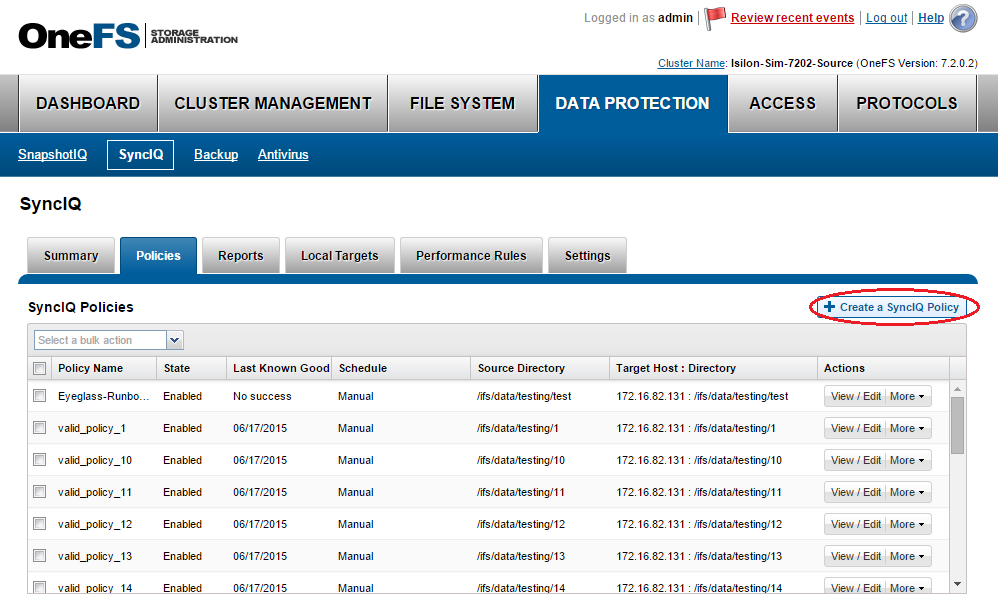
- Log into the PowerScale Source cluster via OneFS.
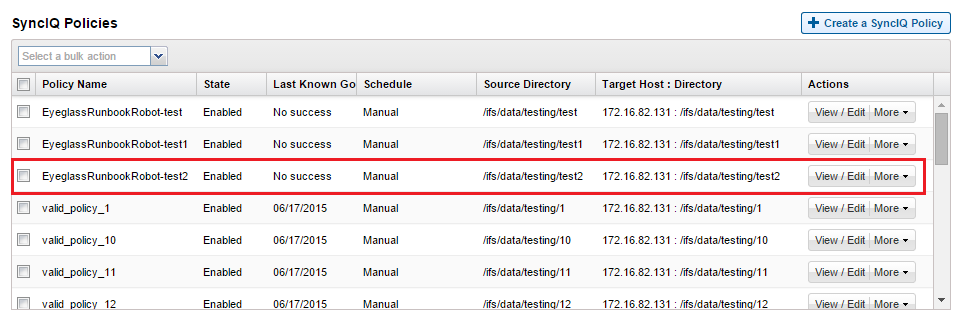
- Click on Data Protection, then SyncIQ, then on the Policies tab.
- Click on + Create a SyncIQ Policy.
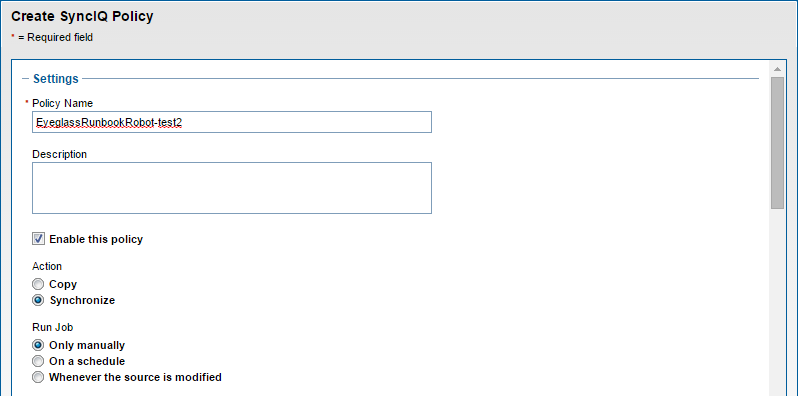
- In the Settings section of the Create SyncIQ Policy window, enter EyeglassRunbookRobot-XYZ (where XYZ is a random string) in the Policy Name field.
IMPORTANT: This name format must be followed exactly in order for the Basic Runbook Robot job to execute.
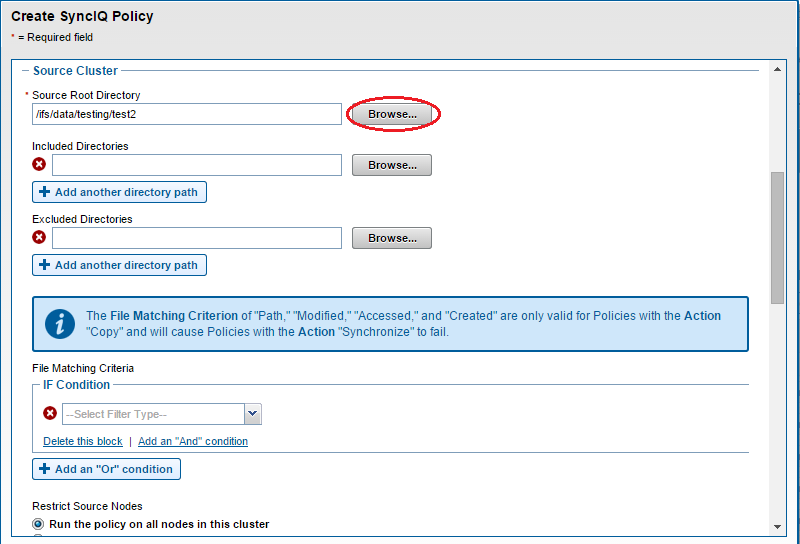
- In Source Cluster section, select a Source Root Directory by clicking Browse next to the box and navigating to the desired folder.
IMPORTANT: This should be a directory containing NON production data as it will be failed over by default once a day.
- In Target Cluster section under Target Host, enter the target cluster SmartConnect zone name used for SyncIQ replication of the Target cluster , and under Target Directory the path on the Target cluster to where the data will be replicated .
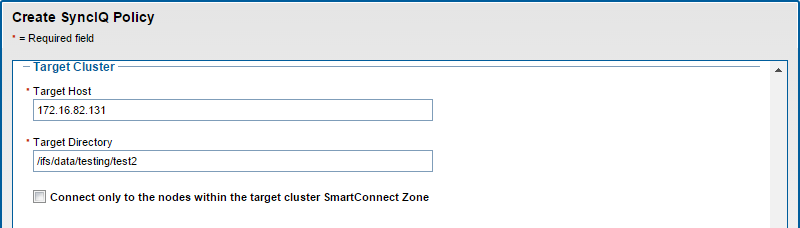
- Do not enter or modify anything in the Target Snapshots and Advanced Settings sections.
- Click on Create Policy. The policy will appear in the SyncIQ Policies chart.
- Click on More and select Start Job on newly created policy.
- Ensure that the policy completes successfully.
- Log into Eyeglass.
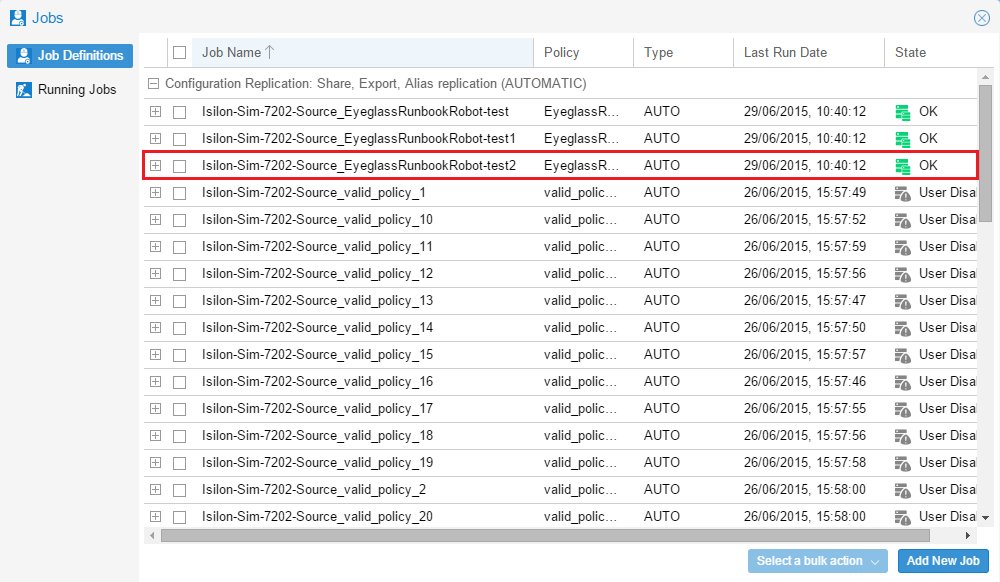
- Open the Jobs window and select the Job Definitions section.
- Under the Configuration Replication jobs, look for a Job Name that resembles SourceClusterName_EyeglassRunbookRobot-XYZ (where XYZ is the random string chosen when creating the policy). Make sure it’s State is OK.
Notes:
- This Job will be created after Eyeglass discovery has found the SyncIQ Policy created in the previous steps. If the Job is not present, wait for the next Eyeglass discovery cycle and then check again.
- NOTE: You can enable DFS mode on the basic robot policy. Eyeglass will still use NFS to write data to the cluster but DFS mount can be created to verify faiover and failback operations over DFS by manually check the DFS mount each day. Eyelgass will still execute normal NFS failover and failback data integrity check.
- How to Enable DFS mode Basic Robot
- Find the policy the Configuration replication section of the Jobs icon.
- Select the checkbox on the left-hand side for the Job mentioned above and click the Select a bulk action button at the bottom of the Jobs window. This time, click the Enable/Disable option.
- Select the checkbox on the left-hand side for the Job mentioned above and click the Select a bulk action button at the bottom of the Jobs window and click the Enable/Disable Microsoft DFS option.
- Inventory runs with every Eyeglass Replication cycle ( every 5 minutes by default ) so you may need to wait for the next Eyeglass Replication cycle for the new Job to appear in the jobs window.
- If the SyncIQ Policy Name that was created has been entered properly, a new type of Job category will appear in Eyeglass: Failover: Runbook Robot (AUTOMATIC).
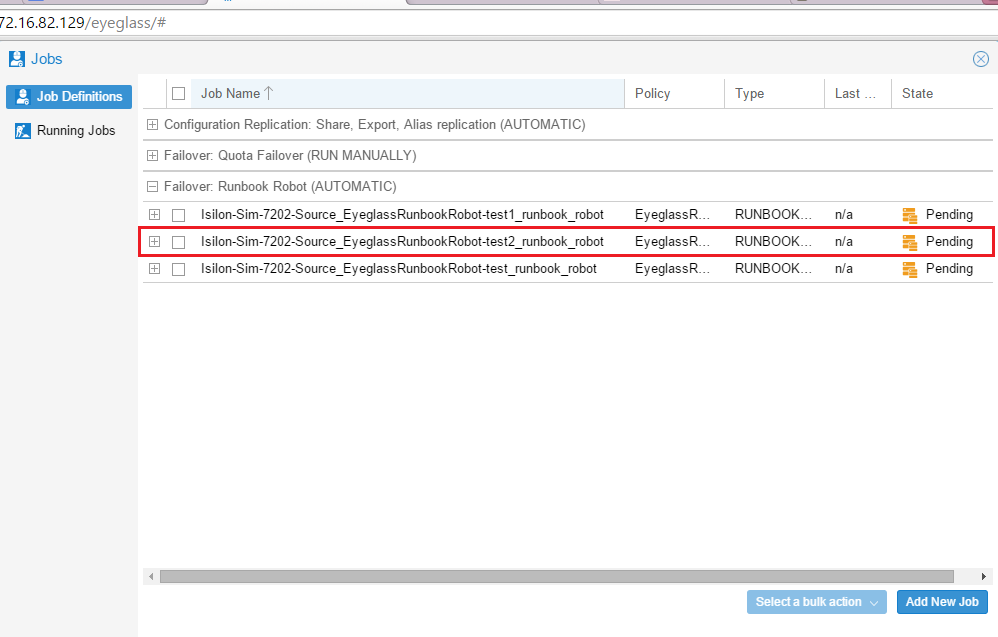
- By default, the Job will be queued to run at midnight every day.
- If you want to test it after creating the policy, select the job in the jobs windows and use bulk action to run now.
- When the Runbook Robot Job runs, in the Running Jobs section a job will appear with the Name Runbook Robot, followed by a time stamp.
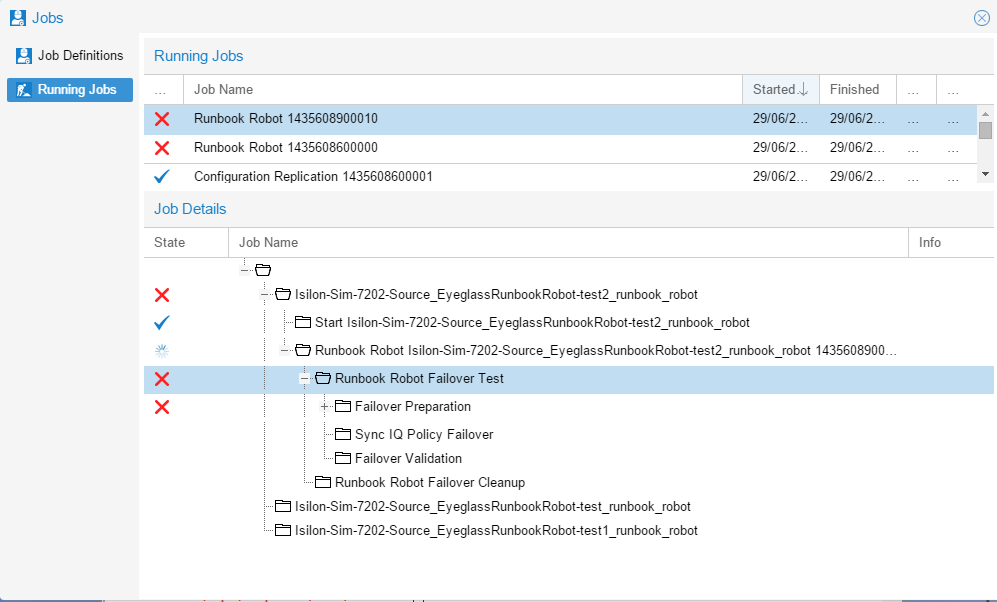
- The Runbook Robot job will run a three-stage Failover Test, which consists of a Failover Preparation, SyncIQ Policy Failover, and Failover Validation. Once this is done, it will run a Failover Cleanup.
- The Failover Preparation component consists of the following steps:
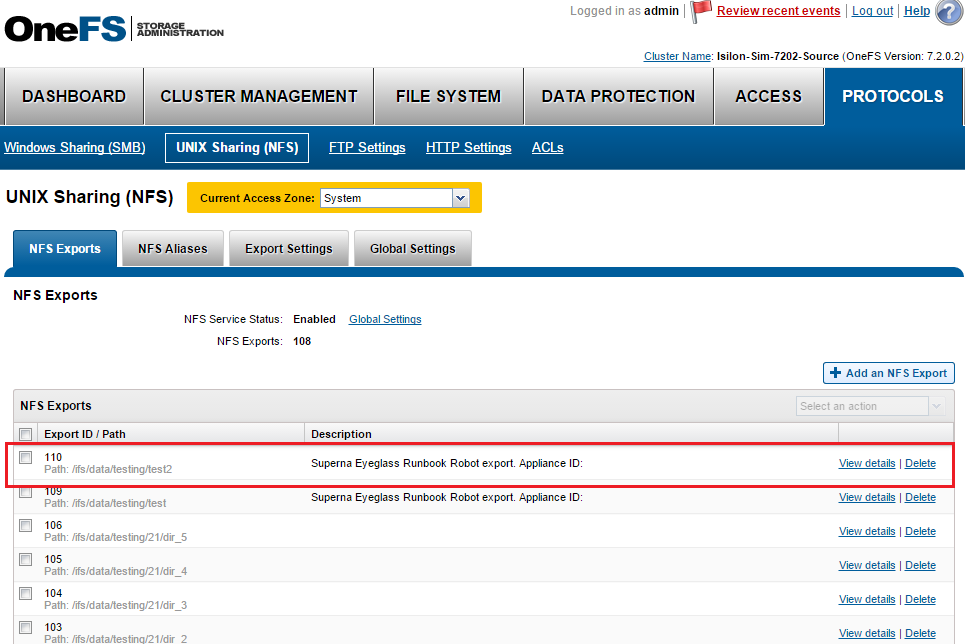
- The job will create a new Eyeglass export or update an existing Eyeglass export with the following parameters:
- Description: Superna Eyeglass Runbook Robot export Appliance ID
- Root Clients: The Eyeglass IP address used
- Map Root User settings
- Directory Paths: The Source Root Directory chosen when creating the SyncIQ Policy
- This export is then mounted on the Eyeglass appliance.
- Data is then written to the export, which is dependent on the SyncIQ Policy Path and timestamp.
- The export is then unmounted
- To view the exports created: open OneFS with the IP address of the source cluster, click on the Protocols tab, then click on UNIX Sharing (NFS), followed by the NFS Exports tab.
- Once the preparation is successfully completed, Eyeglass performs a SyncIQ Policy Failover.
- On completion of the failover, Runbook Robot will run a Failover Validation in order to make sure that the data was failed over without issues. The Failover Validation component consists of the following steps:
- The export created is mounted on the Eyeglass appliance using the IP address of the failover target cluster.
- The timestamp is read to confirm it is identical to what was written during the Failover Preparation step.
- A new timestamp is written to the Failover.ts file.
- This new timestamp is then read to confirm it has been written correctly.
- This export is then unmounted from the Eyeglass appliance.
- Once the Failover Test has been completed, the Runbook Robot job will run a Failover Cleanup, which consists of unmounting the export from the Eyeglass appliance.
- The default Robot jobs run every day at midnight and executes a failover Robot policy.
- Creates export.
- Mounts the cluster writes test data using the export created.
- It failovers the policy.
- Runs the policy.
- Mounts the data on synced export on target.
- Unmounts.
- Moves the schedule on policy to the target.
- Runs resync prep on source.
- Goes to sleep until time to failback.
- Methods to verify it was successful:
- Check the DR Dashboard policies tab and verify it’s green.
- Check the cluster SyncIQ policy status on both clusters and make sure the policy moves from one cluster to the other each day.
- Make sure the test file exists with a current date and time stamp on the active cluster (Hint; look in the policy path root file system for the test file).
- If a quota was applied to Robot policy path, make sure the quota moved to the target cluster AND was deleted on the source cluster (Eyeglass moves policies on failover).
- Review the Failover Log (DR Assistant / Failover History / Open log file). Failover log may also be downloaded from the Failover Log Viewer using the Download File link.