Eyeglass Administration guides Publication
Unlock My files Help Desk Application
Home
- What's new
- Read Me First
- Please read Notes below to understand more about locked files
- Known Issues
- The Use Case
- Requirements
- How to add Unlock My Files Icon permission to the admin user role
- How to delegate Unlock My Files to the Help Desk
- How to find Locked files and Break locks
What's new
- 2.5.6 update 2 includes a completely new tool for unlocking files.
- Partial results feature will search each access zone and return results from each access zone as they are received.
- A cluster selection requires 1 and only 1 cluster to be selected for searching for open and locked files. This limits the time need to complete the search.
- Search progress bar indicates the search is still executing and shows which access zones have pending results.
Read Me First
Users leave files open and locked. This requires finding the PowerScale node with the open file and issuing a command to break the lock. This is a time consuming process. This feature is designed to allow a help desk to securely find and break locks on files without any permissions on PowerScale.
Please read Notes below to understand more about locked files
- This feature only displays files that are locked and opened with write permissions. Applications that open for read only do not place locks on files. example notepad, wordpad do not lock files
- NOTE: Very important information about open files, not all applications use persistent file handles and many applications do not lock files ever. If a file does not show up in the results it likely means the application does not use persistent file handles and does not lock files. This is application dependant.
- NOTE: This feature is not intended to list or report on all open and locked files. It is intended to search for a specific open file.
- NOTE: Only 100 files are returned per search
Known Issues
- See Release note for releases before 2.5.6 update build < = 200158
- Service account user used to add the cluster to eyeglass must support sudo command over ssh
The Use Case
- Unlock my files! is a new desktop icon with a dedicated permission to allow delegation to a help desk to unlock files for end users.
- Search for a file based on name or partial string match
- Find the file in the list
- Click break lock button
- Done.
Requirements
- Requires Onefs 8.x or later.
- Upgrade to 2.5.6 update 2 build > 200158 , major enhancements in this build. Follow the upgrade guide to get upgraded.
- Special character handling in searches
- Partial results returned per access zone scan allows faster results to be returned while other access zones are being scanned for open files
- Per cluster search allowing selection of a specific cluster to search
- Help text on how to search efficiently is now in the GUI
- MANDATORY STEPS BEFORE USE See guide with sudoer permissions changed required
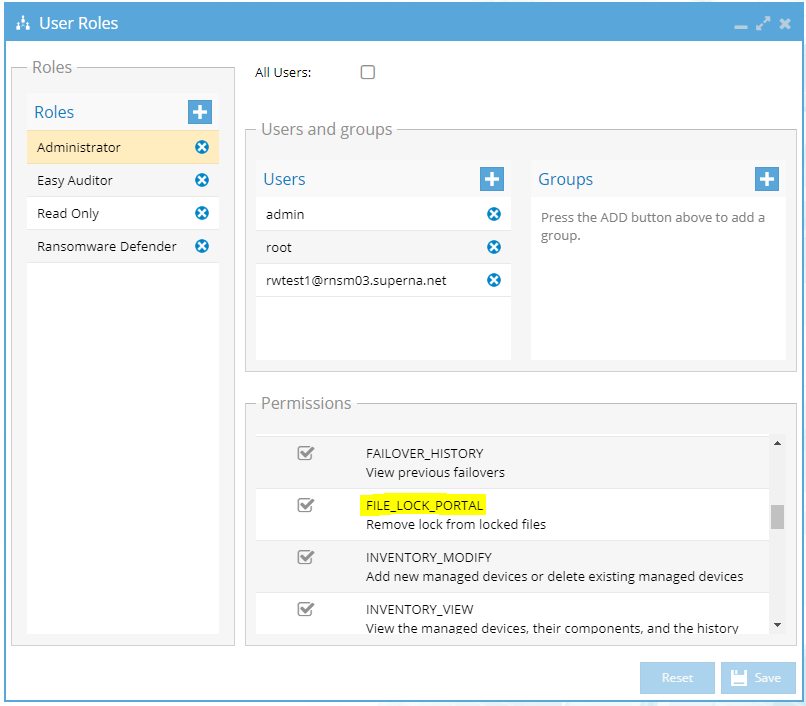
How to add Unlock My Files Icon permission to the admin user role
- Login as admin
- Open User Roles icon
- find the file lock portal permission and enable it.
- Save admin role
How to delegate Unlock My Files to the Help Desk
- Please read the Full RBAC Guide for trouble shooting and configuring RBAC.
- The RBAC feature is required to provide AD login and delegation to a Help desk to unlock files.
- Prerequisites
- Create an AD group in Active Directory for this role
- NOTE: group name cannot have spaces or special characters, the group name should be all lower case.
- Create an AD group in Active Directory for this role
- Open the User Roles icon
- Create new role in User roles called "Help desk" with the + sign
- Assign the AD group to this role
- NOTE: syntax of AD group MUST be DOMAIN\lowercasegroupname (where domain name is uppercase, and ad group name is lower case)
- Add the file lock portal permission to this role and save the role.

- Click Save
How to find Locked files and Break locks
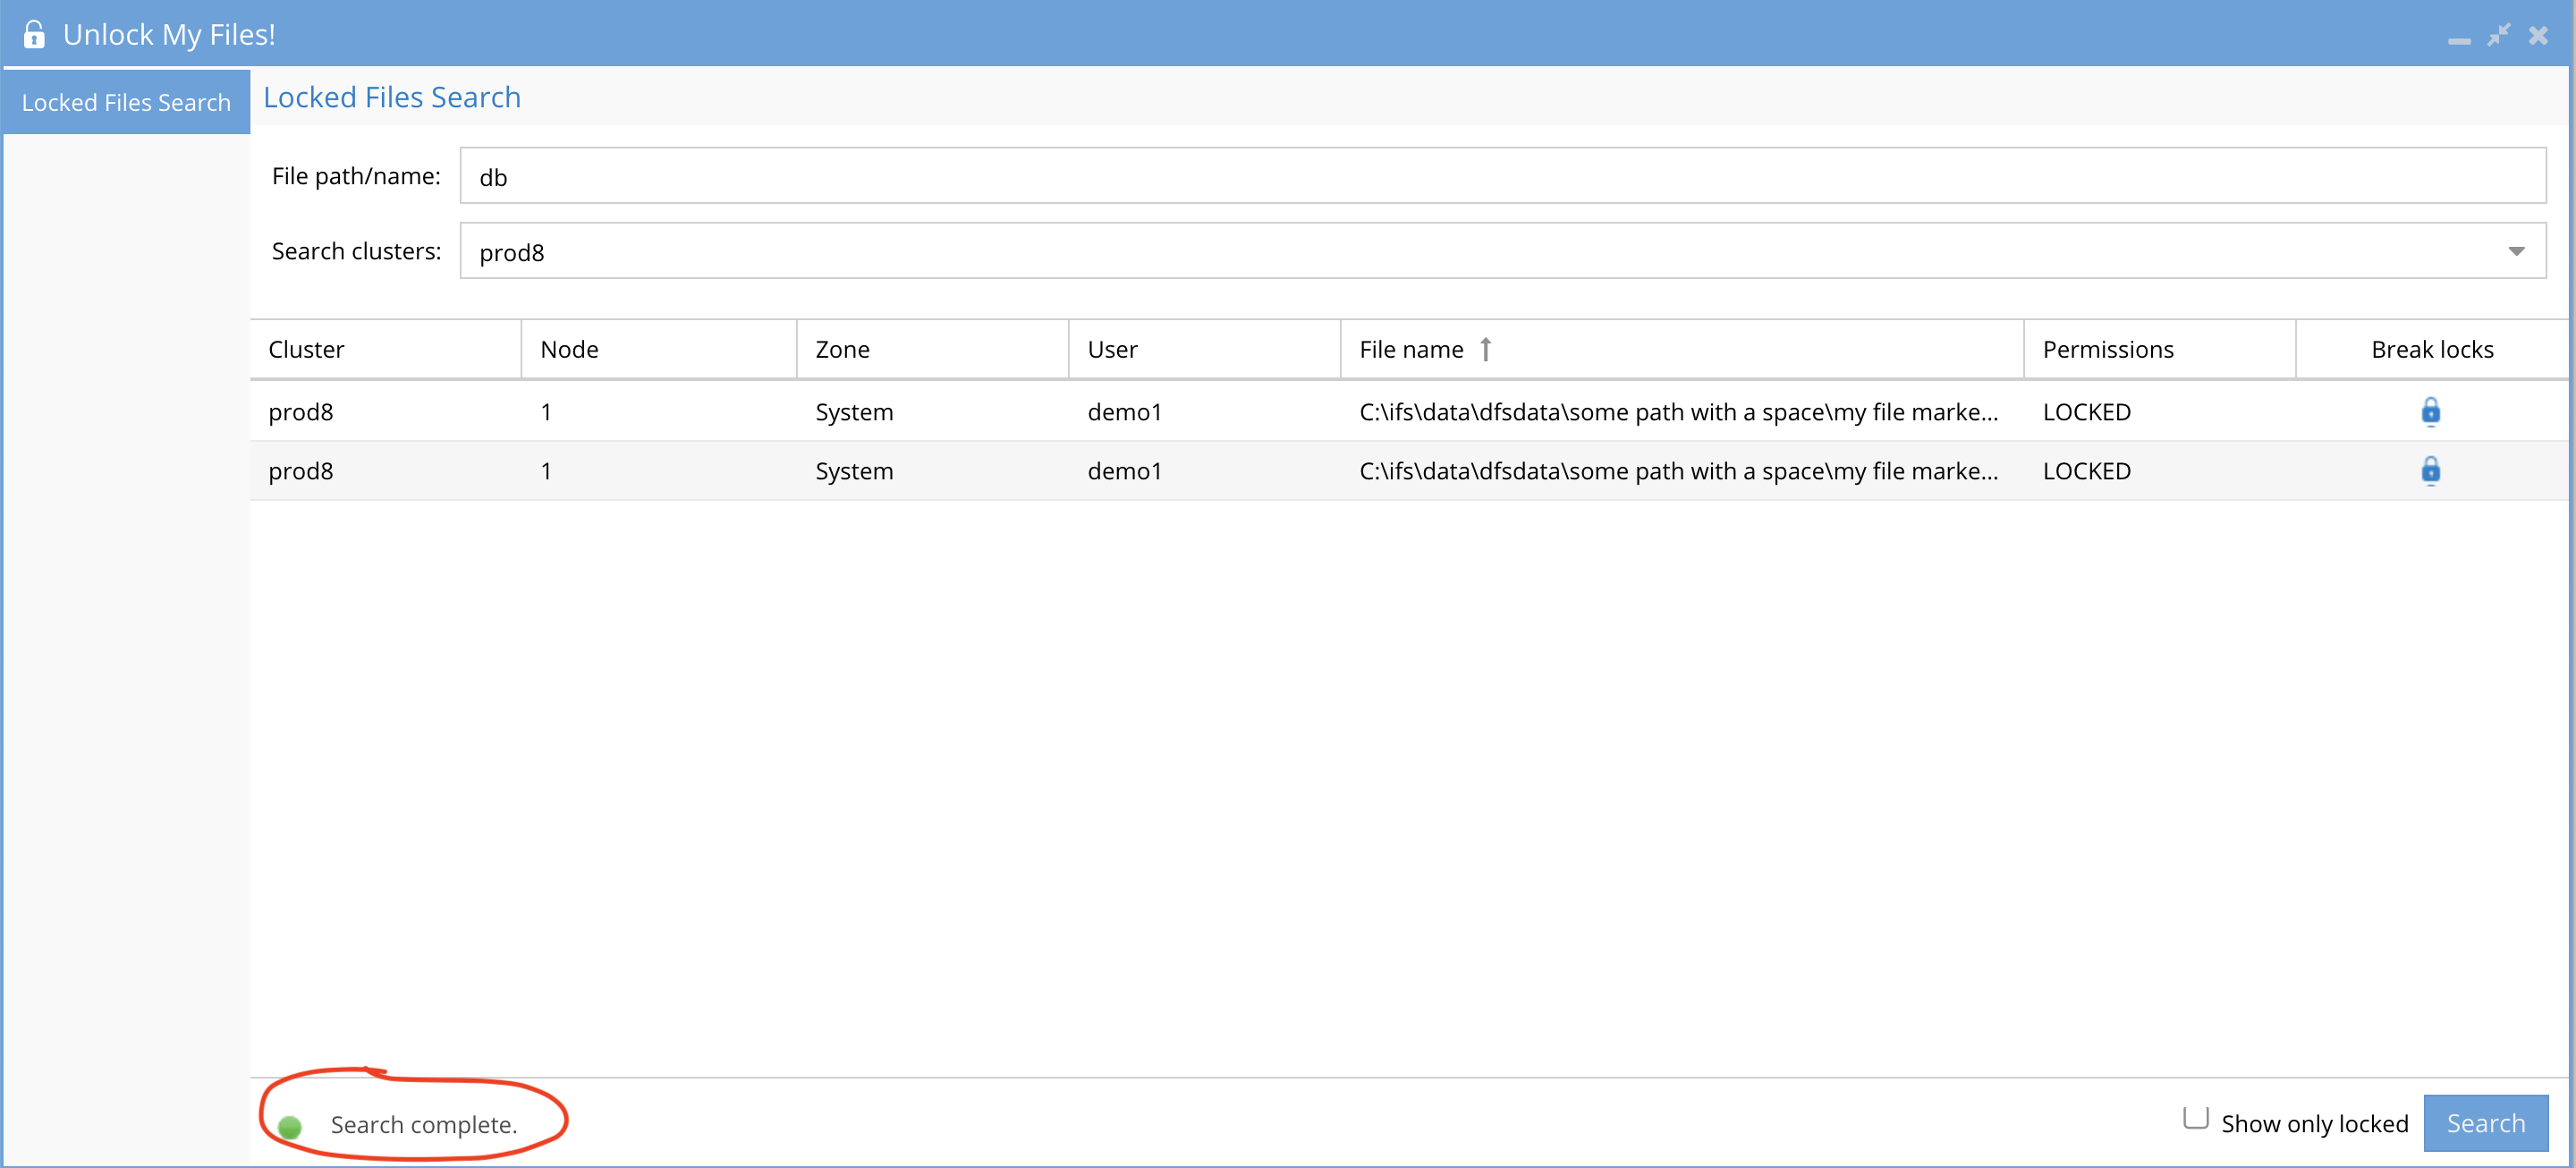
- Type the name of the file or partial match of the file.
- NOTE: do not enter access zone name, do not enter special characters for the path , only enter text for the path, or exact file name. Example do not enter /ifs/data/marketing enter marketing to find open files in folders named marketing.
- See the example below searching for a file with db in the extension. The red circle indicates how many Access zones exist and which zones have searches completed. Partial results per access zone will be returned the user interface.

- Once all results for all access zones are completed the GUI will indicate a completed status. See example below.
- Best Practice:
- Only enter the name of the file, or text of the directory the file is located.
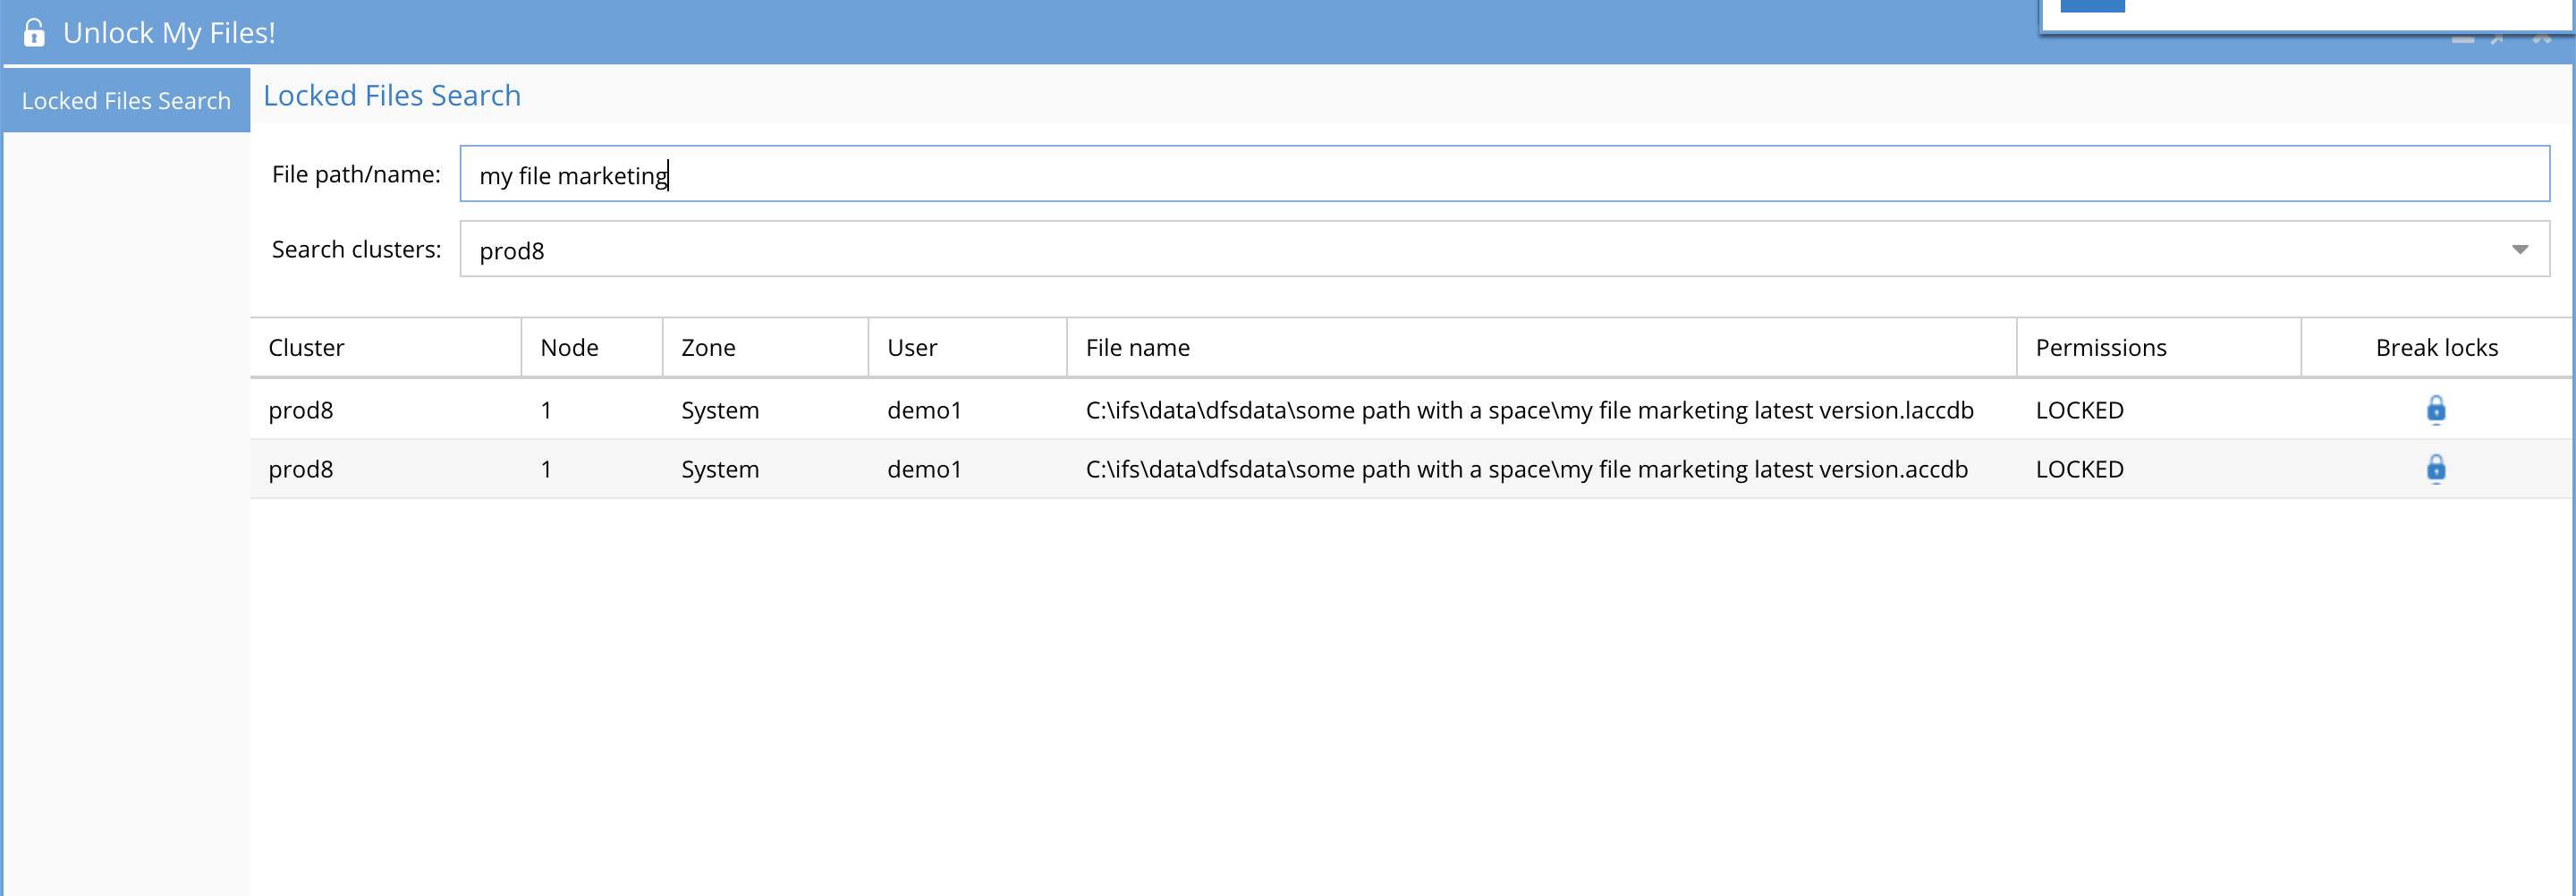
- Using 2.5.6 update 2 and later. Files with spaces can be entered exactly as the file name looks with spaces. No need for quotes to search. See example.
- example path is /ifs/data/groups/marketing/project123.docx search for project123.docx or enter marketing to search for files open in the marketing folder
- Results will return all matching files and directories
- NOTE: Only 100 files are returned, if the file is not listed a more accurate file match search is required.
- NOTE: The locked column will shows files with a SMB file lock applied the client application. If it does not display locked status it means the application did not open the file with a lock request.
- Use the show only locked files filter to view only files with lock requests on the files
- Click the break lock icon next to the file. Answer yes to the break lock when prompted.
- NOTE: Breaking a lock on an application can lose data if the application has not committed the data to the file.
- Verify with user that the file is unlocked and attempt to re-open the file.