Eyeglass Administration guides Publication
Simple Setup AD Group based RBAC
Home
Before You Start
Read AD Group Name Requirements before starting Click Here.
Configuration Steps
- Steps should be followed exactly
- NOTE: In this example the domain name is AD02 and must be upper case, follow screenshots as a reference. We suggest using our exact group names to create your first RBAC role.
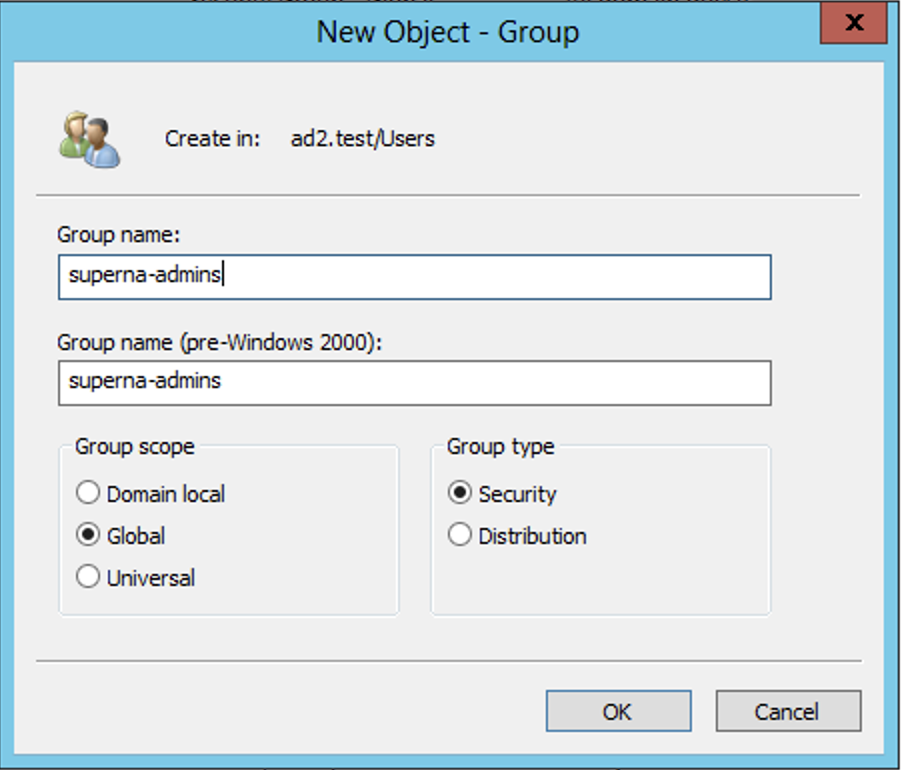
- Create an ad group named superna-admins (make sure it is all lower case, create as a global security group)
- Add your user account to the group using Users and Computers Snapin console.
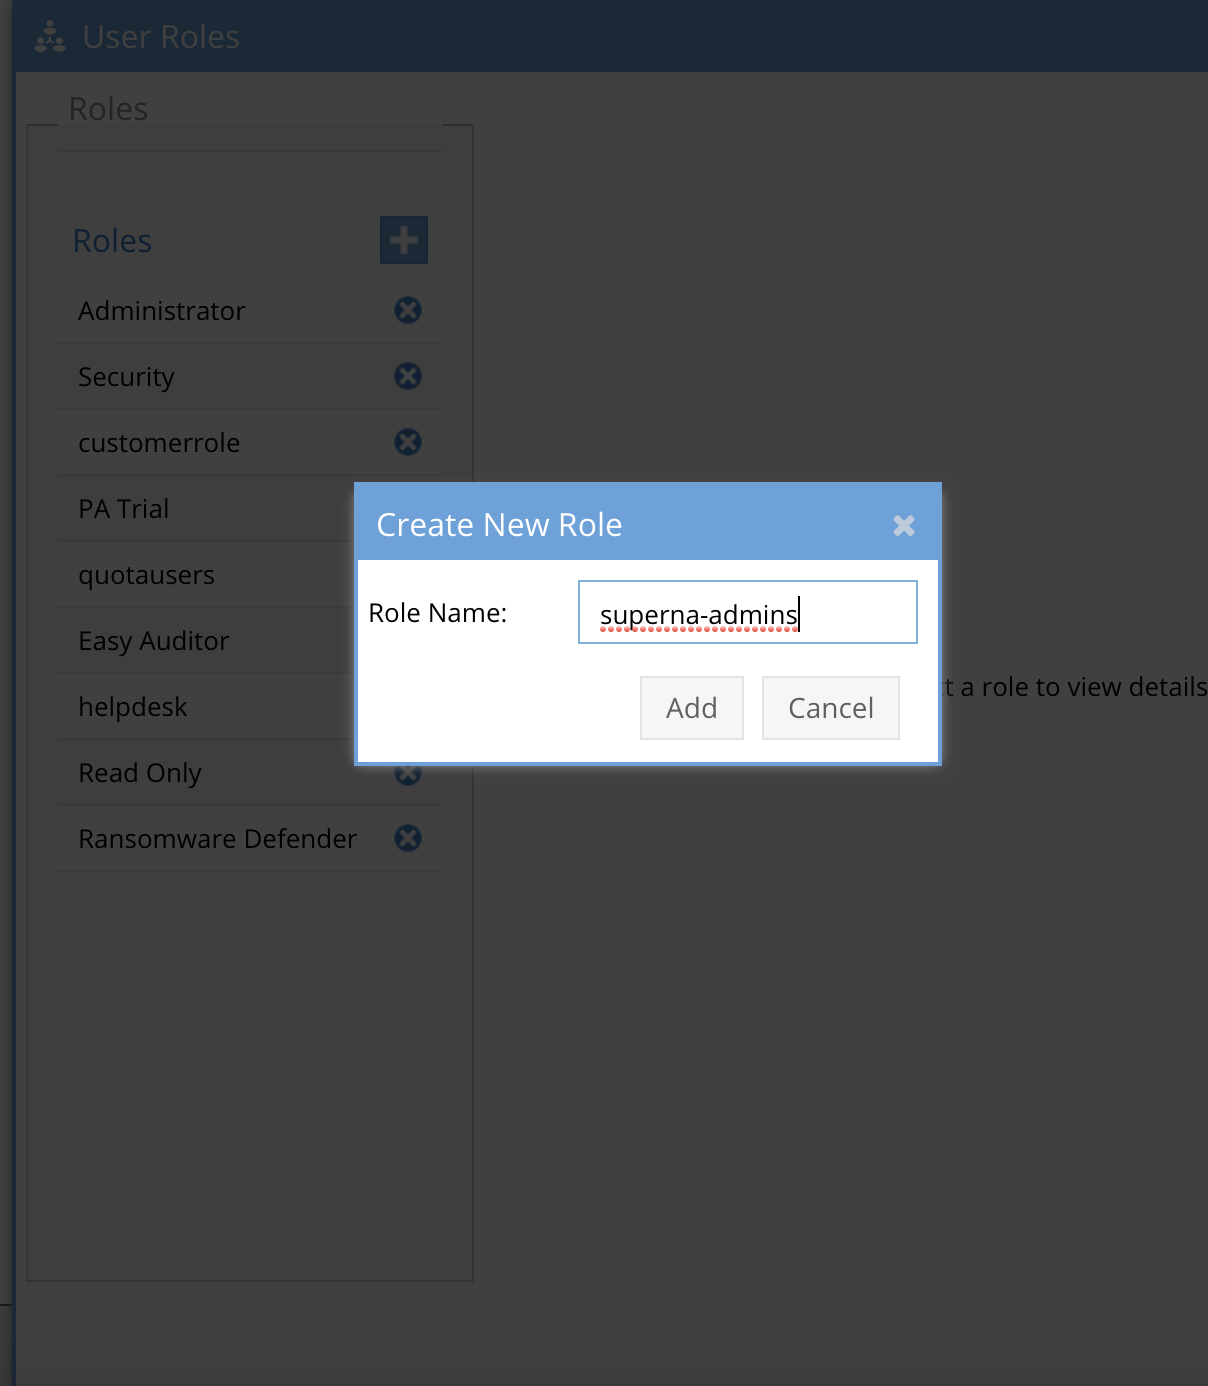
- Create role in the Eyeglass User Roles Icon after loggin into Eyeglass as admin user.
- Add the AD group with Upper case domain name (mandatory upper case) and lower case group name (mandatory lower case), see the diagram below as a reference.
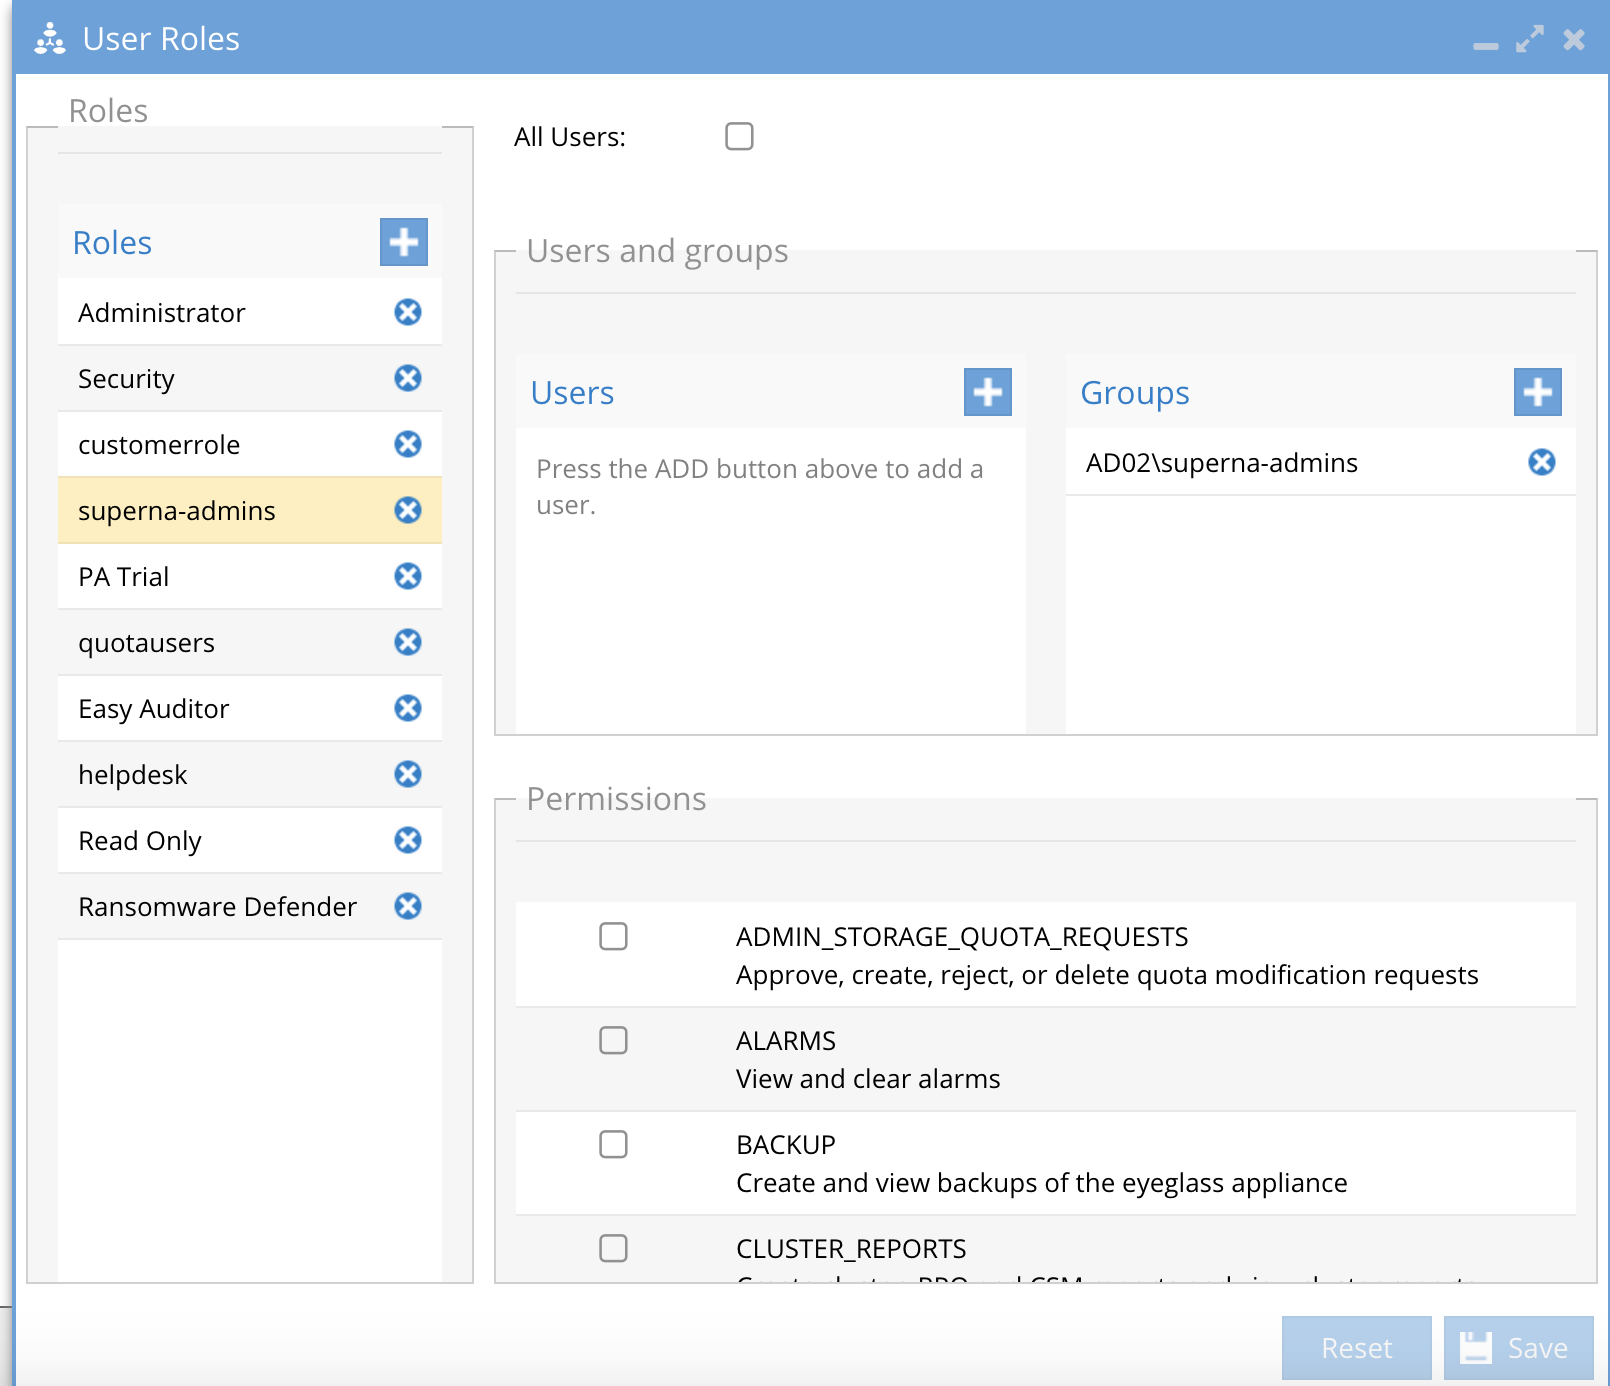
- Select check boxes for the roles functions or icons that should be assigned to the role, make sure to click save.
- Verify your cluster is ready for RBAC
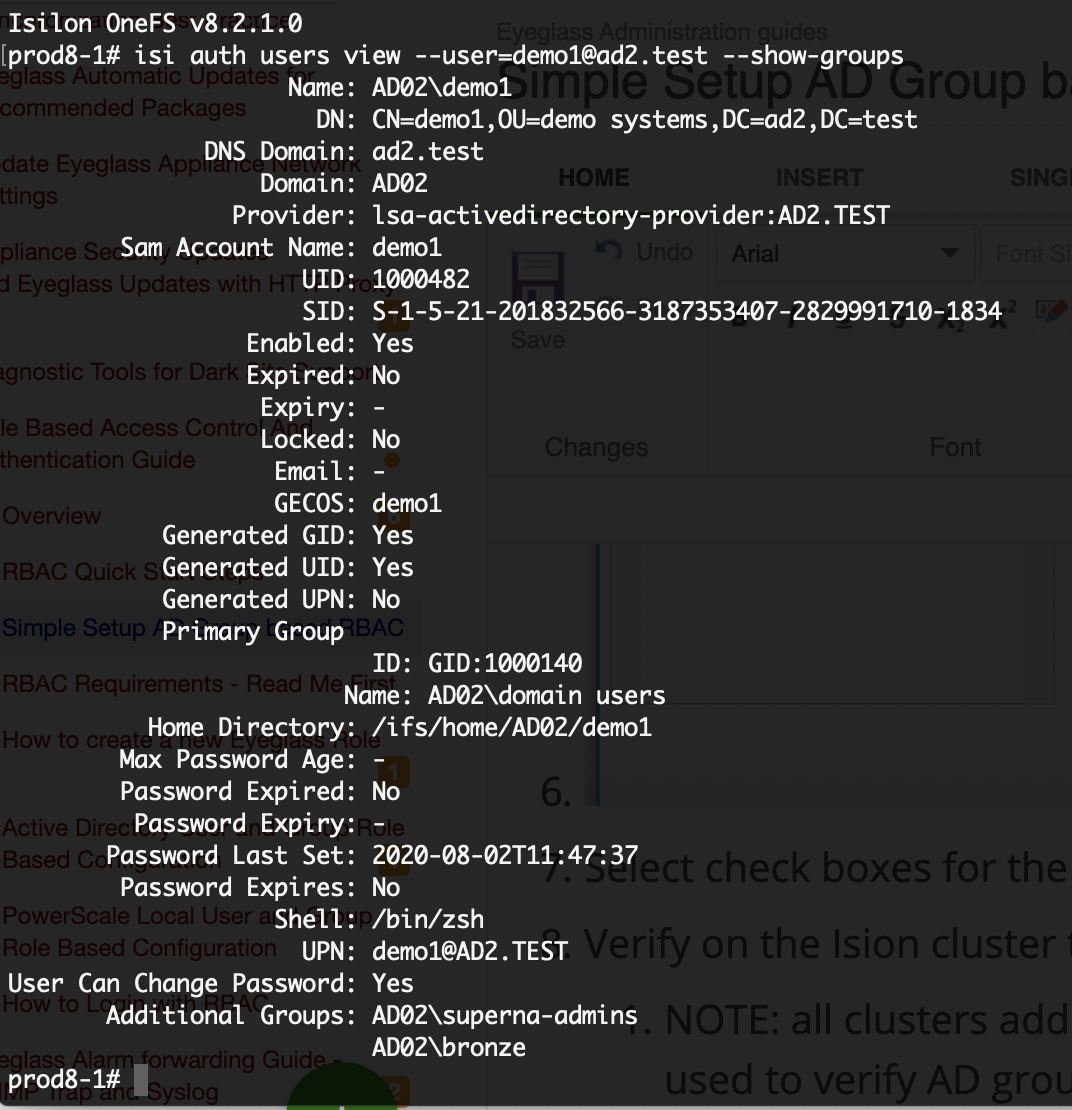
- The user view command will list AD group.
- Run this command on your cluster isi auth users view --user=user@domain --show-groups
- The AD group created above must be listed in the output of the isi command.
- WARNING: If AD the group is not listed in the output the RBAC role will not work.
- The ISI command above will also include the DNS domain property of the user and the SAM Account Name
- The login name will be <sam account name>@<DNS Domain name>
- Example below:
- DNS Domain name = AD2.TEST
- SAM Account Name = demo1
- The additional groups must show the AD group AD02\superna-admins.
- The user name to enter to the proxy login would be demo1@ad2.test
- Login with <sam account name>@<DNS Domain name>
- Follow the How to Login guide located here.