How to respond to Security Events for Warning, Major or Critical Events
- Read Me First
- Security Event Triage Process to Collect Key Information for Your Security Incident Response Process
Read Me First
Incident Response
Data Security Edition is storage domain detection and response and is a key detection domain for a data first security incident response process. Alerts from Data Security Edition sent into SIEM, ITSM systems as part of a broader incident response process within a SOC, should use alerts from Data security edition to start an end to end IR process. The steps below are recommended to integrate Cyber Storage alerts into an existing IR process.
- Incident Response Phase
- The Data Security Edition alerts include critical context such as username, client ip address, and action taken (Storage action user data lockout enabled or disabled), SMB/NFS share list, summary list of files affected.
- Create in Investigation or incident within the SOC tools for investigate security threats
- Client IP Investigation Endpoint System: This information should be used to investigate any reported anomalies or indicators of compromise on the client host by looking up the IP in the endpoint management system and reviewing any threat signals on this host.
- If the capability is available within the endpoint software, launch an endpoint deep scan and review
- Add artifacts to the SOC investigate incident from the endpoint investigation.
- Username Investigation IAG System: This information should be used to investigate any anomalies within an Identity Access Governance platform for login behaviors that may indicate an account compromise.
- Add artifacts to the SOC investigation incident from the IAG investigation.
- Storage layer After completing the above steps to collect multi domain context of the threat to help determine if the storage layer detection needs to be acted on with additional IOC's from the endpoint and IAG security tools.
- If the overall investigation (all security domain artifacts) indicates a possible compromise from other security domains (endpoint and IAG), the recommended action within Data Security Edition are below:
- If the user enforcement mode is enabled, leave the user in locked out state.
- If enforcement mode is not enabled globally select Actions menu on the active event and select User lockout and click apply to lock the user out of the file system.
- Verify SMB shares affected in Data Security Edition Ransomware Defender Active event UI, add the list of SMB shared to SOC artifacts. NOTE: Data Security Edition integrations include SMB/NFS share list and summary files automatically to incidents. No steps needed if using an Integration. The alert should have all relevant information and context to include in the artifact list of the investigation.
- Verify Snapshots are taken on the active Event
- If the overall investigation (all security domain artifacts) indicates a possible compromise from other security domains (endpoint and IAG), the recommended action within Data Security Edition are below:
- Check and make sure no other active events listed in Data Security Edition, if additional active events are listed this is another indicator of possible compromise and the process above must be followed to build context of multi user, host impact.
- Enable enforcement mode if it was not enabled to help limit blast radius if your enviroment is facing a multi host cyber incident.
- Final determination using all security domain inputs to determine if this is a false positive will determine next steps.
- If multi security domain threat context indicates false positive , the following steps can be take within Data Security Edition active event.
- See steps here to unlock, and archive the active event as resolved status.
- If multi security domain threat context indicates a breach event continue on to Forensics phase
- If multi security domain threat context indicates false positive , the following steps can be take within Data Security Edition active event.
- The Data Security Edition alerts include critical context such as username, client ip address, and action taken (Storage action user data lockout enabled or disabled), SMB/NFS share list, summary list of files affected.
- Forensics Phase
- This phase would not begin until the investigation has used multi security domain context to assess the threat. Once this threat has been determined root cause at all security domain layers is vital, starting with endpoint breach validation since this is the entry point of the breach and the storage layer detection is the symptom of this initial breach of the endpoint.
- Open the active event action menu to review the history of the detection, if a file extension is listed then Google Search this file extension for ransomware variant validation. This step will help determine the next steps to understand the breach capabilities of the variant and how it compromised endpoints and what mitigation step might be possible.
- Using Easy Auditor user search capabilities within the Auditor application, run 60 day user search on each user listed in the active events within Ransomware Defender Active events. (guide is here). Review the file access patterns of the users for signs of bulk rename, delete or bulk Read operations on a lot of files over the last 60 days , looking for signs of mass delete, rename or bulk read operations that indicate signs of data exfiltration.
- NOTE: The storage layer forencis is a component of an overall incident response, forensic , breach response process and the storage layer detection, response should not be used as the sole deciding factor of a breach or cyber incident.
Storage Layer Incident Response
On detection of a possible ransomware event we can provide you with a relative severity of the detection and then provide with you information to make a decision such as files affected, user associated with event and client IP. This information should be used in conjunction with your security incident response process and security tools such as virus scanning and inspecting users computer to reach a conclusion whether or not it is a ransomware event. A detection event should be evaluated based on the signal strength column and the severity column on an Event as additional information for you security response process.
The information below should be used when following the process in this guide, get the signal strength and severity of the event and then review ranges below to determine the relative severity of the User Behavior. Your Ransomware Defender settings determine when a user will be locked out based on the signal strength value and settings for Severity. If you are in Monitor Mode, no lockout will occur and manual lockout is required from the actions Menu.

Quick Assessment
- Use Severity and signal strength values to assess the event
- Severity level is determined by the settings in your environment
- Warning - is considered low probability of infection
- Major - an increased probability of infection or a medium User Behavior
- Critical - is a strong Ransomware user behavior and an indication of a possible infection. A decision to lockout the user should be determined along with reviewing the files affected
- Signal Strength - For any Severity level a higher signal strength count indicates the User Behavior is a continuous pattern. A continuous repeating detection pattern is consistent with Ransomware activity and should be used as an input to a response action based on the security incident response process.
Security Event Triage Process to Collect Key Information for Your Security Incident Response Process
When a security event has been detected, the steps to review and take actions should be followed exactly as listed below and then follow your internal security incicdent response process.
- Open Ransomware Defender Active Events tab.
- Review the files that tripped the detector and to download the CSV file associated to the event. Review these files.
- Each event shows the number of files associated with the active or archived security event. NOTE: The list of files shown here are the files that tripped the detector and were stored with the event. A limit of 100 files is stored in the Eyeglass database, that populates the browser tree. See screen shot below
-
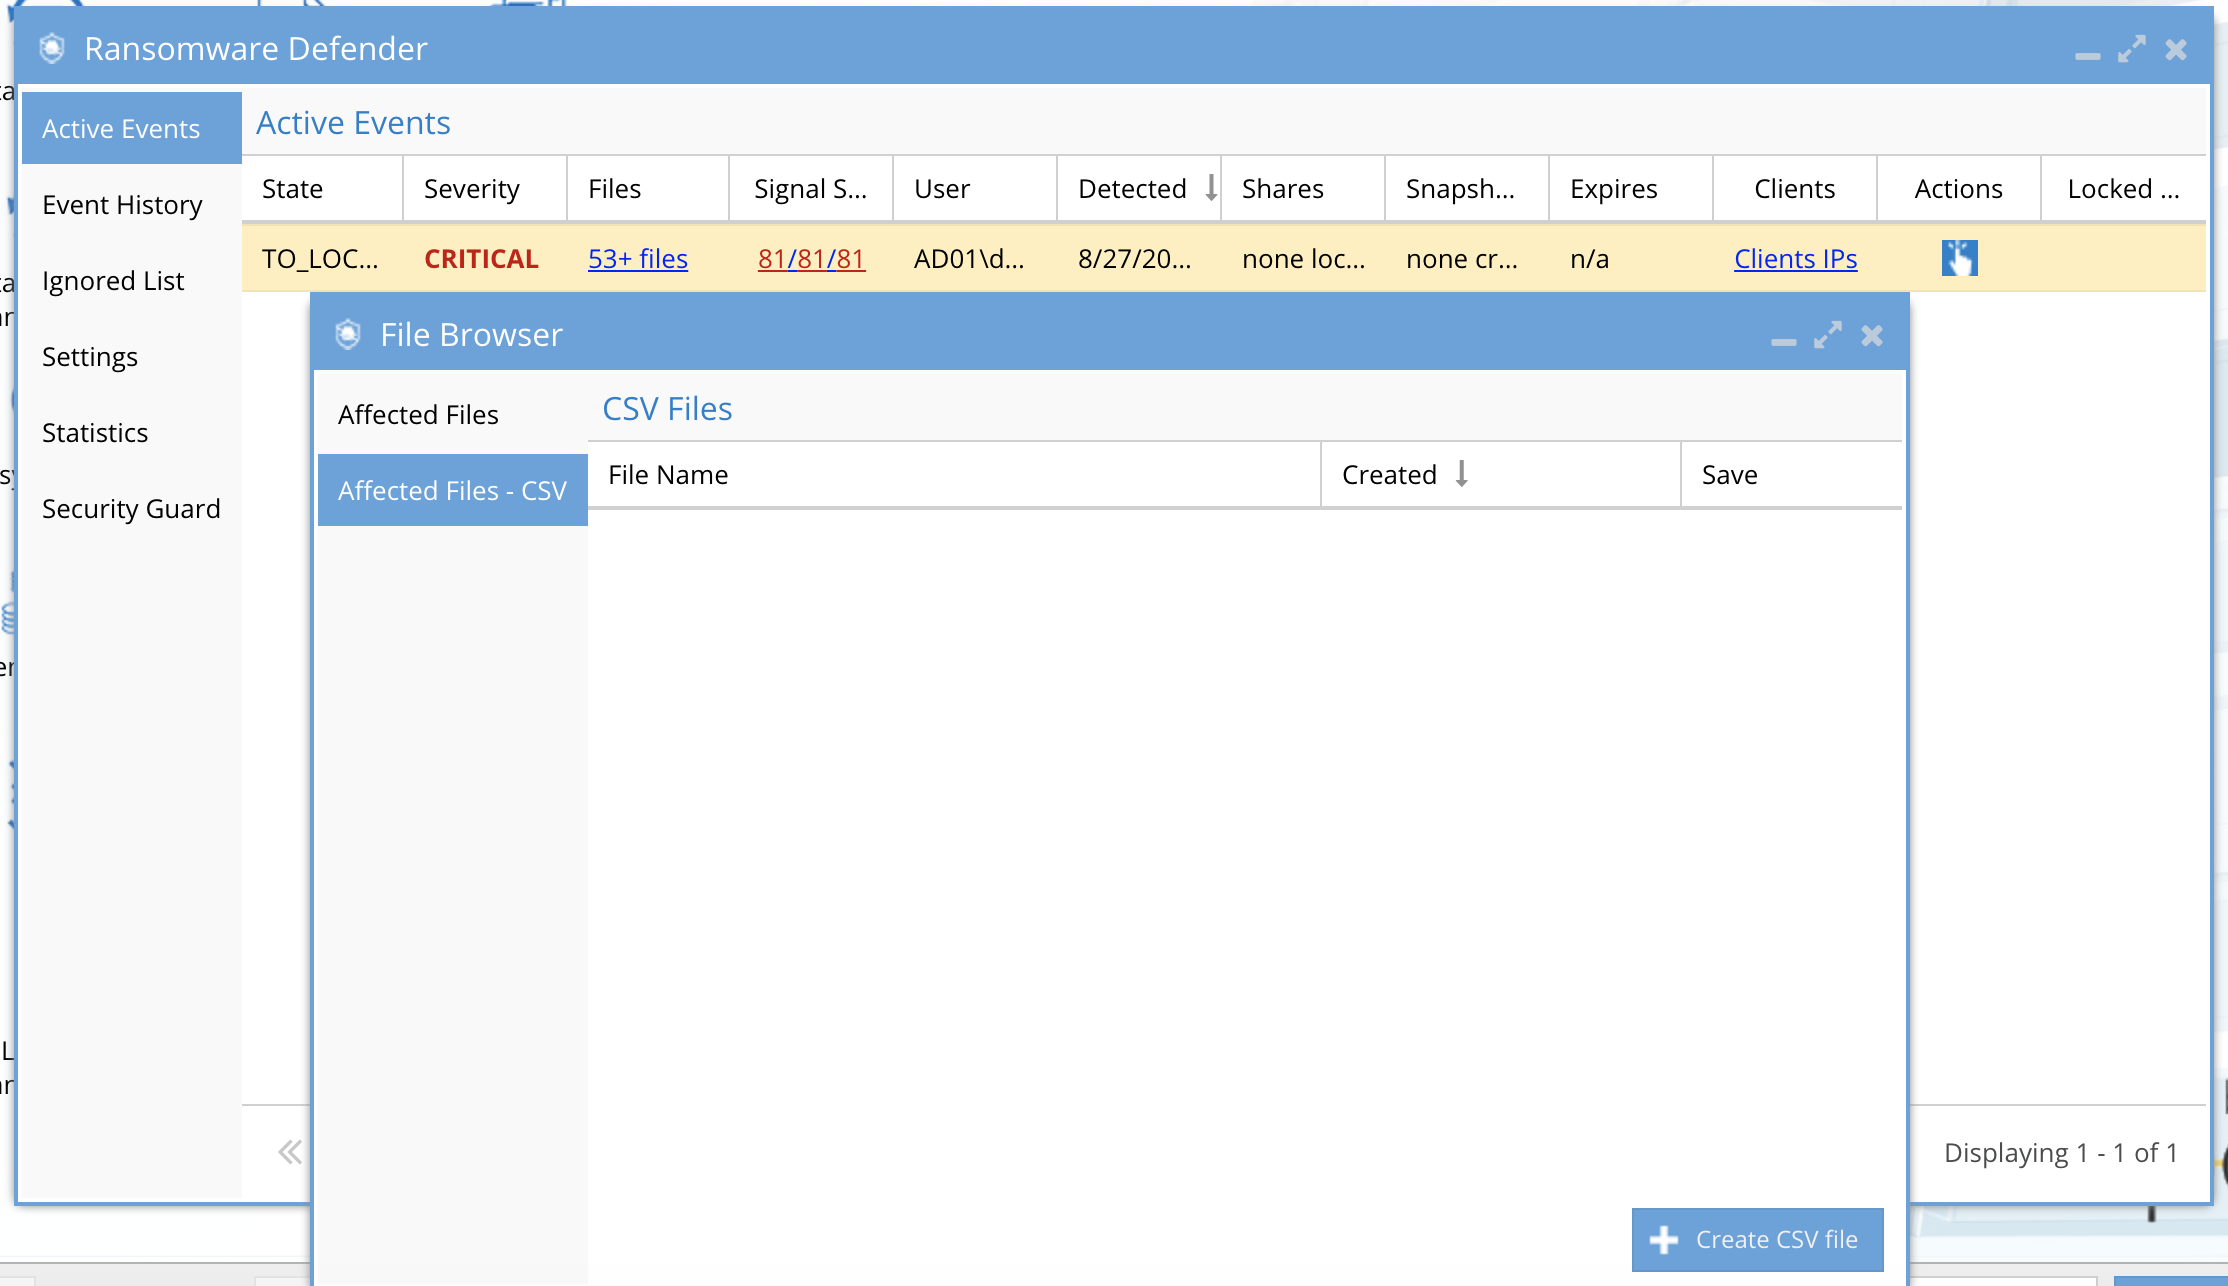
- The CSV download of affected files will list all sections for this user for all time, the date stamp in the file should be used to indicate when the detection occurred, the file name. NOTE: It is possible to have more files associated with the event than the CSV shows, if the event was active for more than 1 hour. The list of files in the CSV represents only files deemed to have tripped a detector, and NOT files accessed or saved in this time period that did NOT trip a detector.
- Review the list the following elements of the active event to review what occurred from the lockout:
- Click on the "Shares" link to review the shares with a lockout applied.
- Click on the "Snapshots" link to review the snapshots that were applied to shares.
- Click on the "Clients IP's" link to review the source IP of the subnet of the infected computer.
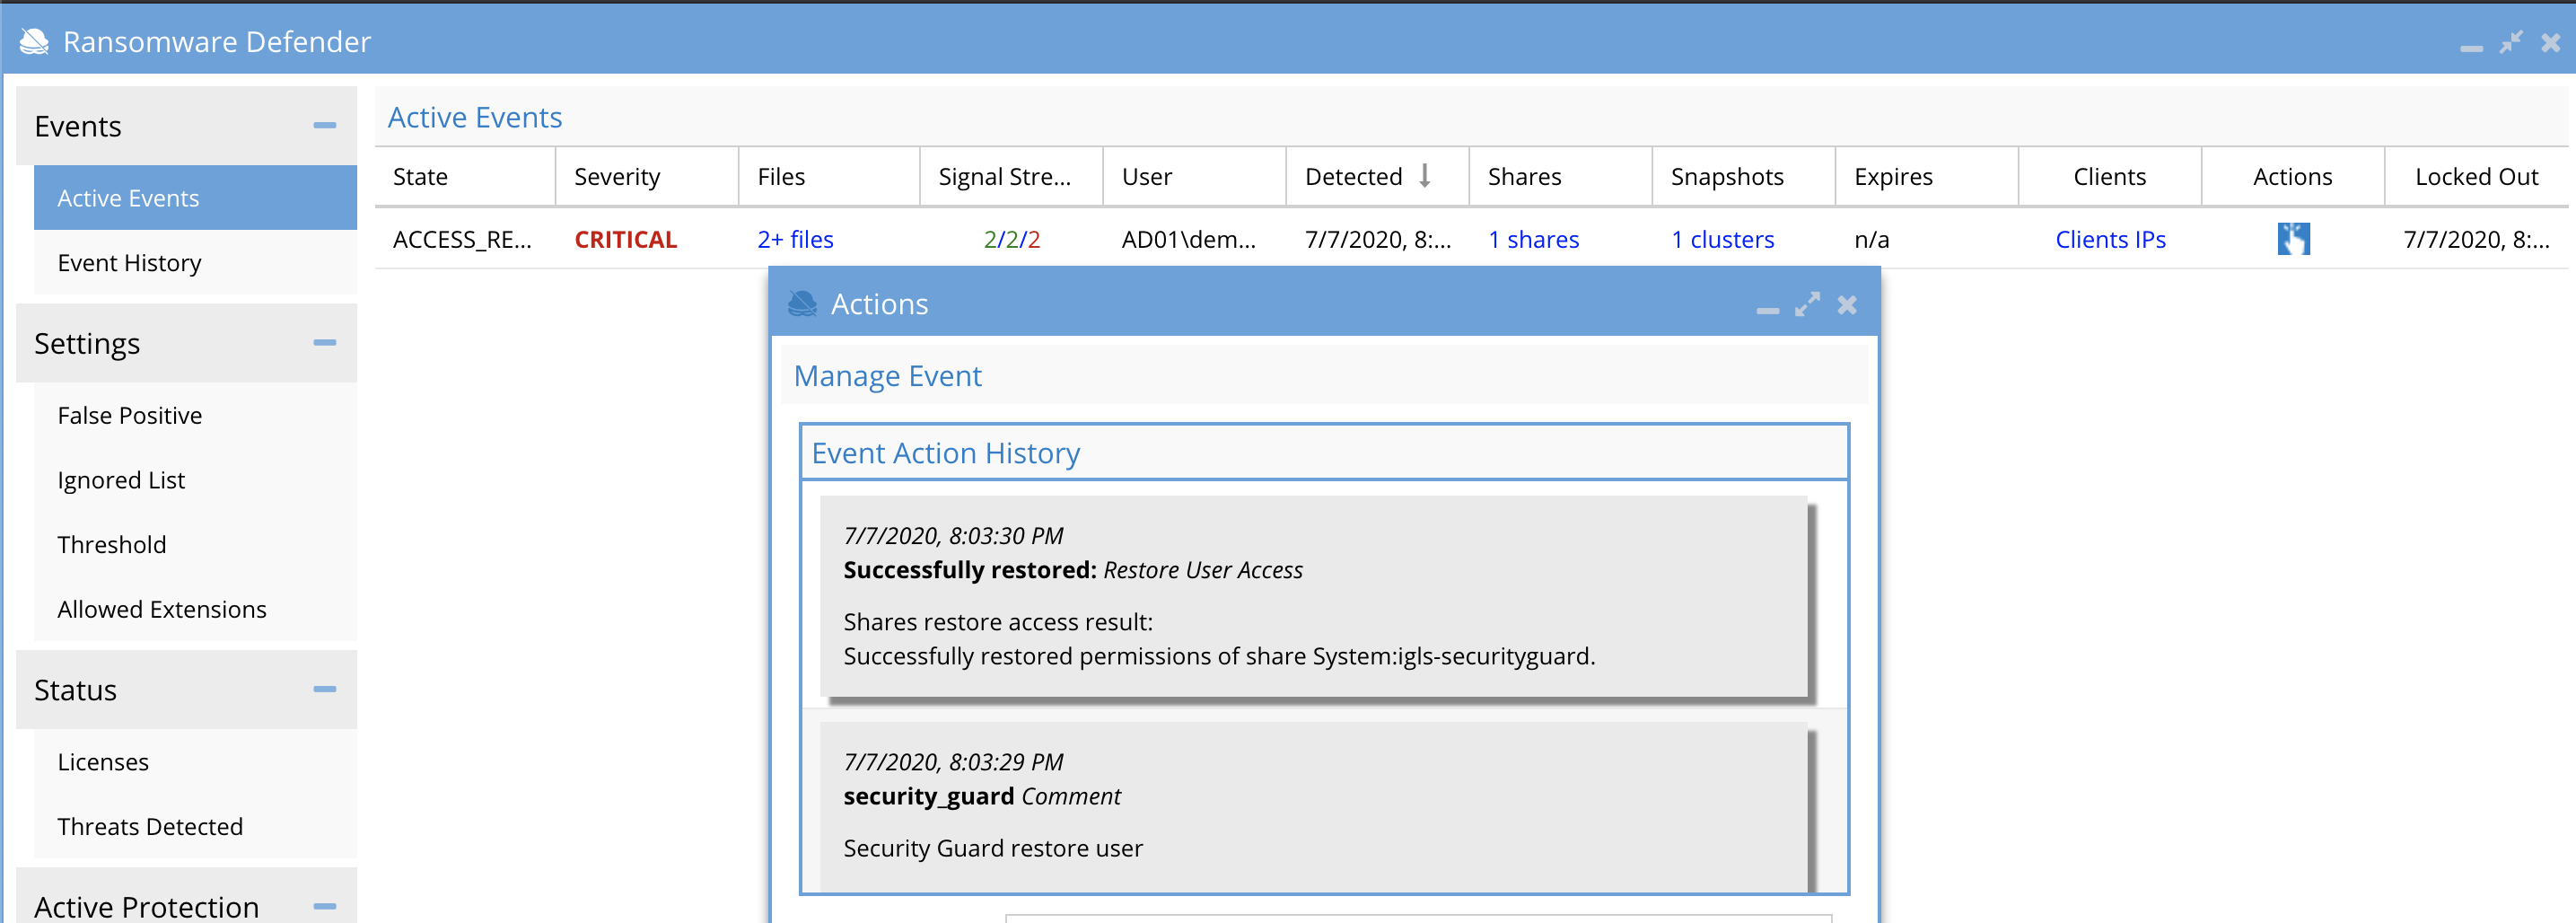
- Click the "Actions" menu to review the time stamps of each action applied to this event including share lockout, snapshots. The Action menu also provides a menu of actions that will be used based on the Warning, Major and Critical event severity, to make a decision on next steps.
- Sample event screenshot
- Review the severity (Warning, Major and Critical) response steps in the topics below. To evaluate which files tripped the security detectors use the steps in this section to understand how the files download and browse window assists.