Eyeglass Administration guides Publication
Bulk Loading Data with Azure Data Box
Home
- Overview
- When to use
- Major steps to order Data Box , install, load data and return
- How to Load data onto a Azure Data Box with Golden Copy
- How to switch the folder to incremental sync mode
Overview
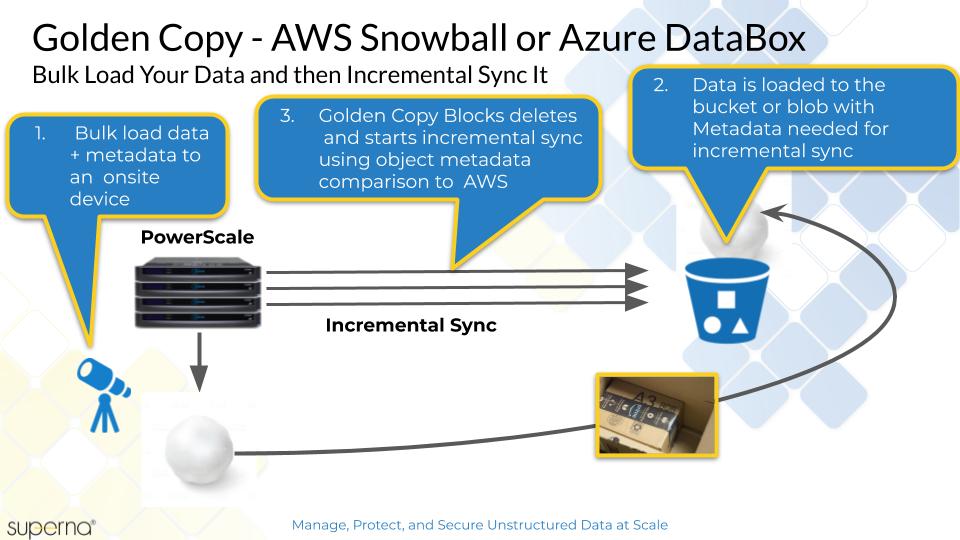
Azure Data Box is an on-side device used to bulk load data into Azure Blob Storage that is faster than using an Internet connection. This section provides a high level explanation of how to use Golden Copy to load file system data onto an Azure Data Box. This process ensures the file system metadata is maintained on the objects copied to the Data Box device. Once the data is imported to your storage account and container, Golden Copy can maintain an incremental update of the data over the Internet.
When to use
- This option should only be used for very large files and when Internet bandwidth is limited to veery low rates. This option is not faster for small files or when 100 Mbps or more of Internet bandwidth is available. Consult with support before using this option. In most cases sending data directly over the Internet will always be faster.
Major steps to order Data Box , install, load data and return
- Follow steps here to order your Data Box making sure to have a resource group, storage account created of type Blob Storage and in a region.
- Create Storage Account in Azure.
- Create a container in the Storage Account to receive bulk load data.
- Complete the steps on the quick start page:
- Order.
- Unpack.
- Connect and unlock.
- Copy Data Steps click here to follow the Golden Copy Steps.
- Ship to Azure.
- Verify your data.
- Clean up resources .
How to Load data onto a Azure Data Box with Golden Copy
- Create Blob container
- In the Azure console open the Storage Account used to order the data box, create a container name to store your PowerScale data, and set the Public Access to Private.
- The Data Box should be on the network with an IP address following steps in the quick start guide.
- To get the blob storage API endpoint follow the steps on this link https://docs.microsoft.com/en-us/azure/databox/data-box-deploy-copy-data-via-rest#add-device-ip-address-and-blob-service-endpoint .
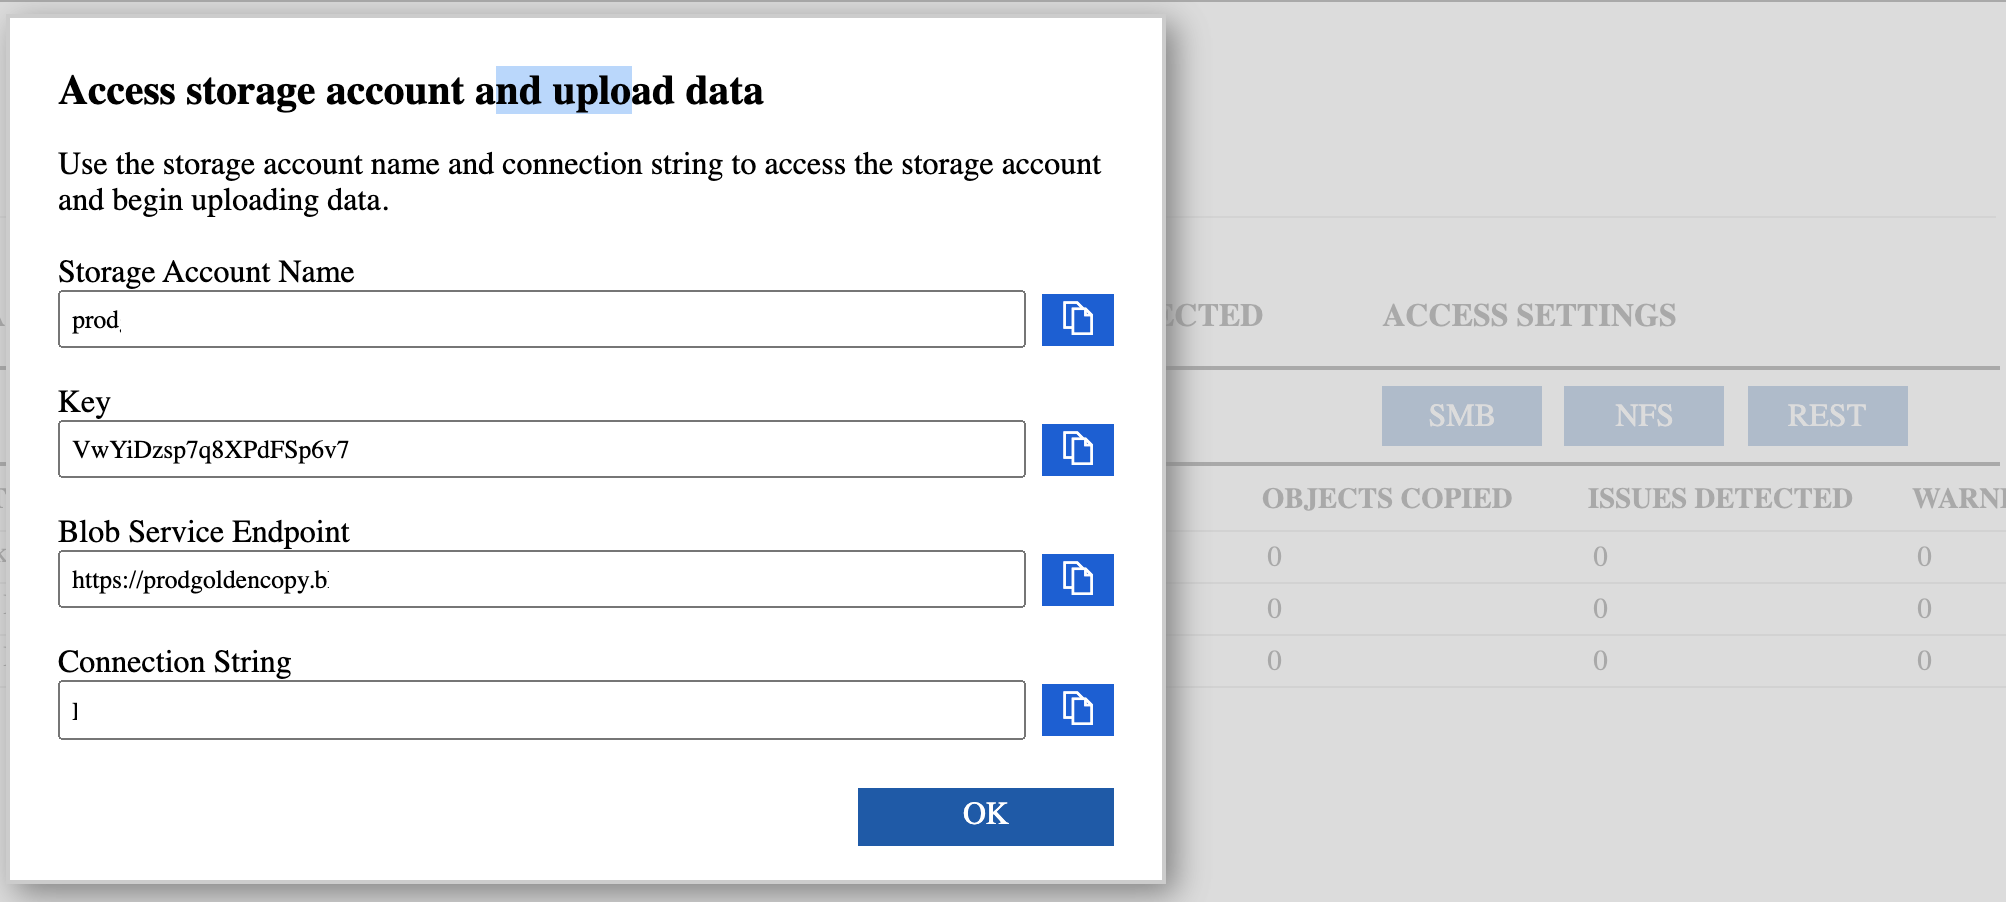
- Record the end point DNS name from the steps above on the Data Box Azure console page and record the Access ID.
- On a Windows PC download Azure Storage Explorer and test access to the Data Box by adding host entry to the Windows PC as per the quick start guide section here.
- Mandatory Step:
- Create Azure container in the storage account that the Data Box was ordered with. The bulk load data will be stored in this container. It is required to create the same container on the Data Box to upload data.
- Using Storage Explorer connect to the Data Box (use the Storage Account when ordering the Data Box) and create a container with the same name (case sensitive) that was created in Azure. See example below.

- Once connection is verified and the container is created, continue to the next section
- Update DNS with Data box A record using matching blob endpoint
- The quick start guide requires the endpoint to resolve to the on-side ip address of the Data Box. Add a domain record matching the endpoint listed on the Data Box configuration page. A Windows DNS example is shown below, where domains are added to the blob domain name and an A record added to complete the DNS entry lookup pointing at the on-side IP address of Data Box. A com domain needs to be added to the DNS server to build the service endpoint DNS entry. The full fqdn will be similar to this .<storageaccountname>.blob.<serialnumber>.microsoftdatabox.com
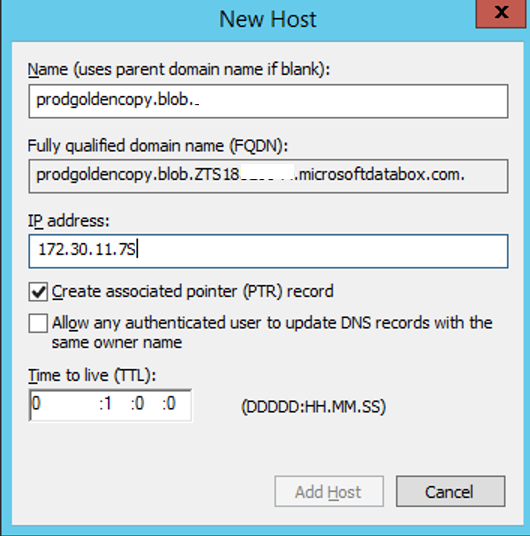
- Create a blob.<serialnumber>.microsoftdatabox.com zone on the DNS server used by Isilon. Replace <serialnumber> with the value from your unique databox endpoint URL. Then create an A record in the next step.
- Create the A record under the new zone from the step above. The A record will be <storage account name>.blob as the host A record and replace the ip address with the IP used on the databox on your LAN. See example below (actual name was blanked out example only). The FQDN should show the exact same DNS entry as the REST endpoint shown on the Databox admin UI. Verify before saving.
- Verify DNS Resolution
- Now login to the PowerScale cluster with ssh (root user) and verify the DNS name resolves. Ping the service endpoint and verify the DNS entry resolves correctly to the IP address of the Data Box.
- Do not proceed until the endpoint DNS name resolves correctly.
- If the ping does not return correct IP it means the DNS server used by the Groupnet 0 is not able to resolve the name. Double check the DNS configured on groupnet 0 System zone is configured correctly.
- Add the Data Box device to Golden Copy using the "searchctl archivefolder add" command.
- searchctl archivedfolders add --isilon <cluster name> --folder /ifs/archive --secretkey <secret key> --endpoint <databox endpoint DNS name> --container <container name> --bucket <storage account name> --disable-incremental true --cloudtype azure
- NOTE: You specify the Storage Account name configured when the Data Box device was ordered.
- NOTE: Incremental Mode is disabled on the folder since the data is shipped back and takes time to load into the container. This can be switched on again with the steps below.
- Start the archive job to copy data to the Data Box:
- Get the folder id from the add folder command using searchctl archivedfolders list.
- searchctl archivedfolders archive --id xxxxxxx .
- Monitor the archive copy job with:
- searchctl jobs running (get the job ID )
- searchctl jobs view --id job ID
- Wait for the Archive job to complete. This could be hours or days depending on the amount of data. Use the commands above to monitor progress.
- Return Data Box to Azure. Follow the return and clean steps in the Azure guide (referenced above)
- Remove DNS entry added to DNS for the Data Box device.
- Once notification from Azure about data loaded into the container, login to Azure portal and open the container to verify data is present in the blob storage.
- Click on a file, and click properties to verify the custom metadata is visible on the object
- Done
How to switch the folder to incremental sync mode
- Once the data is loaded into the Azure container and verified from the Azure console, it's possible to switch the folder configuration from bulk load mode to incremental sync mode. The metadata encoded into the objects allows incremental sync mode.
- The folder configuration used for bulk data load can be modified to use the Azure production endpoint.
- Get the folder id:
- searchctl archivefolders list .
- Modify the folder to use the Azure blob endpoint:
- searchctl archivedfolders modify --id xxxx --endpoint <storage account service endpoint DNS name> --disable-incremental false .
- NOTE: the endpoint is different for the Internet hosted blob container and must be changed. See Configuration guide for details.
- Verify incremental schedule is configured and wait for the next incremental job to run.
- Verify the incremental job runs and that incremental copy was able to add new files, or delete objects for deleted files using the html report. The html report export command can be found in the cconfiguration guide.