AWS DR Solutions with Golden Copy
- Mountpoint for Amazon S3
- Description
- Installation
- Mounting
- Overview - Cloud Compute and Application DR - Read Write Hybrid Cloud Solution
- Requirements
- Limitations
- Topology
- Configuration
- Testing your Application DR Failover Process
- Summary and Conclusion
- Overview - How to Copy Golden Copy Data into AWS FSx SMB Service
- Requirements
- High Level Steps
- Golden Copy Steps
- AWS DR Application & S3 to FSx SMB Share Configuration Steps
- Active Directory Deployment Options in AWS
- Create FSx File system for the Application Server Data
- Application Server AMI in EC2
- AWS DataSync Service configuration
- Create a DataSync Task to sync S3 to FSx Filesystem Share
- Test DataSync Copy
- Test Mount FSx Share from the ECA Application Server VM
- Application DR Recovery Procedures
- How to Initiate DR Test or Actual DR of the application to AWS EC2 and FSx File System
Mountpoint for Amazon S3
Description
Mountpoint for Amazon S3 is an application that runs on our compute node, such as an Amazon EC2 instance, and mounts an S3 bucket (AWS S3 bucket used as Golden Copy target) to a directory on that EC2 instance local file system.
Installation
Reference: https://github.com/awslabs/mountpoint-s3
The alpha release of Mountpoint for Amazon S3 is only available by building from source, and only supports Linux. Mountpoint for Amazon S3 is currently read-only.
The following steps are based on the Amazon Linux 2, but other Linux distributions should be similar.
Install dependencies, including the Rust compiler via rustup:
sudo yum install fuse fuse-devel cmake3 clang-devel
curl --proto '=https' --tlsv1.2 -sSf https://sh.rustup.rs | sh
Clone this repository and its submodules:
git clone --recurse-submodules https://github.com/awslabs/mountpoint-s3.git
Compile the client:
cd mountpoint-s3
cargo build --release
The final binary will be at sub-directory: target/release/mount-s3
Mounting
To use the client, first ensure we have access to valid AWS credentials. (Configure an EC2 instance with an IAM role, or configure by using aws configure)
Create the mount point (or use existing mount point)
mkdir ~/my-mount-point
To mount, use mount-s3 command (The path of this command is at sub-directory: target/release/mount-s3) my-gc-target-s3-bucket-name ⇒ specify the AWS S3 bucket used as the Golden Copy target
mount-s3 my-gc-target-s3-bucket-name ~/my-mount-point
Now we can access S3 bucket from that mount point
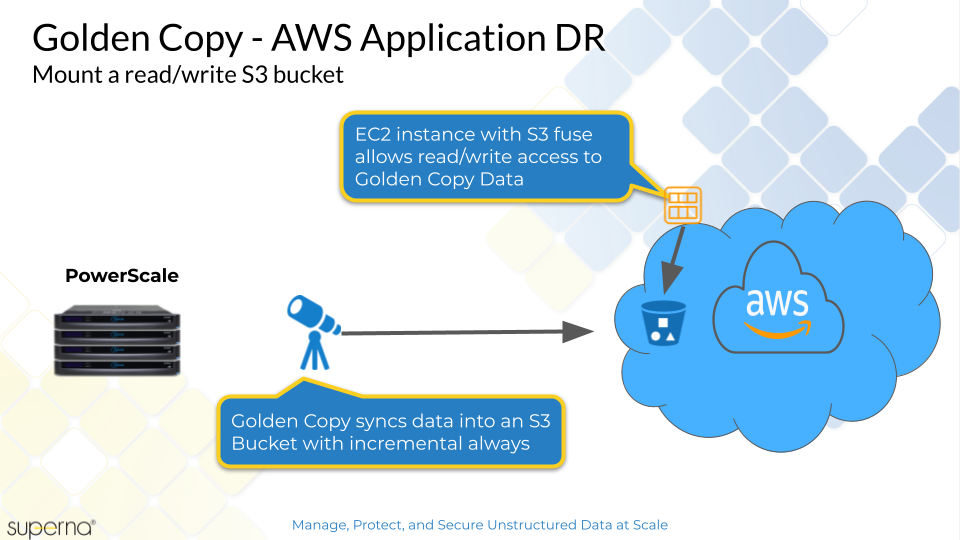
Overview - Cloud Compute and Application DR - Read Write Hybrid Cloud Solution
This solution allows a read and write copy of S3 data within AWS EC2. The solution components requires S3 Fuse file system and is not intended for high performance read , write use case. This solution allows mounting PB of S3 data for simple easy access to live synced Golden Copy on premise data. The edits to the S3 data can be synced back to on premise Powerscale.
Requirements
- Linux OS in EC2 instance
- Install s3 fuse
- Golden Copy licensed appliance with Advanced license key
- The S3 bucket name used by Golden Copy and access and secret keys to gain read and write access to the bucket
Limitations
- Performance of S3 mounted storage will not perform like a traditional file system. A reasonable throughput is 35-40 MBs.
- Limited file locking for concurrent access to files.
Topology
Configuration
- Deploy a Linux EC2 Instance
- Login to the EC2 instance over ssh
- Become root sudo -s
- Install fuse s3 file system
- zypper install s3fs
- answer yes to install the packages
- Create the password file with access keys
- echo ACCESS_KEY_ID:SECRET_ACCESS_KEY > /etc/passwd-s3fs
- NOTE replace access and secret with correct values
- chmod 640 /etc/passwd-s3fs
- Configure the mount folder for the S3 data
- mkdir -p /goldencopydata
- Test the mount to AWS S3 bucket that stores the Golden Copy data
- s3fs <s3 bucket name used by Golden Copy> /goldencopydata
- If it fails use this command to debug the reason why
- s3fs <bucket name> /goldencopydata -o dbglevel=info -f -o curldbg
- no response will be returned if it is successful
- test the mount
- touch /goldencopydata/test
- This command should succeed to create a test file. now test deletes
- rm /goldencopydata/test
- Configure fstab to mount at boot time
- nano /etc/fstab
- Paste this to a new line (Update the bucket name)
- <bucket name> /goldencopydata fuse.s3fs _netdev,allow_other 0 0
- control+x (save and exit)
- Test listing the data in the bucket
- ls /goldencopydata
- done
Testing your Application DR Failover Process
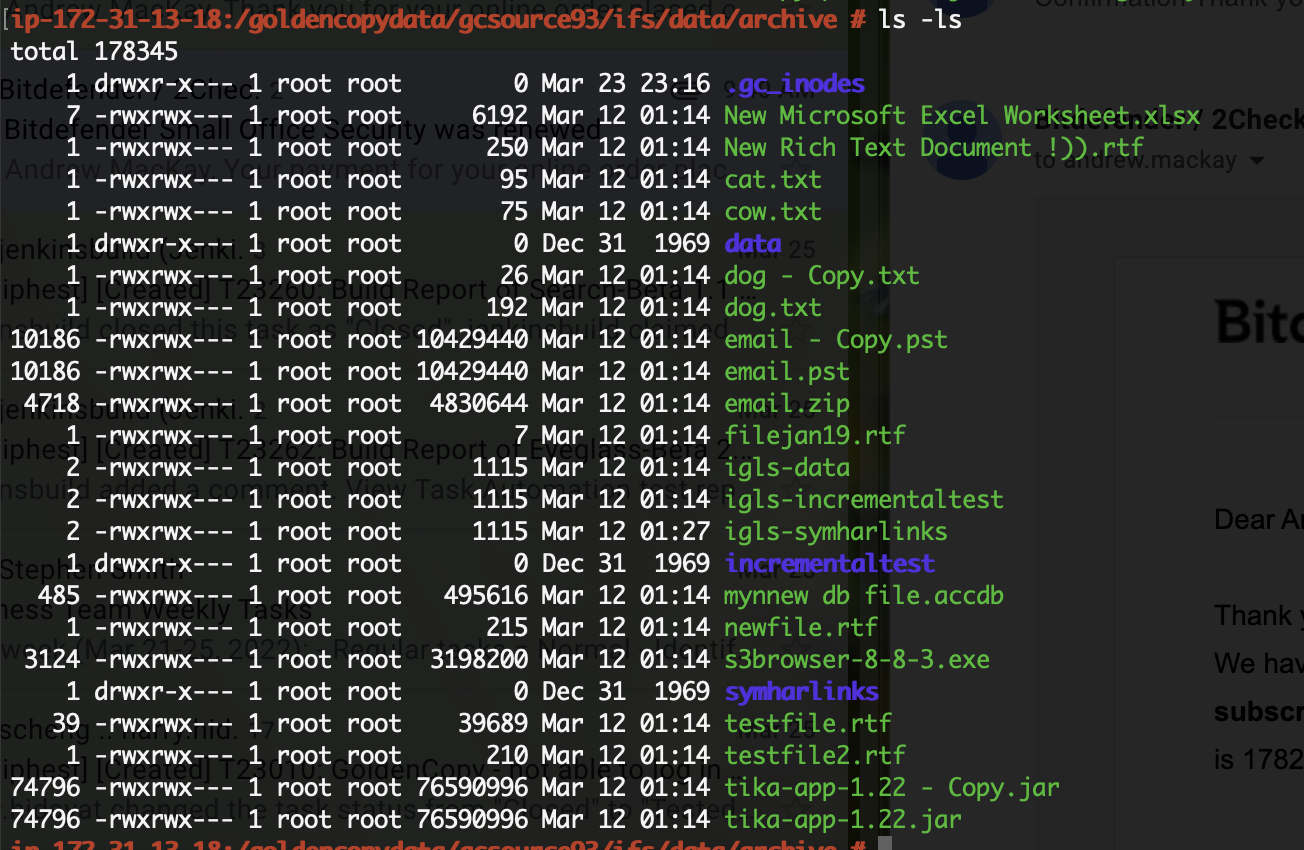
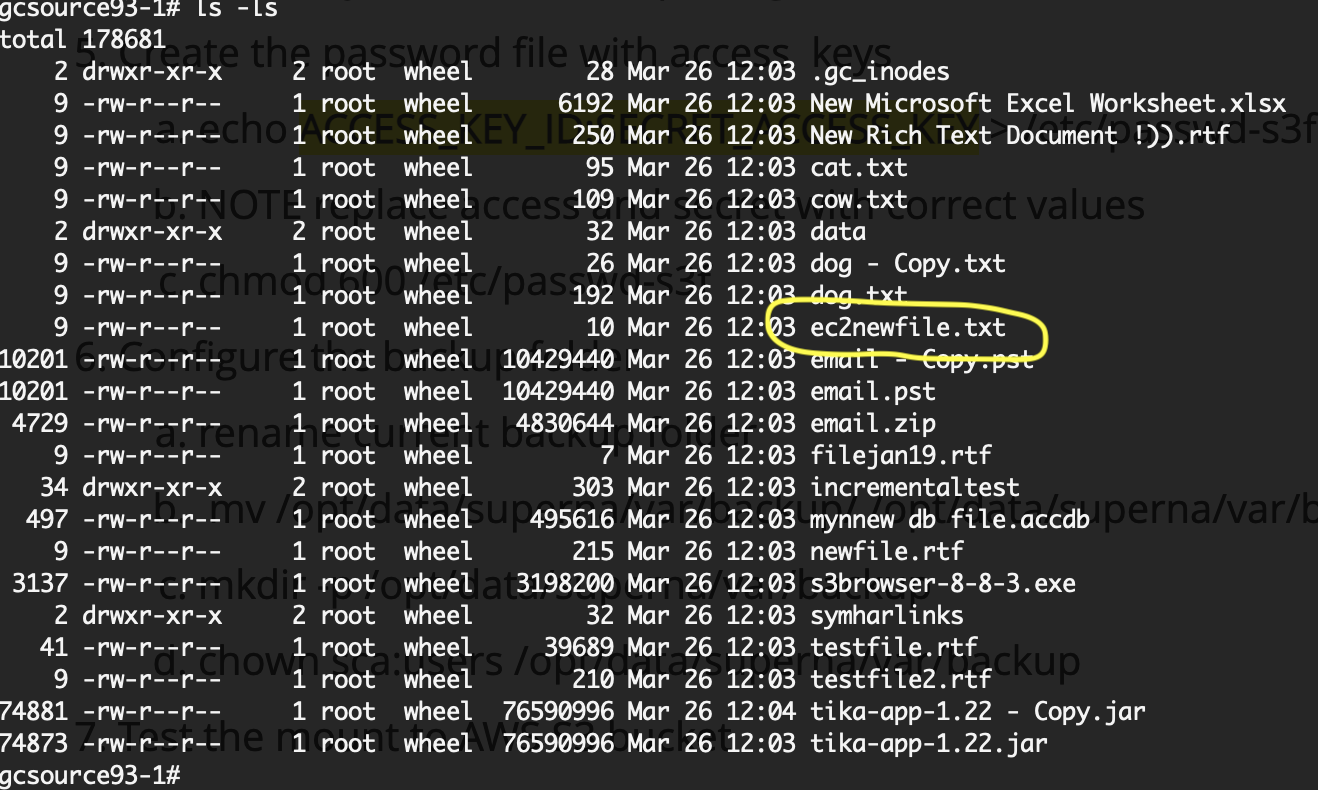
- Now you can test the failover process for your application. This example will use text files to show how the solution works.
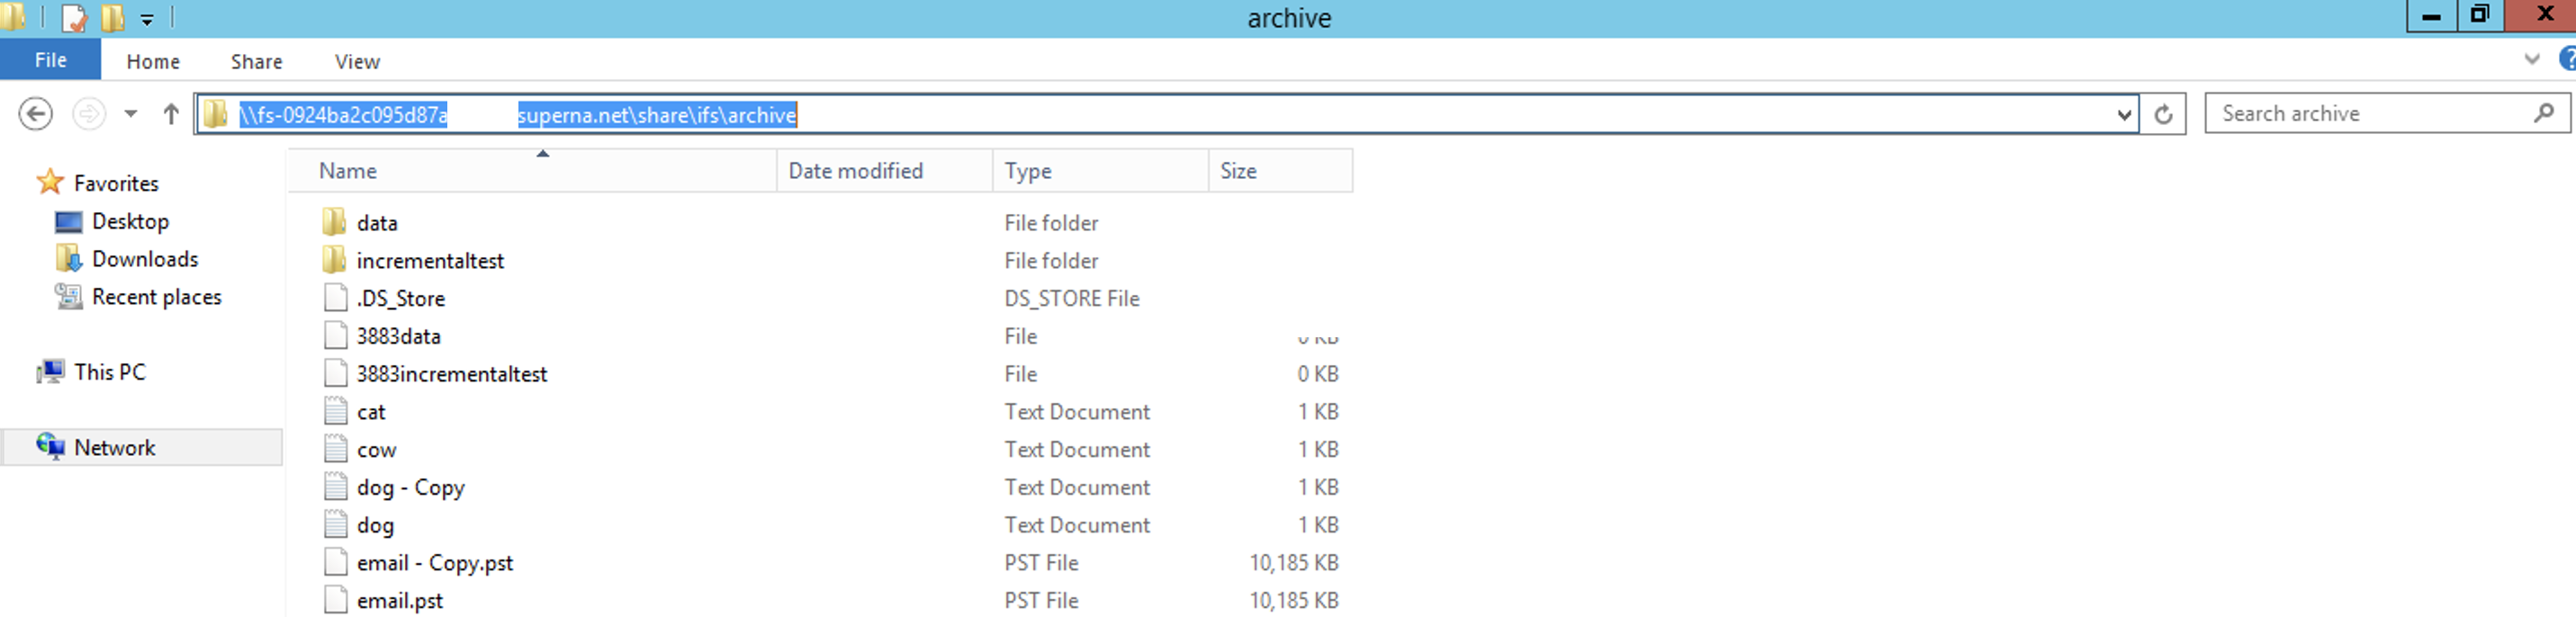
- This is the Golden Copy target bucket listing from the EC2 instance that mounted the S3 bucket.
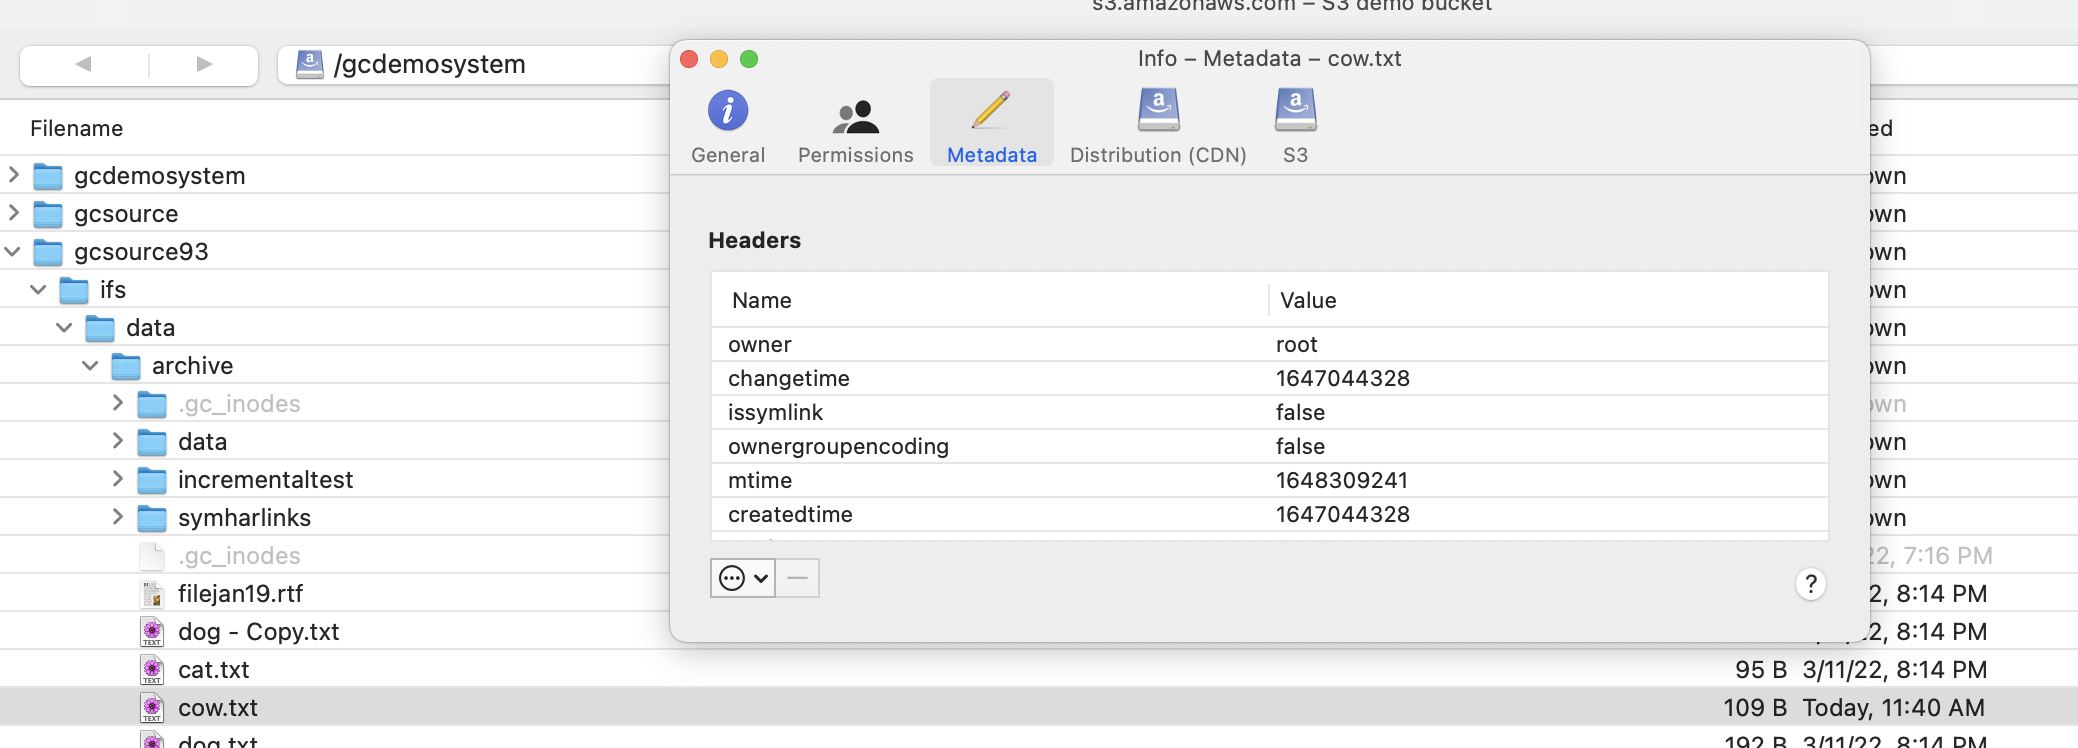
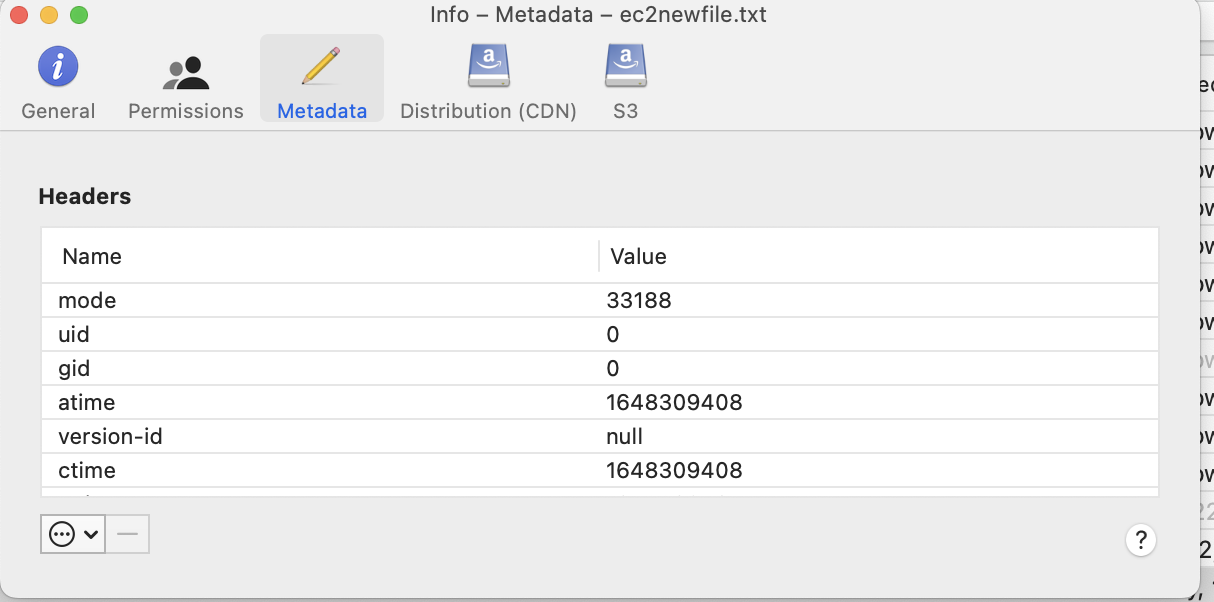
- View of the custom metadata on the file cow.txt
- Now we will edit this file and add some text and save it from the EC2 instance.
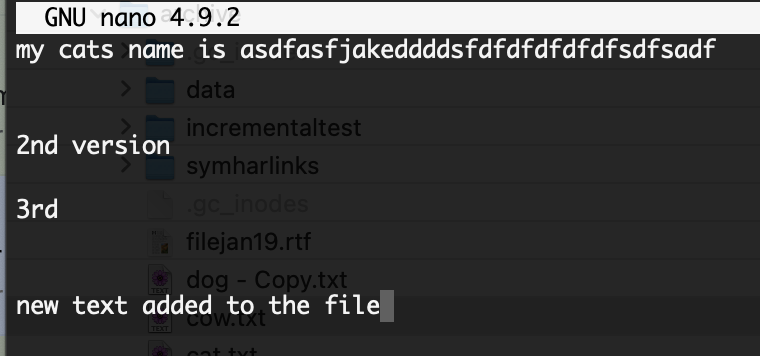
- The save operation by S3 Fuse preserved the metadata information on the file , used by Golden Copy
- Create new file from the EC2 Instance
- nano ec2newfile.txt
- add some text to the file and save it control+x
- Note that fuse adds its own custom properties, these will need be used by Golden Copy but will allow this new data to be recalled back to the Powerscale.
- A recall job was started from Cloud Browser GUI and the below screenshot shows the new data created in AWS EC2 host is recalled back to Powerscale.

Summary and Conclusion
- This completes the end to end testing showing how Golden Copy is a key tool to build a robust hybrid cloud solution with on premise PowerScale and AWS S3 and EC2 Fuse mounted bucket allowing read-write access in the Cloud and full data recall to on premise storage
Overview - How to Copy Golden Copy Data into AWS FSx SMB Service
This solution explains how Golden Copy Amazon S3 sync mode can be used for application specific DR recovery in AWS. The solution uses S3 storage and the FSx SMB Share Service in AWS to allow recovery of one or more applications in AWS. This solution will cover the high level steps needed to get the data prepared for an application server running in AWS. There are many aspects to accessing and securing data within AWS that are not covered in this guide. Consult with AWS documentation on aspects of running and accessing applications within AWS for your requirements.
Requirements
- AWS S3 , FSx Configured Service
- PowerScale Onefs 8.1.x or 8.2.x
- Golden Copy
- This example is only covering within a single availability zone
High Level Steps
- Sync Isilon file system data to Amazon S3 for applications that need DR
- Deploy EC2 application instances that will be used for DR. They can be left powered off.
- Configure FSx SMB service in AWS to hold the SMB application data within AWS to be used by EC2 application VM
- Configure Datasync service in AWS to sync S3 data to FSx SMB share, in the event of a disaster recovery scenario
- Start EC2 application server to recovery your application in AWS.
Golden Copy Steps
These steps explain how to protect a single application's data stored on PowerScale with the goal of providing a DR recover option for the application in AWS.
- Create Amazon S3 Bucket to store the application data.
- These steps are covered here.
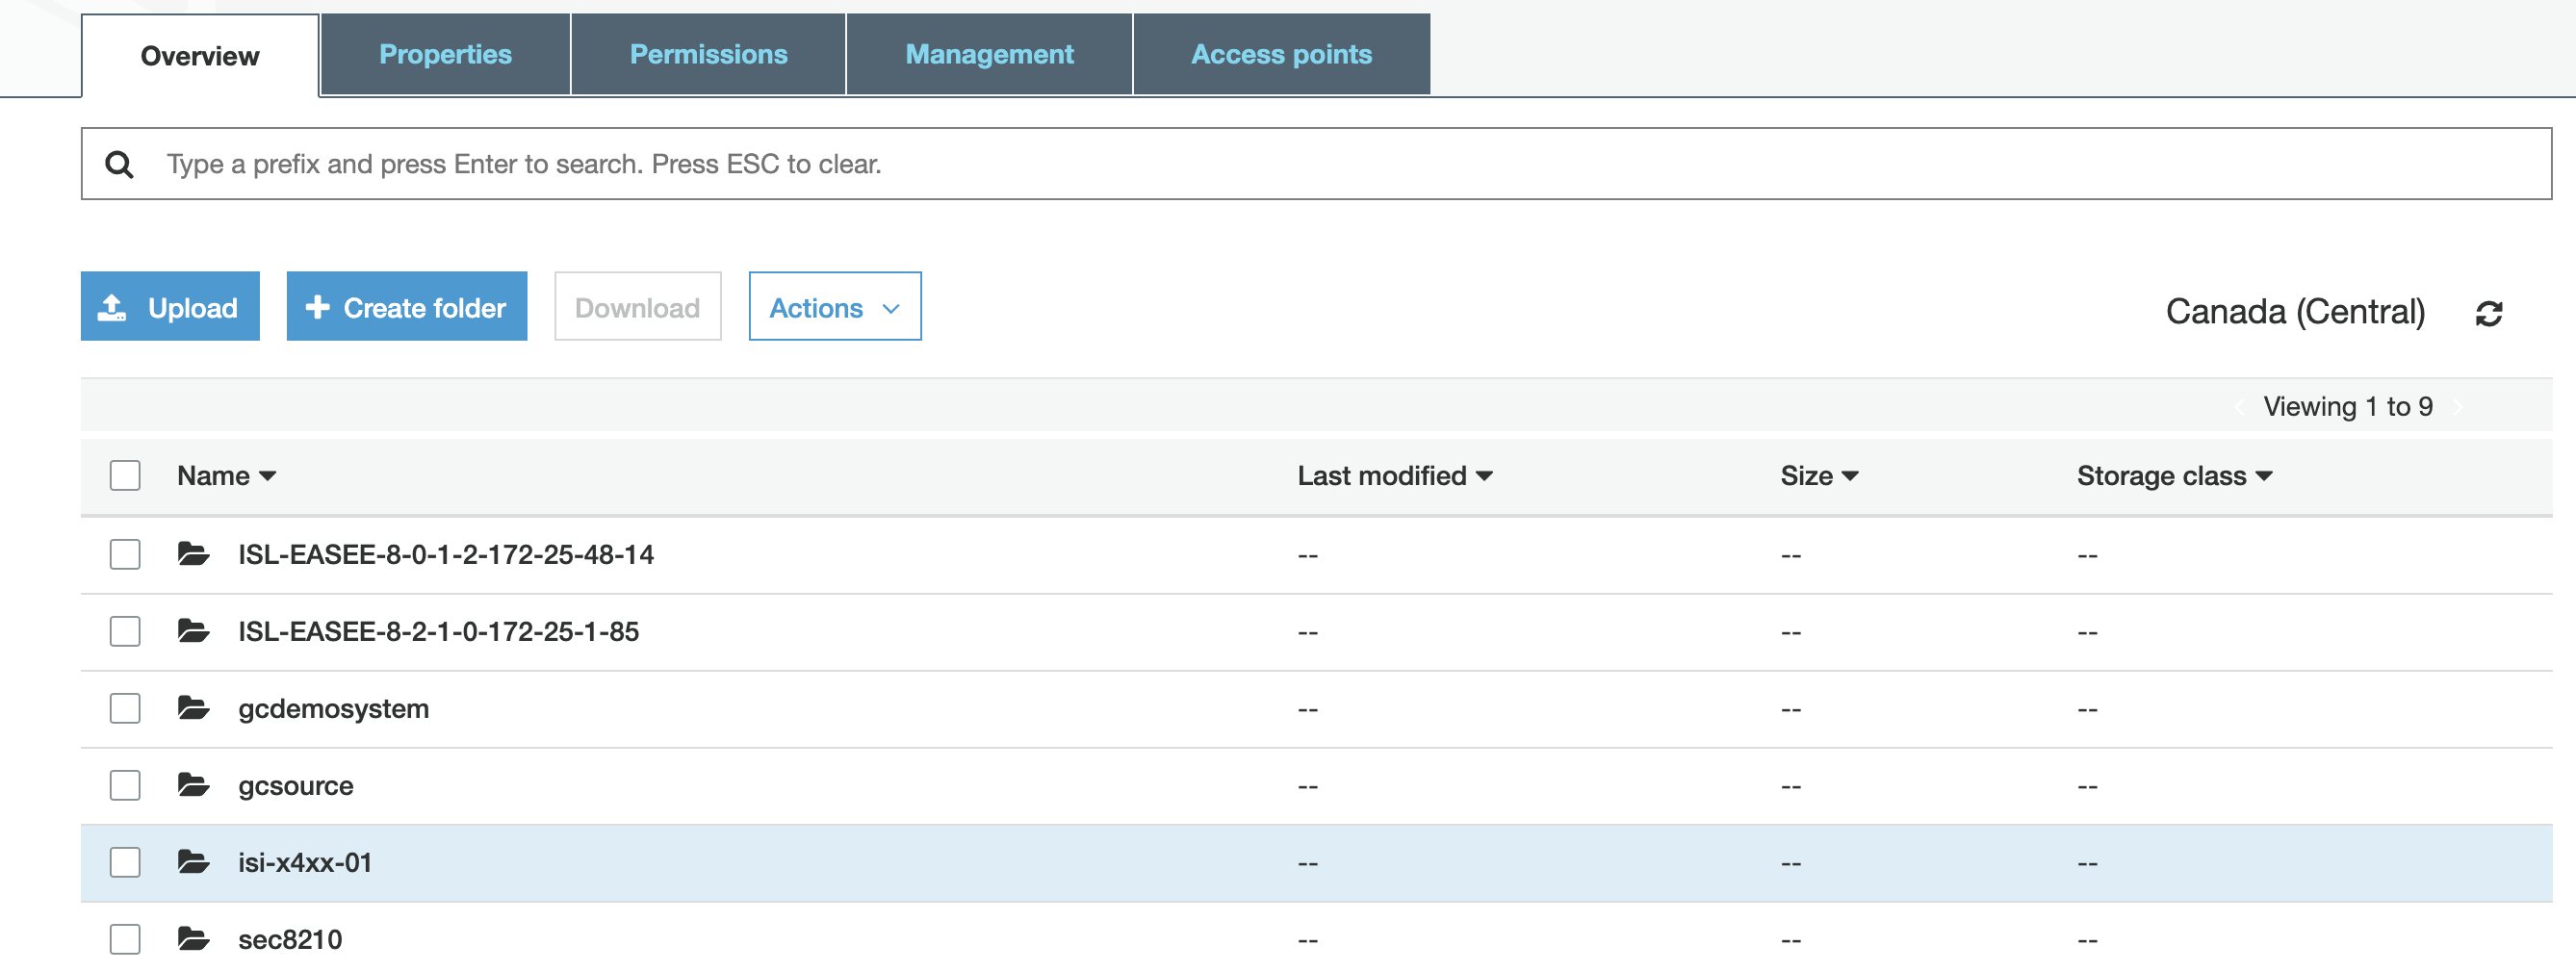
- In this example the storage bucket created is GCDEMOSYSTEM.
- You will need the access and secret key to authenticate to the bucket.
- Install Golden Copy and configure sync mode on an application folder to sync the path on the PowerScale where the application data is stored and is required for DR recovery.
- AWS example in the configuration guide to add a folder.
- Set an incremental schedule on the folder following guide here.
- Start the Sync job full sync to copy the application data to the blob storage in AWS.
- searchctl archivedfolders archive --id (use searchctl archivedfolders list to get the folder ID for /ifs/data/applicationdata)
- You can verify the data is visible in the S3 bucket from the AWS Console
- Now move on to AWS DR steps.
AWS DR Application & S3 to FSx SMB Share Configuration Steps
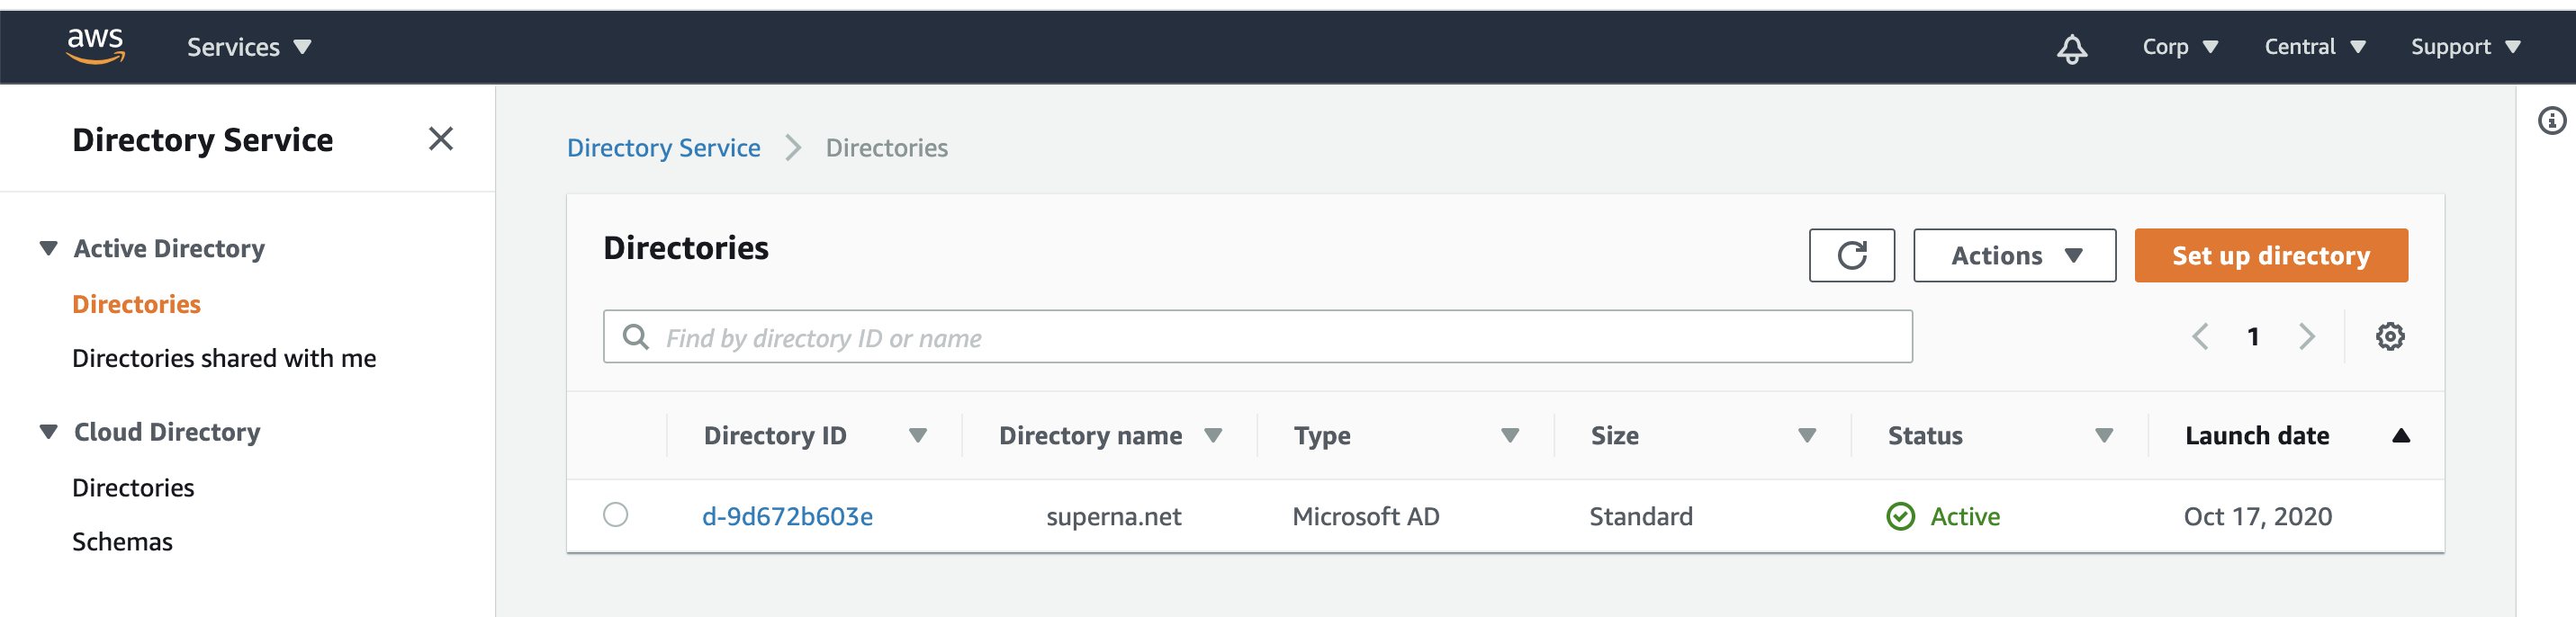
Active Directory Deployment Options in AWS
AWS Managed AD instance - guide here - This option requires the AWS AD to have a trust in place to the on premise Active Directory Domain to ensure on premise and cloud authentication is the same.
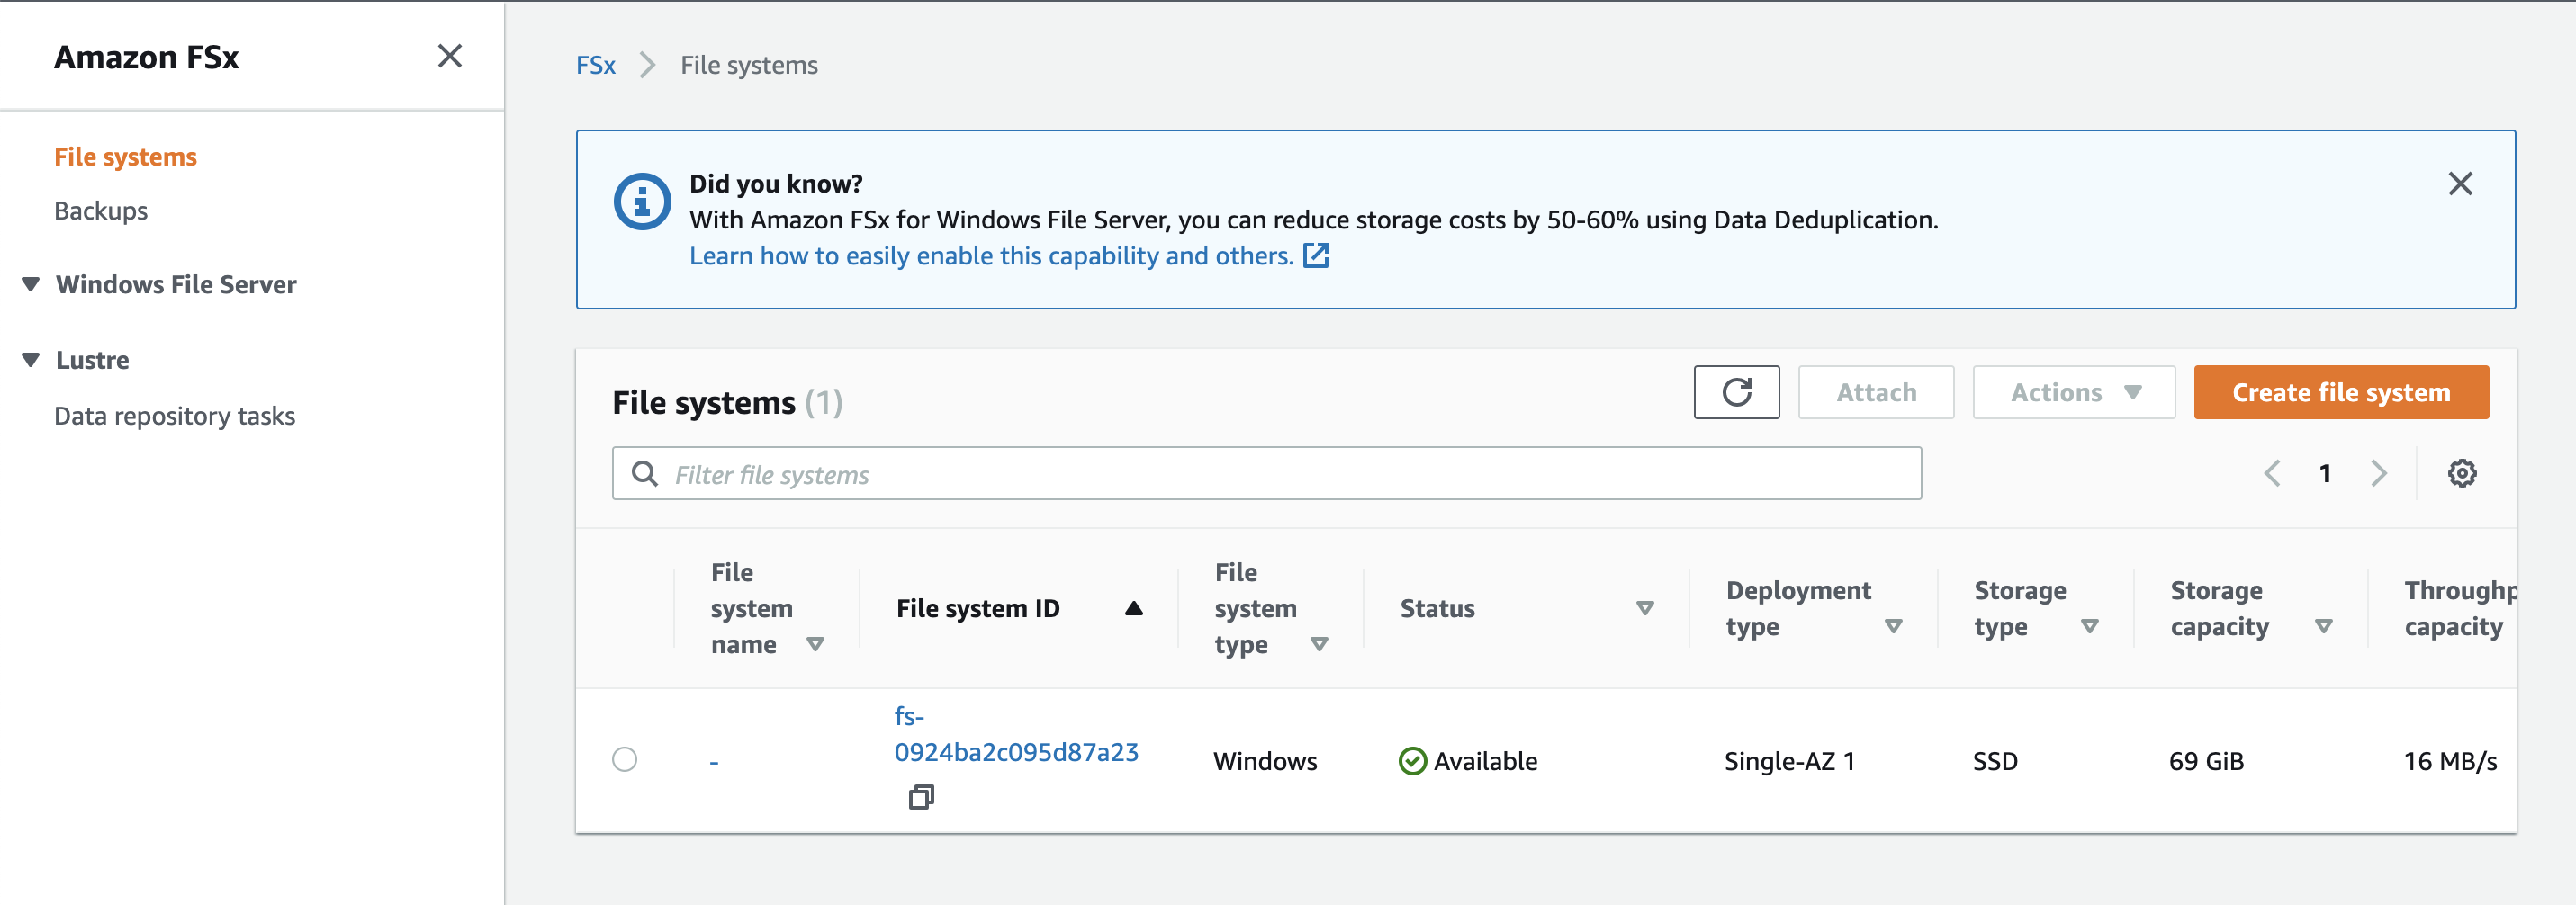
Create FSx File system for the Application Server Data
The FSx File System is a managed SMB server in AWS that can present SMB shares to applications servers. This File System can store data for multiple applications and have multiple SMB shares for each application. This example guide only presents a single SMB share for 1 application.
Make sure to create the Windows FSx File System large enough to store the application data. The FSx file system must also be connected to Active Directory. The disk can be extended to add space from the AWS console if required.
Follow the FSx guide to configure a new file system.
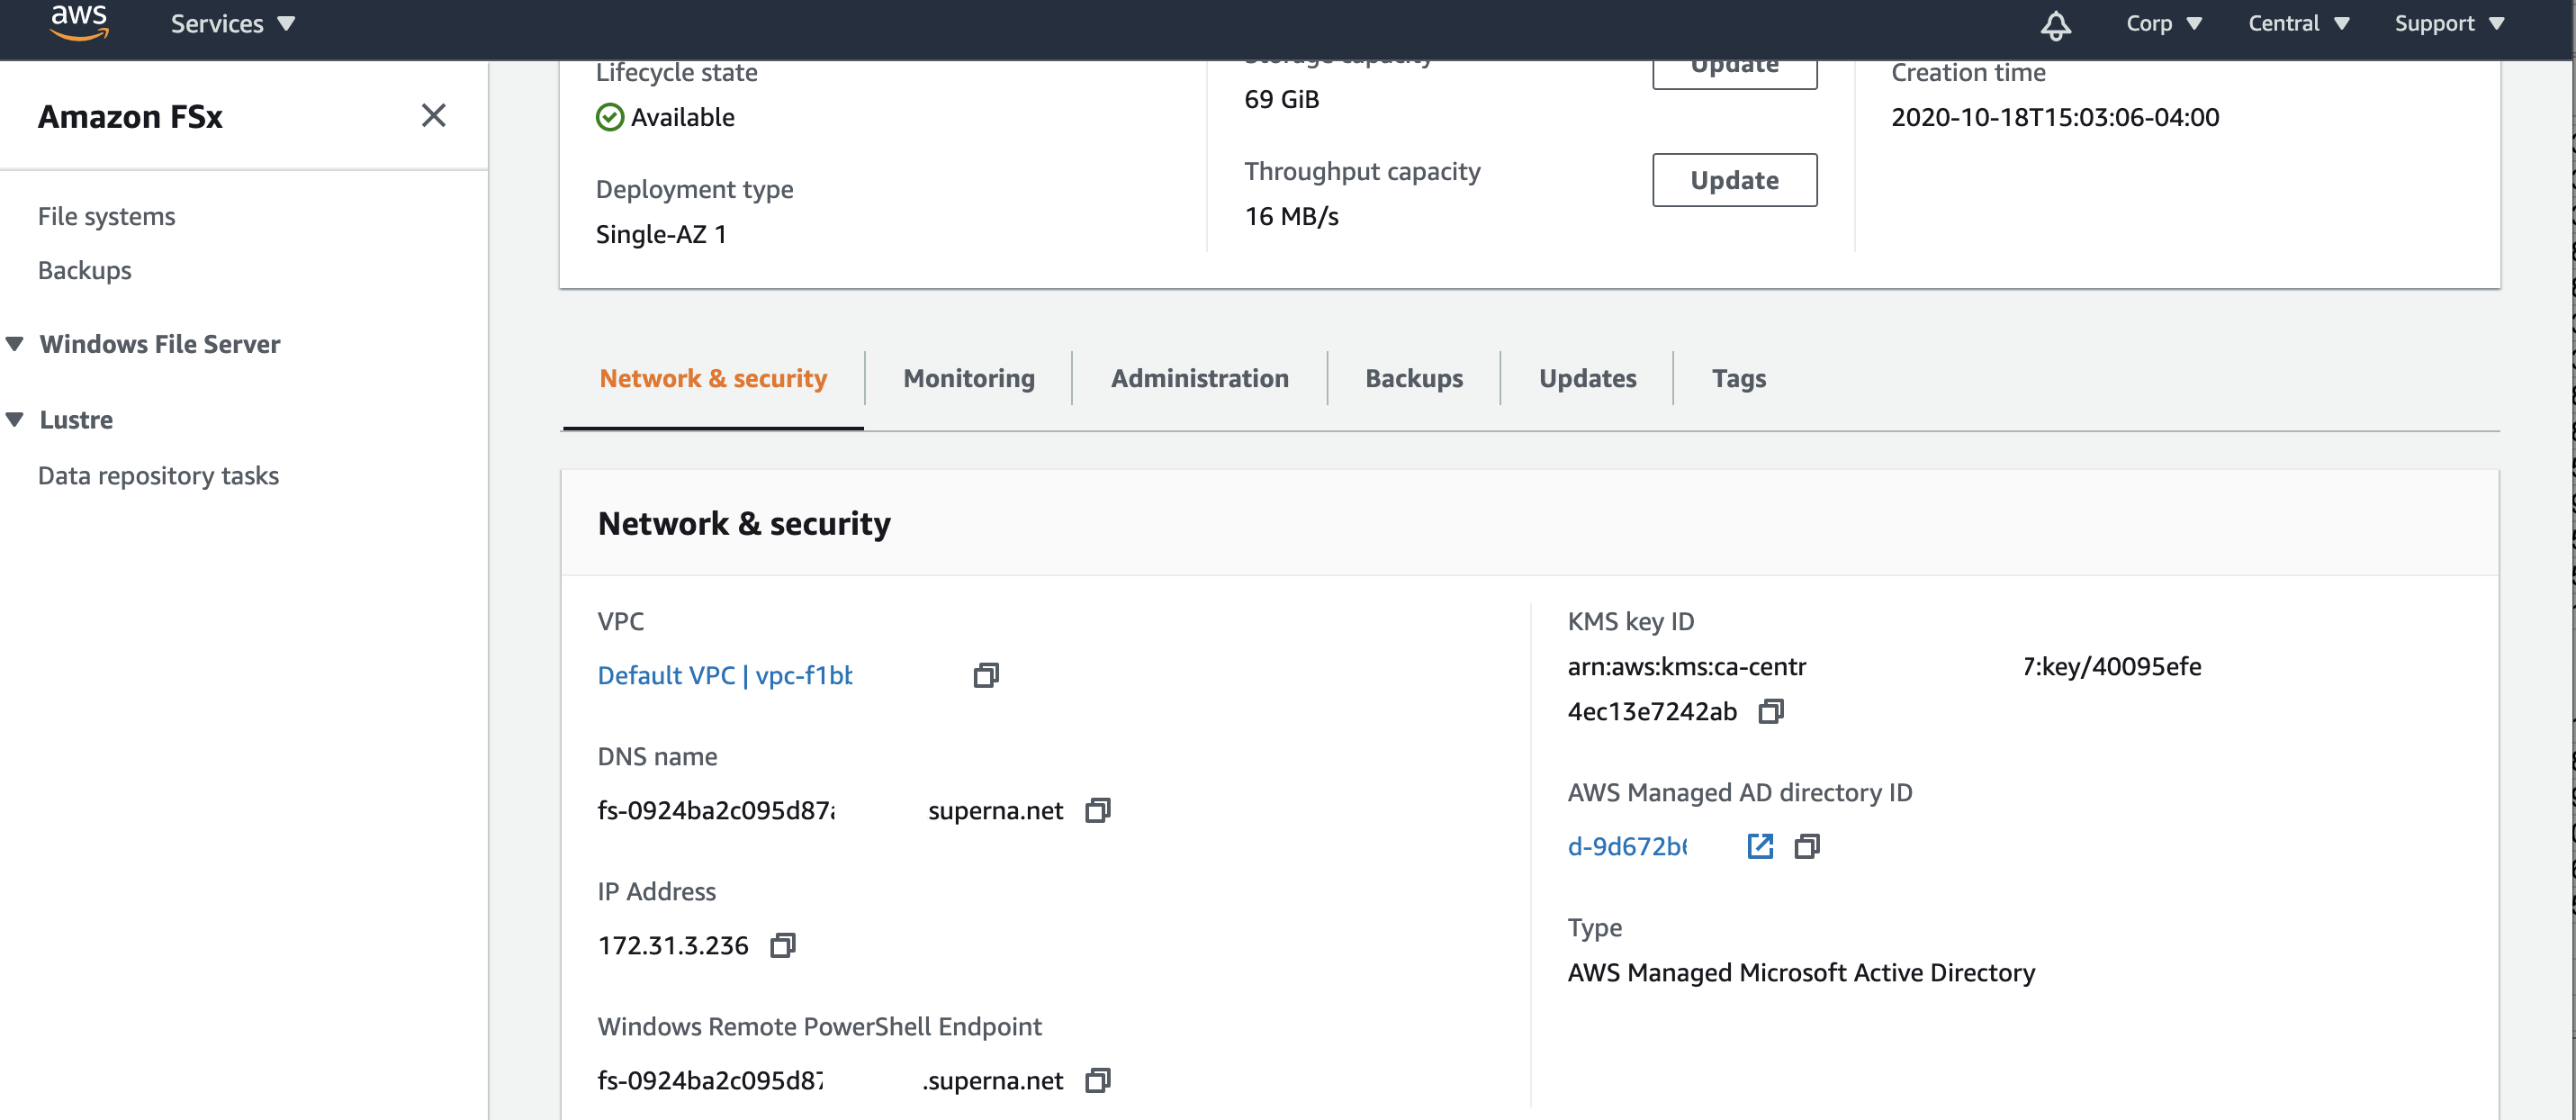
- Retrieve the FSx File System DNS end point for mounting Shares from Application servers or Management Servers
- Login to the FSx management page in the AWS console and record the DNS endpoint, ip address and power shell endpoint needed to mount SMB shares within AWS VPC. See example below.
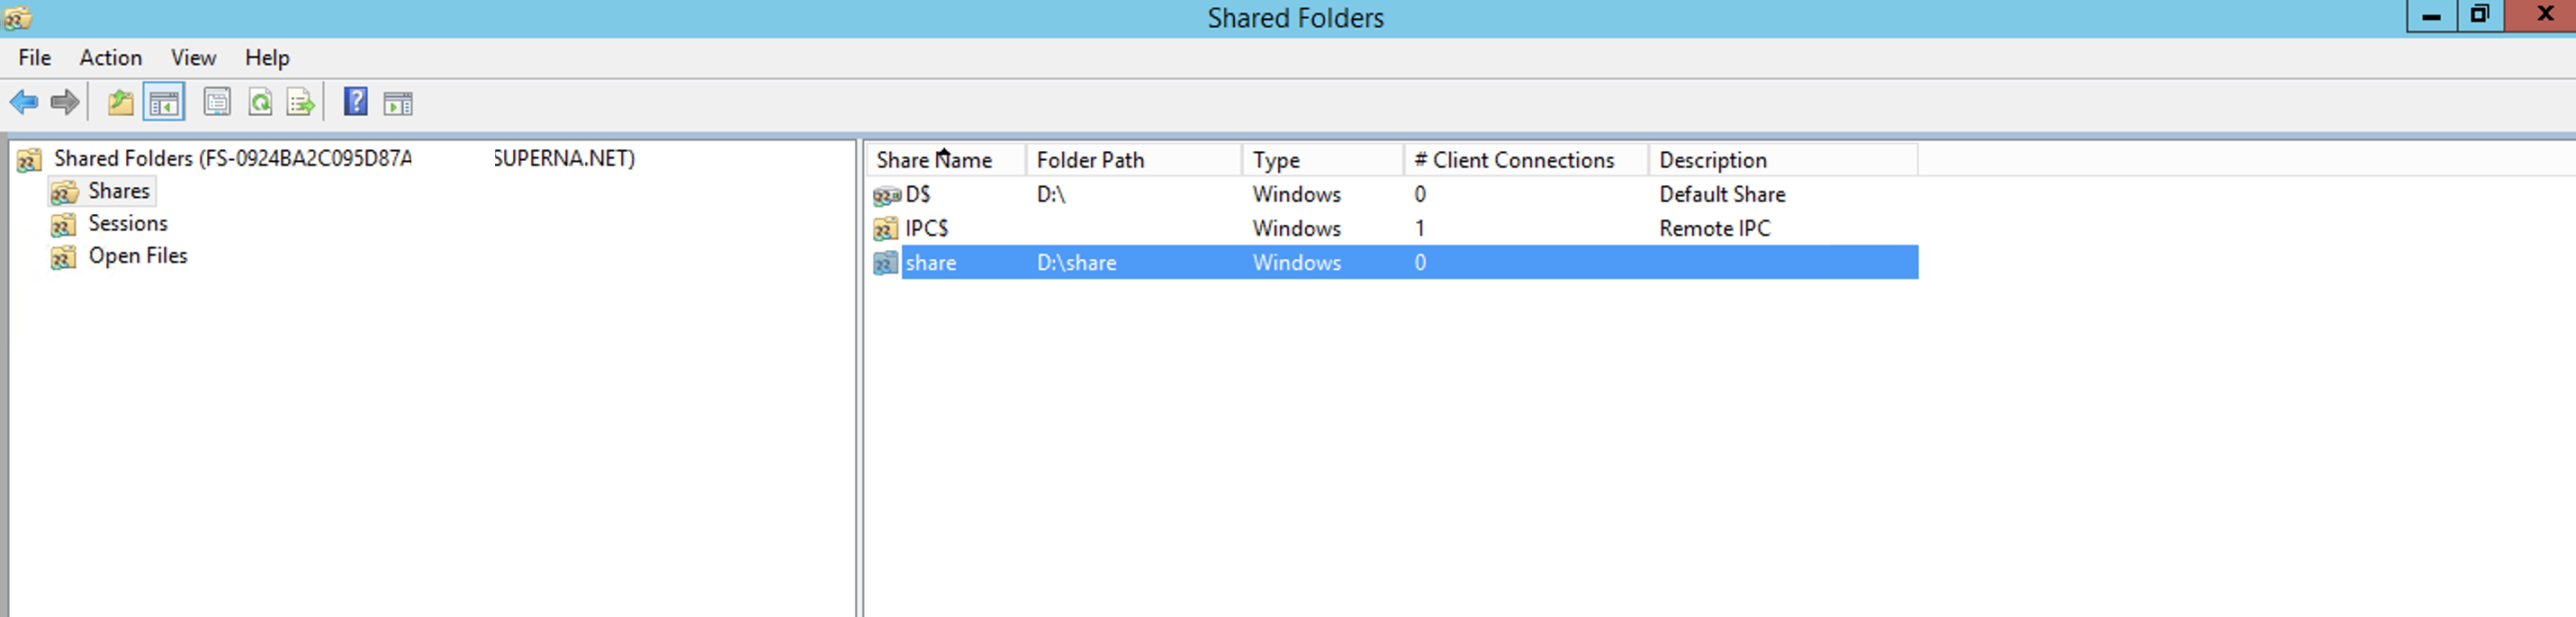
- Create or Manage SMB shares in FSx File Systems
- To create or manage SMB shares in an FSX File System requires a management server in AWS to ensure access to manage the file system is available in a disaster.
- Best Practice: Create a management server to connect to FSX File Systems.
- Follow the guide to use power shell or Windows Management server GUI tool
- RDP to the management Windows server logged in as domain admin user that has permissions to the File System FSX shares. Consult FSx documentation on the Managed AD domain group that allows management of FSx File Systems.
- open fsmgmt.msc tool to create or modify SMB shares and set permissions
Application Server AMI in EC2
- Application virtual machines to mount the SMB shares. Your application server should be pre-staged in AWS EC2 and joined to Active Directory so that correct SMB share permissions will allow the application to mount the data.
- NOTE: The scope of this is outside this documents intended purpose, and may require multiple VM's and a resource familiar with AWS services and application server clone and migration to AWS should be consulted.
AWS DataSync Service configuration
- This service copies data from S3 AWS buckets and a specific path of data within the bucket to a destination FSx SMB share. This copy configuration can be preconfigured in advance of a DR event. The steps below cover some of the key steps needed to setup and configure the Datasync service. To learn more about DataSync see the documentation page here.
- Deploy the Datasync Agent following this guide. The Datasync EC2 instance should be deployed in the same region as your storage bucket and FSx file system.
- The next step involves creating an endpoint. This is documented here. Since the DataSync service is only copying data within AWS choose the VPC endpoint option.
- Continue to activate the agent following this procedure
Create a DataSync Task to sync S3 to FSx Filesystem Share
- The documentation can be found here. A location is required for FSx and S3 bucket. Using the links below create a location in DataSync to authenticate to your FSX file share for your application, this requires an AD user with permissions to the FSx filesystem share.
- Creating a Location for Amazon FSx for Windows File Server
- Creating a Location for Amazon S3
- Create the task that defines the source (s3) to target FSX following steps here
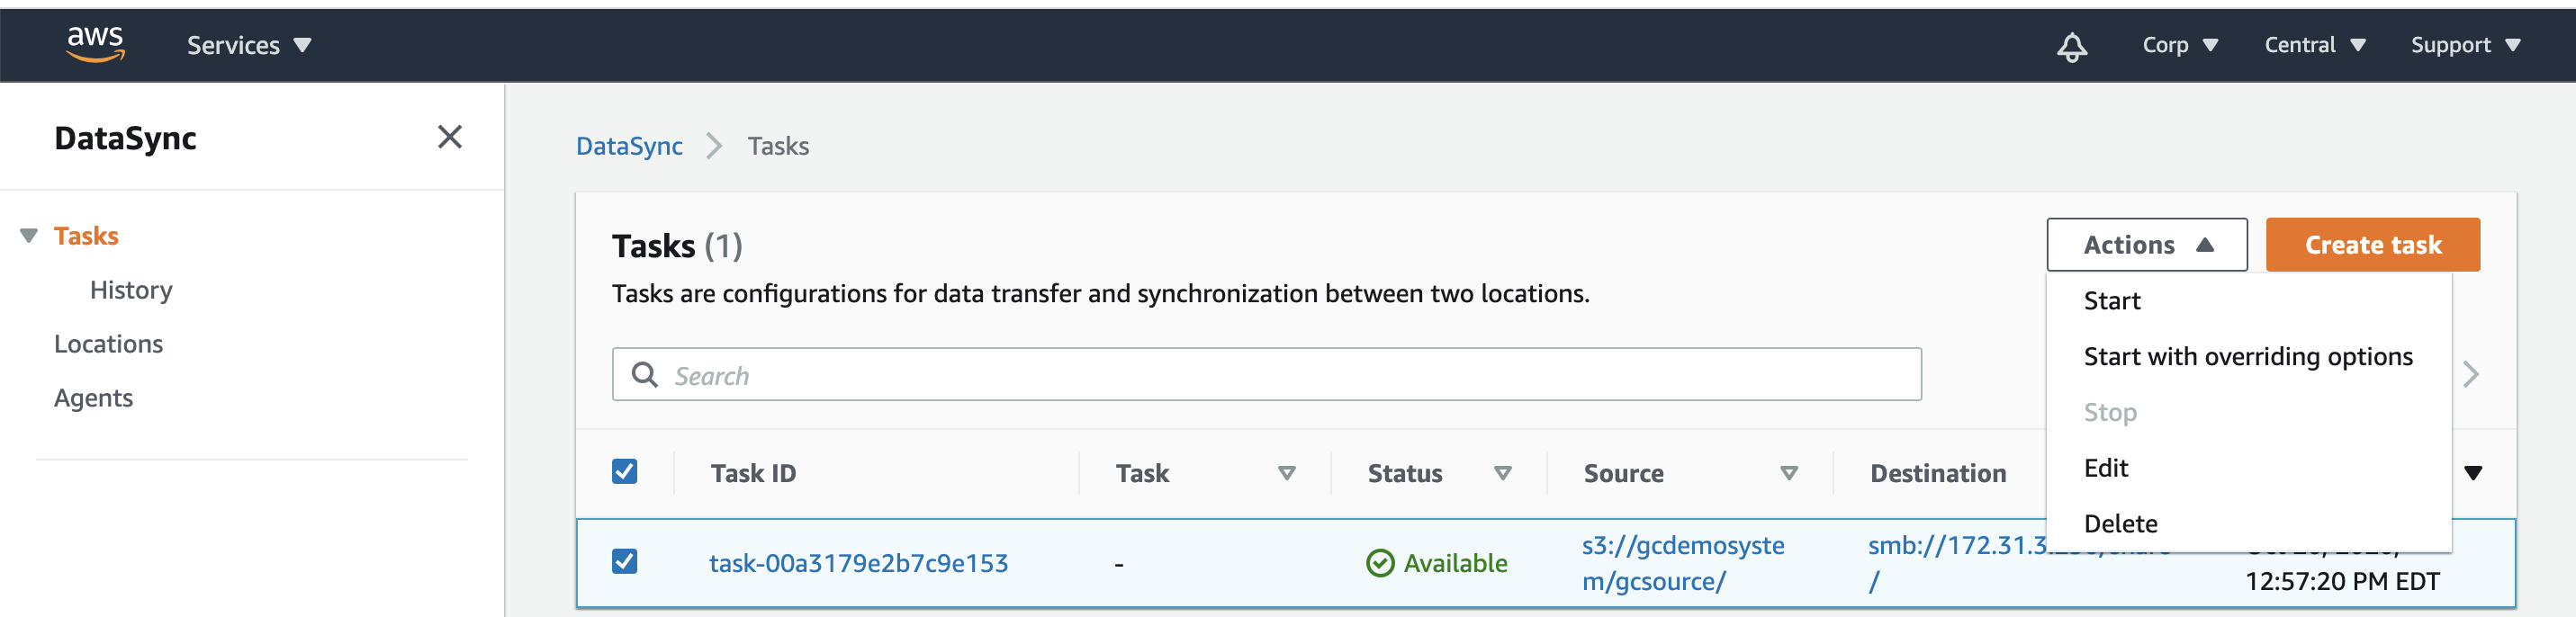
Test DataSync Copy
- Perform a test copy to verify the task is setup correctly. Once the test is complete you can delete the data in the share. This requires a management VM running Windows to mount the share and verify the data was copied and also to delete the data.
- This is done by selecting the task and starting the job.

Test Mount FSx Share from the ECA Application Server VM
- From a the Windows application server in EC2 mount the SMB Share Configured for this application server to verify the DataSync Job has copied the data successfully. See example below.
-
Application DR Recovery Procedures
- Overview: The process would be used in the event of a disaster or if you plan to exercise a DR test. The high level steps below would be used to move an application to operate from within EC2 AWS VPC. These steps can take time to complete depending on the quantity of data in Amazon S3 that needs to be copied into the FSx file System.
How to Initiate DR Test or Actual DR of the application to AWS EC2 and FSx File System
- Open AWS DataSync console
- Start the application datasync task to sync data into the FSx Share location target. This process can take time depending on how much data needs to be copied.
- Monitor the DataSync task's copy performance and completion status on the console.
- Proceed to startup up the EC2 instance of the application server
- Login to the application server over RDP and verify the SMB mount. Data should already appear in the mount as the copy progresses.
- Startup the application software once the DataSync task has completed.
- DR test completed.