Eyeglass All Product Installation and Upgrade Guides Publication
Eyeglass Search & Recover Installation and Upgrade Guide
Home
- VMware ESX Host Compute Configuration and Cluster Sizing
- Firewall Rules and Direction Table
- Eyeglass Search & Recover Installation Prep Steps
- Search & Recover OVA Deployment and Cluster VM Configuration
- How To Upgrade Search & Recover Cluster
VMware ESX Host Compute Configuration and Cluster Sizing
See Sizing guide here.Firewall Rules and Direction Table
NOTE: These rules apply to traffic into the VM and out of the VM. All ports must be open between VM's, private VLAN's and firewall between VM's is not supported.
Port | Direction | Function |
Operating System Open Suse 15.3 | It is customer responsibility to patch the operating system and allow Internet repository access for automatic patching. The OS is not covered by the support agreement. | |
| ping | Search node 1 to PowerScale cluster | Used to verify reachability before adding a cluster to Search & Recover |
443 HTTPS (TCP) | Browser → Search Cluster | UI Access, management tools (password protected) |
22 | Admin PC → Search Cluster | Management access to the CLI |
8080 (HTTPS) over | Search Cluster → PowerScale | REST API Access |
| 445 TCP SMB authentication | Search Cluster → PowerScale | SMB authentication of user name and password |
NFS (optional for content) NFS UDP/TCP port 111, TCP and UDP port 2049 and UDP 300 NFSv3 only | Search Cluster → PowerScale | File Content Ingestion |
Eyeglass Search & Recover Installation Prep Steps
The Search & Recover appliance is based on the ECA cluster architecture and has similar steps to complete installation.
Before you begin, collect the information below and verify all pre-requistes are completed:
- See the sizing your cluster based on your environment to determine the number of nodes required. Guide Here.
- Must have 4-7 IP addresses to assign during OVA deployment of the Search & Recover cluster depending on the size of the cluster ( 4 node or 7 node cluster)
- Must have DNS IP, router IP, subnet mask, NTP server IP
- Permissions for Service Account: PowerScale REST API access with file traverse permissions to ingest files and directories by the Search & Recover cluster. See the minimum permissions guide for a full list of permissions required for the eyeglass service account used by all ECA cluster products. Guide here.
- (optional skip this section if Meta Data only indexing is needed)
- File Full Content data Indexing Requirements
- Must have DNS smartconnect name assigned to a management IP pool in the System zone for the NFS export used to ingest content from the snapshots folder.
- Get each Cluster GUID and name that will be indexed. Record these values for steps below.
- Login to the cluster OneFS GUI and open the Cluster Management --> General settings menu and record the cluster GUID and cluster name. Example below.
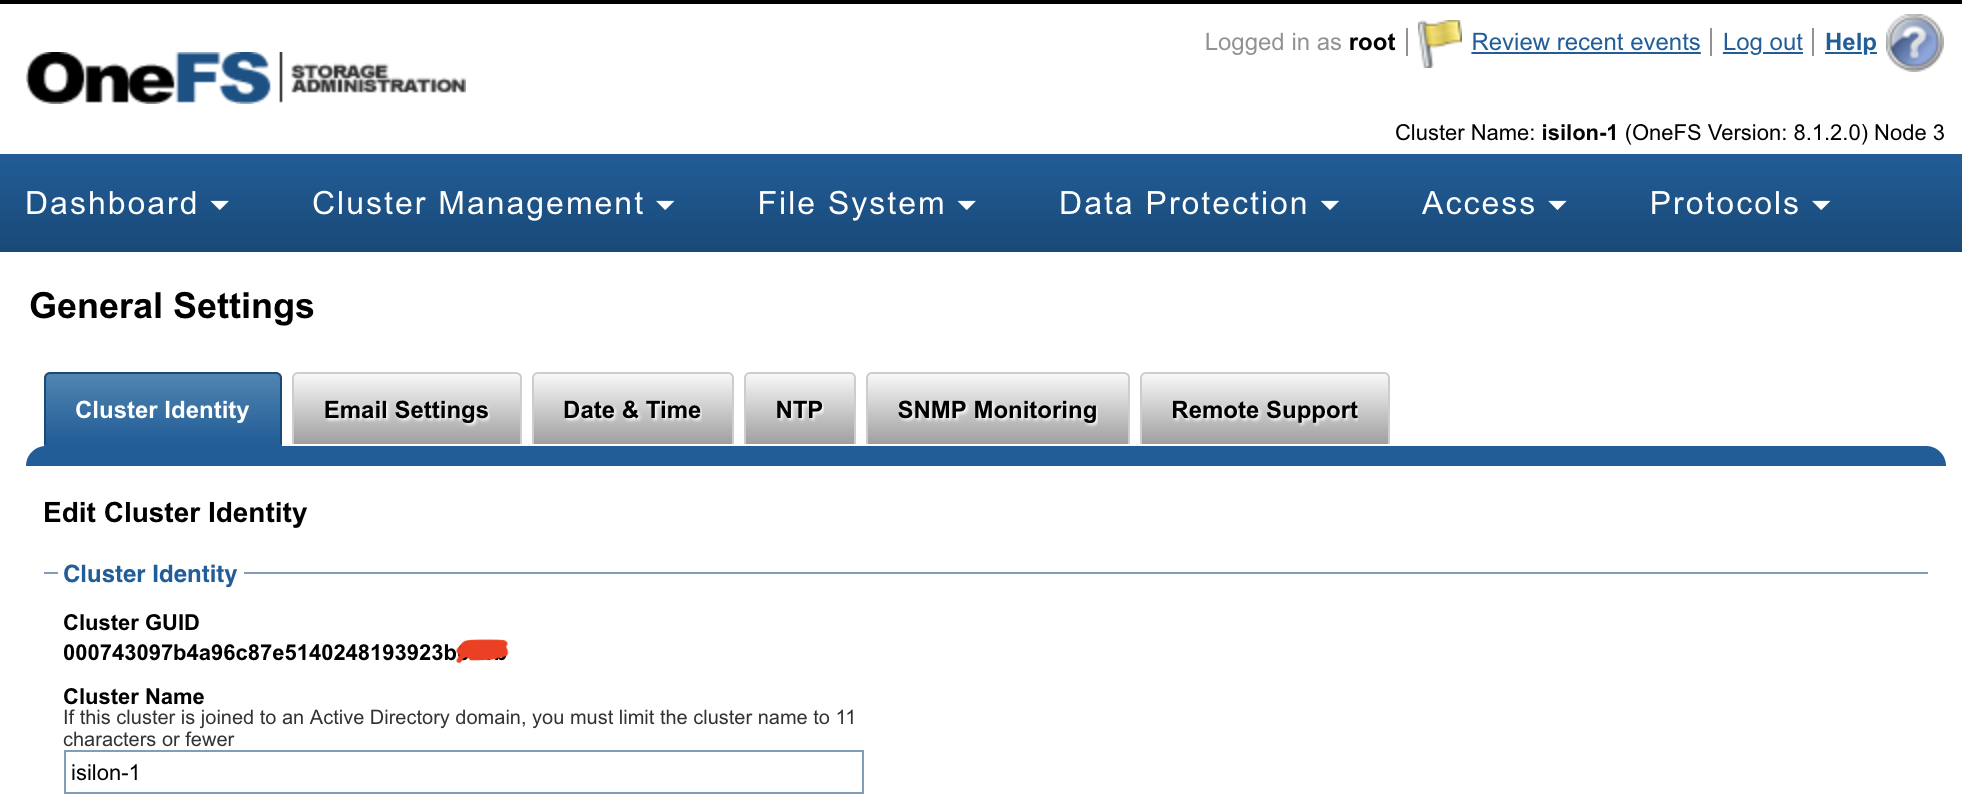
- Repeat for each cluster that will be licensed and indexed.
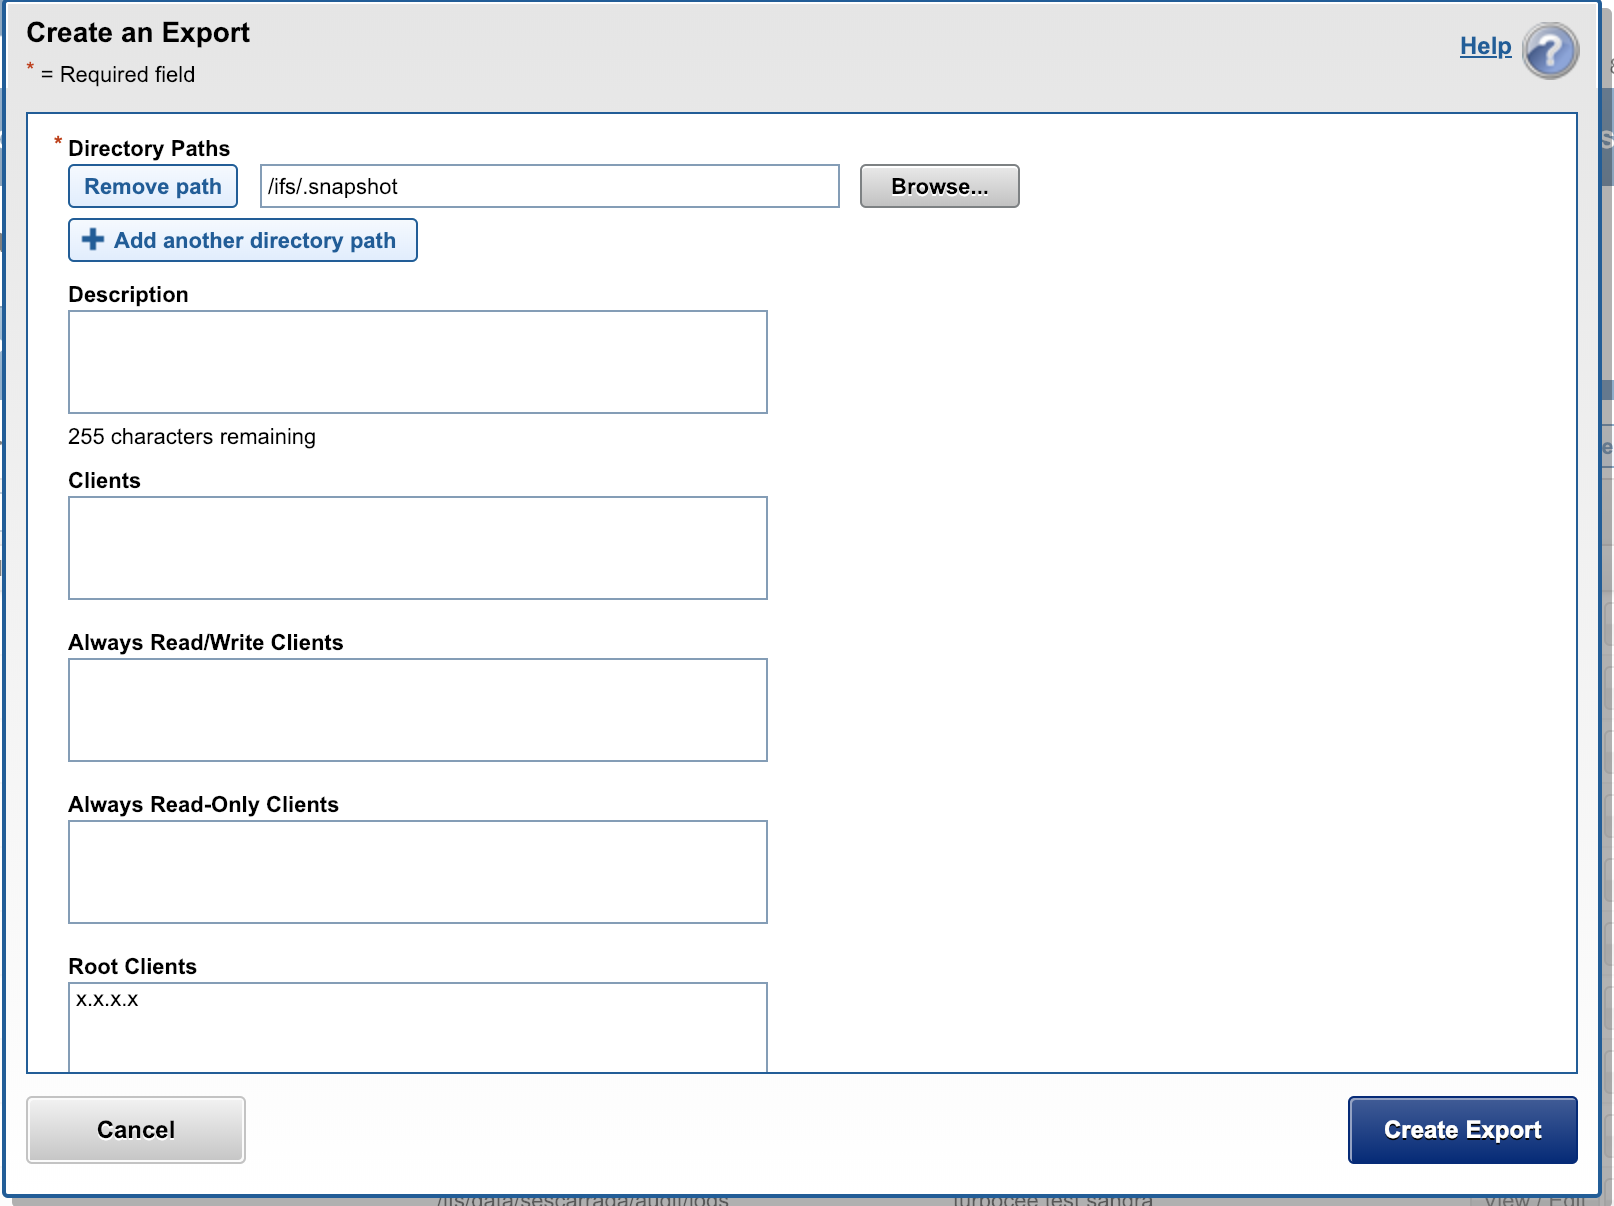
- Create an NFS export in the System Access Zone for full content on all clusters that will be indexed. See example below where the IP addresses entered are the Search & Recover cluster IP addresses. The export is created on the /ifs/.snapshot directory with root client list used and add all nodes except node 1.
Search & Recover OVA Deployment and Cluster VM Configuration
- Download the OVA following instructions here
- Deploy with vCenter
NOTE: vCenter 6.5 and 6.7 use FLASH or FLEX interface. HTML5 interface is not supported.- Select the OVF file with the required node count based on cluster sizing pre-requisite step.
- Set the node ip addresses, gateway IP, DNS, NTP IP and index volume size during the OVA deployment. Use the disk size values from this sizing table.
- Note: Data disk size value MUST be left at the default.
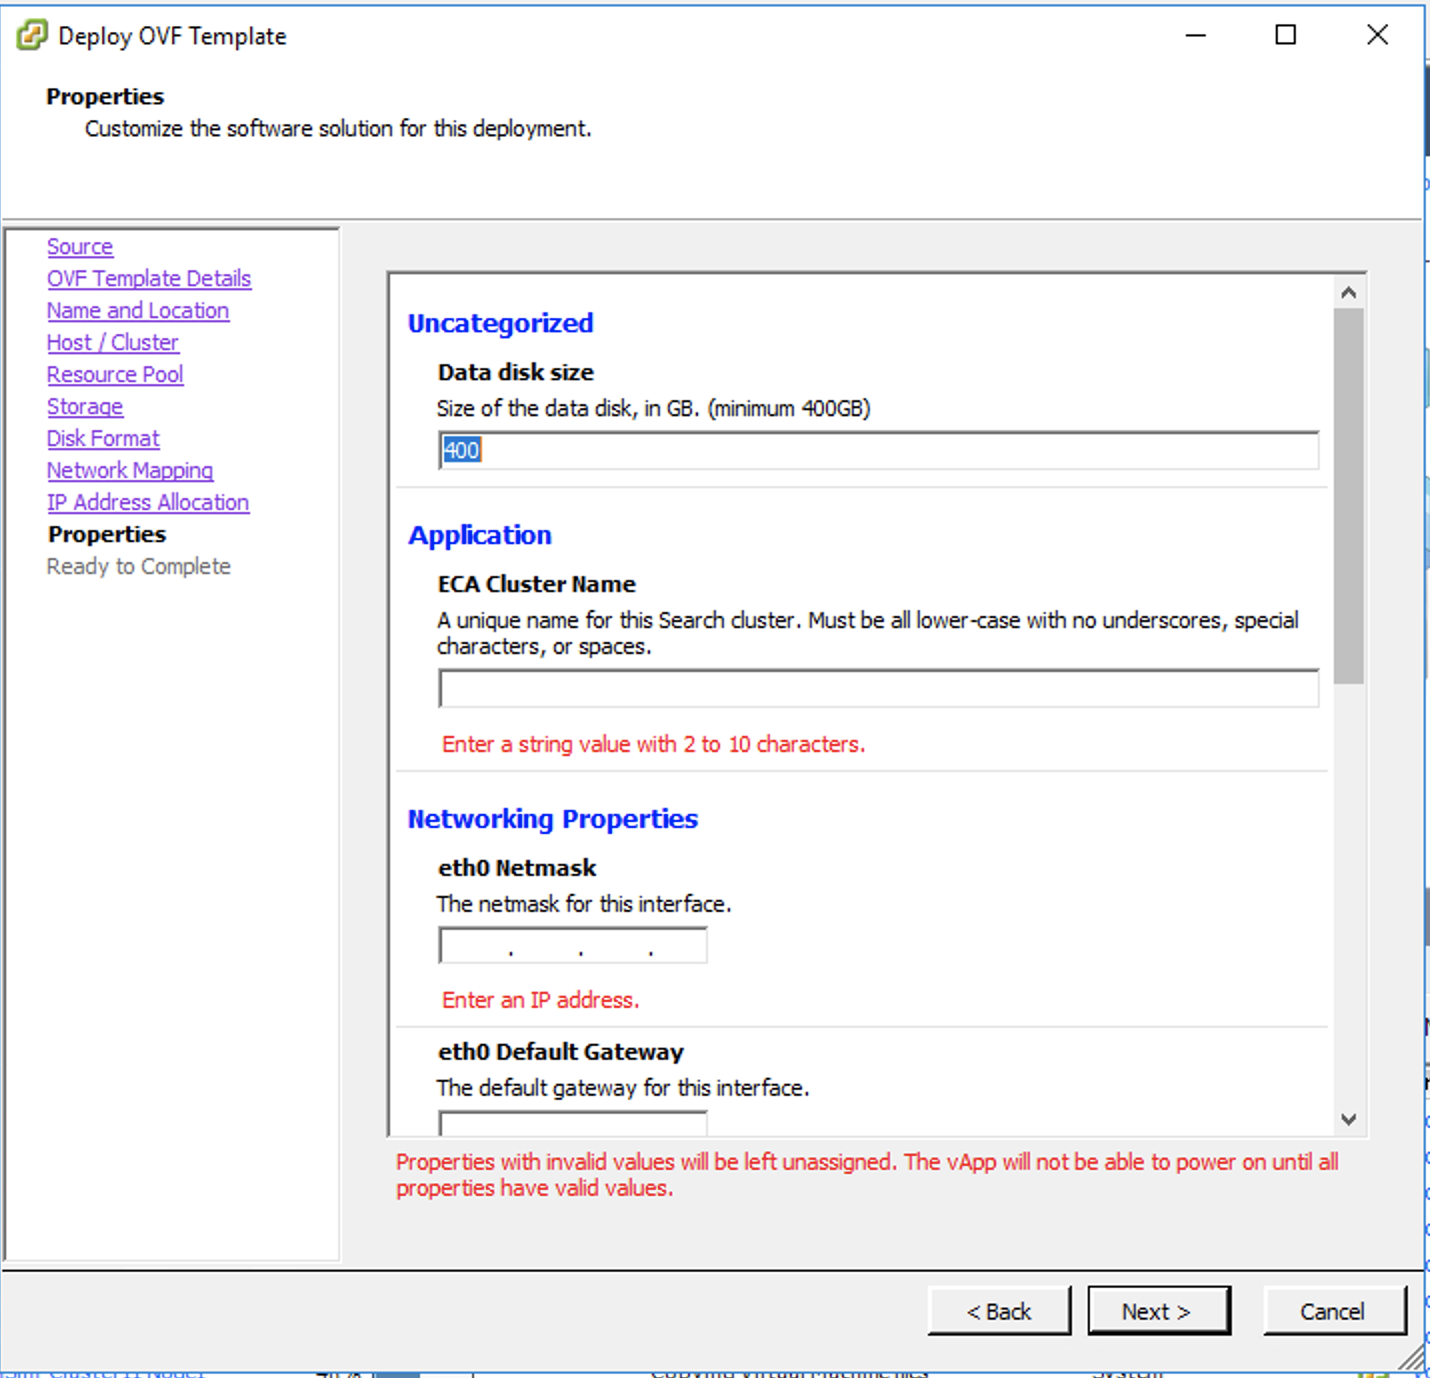
- Set the ECA cluster name (no special characters should be used, all lower case)
- Power on the OVA
- SSH to the node 1 IP address
- Login with user ecaadmin and default password 3y3gl4ss
- Configure and test NTP (NOTE if Internet access is allowed for NTP protocol, then no configuration is needed, use this procedure to test access and or change NTP to an internal server IP)
- sudo -s
- Enter ecaadmin password
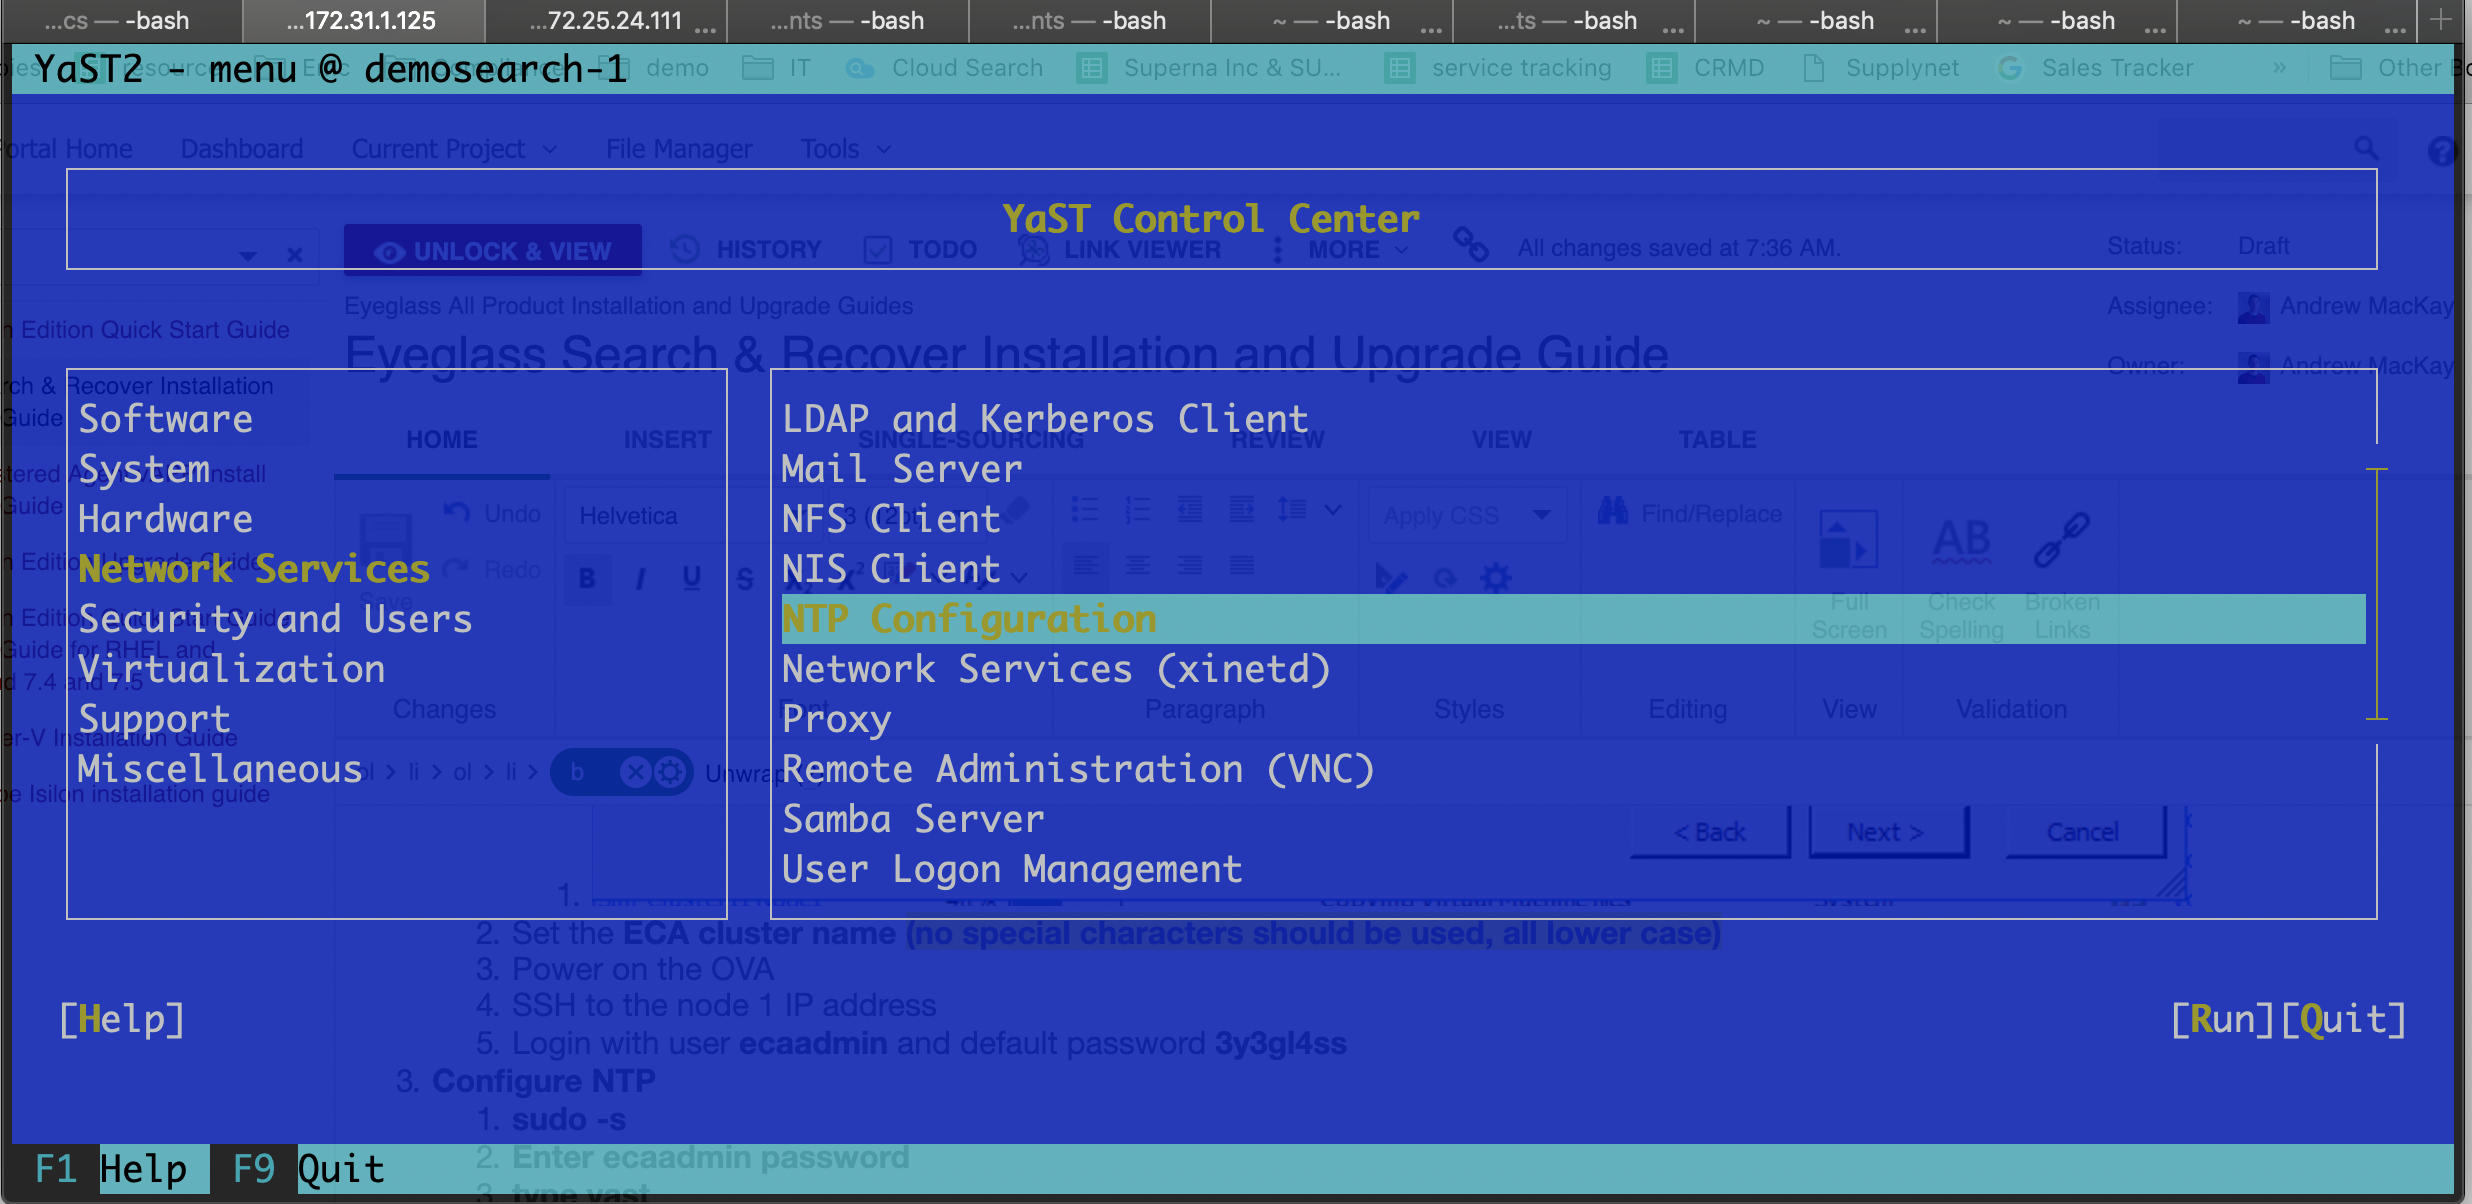
- type yast (NOTE navigation uses the Arrow keys and TAB key and shift TAB key to move between selections on the UI)
- Select Network Services to enter NTP Configuration
- Test Access to Internet NTP servers
- TAB to the Edit button and press enter
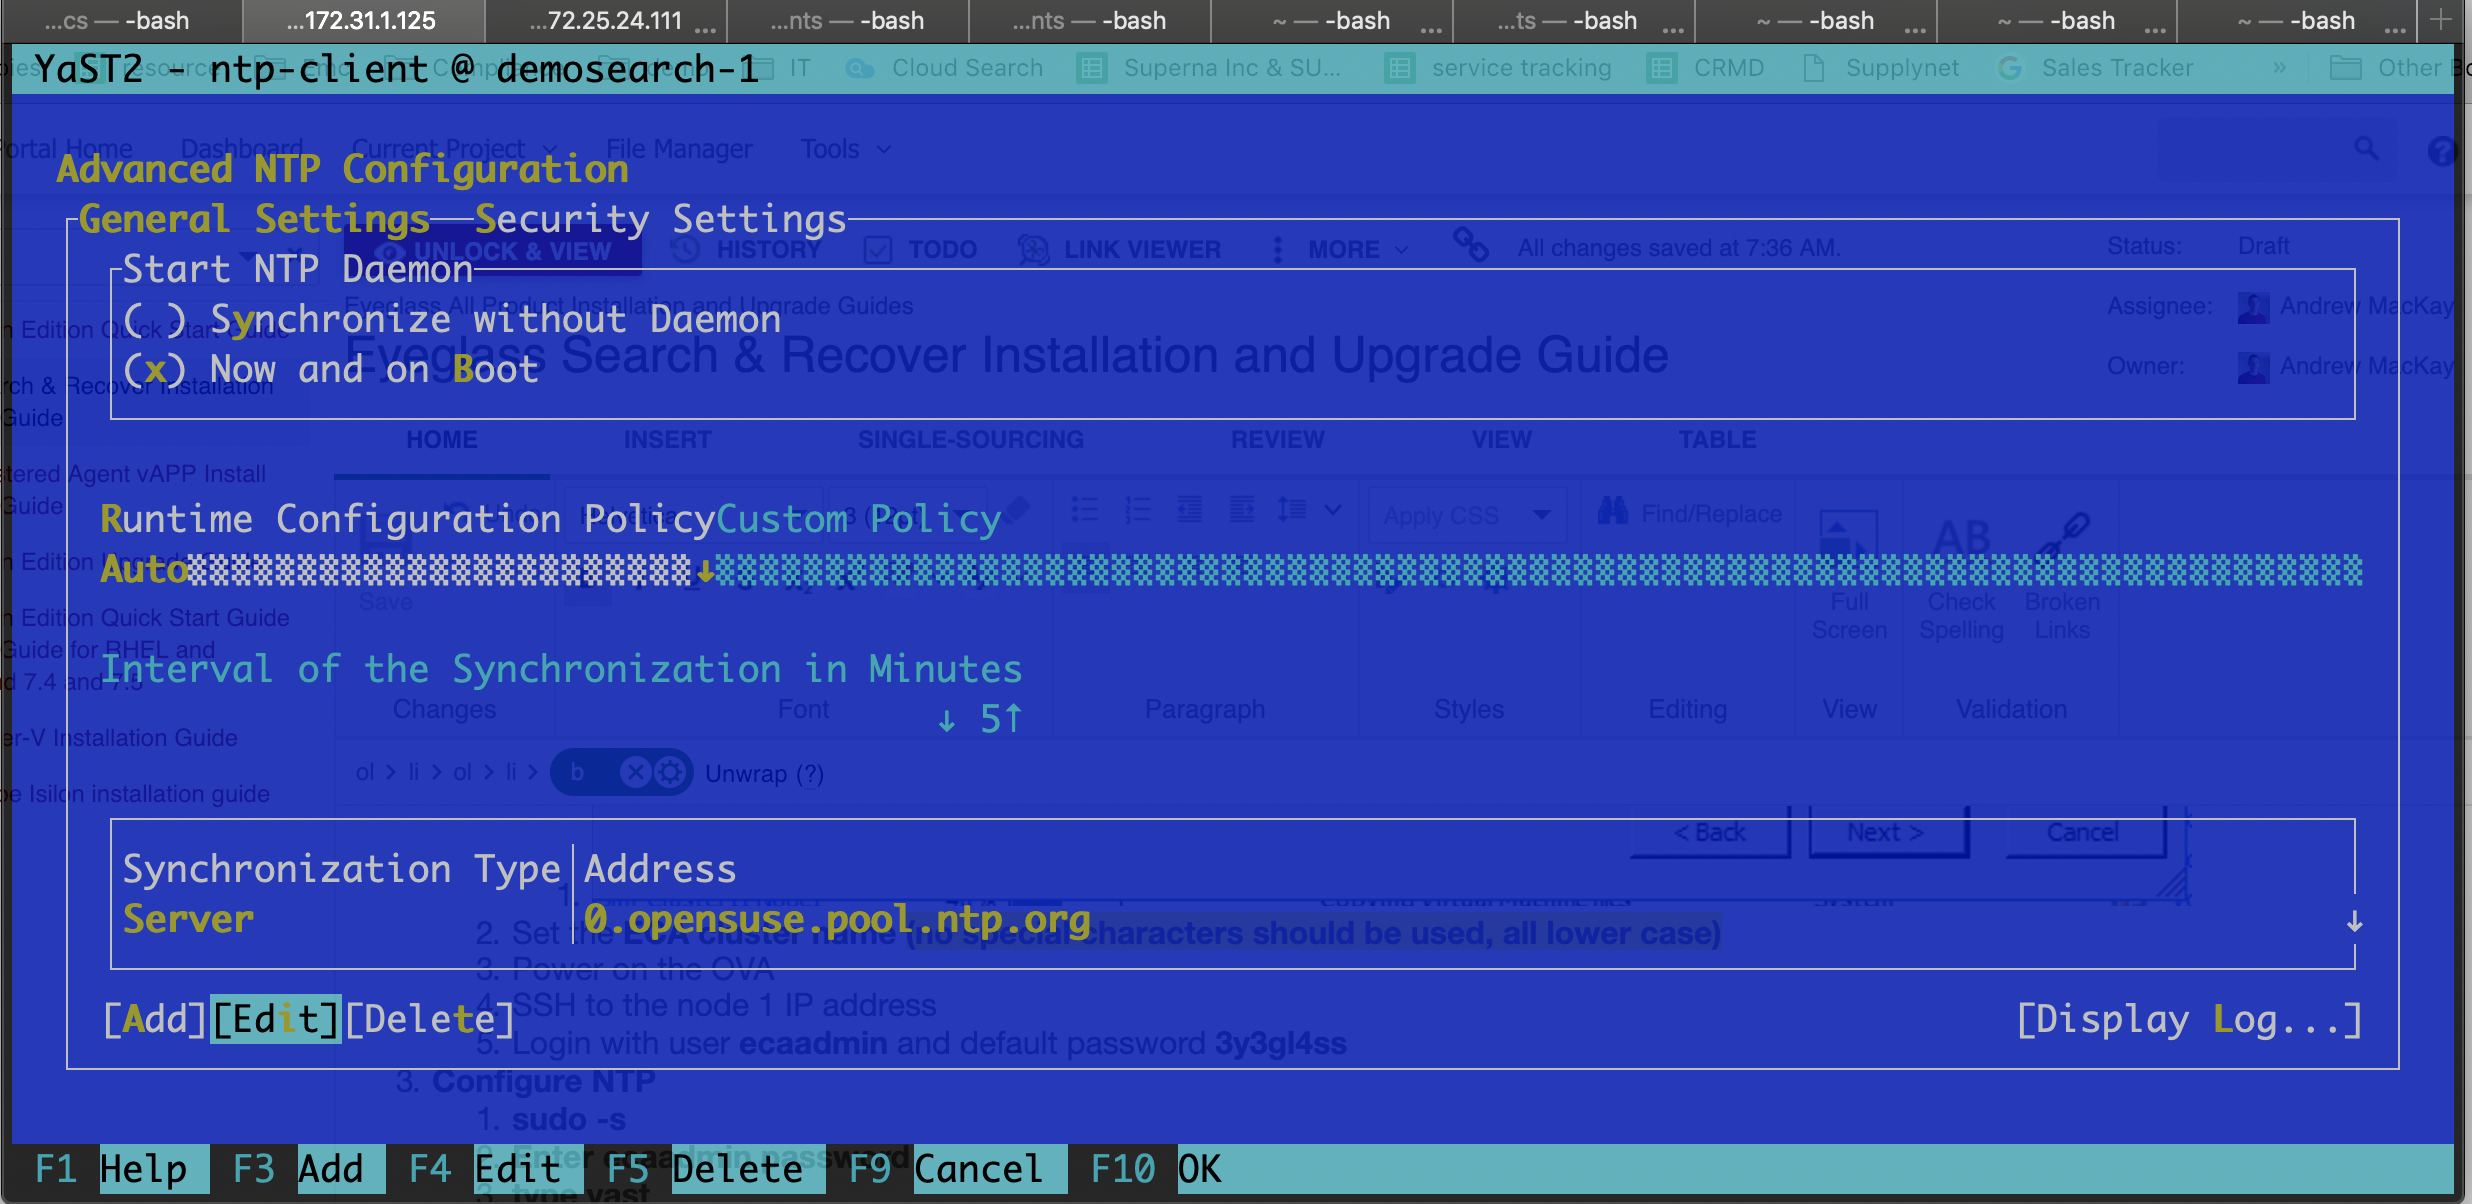
- Now Tab to the Test button and press enter
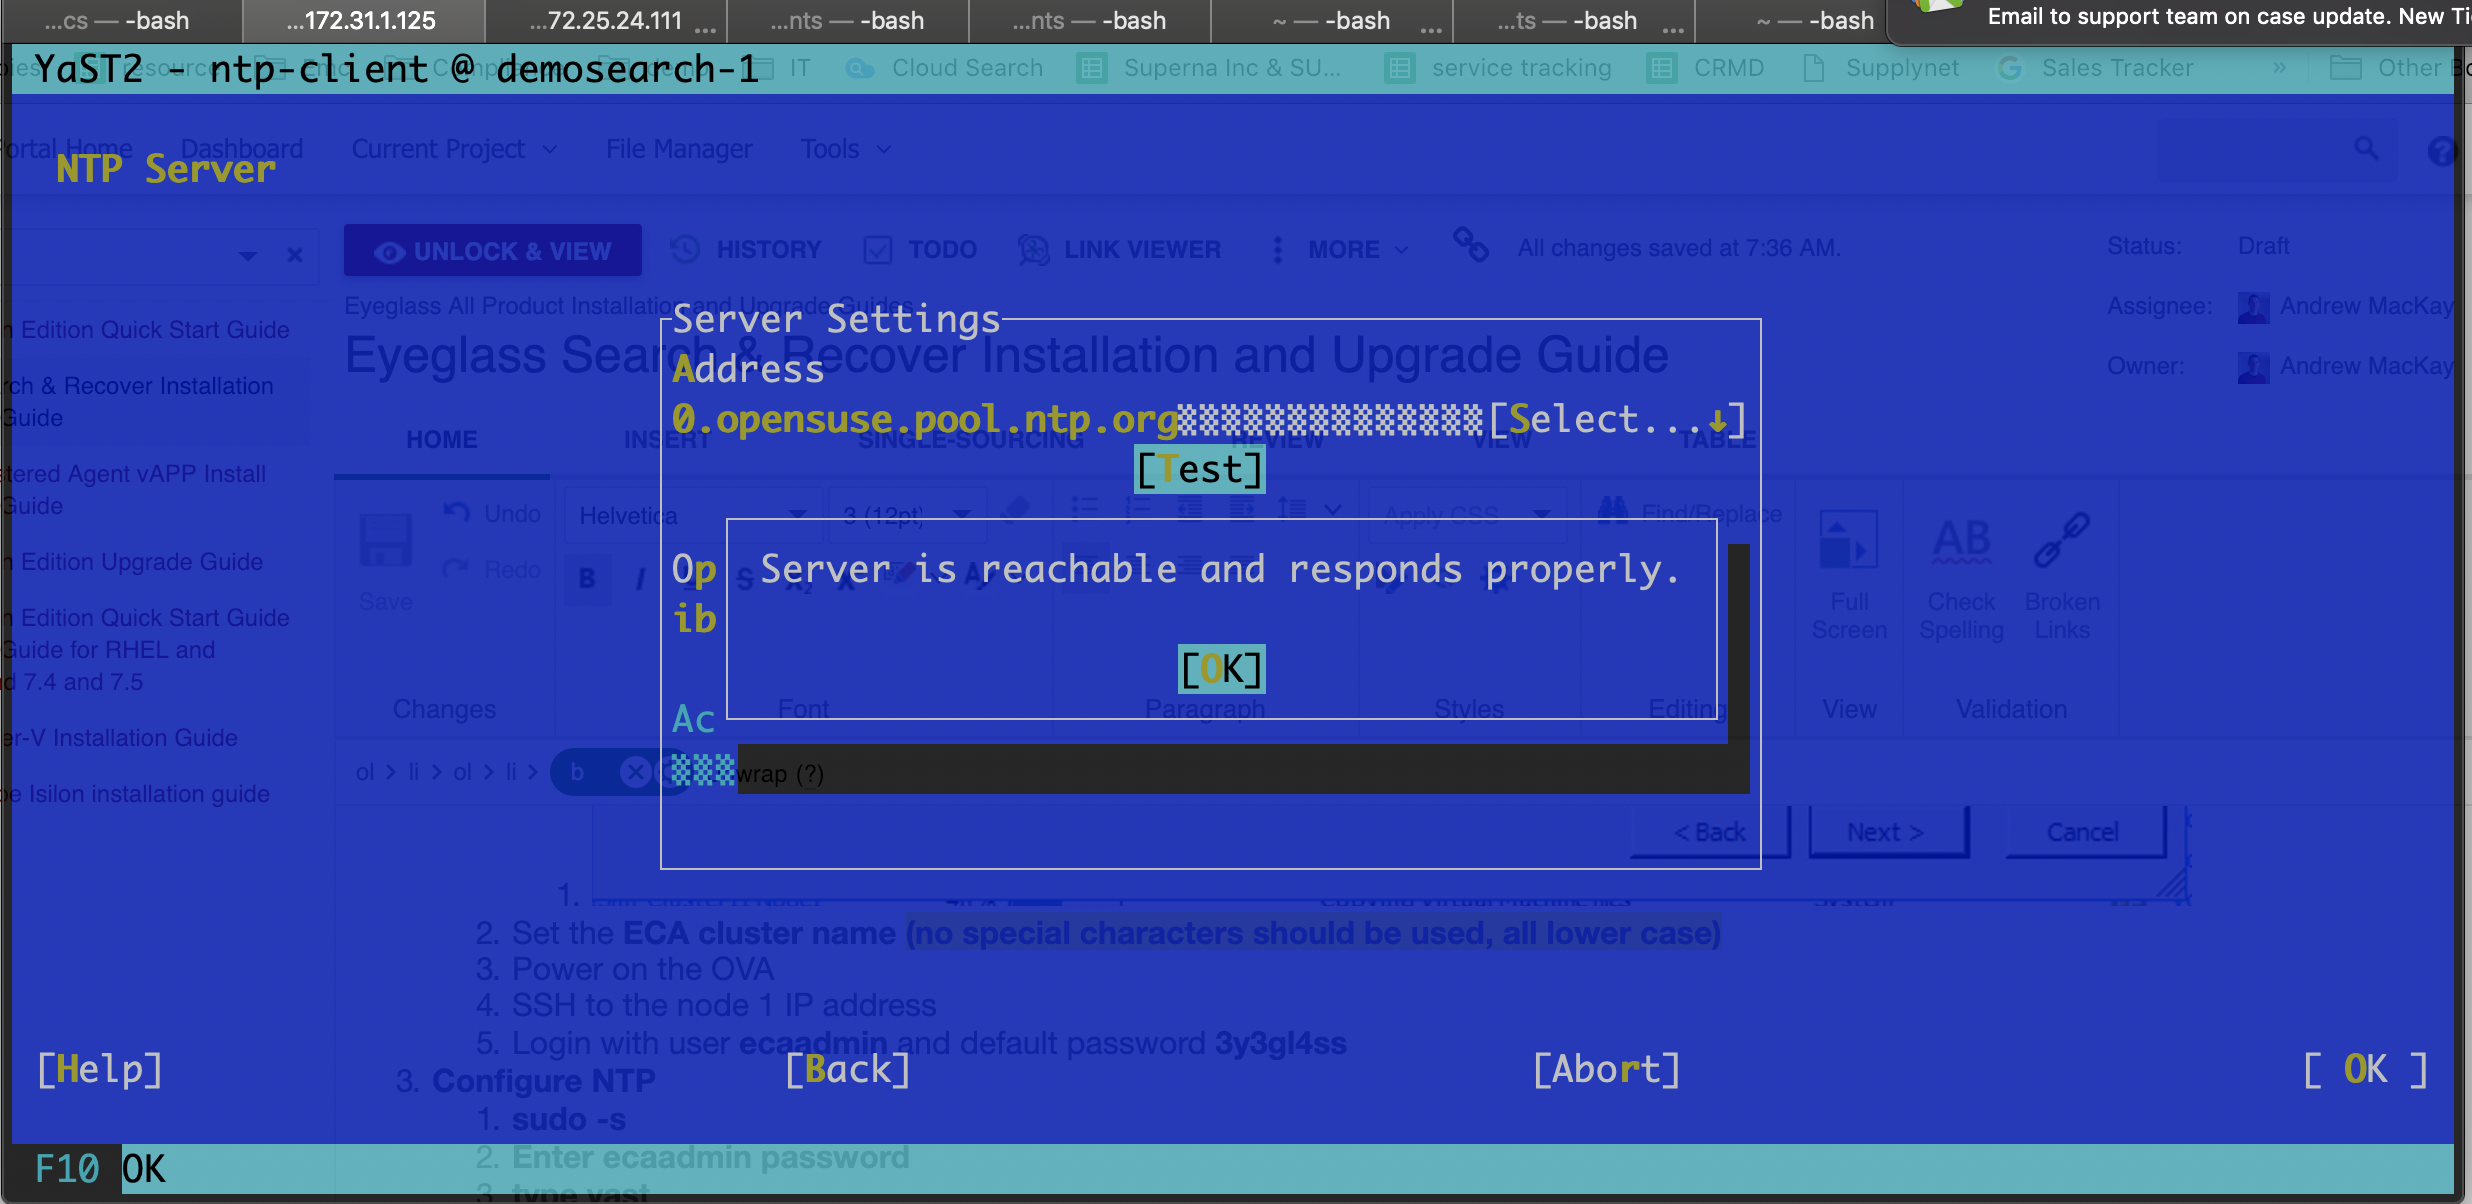
- If Internet access is enabled then test response will look like the image above.
- If it fails
- Replace the NTP server entry with your Internal NTP server IP address
- Use the TAB key to select the OK button, press enter
- Press F10 to exit the NTP configuration screen
- Use the TAB key to Select the YAST Exit button.
- Repeat NTP test and/or configuration on ALL Search nodes
- Configure Cluster Master Configuration file
- IMPORTANT: Next step must be run as ecaadmin user. If still root user from previous steps exit before continuing.
- IMPORTANT: Next step must be run from Search node 1
- Run the cluster setup command (sets up SSH between nodes, configures master file, set password for administration WebUI)
- NOTE: This will setup ssh access between nodes and configure the cluster.
- Type y or yes when prompted to continue.
- You will be prompted to enter the default password to complete this setup process. The default password is 3y3gl4ss.
- You will prompted to login to each node during this one time process
- Run setup command: ecactl components configure-nodes
- After the setup completes on all nodes verify the contents of the master configuration file
- cat /opt/superna/eca/eca-env-common.conf
- Verify the ip addresses are listed for each node
- Verify the cluster name is correctly set in the file variable export ECA_CLUSTER_ID=
- (Skip section if you only plan on indexing metadata) Configure NFS Export for Content Ingestion ONLY
- Search and Recover uses PowerScale snapshots to ingest content. Follow the steps below to add the export to each of the VM's.
- What you will need to complete this step on nodes 2 - x (where x is the last node IP in the cluster):
- Cluster GUID and cluster name for each cluster to be indexed
- Cluster name as shown on top right corner after login to OneFS GUI
- Change to Root user
- sudo -s
- enter ecaadmin password 3y3gl4ss
- Create local mount directory (repeat for each cluster)
- mkdir -p /opt/superna/mnt/search/GUID/clusternamehere/ (replace GUID and clusternamehere with correct values)
- Use this command to run against all nodes, you will be prompted for ecaadmin password on each node.
- ecactl cluster exec "sudo mkdir -p /opt/superna/mnt/search/00505699937a5e1f5b5d8b2342c2c3fe9fd7/prod-cluster"
- ecactl cluster exec "sudo mkdir -p /opt/superna/mnt/search/00505699937a5e1f5b5d8b2342c2c3fe9fd7/prod-cluster"
- (Skip this section if you only plan on indexing metadata) Configure automatic NFS mount Required for Full Text Indexing
- Prerequisites
- This will add a mount for content indexing to FSTAB on all nodes
- Build the mount command using cluster guid and cluster name replacing the yellow highlighted sections with correct values for your cluster. NOTE: This is only an example
- You will need a smartconnect name to mount the snapshot folder on the cluster. The Smartconnect name should be a system zone IP pool
- Replace smartconnect FQDN and <> with a DNS smartconnect name
- Replace <GUID> with cluster GUID
- Replace <name> with the cluster name
- On each node in the cluster:
- ssh to the node as ecaadmin
- sudo -s
- enter ecaadmin password
- echo '<CLUSTER_NFS_FQDN>:/ifs/.snapshot /opt/superna/mnt/search/<GUID>/<NAME> nfs defaults,nfsvers=3 0 0'| sudo tee -a /etc/fstab
- mount -a
- mount to verify the mount
- exit
- Login to next node via ssh
- repeat steps on each node
- NOTE: The mount must exist BEFORE you start the cluster.
- Prerequisites
- Run the cluster setup command (sets up SSH between nodes, configures master file, set password for administration WebUI)
- Start up the cluster
- IMPORTANT: Next step must be run as ecaadmin user. If still root user from previous steps exit before continuing.
- IMPORTANT: Next step must be run from Search node 1
ecactl cluster up- Wait until all steps complete on all nodes verify no error messages are deplayed
- Administration WebUI password
- When prompted enter a secure strong password 8 characters or longer with upper case, lower case , numbers and special characters. This password protects access to administration webUI.
- Get the Search appliance id and make a record of it - will be required to retrieve license
ecactl version - Deployment done
- NEXT Steps Search & Recover Cluster Logical Configuration
- Configuration steps to add licenses, add clusters, add index folders is covered in the Quick Start Steps of the Search & Recover Admin guide.
How To Upgrade Search & Recover Cluster
- NOTE: Always take a vmware level snapshot of all VM's before any upgrade to be able to roll back to a previous release.
- NOTE: Contact support before any upgrade to get upgrade changes between releases for compatibility of the index.
- NOTE: New permissions are required for the latest release for the service account used by Search Update the minimum permissions for the eyeglassSR user follow the guide here and apply all permissions again to ensure all permissions are correct.
- Login to the support site https://support.superna.net and download the offline Search & Recover upgrade file
- Using a tool like Winscp copy the upgrade file to node 1 using ecaadmin user to authenticate
- shutdown the cluster
- Login to node 1 as ecaadmin over ssh
- run the command "ecactl cluster down"
- wait for the cluster to shutdown
- Update EyeglassAdminSR service account with an additional permission or verify the service account has the correct permissions. Verify all permissions listed here have been applied by running the command isi auth roles view EyeglassAdminSR . The networking previlege is now required.
- Modify the install file copied to the cluster node 1
- Assuming the file was copied to default location in /home/ecaadmin
- cd /home/ecaadmin
- chmod 777 <name of install file here>
- Run the installer
- ./name of install file here
- when prompted enter the ecaadmin password
- wait for all nodes to be upgraded to the new version
- Start the cluster
- ecactl cluster up
- wait until all nodes are started
- done.