Splunk SOAR On Premise Alarm Integration with Zero Trusts Alarms
- Overview of Splunk On premise SOAR Solution
- Support Statement
- Limitations
- Solution Overview
- Features
- What is Splunk SOAR?
- Solution Configuration in Splunk Enterprise and Defender Zero Trust
- Prerequisites
- Configuration in Splunk SOAR
- Configure Data Security Edition Integration
- Configure Data Security Edition Zero Trust Webhooks
- How to test the Integration with Splunk SOAR
- Example Splunk SOAR Container and Artifact events
Overview of Splunk On premise SOAR Solution
- Splunk Phantom, renamed to Splunk SOAR, is a security orchestration, automation, and response (SOAR) solution. Security automation involves machine-based execution of security actions to detect, investigate and remediate threats programmatically. Customers can now leverage the full automation capabilities of a SOAR with Superna Zero Trust API's.
Support Statement
-
NOTE: This documentation is provided "as is" without support for 3rd party software. The level of support for this integration guide is best effort without any SLA on response time. No 3rd party product support can be provided by Superna directly. 3rd party components require support contracts
Limitations
Solution Overview
Superna Security Edition Zero Trust API is the cornerstone technology used to integrate with SIEM, SOAR and XDR platforms. Automation begins with data that summarizes the threat and places that information into a security tools to be acted on by Secops and run playbooks to protect corporate IT assets from vulnerabilities and insider or external attackers. The Splunk Soar platform can act on container events and artifacts that provide details on the incident with all relevant data provided to act on with playbooks and automation cross domain.
Features
- An Event will be created with artifacts on the first event with fields mapped,
- Updates to that event in Data Security Edition will append notes to notes field of event based on matching the alarm ID in DSE to the event created in Splunk SOAR.
What is Splunk SOAR?
Splunk SOAR is a data-centric, modern security information and event management (SIEM) solution that delivers data-driven insights for full-breadth visibility into your security posture so you can protect your business and mitigate risk at scale.
Solution Configuration in Splunk Enterprise and Defender Zero Trust
Prerequisites
- Installed Security Edition
- Installed Splunk SOAR On Premise
- Eyeglass OS appliance version 15.5
- cat /etc/os-release
Configuration in Splunk SOAR
- Information Needed to complete the Configuration
- automation user token
- endpoint url of the REST data source application to receive the webhook data
- Firewall ports to allow the Eyeglass VM to reach the Splunk Soar endpoint over https port 443
- Login to Splunk SOAR application as administrator
- Get the Automation user authentication token
- Under the administration menu locate the User management
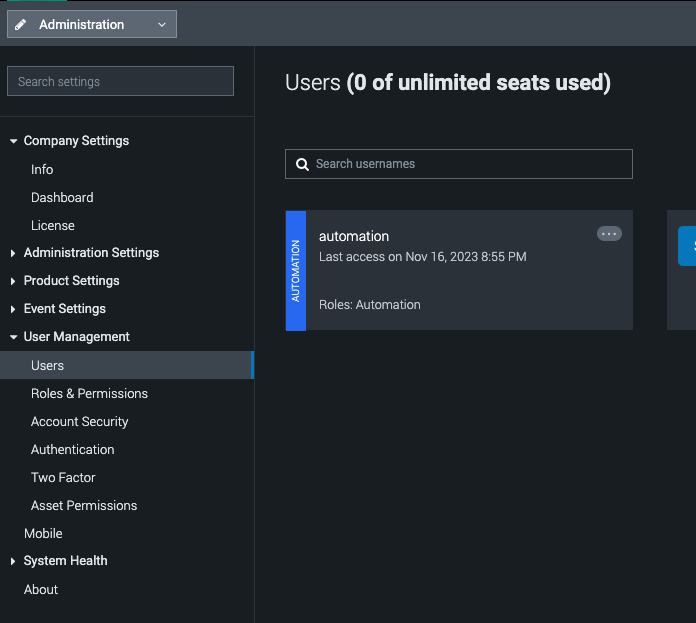
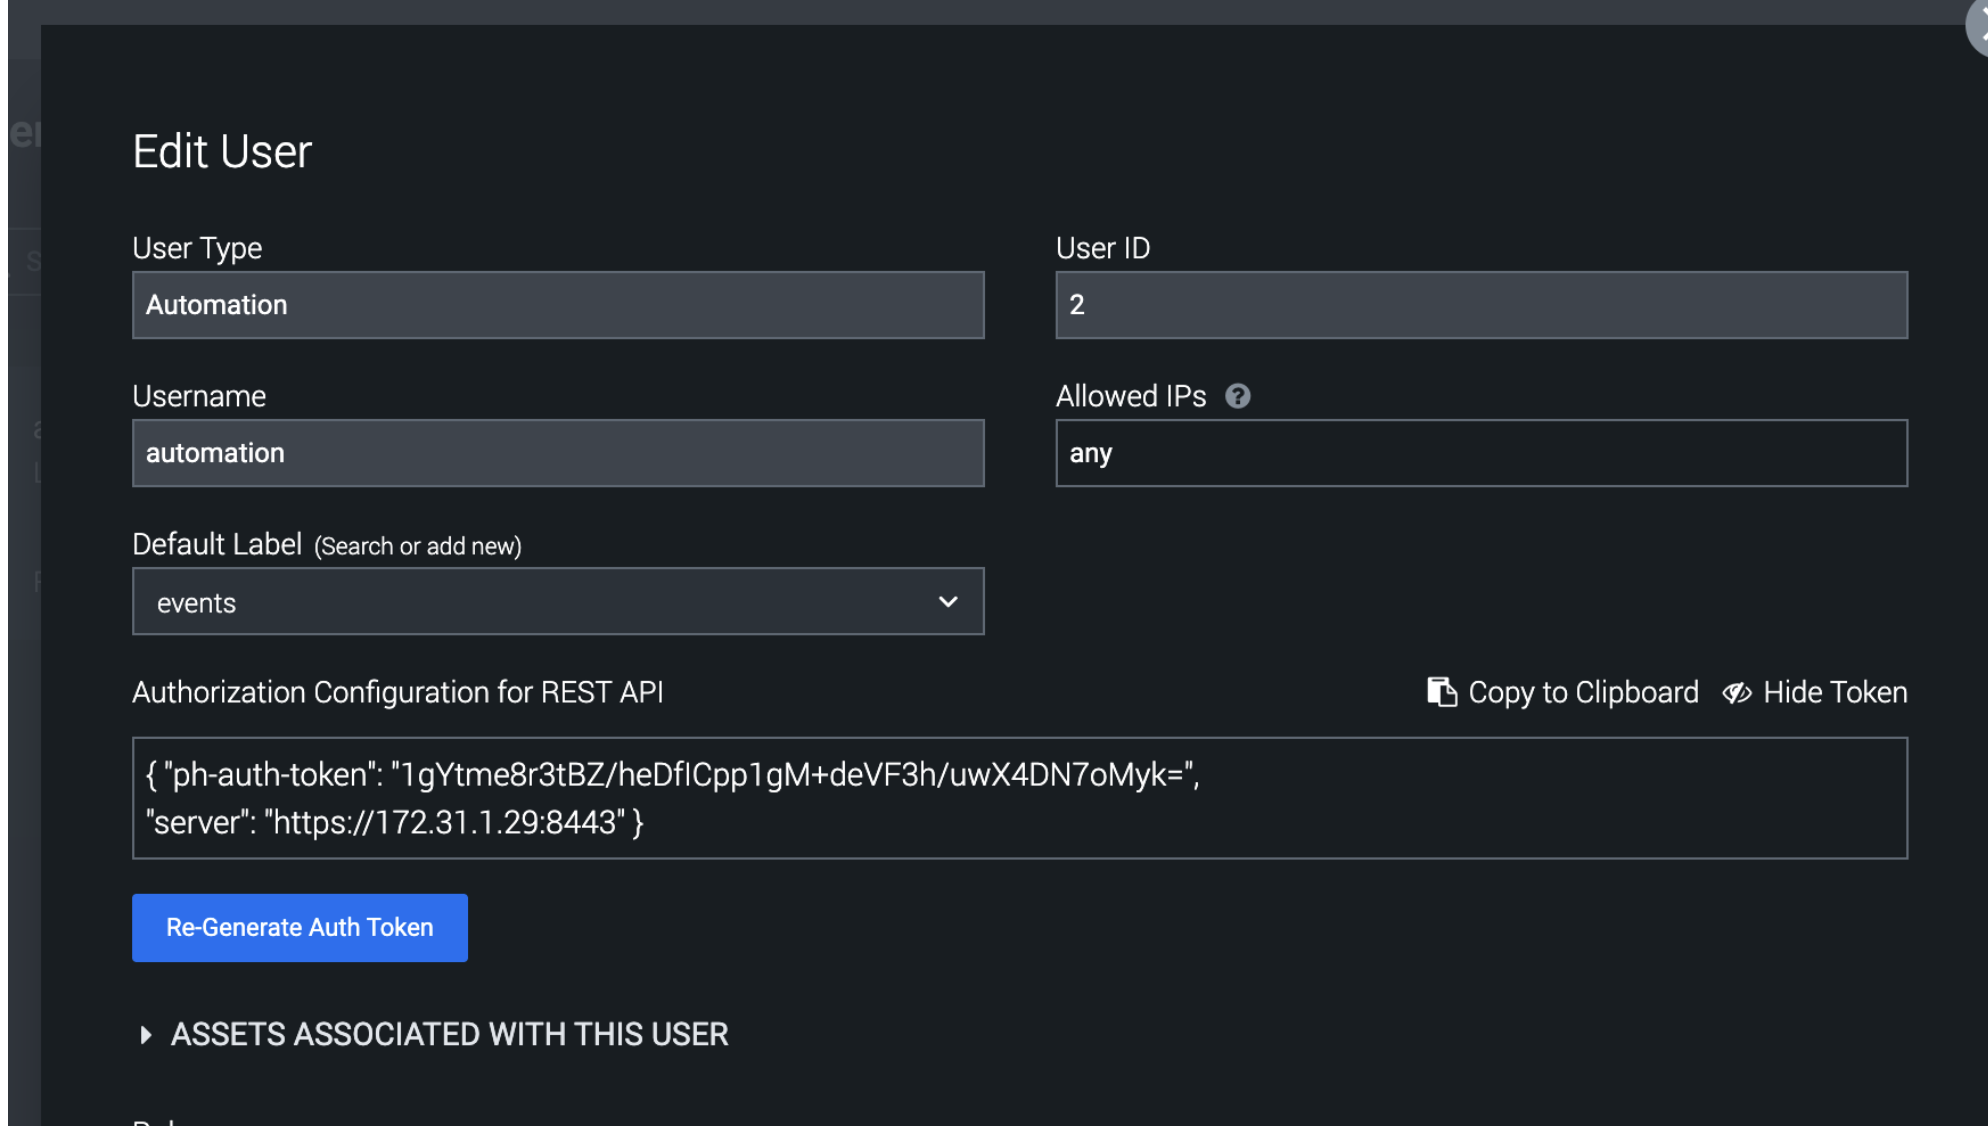
- Edit the automation user
- Click the show token button and record the token to be used later in the configuration.
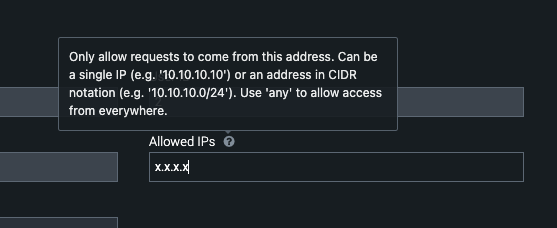
- The Allowed IP's field needs to list the subnet or ip address of the Eyeglass VM to allow webhook data to authenticate using the API token. Type CIDR or any for allowing any ip to issue api calls.
- click show token and record
- Done
Configure Data Security Edition Integration
High Level steps
- Create python location to run the application on the Eyeglass vm
- Create python main application script
- Create linux systemd service and set to auto start
- Create Zero Trust configuration in Defender
- Update the main script to customize with splunksoar python code
- Test the script is running as a service
- Create a test event in Defender to validate the alerts appear as indexed parsed events in splunksoar
Configuration Step by Step
- Login to the eyeglass VM as admin user
- Follow the steps below
Configure the Service start and python integration files
Configure the python packages and customize the splunksoar integration python code
- Customize the application code by downloading the python code from this link to download (right click download as)
- Open the python template file in a text editor. NOTE: make sure to only replace the yellow values (endpoint url for http ingestion of your splunksoar instance, the api token)
- Locate this section in the file, replace yellow highlights. Change the port if different from below. Comment out ECS endpoint and uncomment Splunk HEC if using HEC format and set the hec_format = True to enable HEC format.
- # === splunksoar Configuration ===PHANTOM_SERVER = "https://y.y.y.y:8443"PH_AUTH_TOKEN = "xxxxxxxx"VERIFY_SSL = FalsePHANTOM_LABEL = "events"
- Paste the updated script into the production file
- nano /opt/superna/cgi-bin/splunksoar.py
- Open the file locally in Windows OS notepad and use control-A or select all the text.
- Paste the clipboard into the ssh terminal session with the open nano editor file
- save the file
- press control+x
- Answer yes to save and exit the nano editor
- Start the service and verify it is running
- systemctl start splunksoar
- systemctl status -l splunksoar
- Verify the service is started successfully and returns "active and running".
- If the service does not start do not proceed and double check the steps above are completed.
Configure Data Security Edition Zero Trust Webhooks
- The next step creates an Zero Trust Webhook URL.
- Configure Zero Trust endpoint in Ransomware Defender Zero Trust tab.
- Recommended Configuration: Only Critical and Major events and only the webhooks that set lockout or delayed lockout. Customers can customize based on specific requirements. The goal is to send findings versus a list of alarms that do not pinpoint a security incident.
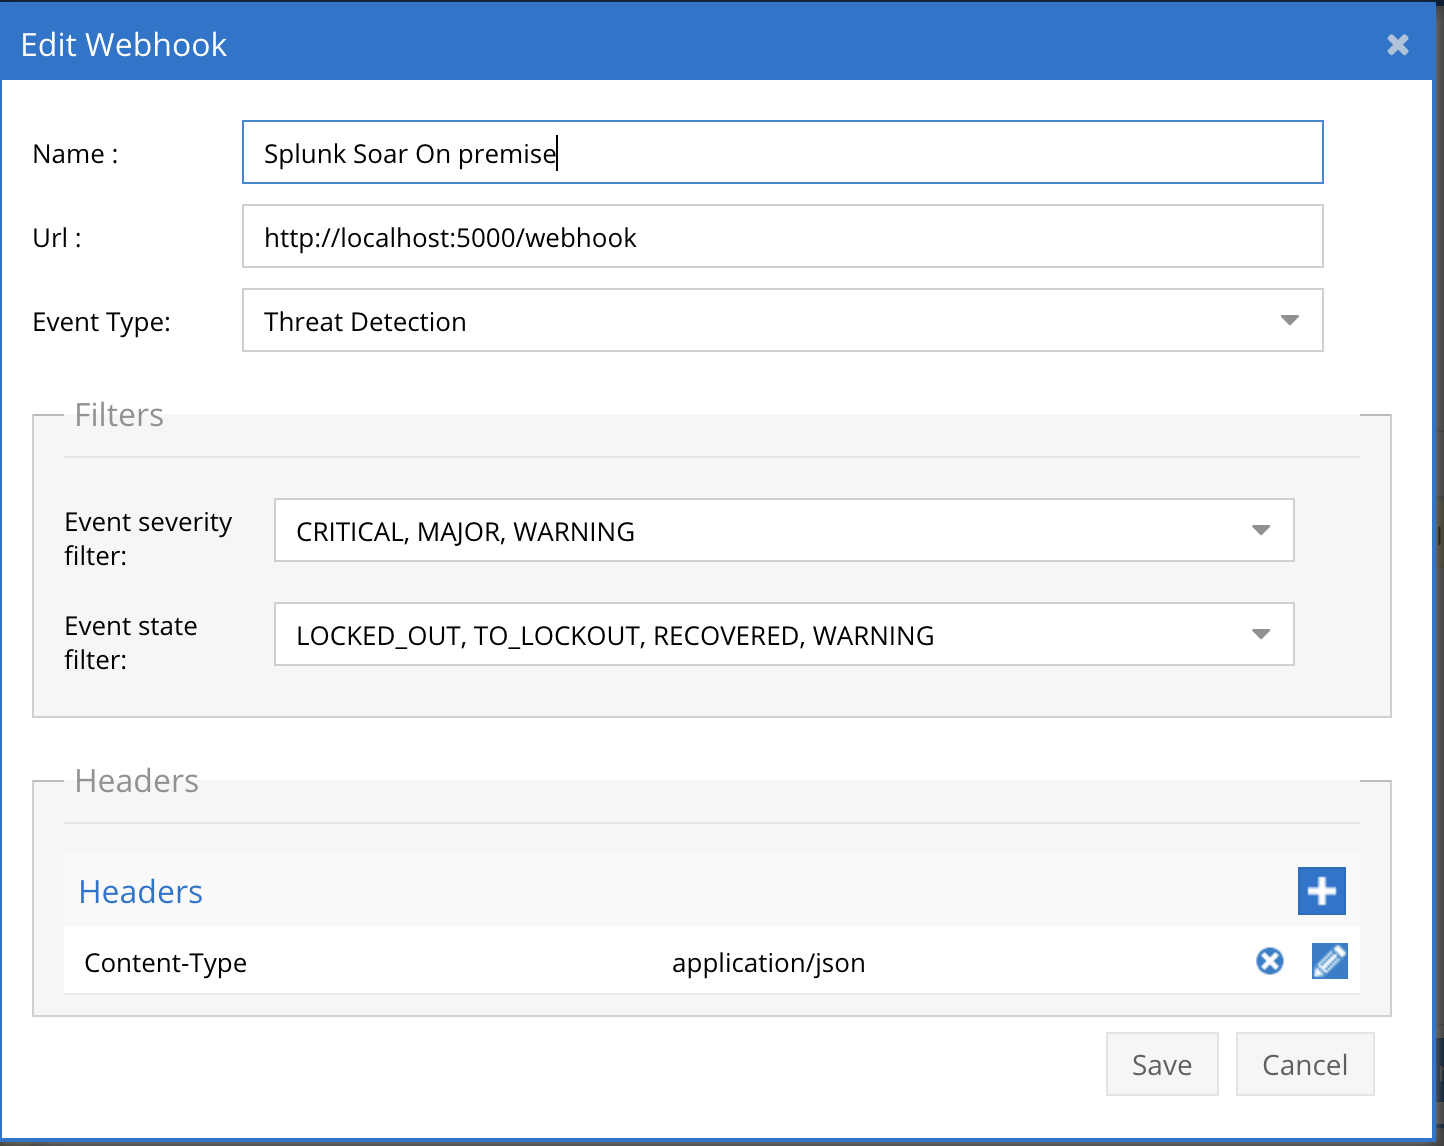
- The endpoint url above will use localhost and will send Webhooks to the application service listening on port 5000. URL to use in the configuration
- Add the name Splunk SOAR
- paste the REST Data Handler endpoint URL into the URL field
- Add the Content-Type header with value of application/json as shown above to complete the webhook configuration.
- Add the custom header ph-auth-token and the automation token captured in the steps above for the value field.
- Click save
- Click save on the main Webhook configuration page
- Configure Zero Trust endpoint in Ransomware Defender Zero Trust tab.
- Test the configuration is working following the next section
How to test the Integration with Splunk SOAR
- To test the integration follow these steps
- download this curl command template and open with a text editor
- locate the very end of the curl command and edit the url and replace the section below with the endpoint recorded above.
- "https://172.31.1.246/rest/handler/restdatasource_95e3bcff-bfca-454d-b59e-768da6280c38/supernazt"
- Save the file
- locate the very end of the curl command and edit the url and replace the section below with the endpoint recorded above.
- Paste the entire cli command to the ssh prompt to send sample data to the running Zero Trust application. This will send test data directly to the application to be processed and sent to Splunk SOAR.
- Copy the curl command to the ssh prompt
- a return code will be returned if it reached the endpoint
- Ssh to the Splunk SOAR appliance and tail the log below to verify that API messages are reaching the endpoint correctly.
- tail -f /opt/<installdir>/var/log/phantom/app_interface.log
- NOTE: Once the CLI command successfully creates a container event message in the dashboard on Splunk SOAR you cannot run the script again without editing the ID value and incrementing the number. Containers are unique with ID's set by the incoming data and will be automatically discarded as duplicate if the same ID is used.
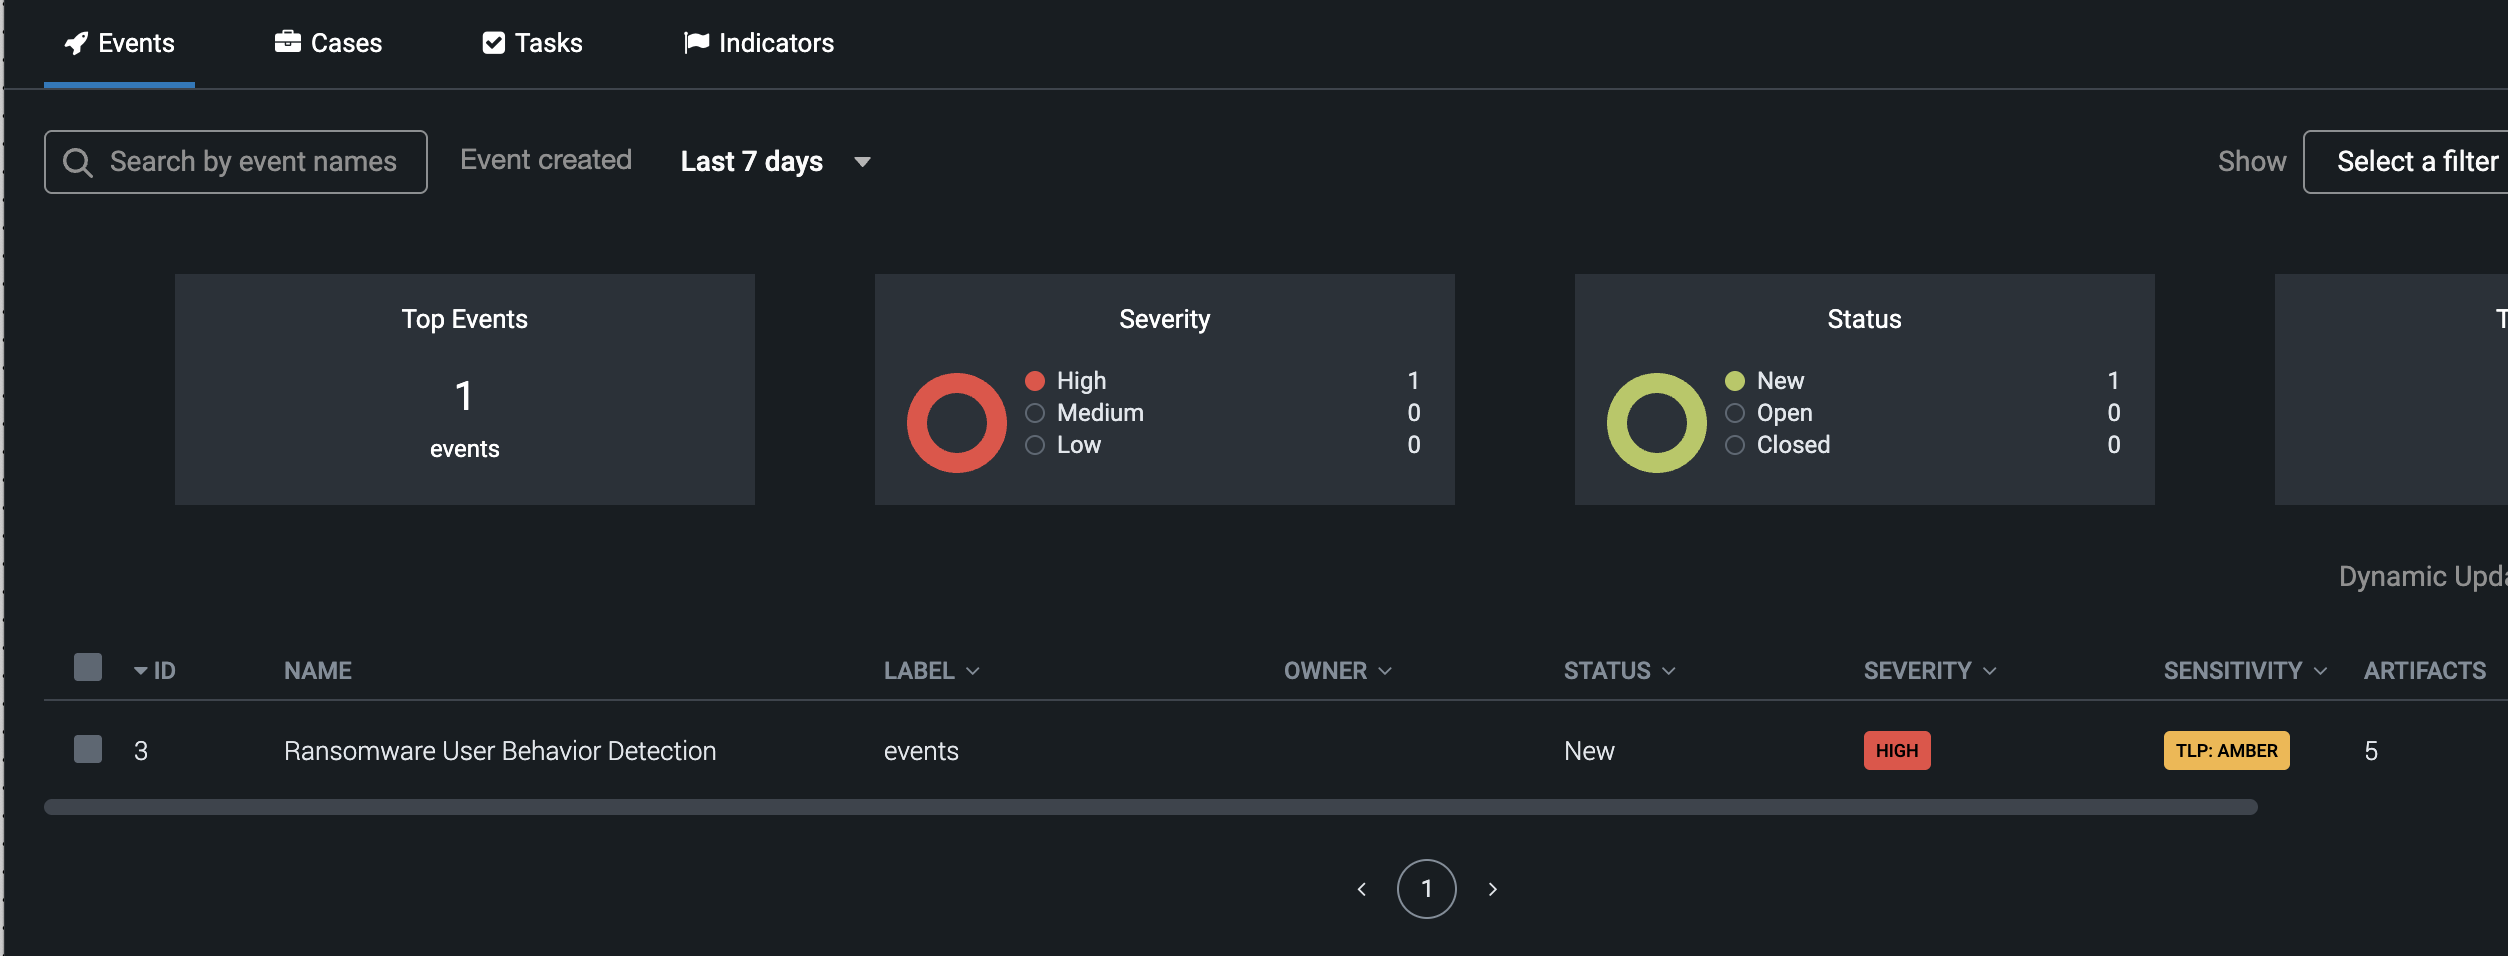
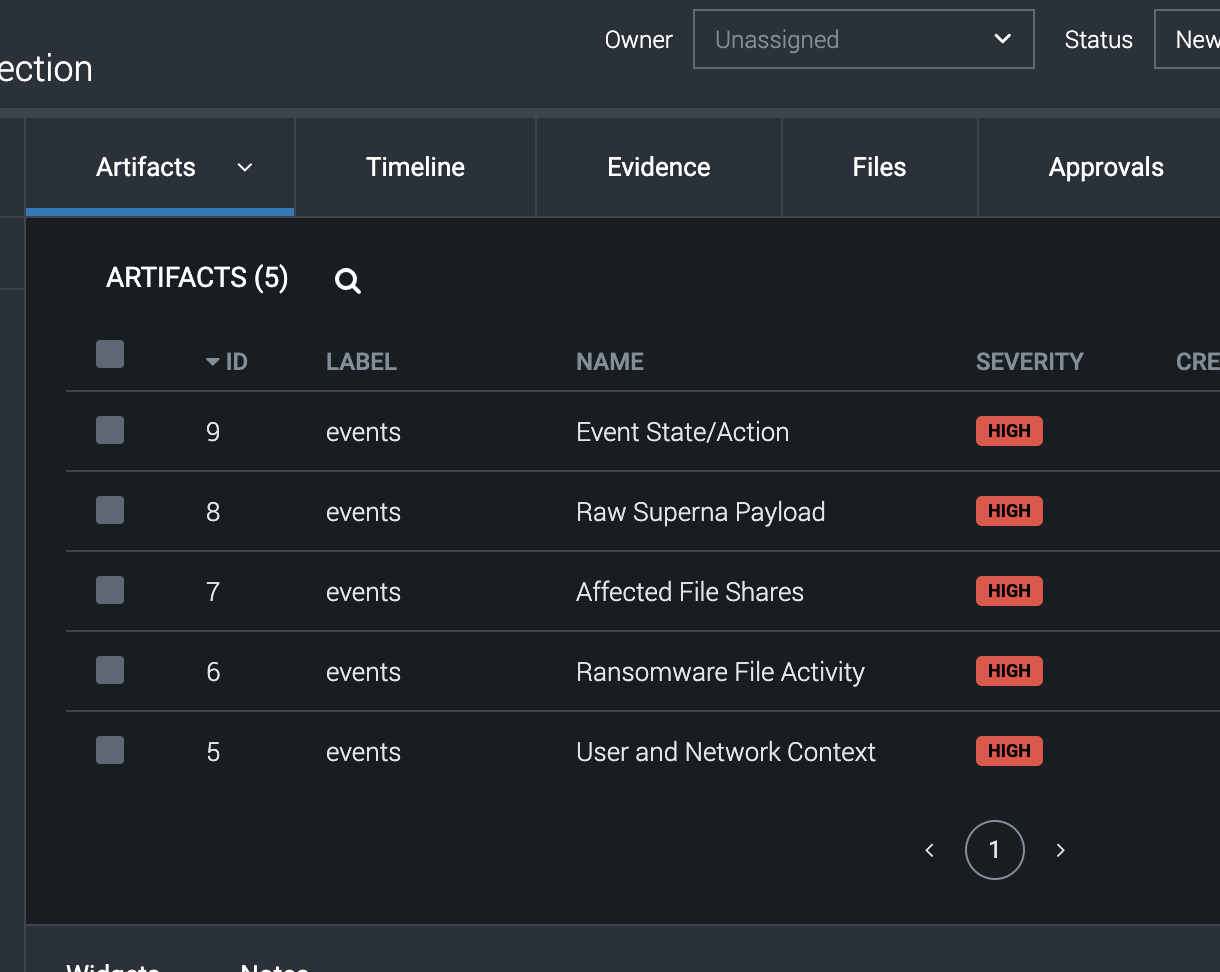
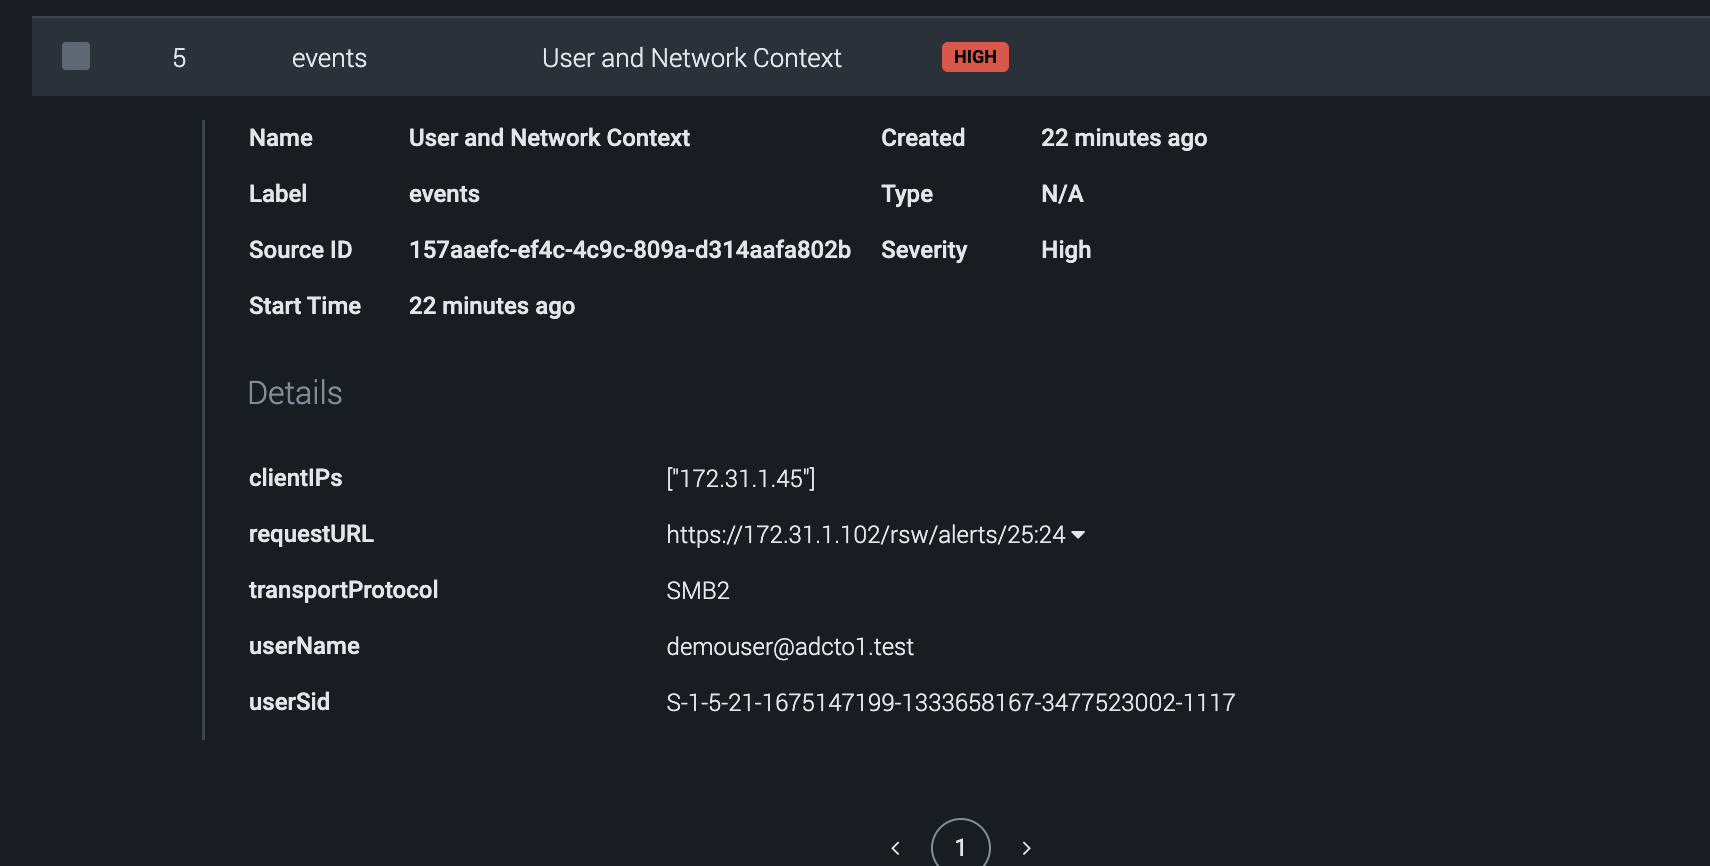
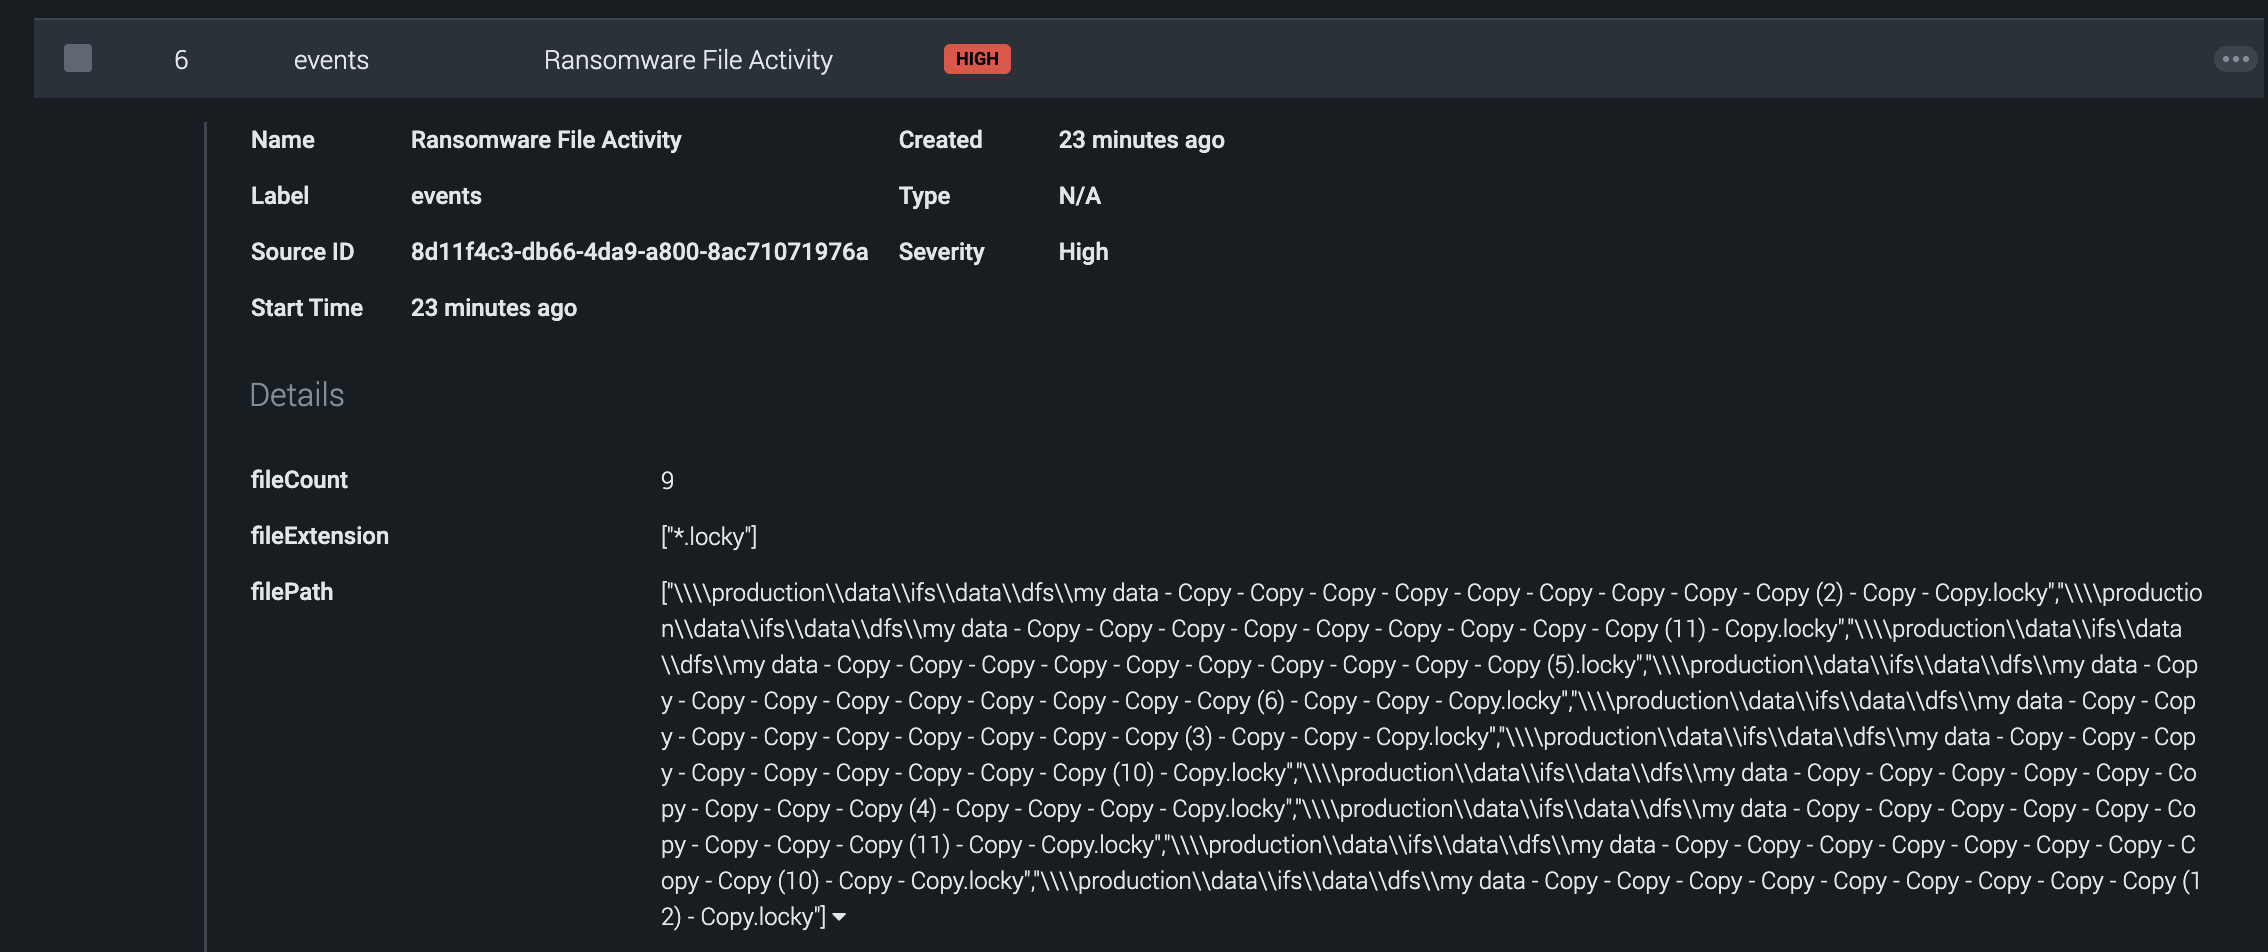
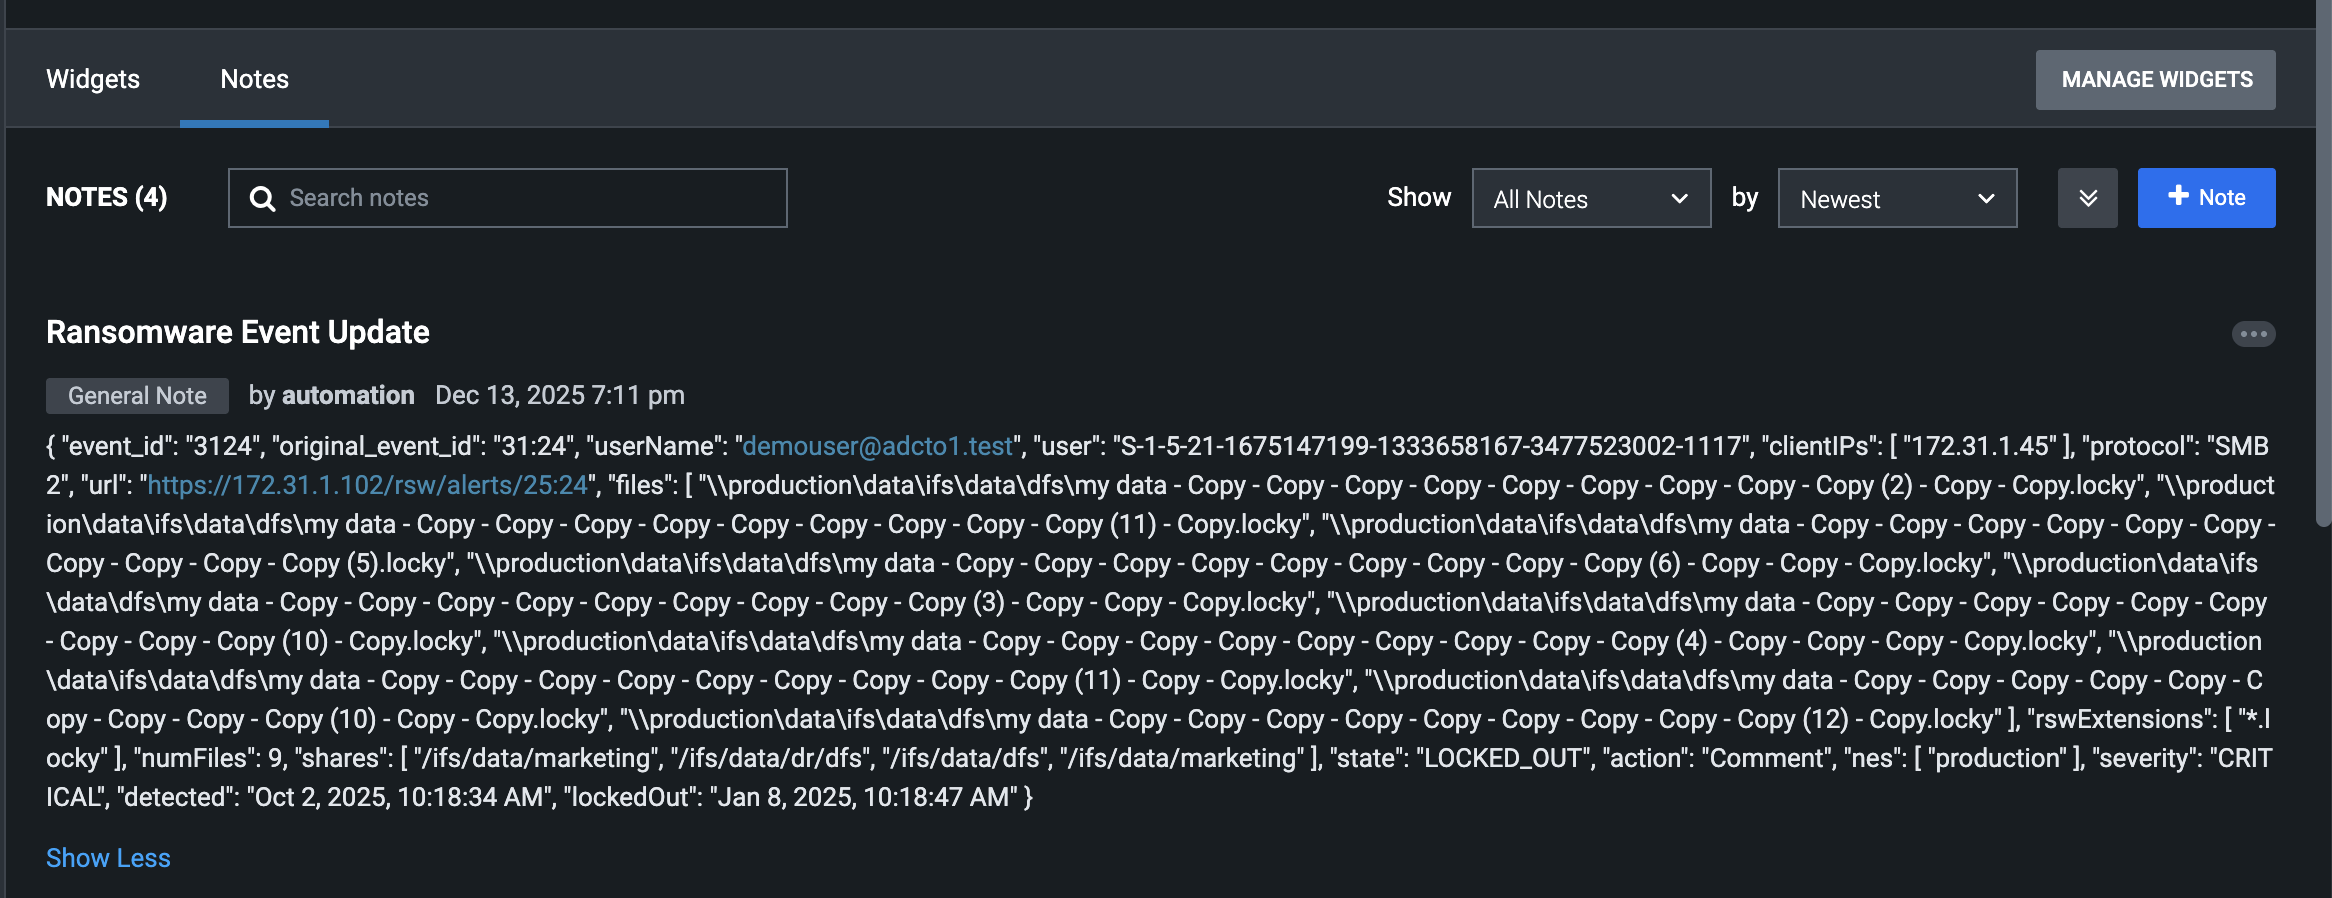
Example Splunk SOAR Container and Artifact events
- Once configured and tested successfully the integration will create containers with artifacts attached.
- Splunk SOAR container is a security event ingested from a third-party source. All containers are assigned labels, which enable Splunk to group related containers. Artifacts are objects that are associated with a container and serve as corroboration or evidence related to the container.
- Example container event