Palo Alto Networks Cortex XSOAR Zero Trust Alarm Integration
- Ransomware Defender & Easy Auditor Cortex XSOAR Webhook alarm Integration
- Overview
- Support Statement
- Solution Overview
- Solution Configuration in Cortex xSoar and Defender Zero Trust
- Testing the Webhook and Viewing Enhanced Data from Zero Trust within Cortex xSoar
- Addition Example playbooks Using Zero Trust Data
Ransomware Defender & Easy Auditor Cortex XSOAR Webhook alarm Integration
Overview
SecOps Automation is a key requirement to combat the never ending threats to corporate data. Palo Alto Cortex SOAR (Security orchestration, automation and response) platform enables playbooks and automation to reduce the time to detect, respond to cross device threats. To support this type of automation, data from external security tools is vital in order to provide complete accurate and concise threat detection and details to allow automation to and SecOps teams the ability to respond to threats across the corporate IT infrastructure.
Support Statement
- NOTE: This documentation is provided "as is" without support for 3rd party software. The level of support for this integration guide is best effort without any SLA on response time. No 3rd party product support can be provided by Superna directly. 3rd party components require support contracts
Solution Overview
Superna Defender Zero Trust API is the cornerstone technology used to integrate with SIEM, SOAR and XDR platforms. Automation begins with data that summarizes the threat and places that information into a SOAR to be acted on by Secops and run playbooks to protect corporate IT assets from vulnerabilities and insider or external attackers. In order to allow a SOAR to act on the data from an external tool it is vital to field map data from one alert to the schema used within the SOAR. This guide will cover basic field mapping used to push Zero Trust Ransomware Defender alerts into xSOAR
Solution Configuration in Cortex xSoar and Defender Zero Trust
Prerequisites
- Installed Ransomware Defender and or Easy Auditor
- License key for the Zero Trust API
Configuration Steps
- The first step is to configure the Generic Webhook Content pak from the marketplace in the xSOAR GUI.
- The steps used in this blog post provide all the needed steps to follow.
- Pushing Events to XSOAR with Generic Webhooks
- While following this guide see examples of how this was configured
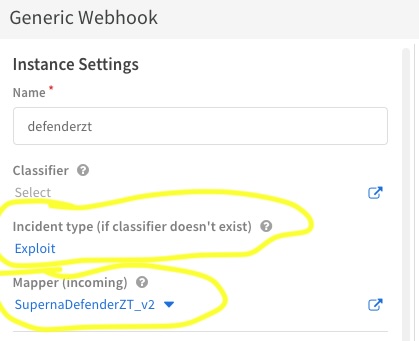
- Create the instance of the webhook using these values
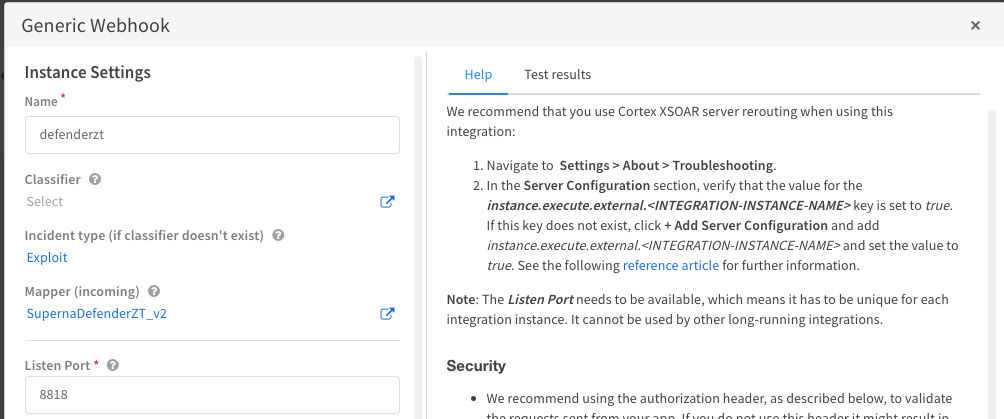
- Ensure this is checked

- NOTE: The mapper (incoming) will be blank when you first create the instance. We will edit the instance later in the guide.
- The completed instance definition

- The next step creates an Incident Mapping (incoming). Before you can complete that step a sample of the Zero Trust alert payload needs to be sent into xSOAR to complete the mapping of Defender Zero trust schema to the incident schema used on xSOAR.
- Configure Zero Trust endpoint in Ransomware Defender Zero Trust tab.
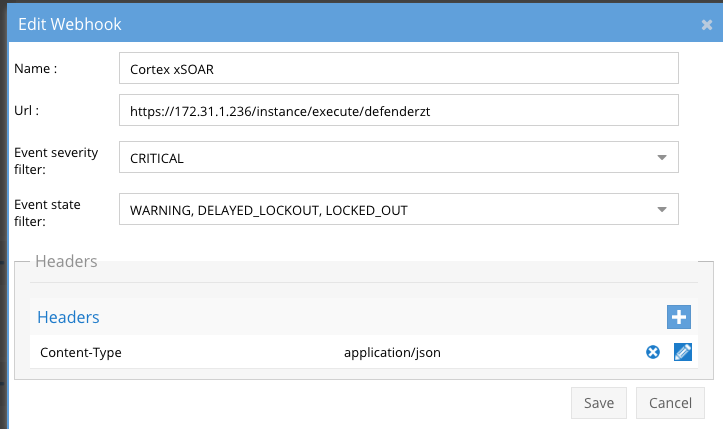
- The endpoint url above will be the IP address of the SOAR VM and the name of the Webhook instance created in the step above. The end of the URL is the name of the instance. example https://x.x.x.x/instance/execute/defenderzt
- Add the Content-Type header with value of application/json as shown above to complete the webhook configuration.
- Click save to commit the configuration.
- Test communications to xSOAR
- Press the Test Webhooks button to send a sample payload. The response code should return successfully.
- If a failed response is returned check: firewall ports are open 443 from Eyeglass to the xSOAR VM, verify that the enable https for webhook configuration was applied to the generic webhook instance based on the blog article link above.
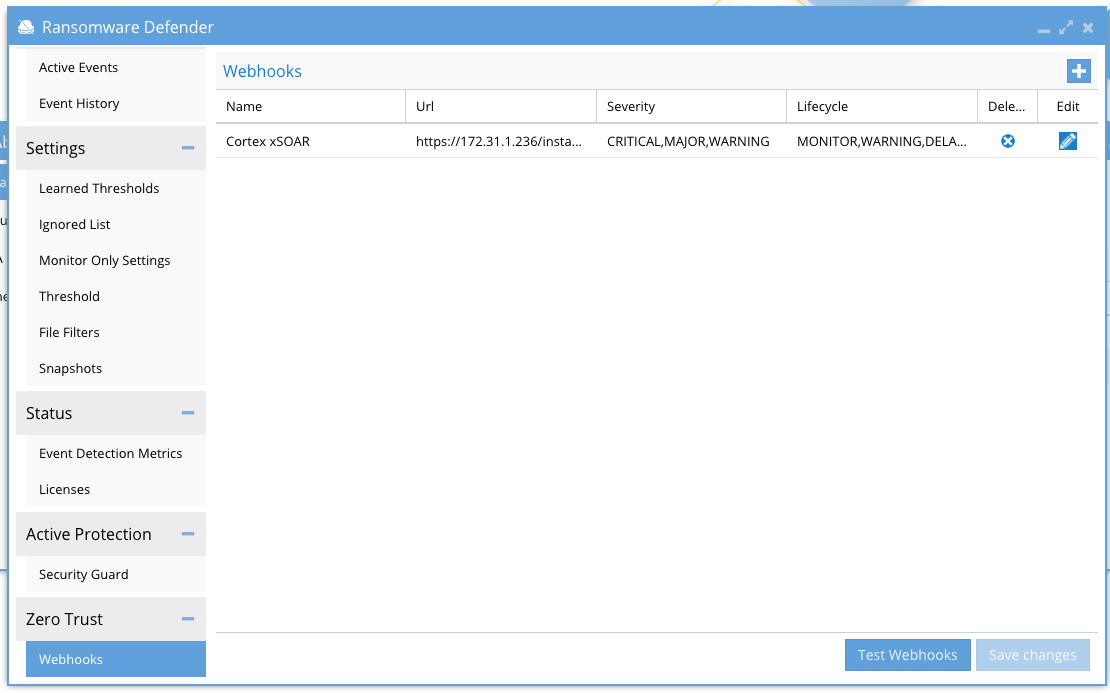
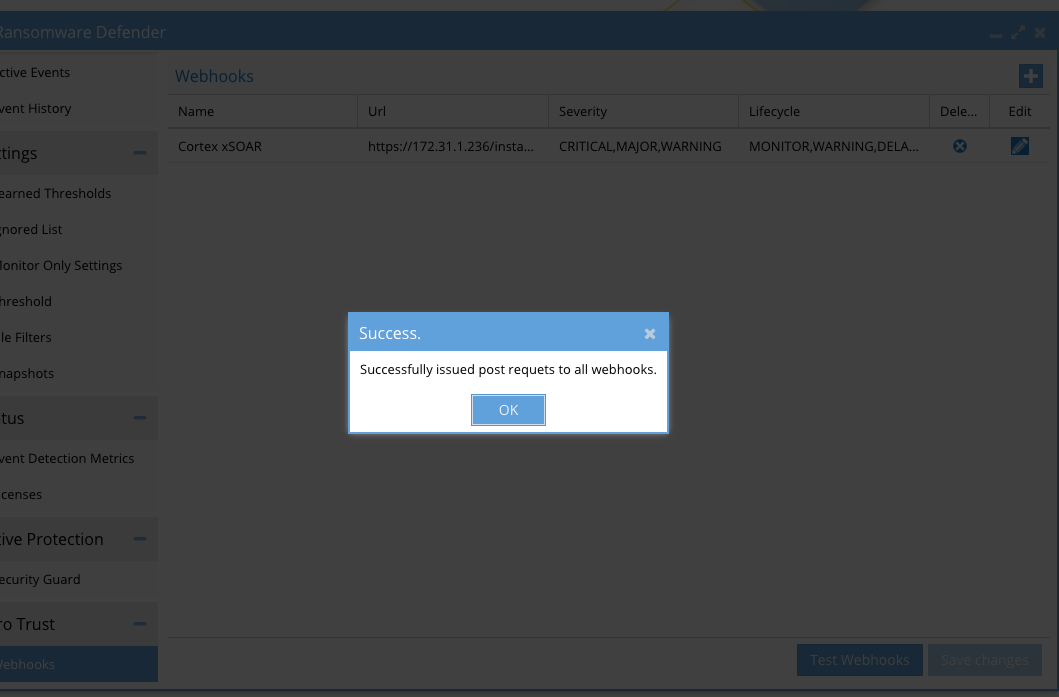
- You should see a generic webhook incident in the main dashboard within xSOAR after a successful test is completed. This incident can be deleted and will not be used for the mapping steps. The mapping step needs the full payload of a lockout event to correctly create the mapping from Zero Trust schema to the xSOAR schema.
- Only once the test is successful continue on to the next steps.
- Press the Test Webhooks button to send a sample payload. The response code should return successfully.
- Recommendation:
- send only Critical events
- send only the event states that should be considered by SecOps for investigation. See the screenshot for recommended even states.
- Configure Zero Trust endpoint in Ransomware Defender Zero Trust tab.
- Send Test Defender lockout event to xSOAR to complete field mapping steps.
- NOTE: Security Guard feature cannot be used since it does not send webhooks as this would flood the security tool, creating test incidents.
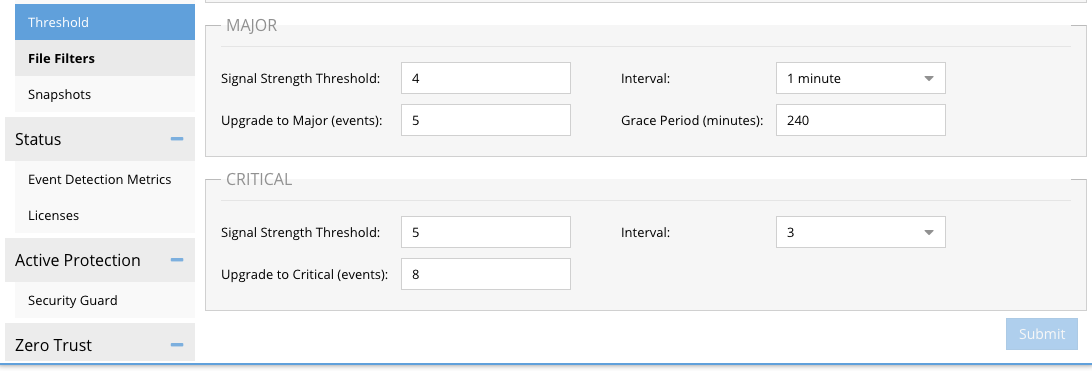
- Using a test AD or local user on the NAS cluster create files with any of the banned file extensions in Defender example files saved with the extension .locky will create an event in Ransomware defender but the number of files must exceed the critical threshold defined, see screenshot below (example only, do not change settings to match below)
- You will need to verify the threshold of files needed to create a lockout condition using the critical threshold value on the settings tab of Defender. The number of files created must exceed the critical threshold.
- Create the lockout event in Defender and once it has been created, login to the xSOAR console and verify a new incident has been created.
- How to create the Incident Mapping (incoming) that will be used to update the Generic Webhook instance settings and map incoming Defender alerts into Incident Type Exploit. Other incident types can be used.
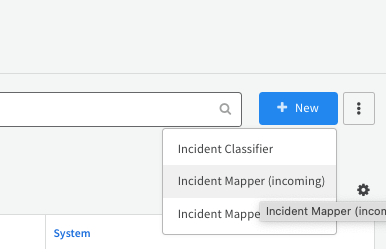
- Select the Get Data from Instance option and select the Instance name created in the steps above example defenderzt. You should see the json payload from the defender incidents on the right hand side of the screen. The toggle arrows allow selecting an incident with state critical that contains all needed fields to create

- To add all the required mappings, start by pushing the Auto Map button that will create common mappings found in both schemas.
- To add remaining field mappings.
- In the search box with Show All selected type each of these field names below and enter the matching Defender field name from the table below to map the fields.
Cortex xSoar Field Name
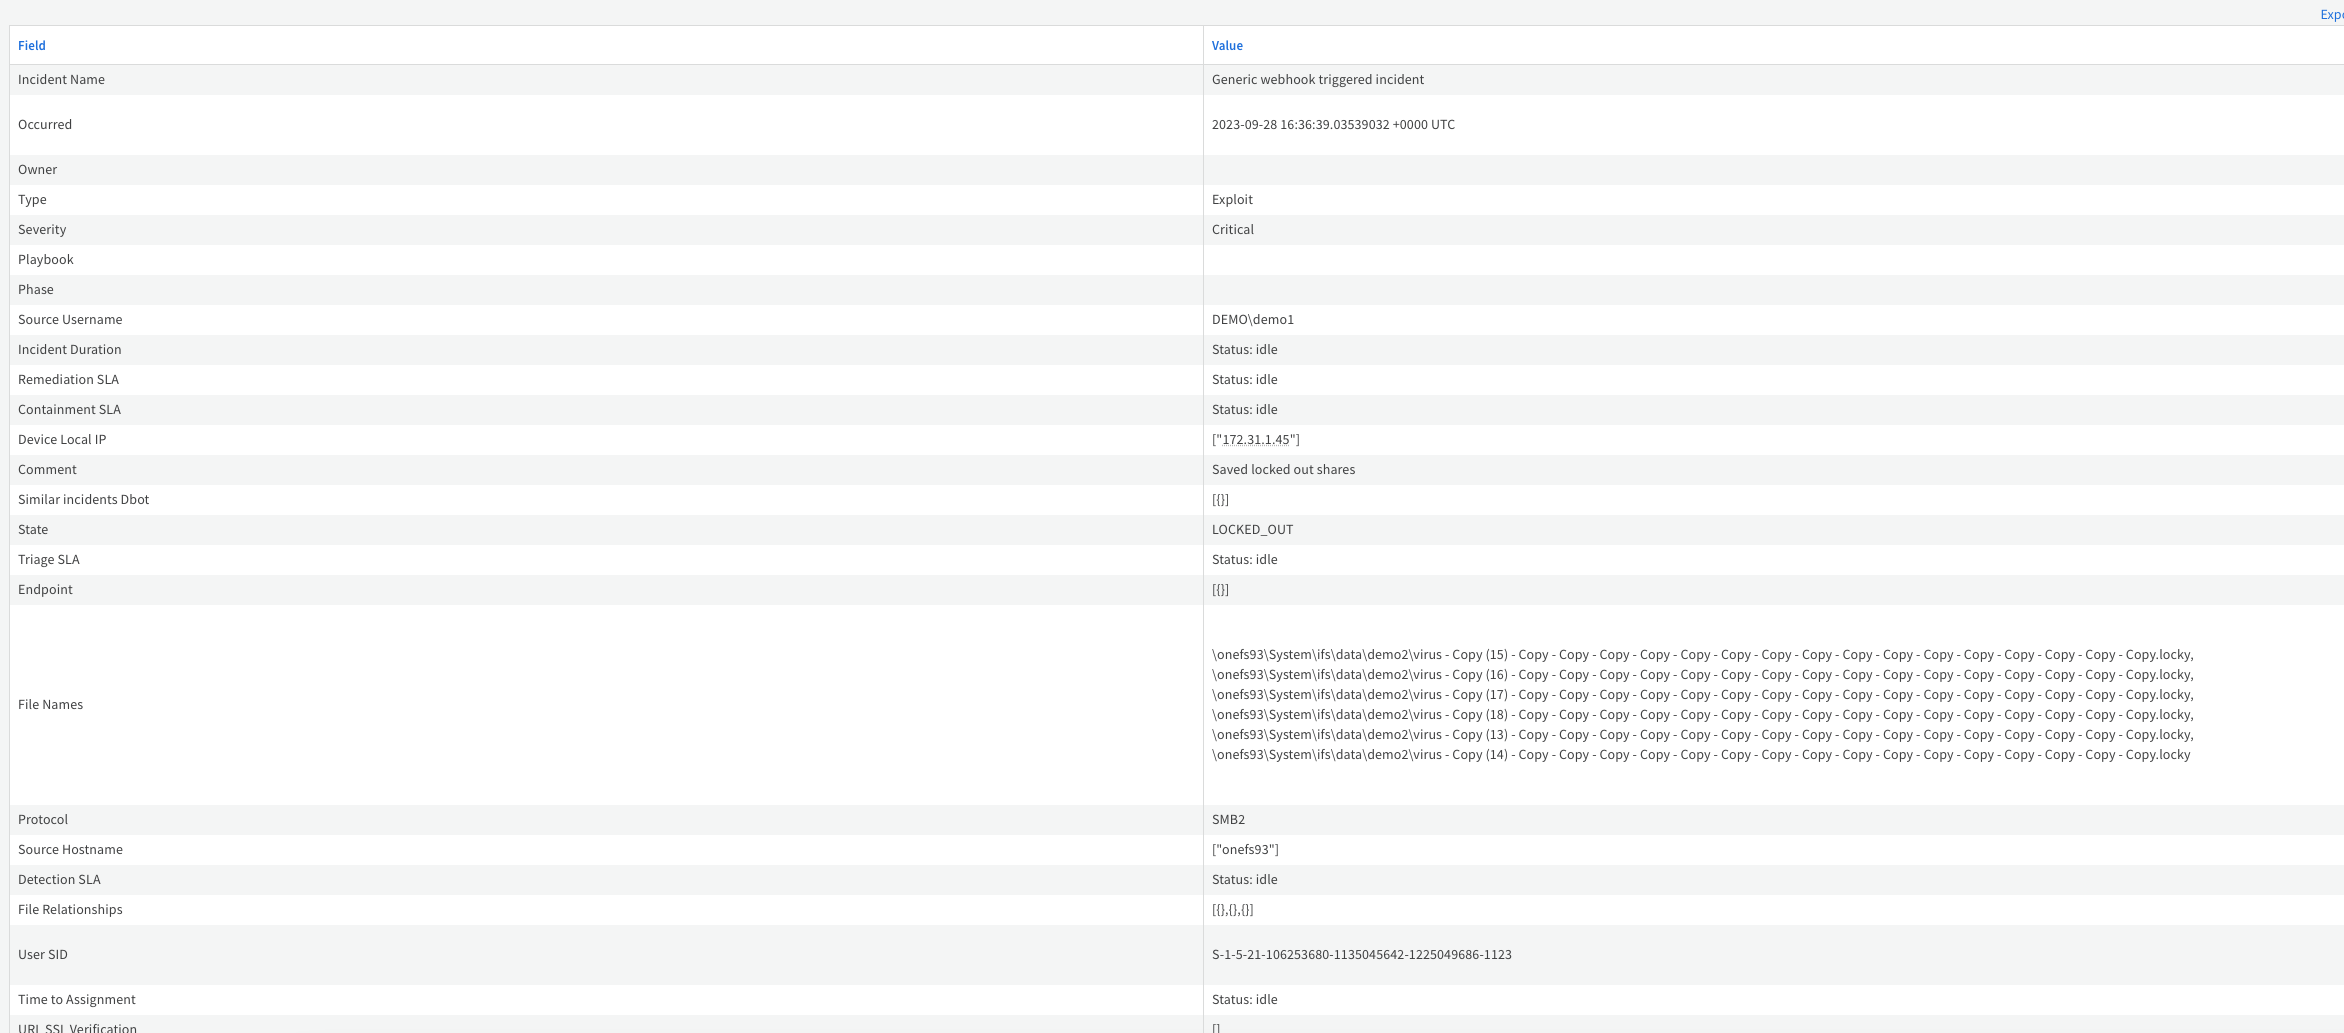
Superna Defender Field NameDevice Local IP clientIPs File Names files Protocol protocol Source Hostname nes Source username userName State state User SID user Severity severity - See the finished mapping example below to compare results. Once complete click save and name the mapping as SupernaDefenderZT
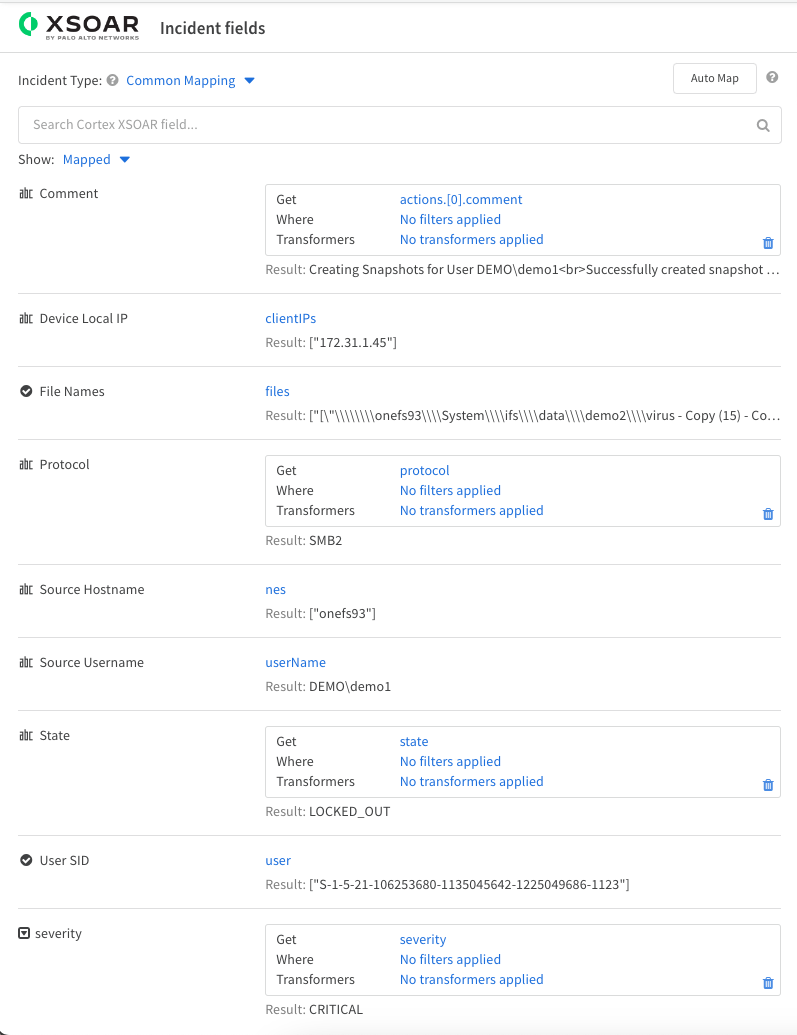
- Next Step, Update the Generic Webhook instance created above
- Select Exploit for the Incident
- NOTE: Other incident types can be used, we recommend using the Exploit Incident type since this is an active exploit security event playbook.
- Select the Mapping (Incoming) that was created above SupernaDefenderZT
- Click Save and Exit
- Select Exploit for the Incident
- Done.
Testing the Webhook and Viewing Enhanced Data from Zero Trust within Cortex xSoar
- The configuration is complete following the steps above. You can now test creation of a sample incident and build playbooks with the enhanced data mapped from Defender into the Exploit Incident Type.
- Create a new Security Incident in Ransomware Defender using the steps documented above.
- You should be able to view the new Incident and see that Incident Type is set to Exploit.
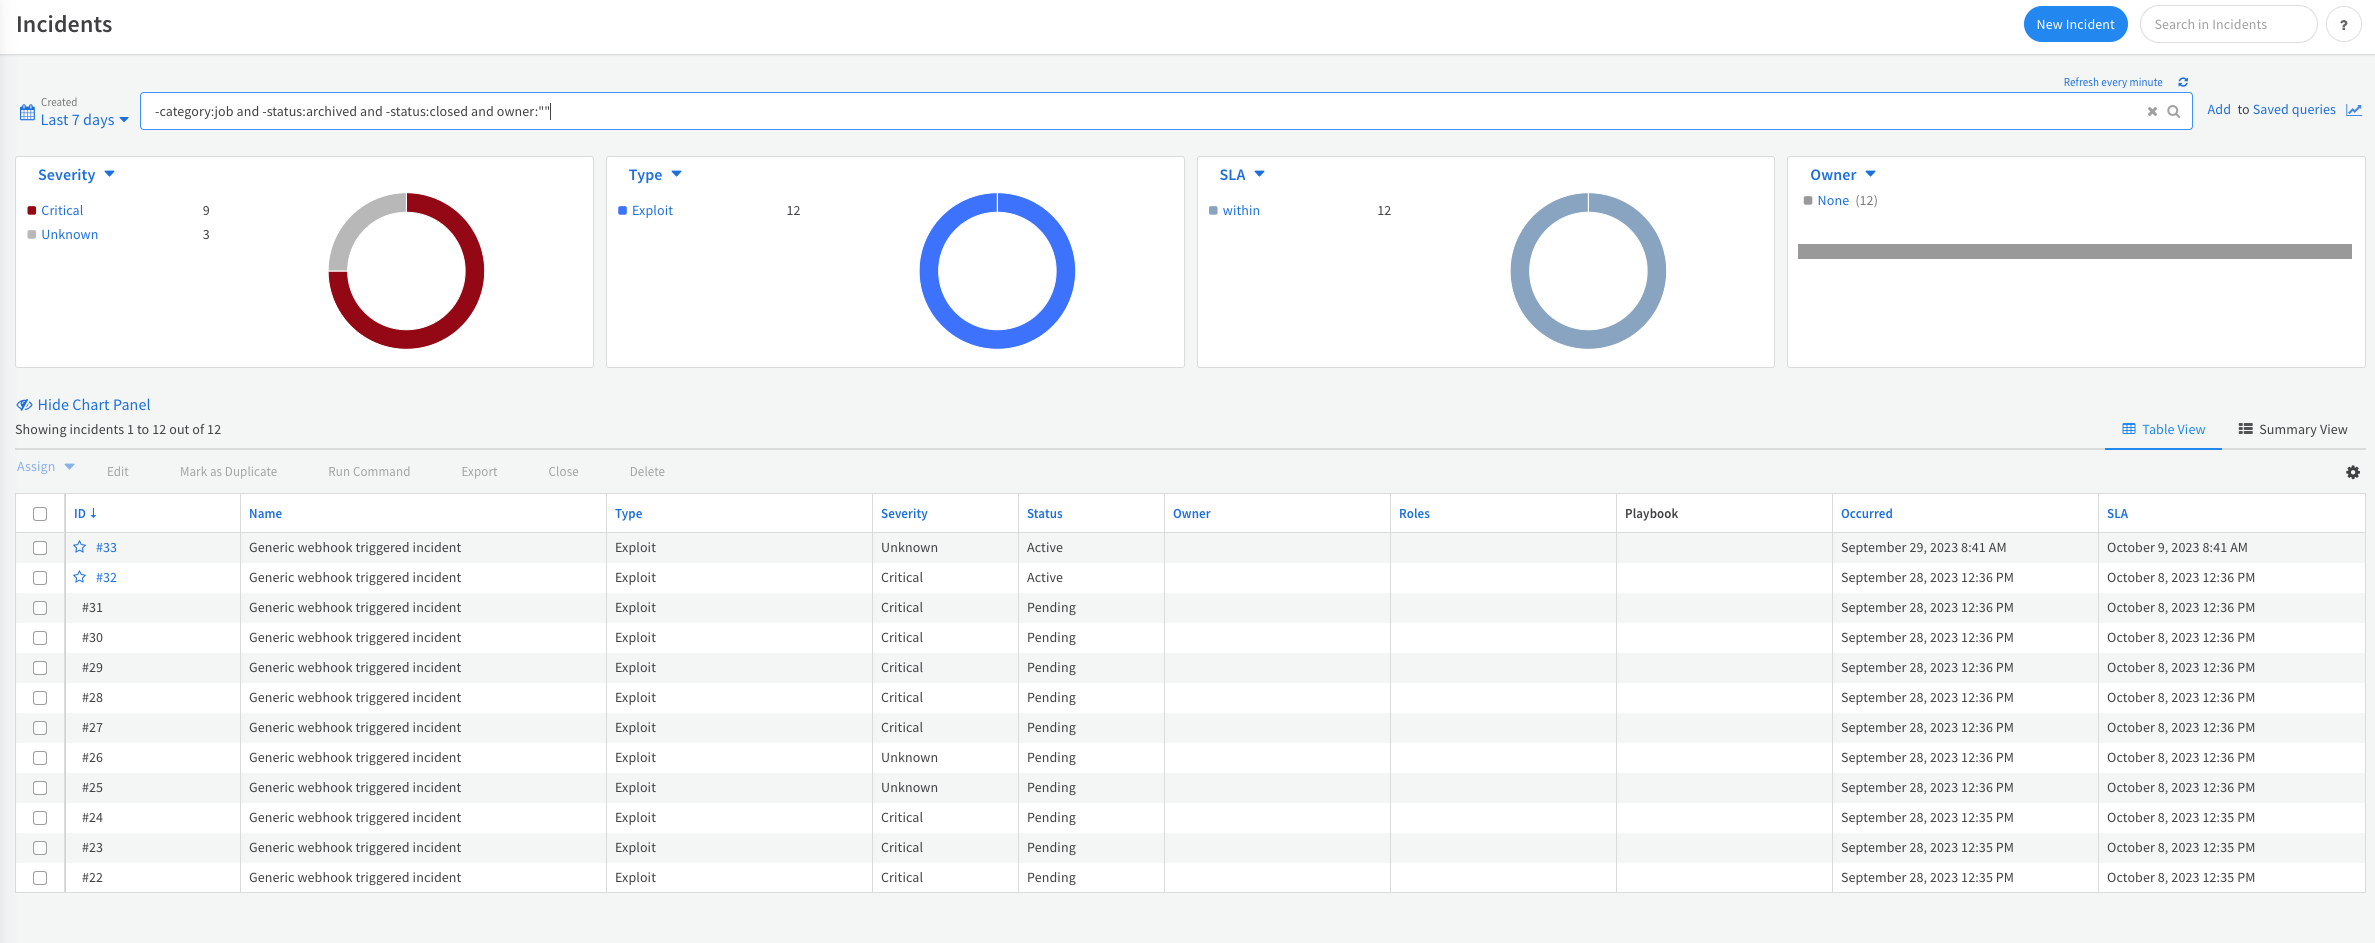
- Open an incident and view the mapped data on the War Room tab. This will assist in investigations and running play books.
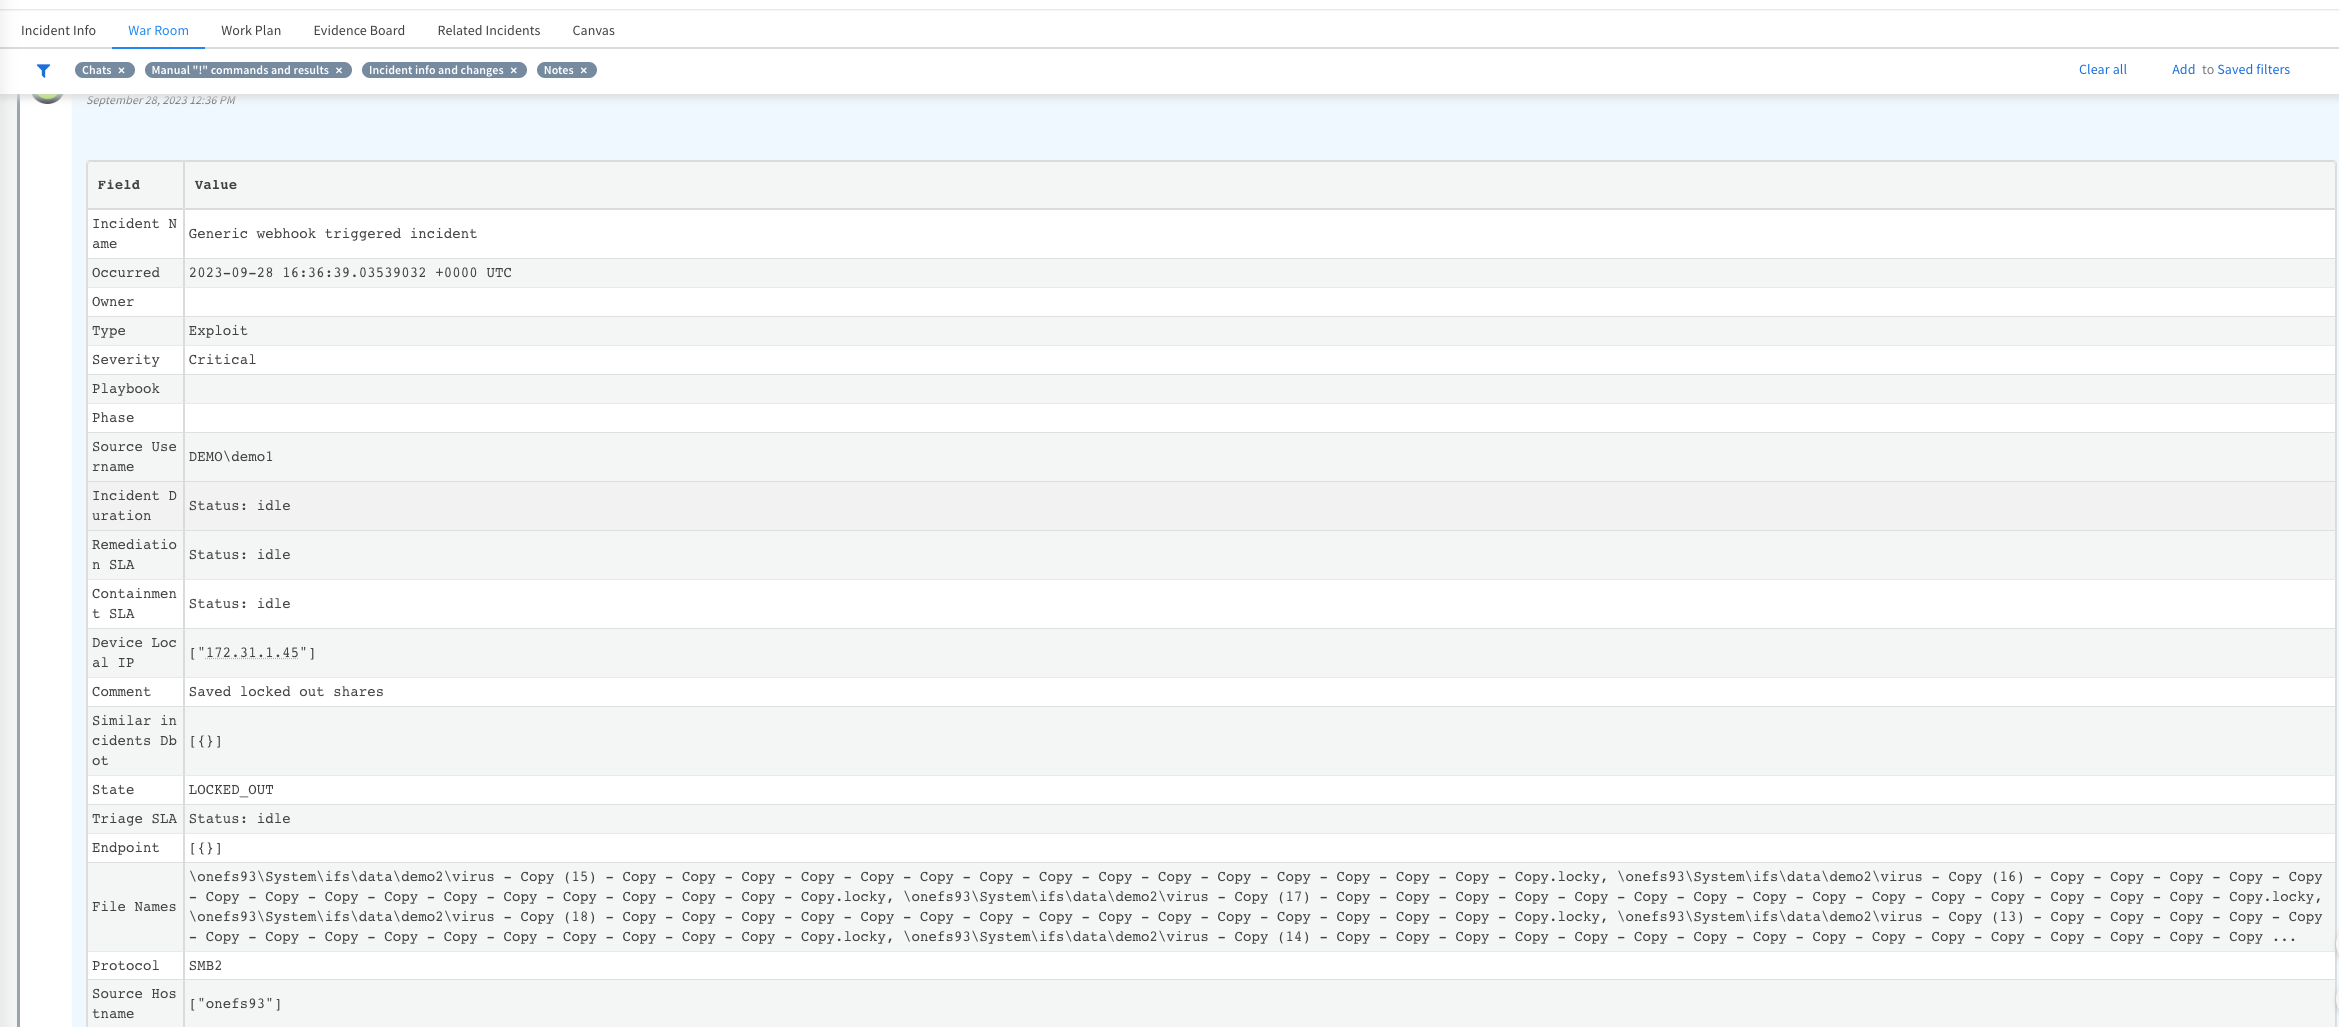
- You can also click full table view if you need to search through the mapped field data
- Additional triggers & play books can now use the enriched data.
Addition Example playbooks Using Zero Trust Data
- Playbooks
- Using the source client IP address launch a playbook to disable the Ethernet port for this host
- Using the user name launch a playbook to disable the Active Directory User account.
© Superna Inc
