CrowdStrike Next-Gen SIEM Zero Trust Log Ingestion and Alerting
- Overview
- Limitations
- Solution Overview
- Video Demo
- Advanced Zero Trust Capabilities
- Quick Start from Marketplace
- What is CrowdStrike Next-Gen SIEM?
- Integration Architecture
- Solution Configuration in CrowdStrike Next-Gen SIEM and Defender Zero Trust
- Prerequisites
- Configuration in CrowdStrike Next-Gen SIEM from the Marketplace
- Configuration Steps on Eyeglass Virtual Machine
- High Level steps
- Configuration Step by Step
- Configure the Service start and python integration files
- Configure the python packages and customize the CrowdStrike integration python code
- Configure Defender Zero Trust Webhooks
- How the Integration works CrowdStrike Next-Gen SIEM
- How to test the Integration with CrowdStrike Next-Gen SIEM
- CrowdStrike Next-Gen SIEM Zero Trust Log Ingestion and Alerting with Data Security Essentials
- Overview
- Requirements
- Features
- Steps to Configure Event Forwarding Integration
Overview
Customers using CrowdStrike Next-Gen SIEM can now leverage a native integration that ingests root cause Cyber Storage events to show as Security events . See Crowdstrike integration landing page
-
NOTE: This documentation is provided "as is" without support for 3rd party software. The level of support for this integration guide is best effort without any SLA on response time. No 3rd party product support can be provided by Superna directly. 3rd party components require support contracts
Limitations
- None
Solution Overview
Superna Defender Zero Trust API receives webhook alerts from Security Edition and maps all relevant data fields into the CrowdStrike Parsing Standard (CPS).
Video Demo
Advanced Zero Trust Capabilities
- Webhook to native CrowdStrike SIEM ingestion API and log parsing
- Superna Security Edition host Containment api integration with CrowdStrike Next-Gen SIEM
Quick Start from Marketplace
- Follow this link to the martetplace listing and click Configure to get started. https://falcon.us-2.crowdstrike.com/store-v2/ddb610cacfc349e4a75bac253d7df550
- Create the connecto and parsing instance and generate an API key can skip to section on configuring Eyeglass VM below.
What is CrowdStrike Next-Gen SIEM?
Integration Architecture
.png)
Solution Configuration in CrowdStrike Next-Gen SIEM and Defender Zero Trust
Prerequisites
- Installed Security Edition
- Eyeglass OS appliance version 15.5
- cat /etc/os-release
- License key for the Zero Trust API
- CrowdStrike Next-Gen SIEM application entitlement
Configuration in CrowdStrike Next-Gen SIEM from the Marketplace
Follow these steps in the Next-Gen SIEM Data Onboarding to install the connector and collect api keys and url to be used with Superna Data Security Edition.
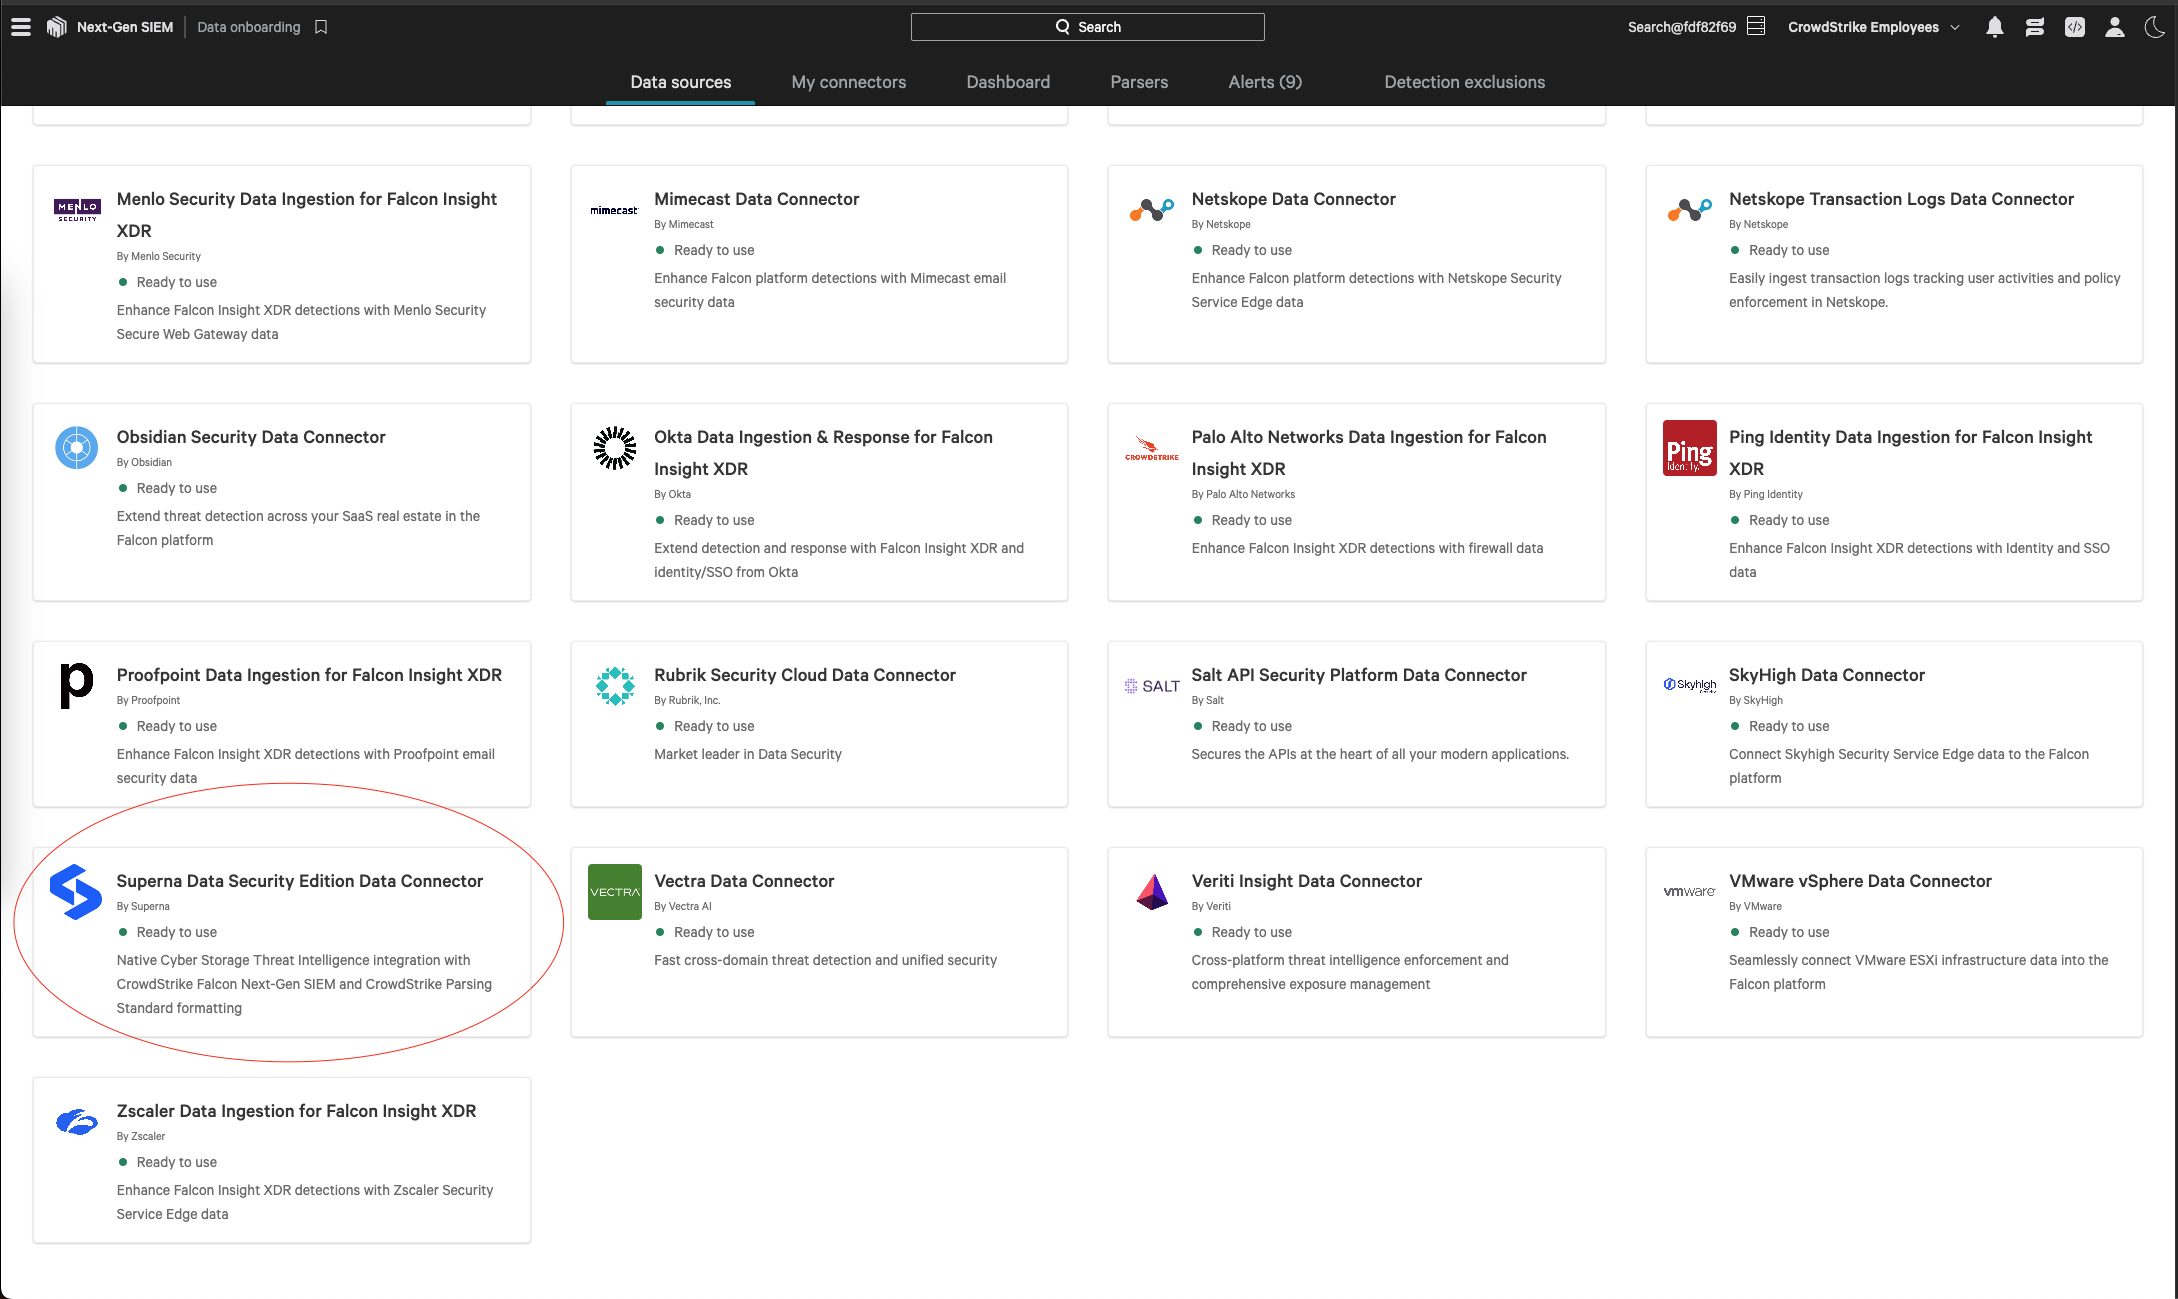
Log in to the CrowdStrike Falcon Console Select Data Onboarding
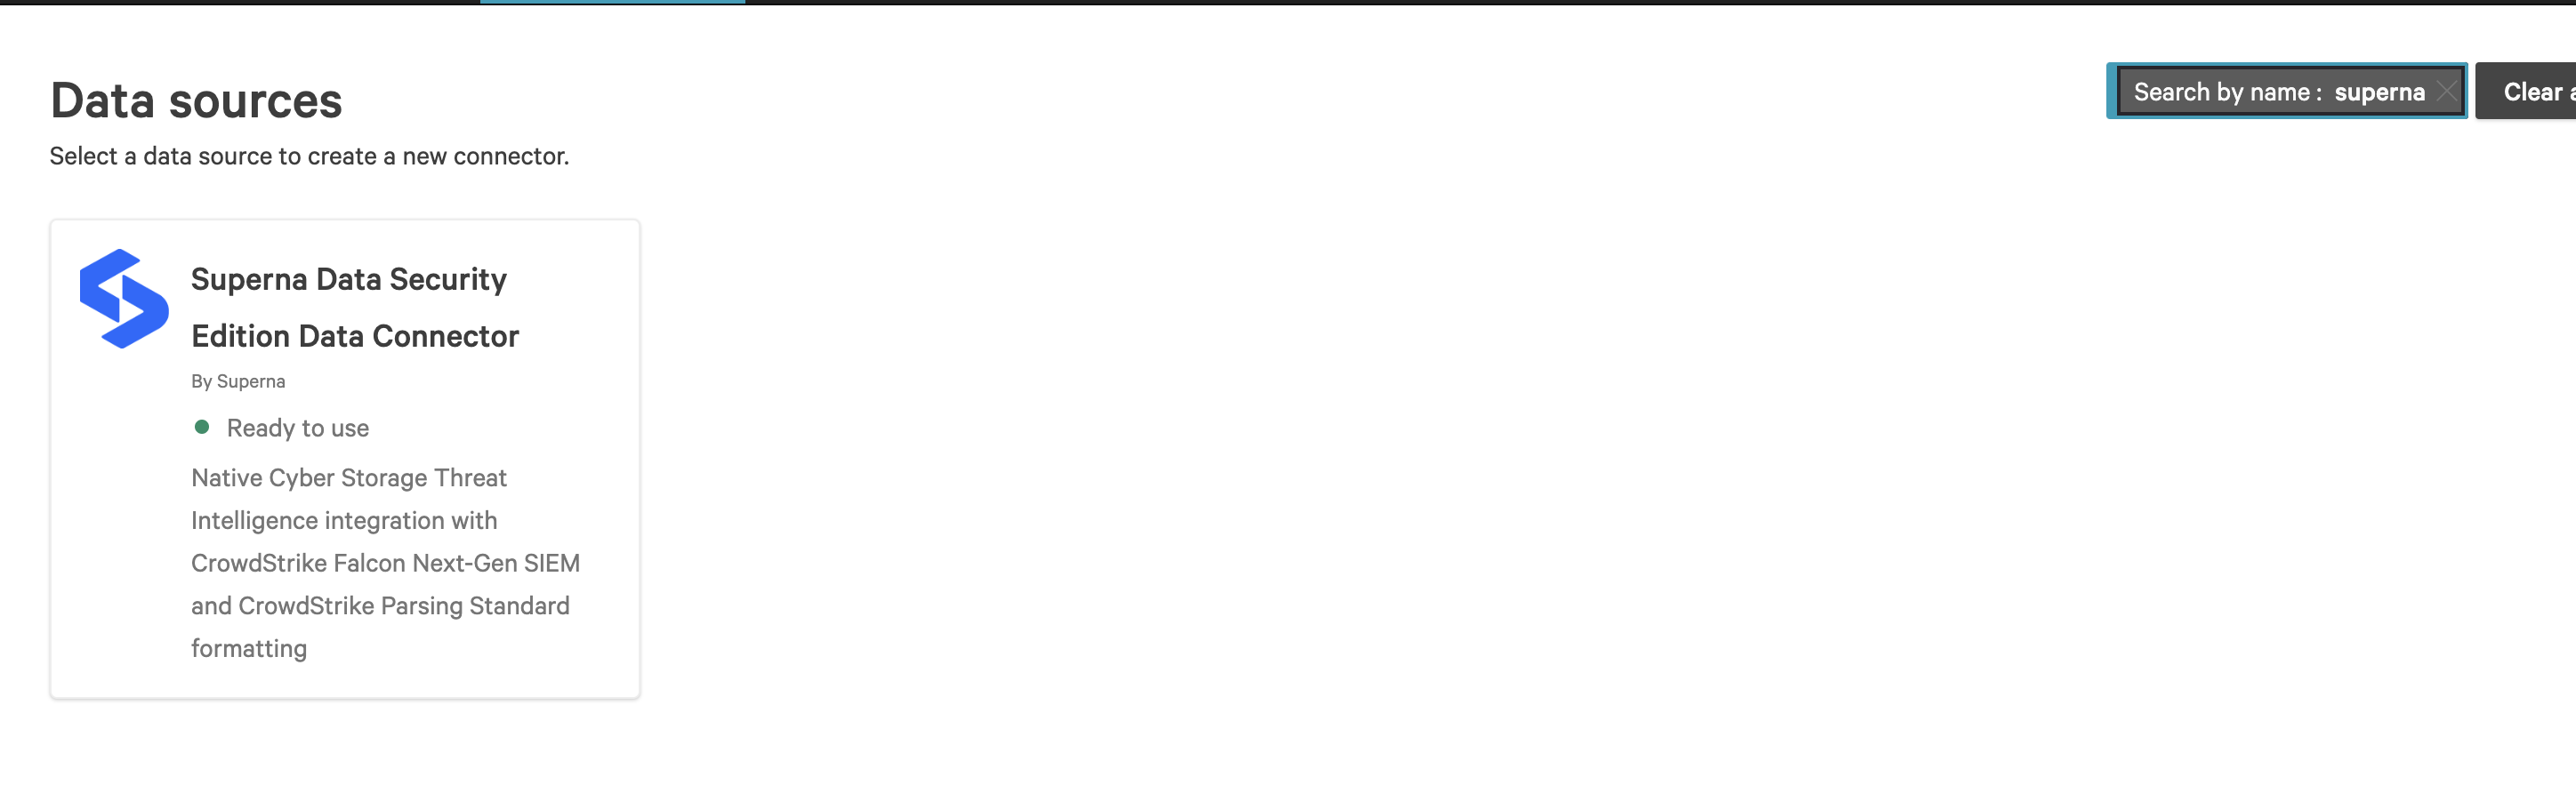
Type Superna in the Data Source Search box
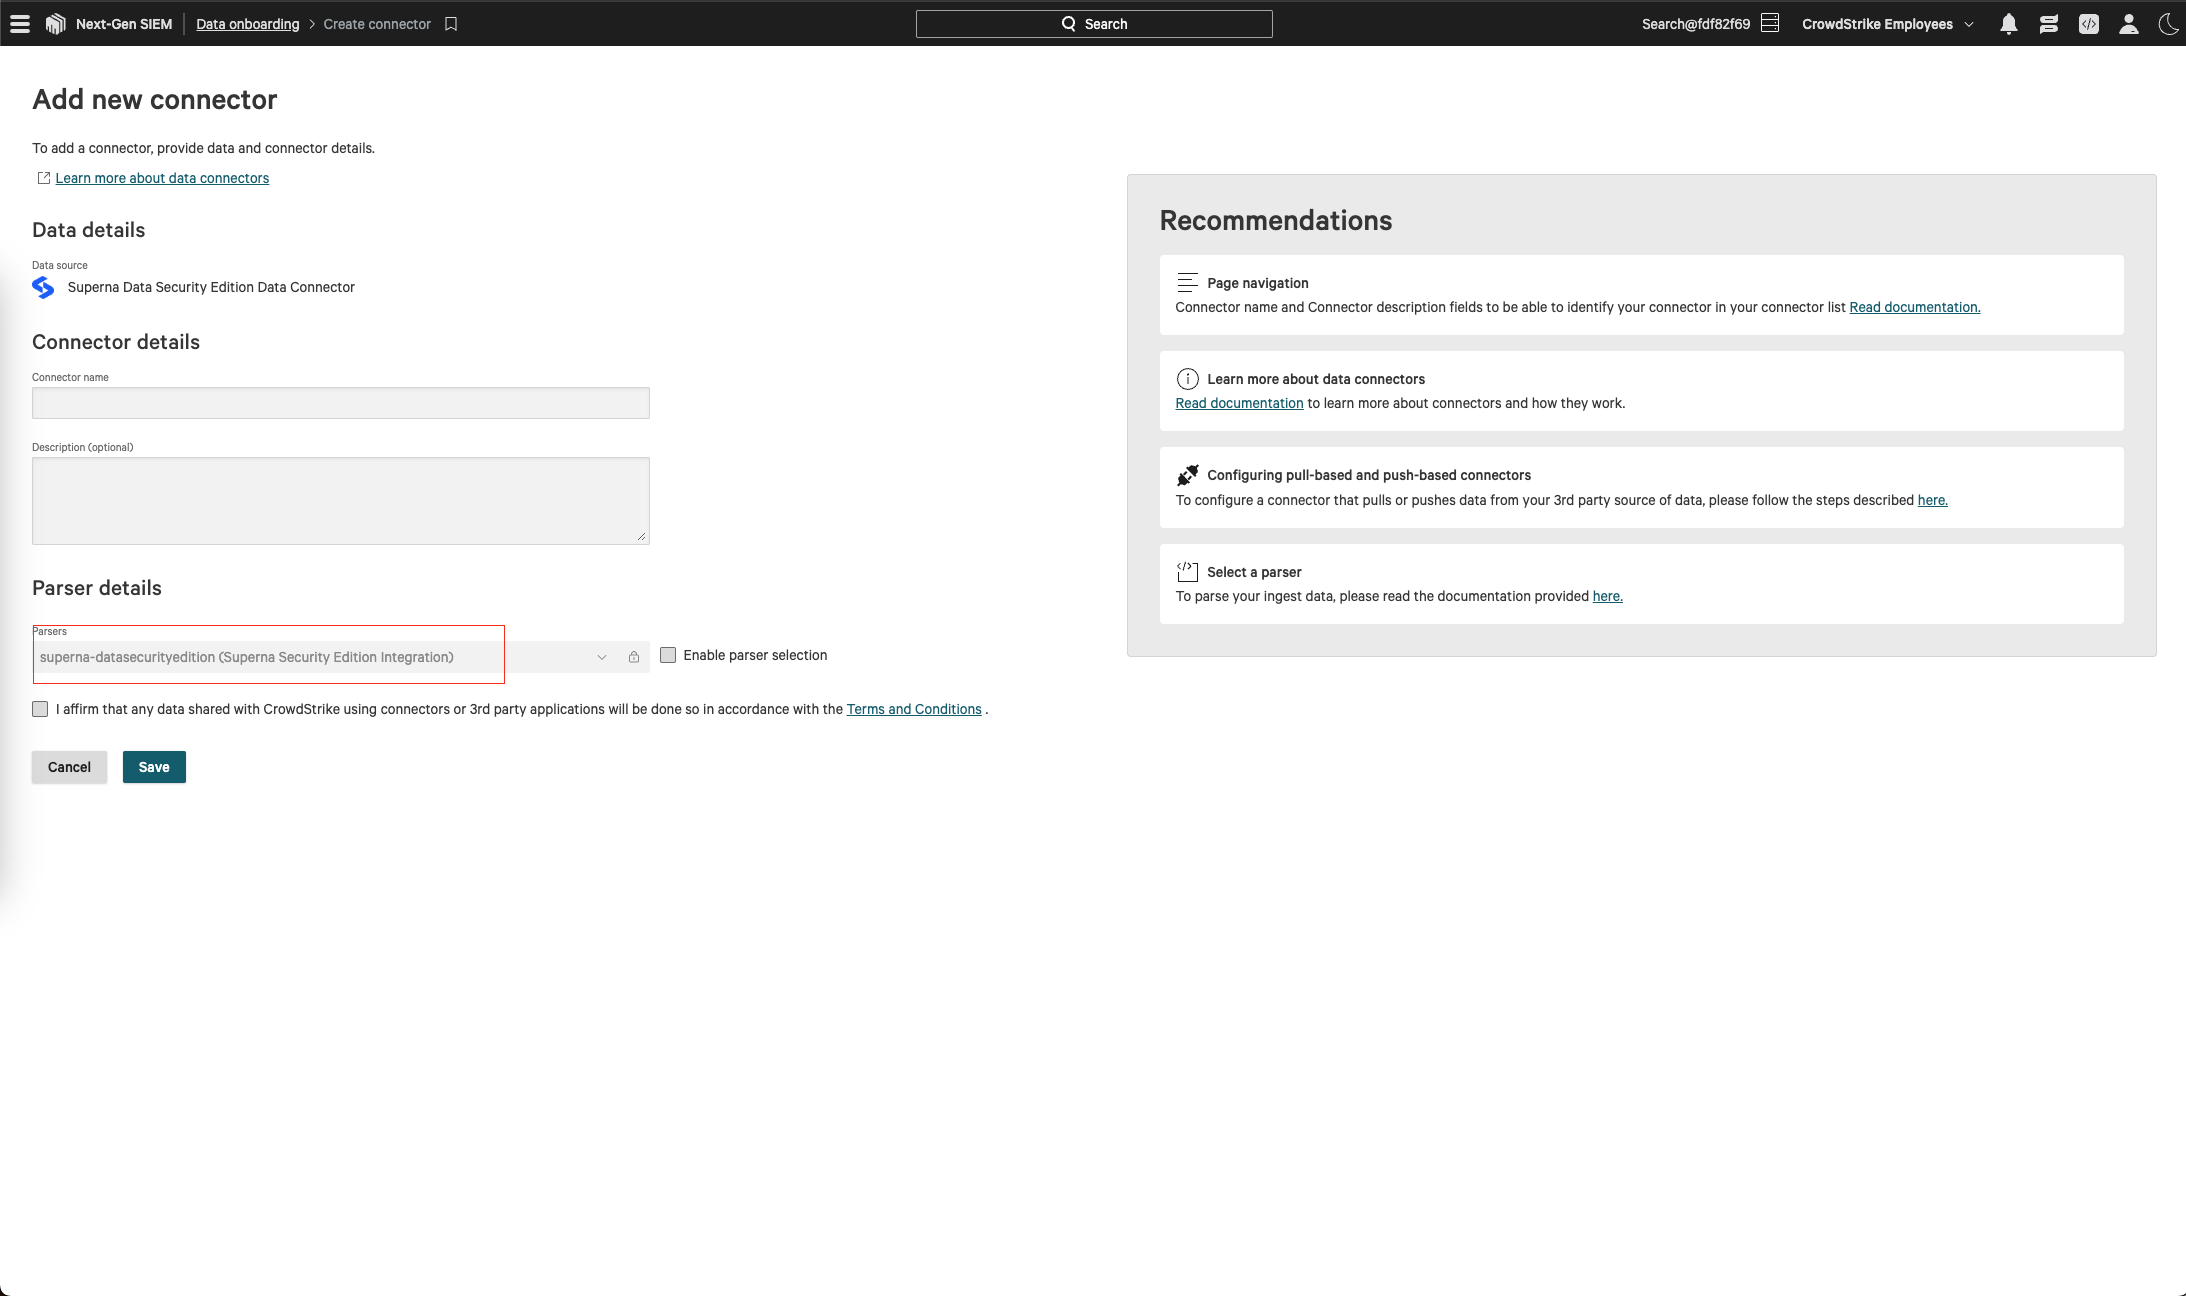
- Click the connector and fill in the fields
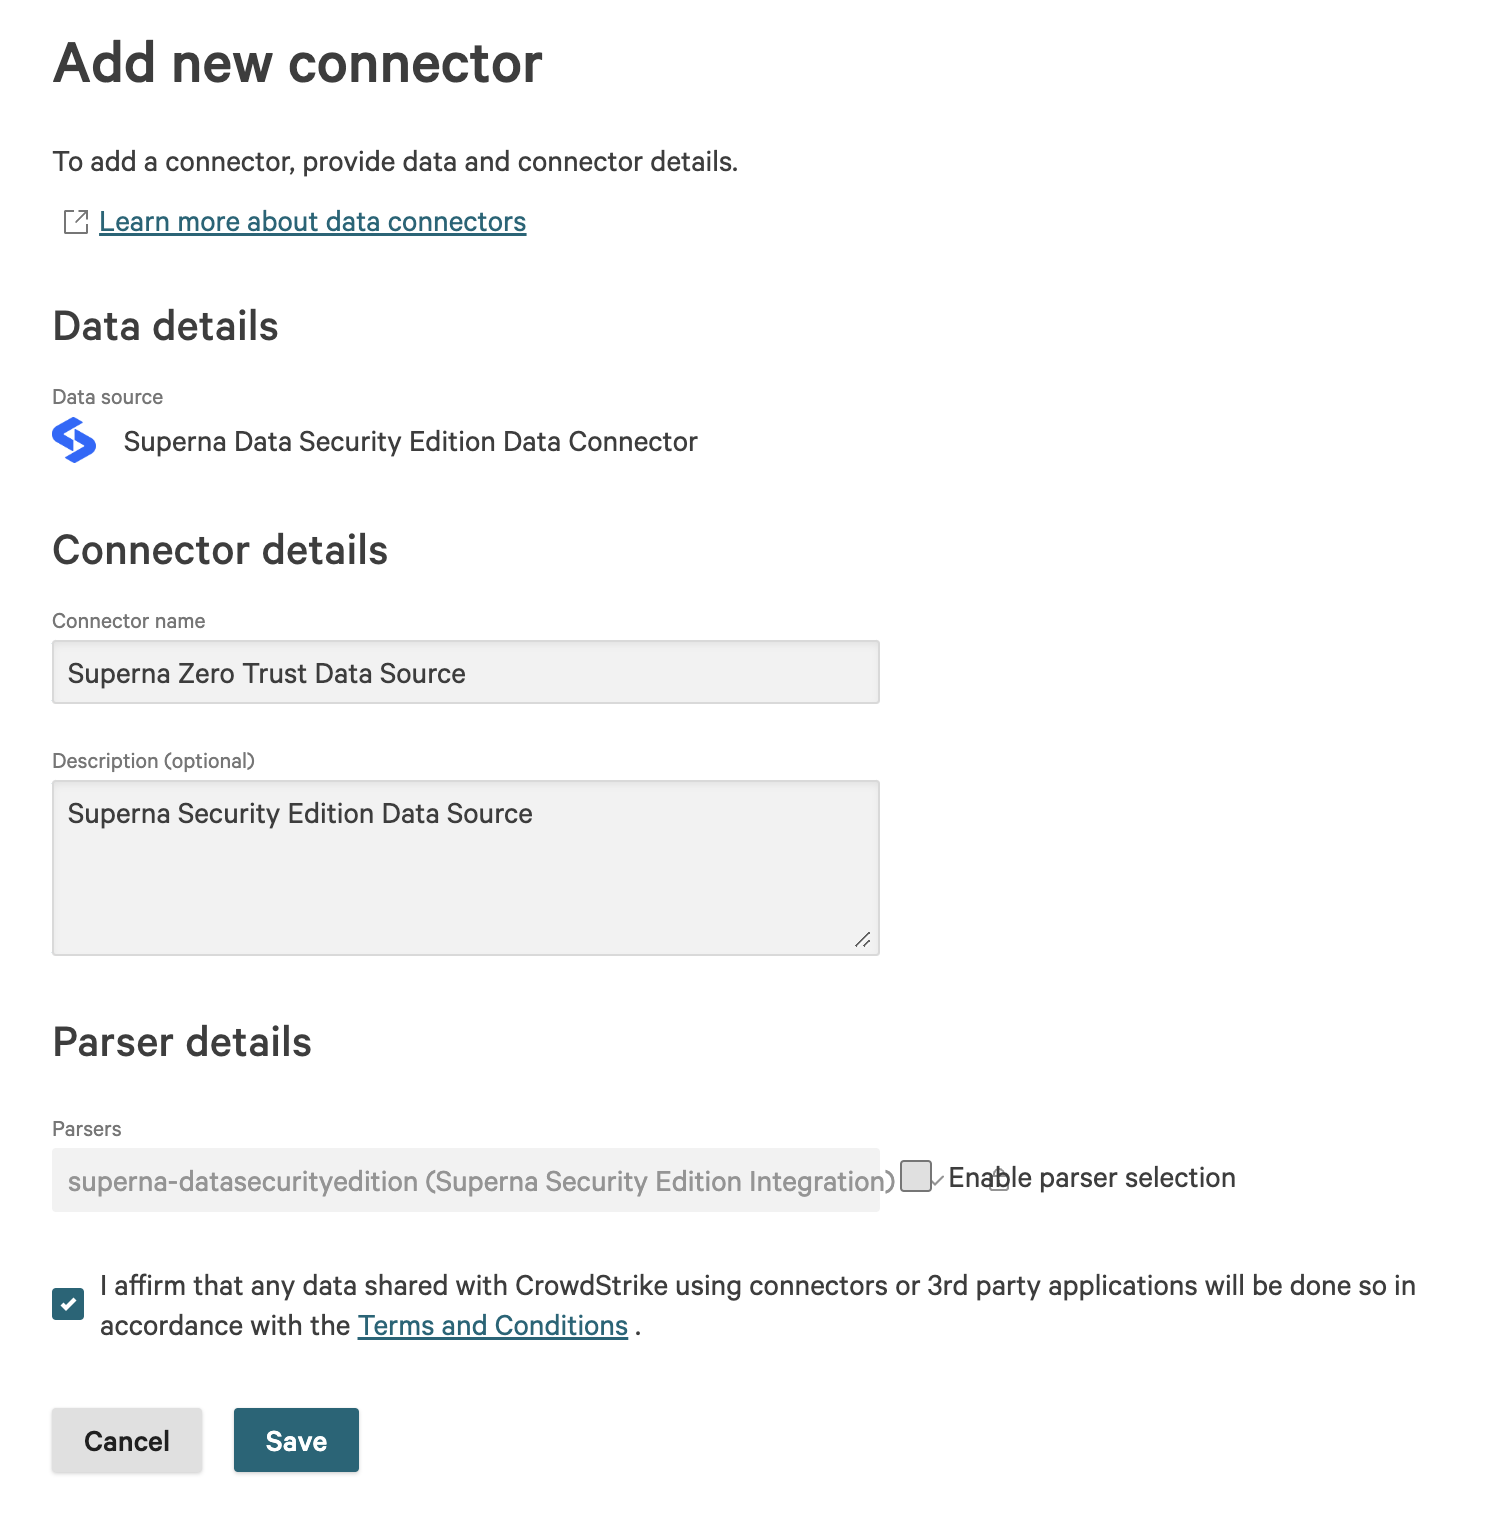
- Click Save
- Click Generate API key when the window appears

- Save the key for use in later steps
- Click on Data Sources and click on the new data source and record the API URL

- Save this url for later steps
done.
Configuration Steps on Eyeglass Virtual Machine
High Level steps
- Create python location to run the application on the Eyeglass vm
- Create python main application script
- Create linux systemd service and set to auto start
- Create Zero Trust configuration in Defender
- Update the main script to customize with CrowdStrike Next-Gen SIEM python code
- Test the script is running as a service
- Create a test event in Defender to validate the alerts appear as indexed parsed events in CrowdStrike Next-Gen SIEM
Configuration Step by Step
Configure the Service start and python integration files
Configure the python packages and customize the CrowdStrike integration python code
- Customize the application code by downloading the python code from this link to download
- Open the python template file in a text editor. NOTE: make sure to only replace the values and do not delete any of the commas
- Locate this section in the file # Define the endpoint and API token as variables to add your CrowdStrike api token and endpoint for API calls .
- Add the API URL and API token into this section.

- nano /opt/superna/cgi-bin/crowdstrikesiem.py
- Open the file locally in Windows OS notepad and use control-A or select all the text in the python template
- Paste the clipboard into the ssh terminal session with the open nano editor file
- save the file
- press control+x
- Answer yes to save and exit the nano editor
- Start the service and verify it is running
- systemctl start crowdstrikesiem
- systemctl status -l crowdstrikesiem
- Verify the service is started successfully and returns "active and running".
- If the service does not start do not proceed and double check the steps above are completed.
Configure Defender Zero Trust Webhooks
- The next step creates an Zero Trust Webhook URL.
- Configure Zero Trust endpoint in Ransomware Defender Zero Trust tab.
- Recommended Configuration: Only Critical and Major events and only the webhooks that set lockout or delayed lockout. Customers can customize based on specific requirements. The goal is to send findings versus a list of alarms that do not pinpoint a security incident.
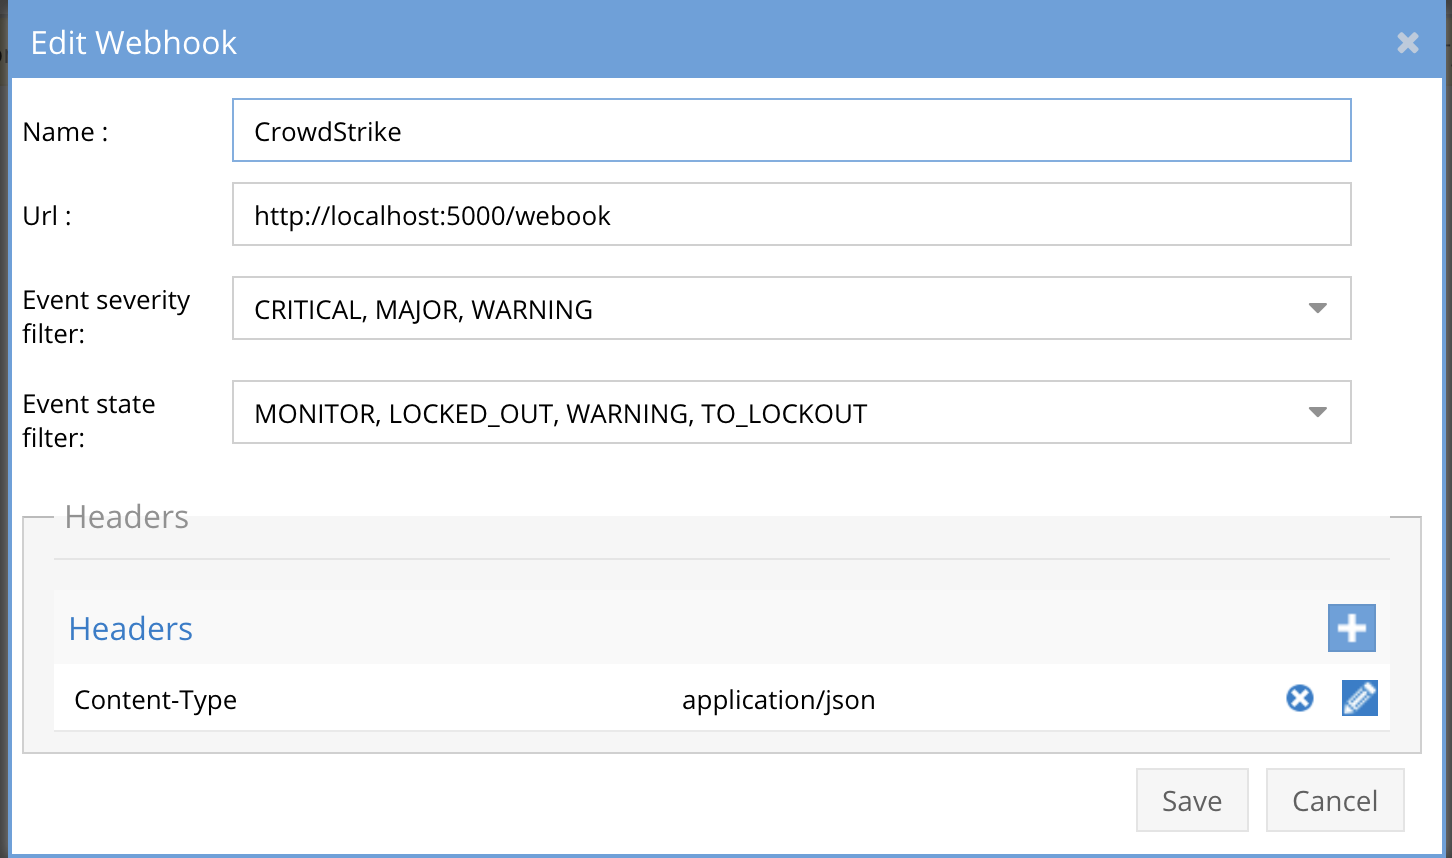
- The endpoint url above will use localhost and will send Webhooks to the application service listening on port 5000. URL to use in the configuration
- http://localhost:5000/webhook
- Add the Content-Type header with value of application/json as shown above to complete the webhook configuration.
- Click save to commit the configuration.
- Click save on the main Webhook configuration page
- Configure Zero Trust endpoint in Ransomware Defender Zero Trust tab.
- Test the configuration is working following the next section
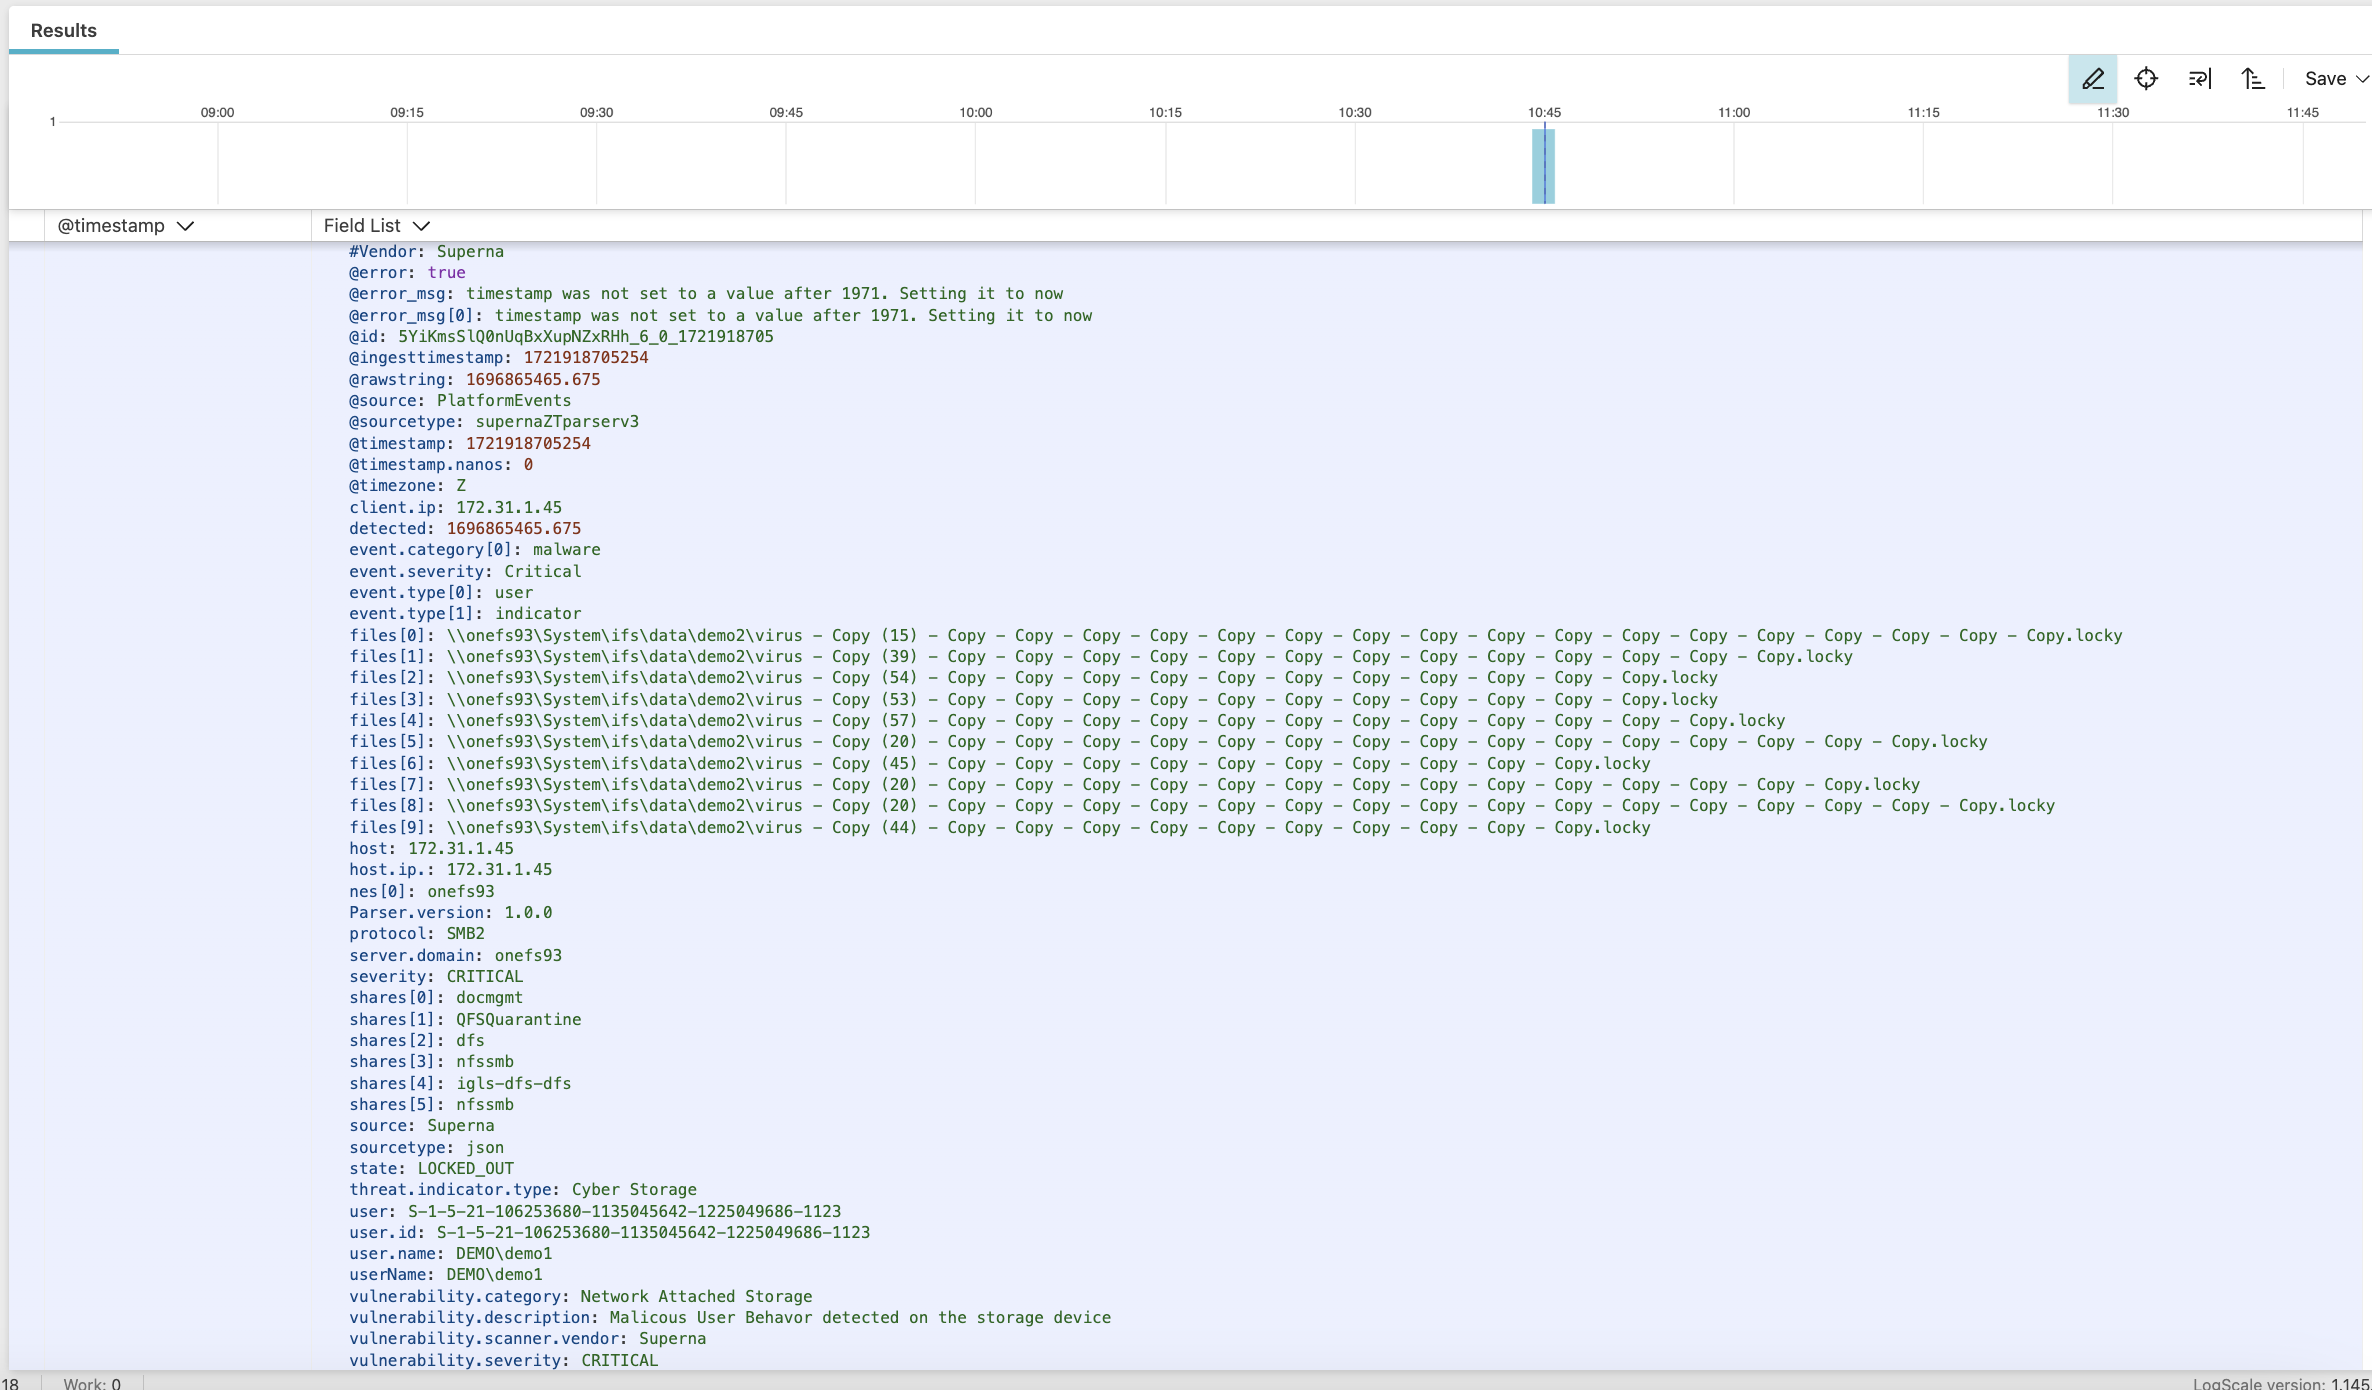
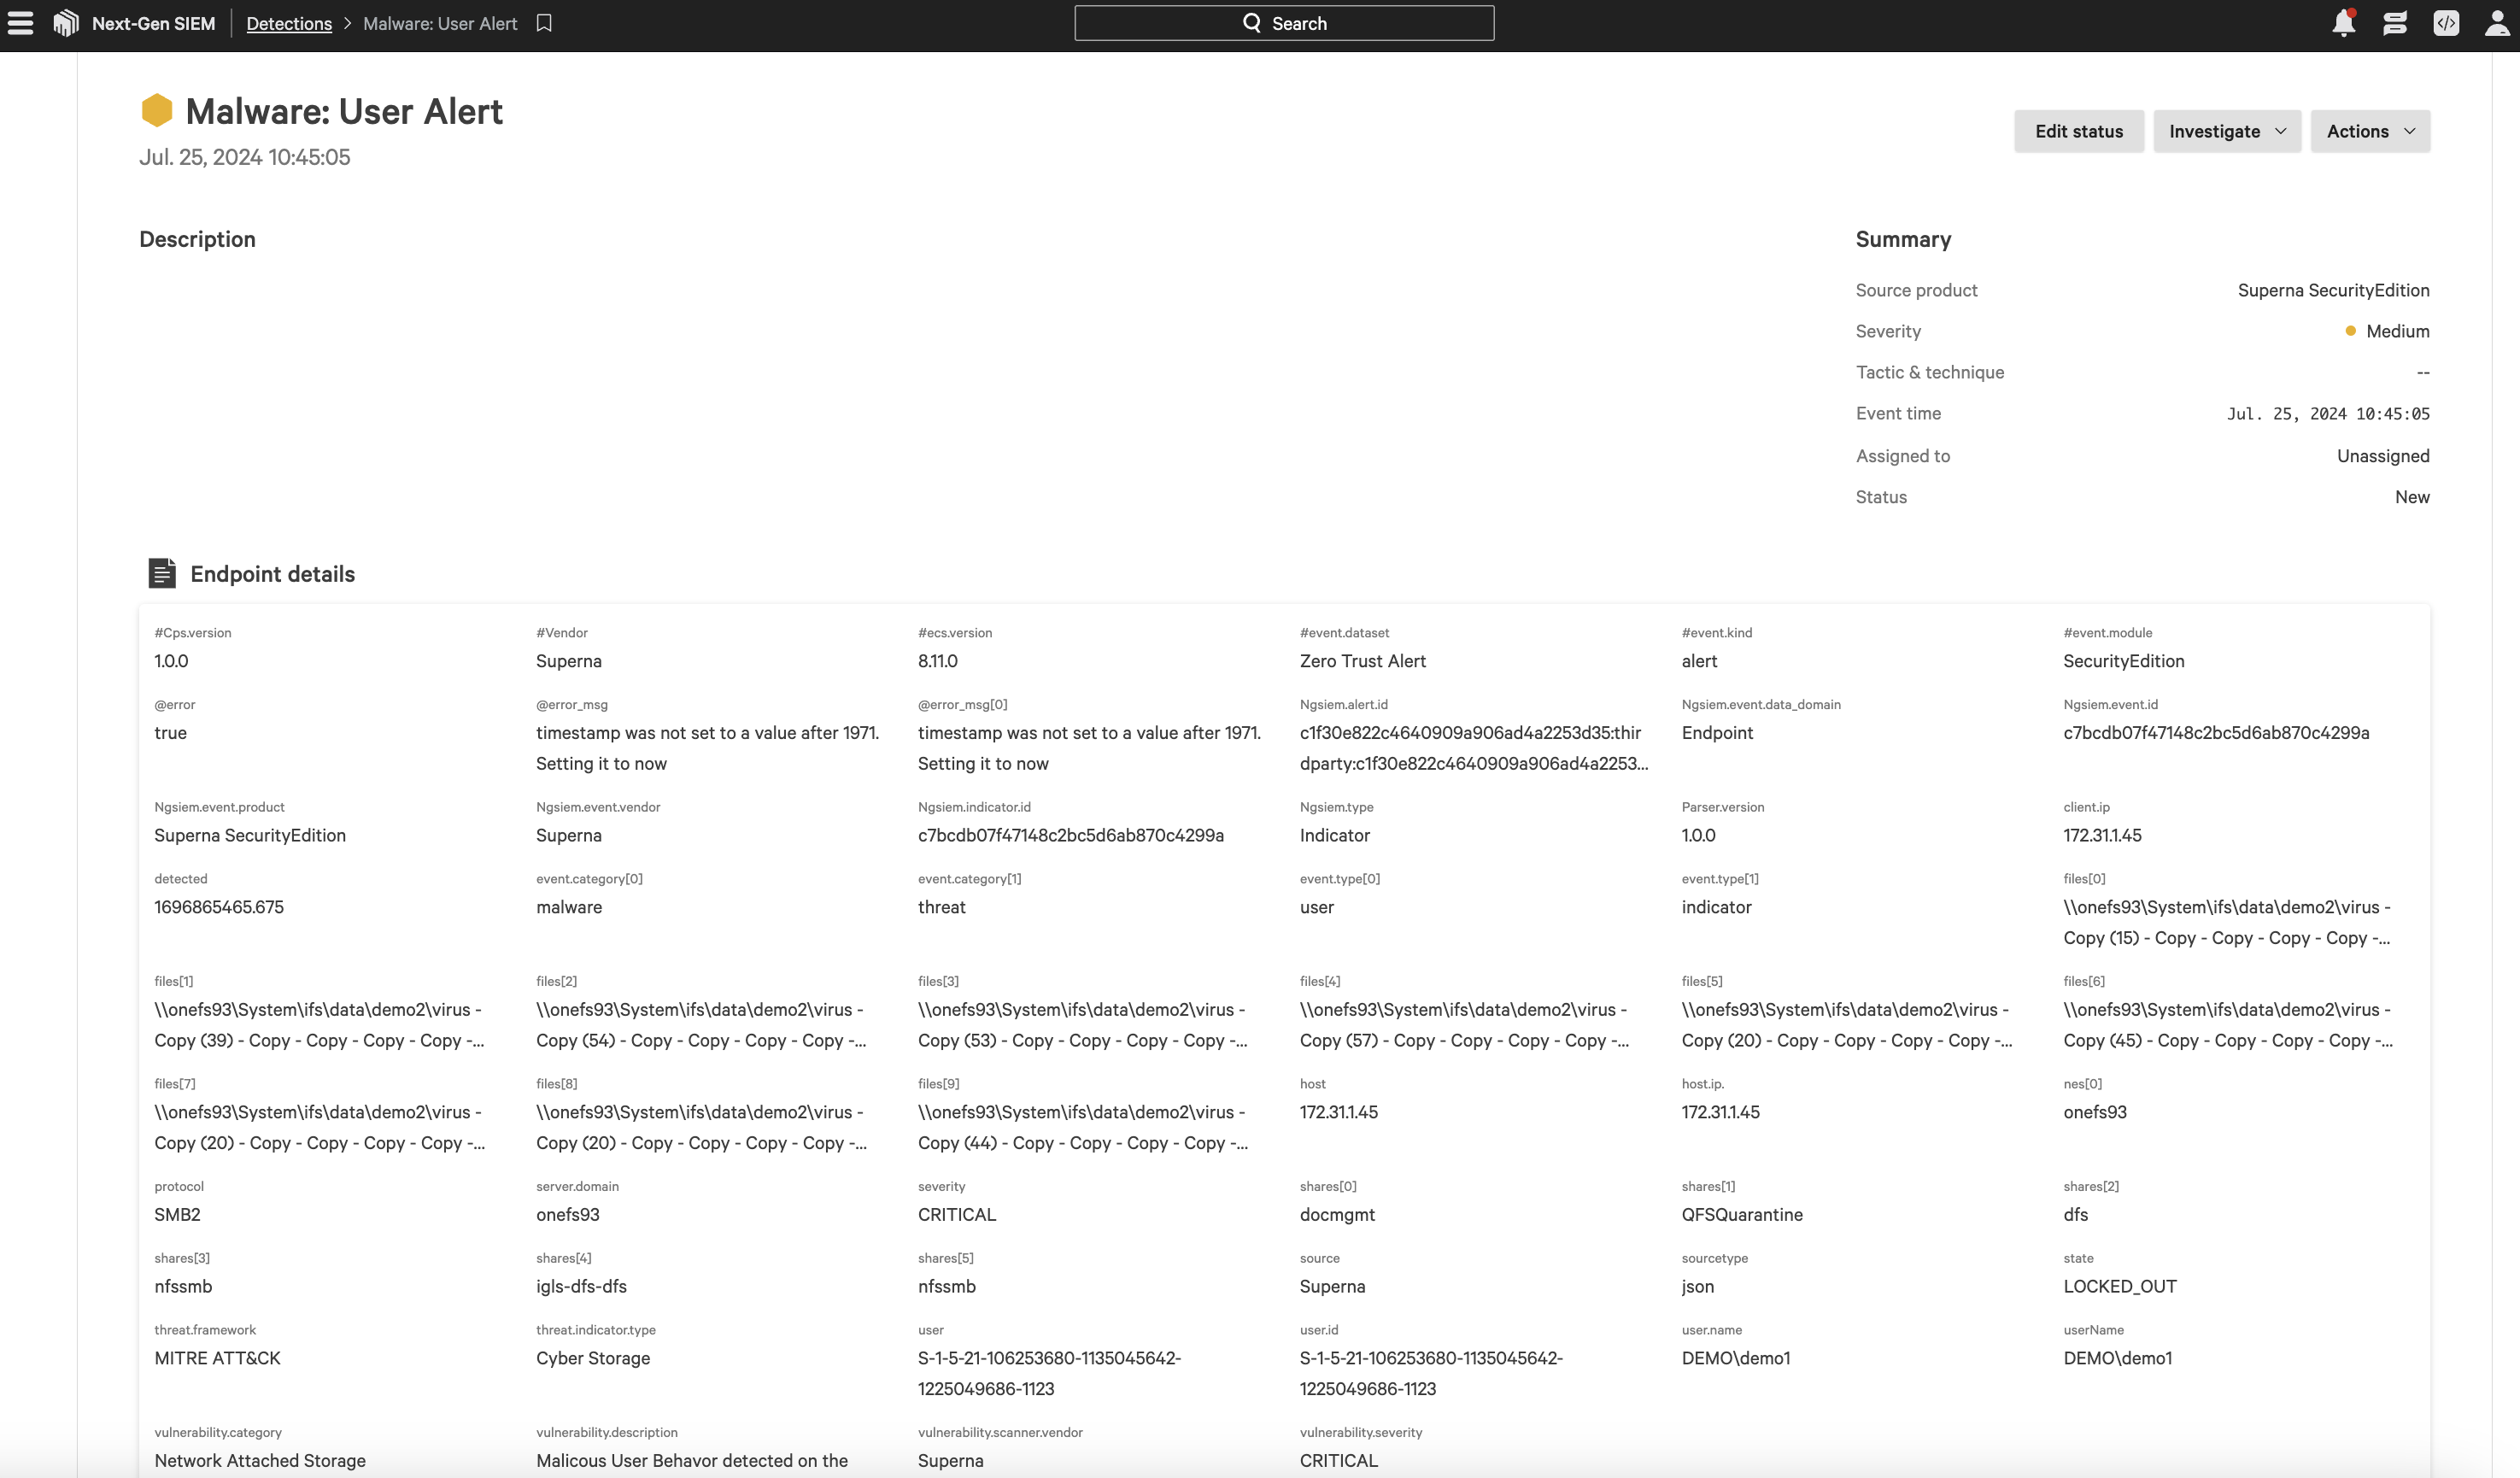
How the Integration works CrowdStrike Next-Gen SIEM
- These screenshots show how log messages appear when searching for raw logs and how Detections appear in the Console.
- Log message in CPS format
- Detections Example
How to test the Integration with CrowdStrike Next-Gen SIEM
- To test the integration follow these steps
- Prerequisites In CrowdStrike Next-Gen SIEM and Eyeglass:
- Download this curl command template and open with a text editor.
- ssh to the eyeglass vm as the admin user
- Copy and Paste the entire cli command text to the ssh prompt to send sample data to the running Zero Trust application. This will send test data directly to the application to be processed and sent to CrowdStrike Next-Gen SIEM Integration service that is running on the Eyeglass VM.
- The output of a successfully processed webhook test will return this text in the ssh terminal
- done sending event to CrowdStrike and check for http 200 and success count in response
- How to review the process logs from the web application
- sudo -s
- journalctl -f -u CrowdStrike
- This allows you to view the logs generated by the application.
- To log to a file and review with nano showing only the most recent 250 lines.
- journalctl -f -n 250 -u CrowdStrike > /tmp/ztwebhook.log
- nano /tmp/CrowdStrike.log
- In the log below the response code from the CrowdStrike Next-Gen SIEM api call should show http 200 status code and successCount 1 to indicate the Finding was successfully created.
- You can also view CrowdStriked.log for specific error messages.
- Login to the CrowdStrike Next-Gen SIEM and verify new incident is raised.
- Done
CrowdStrike Next-Gen SIEM Zero Trust Log Ingestion and Alerting with Data Security Essentials
Overview
Data Security Essentials saves alerts to the Windows Event log to a custom application log. This integration will extract the log entries and the json payload contained within them and format as webhook data to send to Crowdstrike endpoint.
Requirements
- Follow the integration steps above to configure the logical app.
- Install python for Windows on the Data Security Essentials host and allow the installation to add python to the path variable. https://www.python.org/downloads/windows/
- NOTE: Ensure it's installed for all users so service accounts have access, by enabling for all users during installation.
- The integration code matches event log entries from Custom trigger BOT policies and File management policies
- The event log source names are below
- Superna Data Security Essentials BOT Service
- Superna Data Security Policy Engine
- The event log source names are below
Features
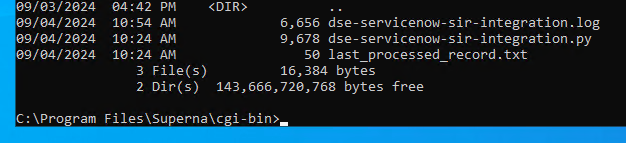
- Logs for each execution are stored in the path below along with the python code.
- Each execution will store the event log record ID and date time and event number of the last processed event in a file called last_processed_record.txt. This file is read on each execution to continue processing from last record. The record number is not visible in Event Viewer, the date time and event number can be used to understand where in the log the last processing occurred.
- The schedule sync runs every minute and only processes events since the last record and logs all processing as well as event matches in the log file for debugging.
- Only events that match the severity filter will be processed for client ip address. The sample code defaults to Major and Critical severity events all other severities will be ignored.
Steps to Configure Event Forwarding Integration
- Follow the steps to create the endpoint and install the Superna parser into NextGen SIEM instance before continuing. The marketplace steps are outlined in this guide above.
- Download the integration code from here. (Right click Download)
- Modify the python and update the Crowdstrike integration settings highlighted in yellow to match your environment. Update all the yellow sections highlighted below.
- Edit the url in the template integration code downloaded above.# CrowdStrike Ingest endpoint and tokenCROWDSTRIKE_ENDPOINT = "https://xxxx.ingest.us-2.crowdstrike.com/services/collector"CROWDSTRIKE_API_TOKEN = "yyyyyyyyy"# Configurationserver = 'localhost'log_name = 'Data Security Essentials'source_names = ['Superna Data Security Essentials BOT Service', 'Superna Data Security Policy Engine']trigger_severities = ['MAJOR', 'CRITICAL','WARNING'] # Configure severities that should trigger event forwarding
- Copy the Python code into C:\Program Files\Superna\cgi-bin on the Data Security Essentials host and name the file Crowdstrike-dse.py
- Create the path from command prompt or GUI makedir 'C:\Program Files\Superna\cgi-bin'
- Install python dependencies
- MANDATORY Step: Open a command prompt as the service account (hold down shift and right click the command prompt icon) run as option to login as the service account dse-service. This is required to install the python packages under the correct user account.
- Install the dependencies with this command
- pip install pywin32 requests
- This command installs the windows API python libraries needed to read the event log.
- Test the script can correctly reach your Crowdstrike instance from a dos prompt
- cd 'C:\Program Files\Superna\cgi-bin'
- python crowdstrike-ngsiem-dse.py
- The output should display event log entries that match and will ignore severities that do not match script settings . It will display the event payload details in json format and will show the data that was sent to the Crowdstrike endpoint.
- NOTE: if no Critical or MAJOR detections occur you can edit the py file to add INFO for testing only.
- You can also review this file last_processed_record.txt to see the last date and time within the event log and event id that was last processed. This file can be deleted to have the script start reading from the oldest windows event log entry. This can be done for testing puposes.
- The above examples shows the output when a client ip address is successfully located and the host containment api returns success.
- The example below is logged when event data is processed and inspected for severity and forwarded with key fields parsed and extracted.
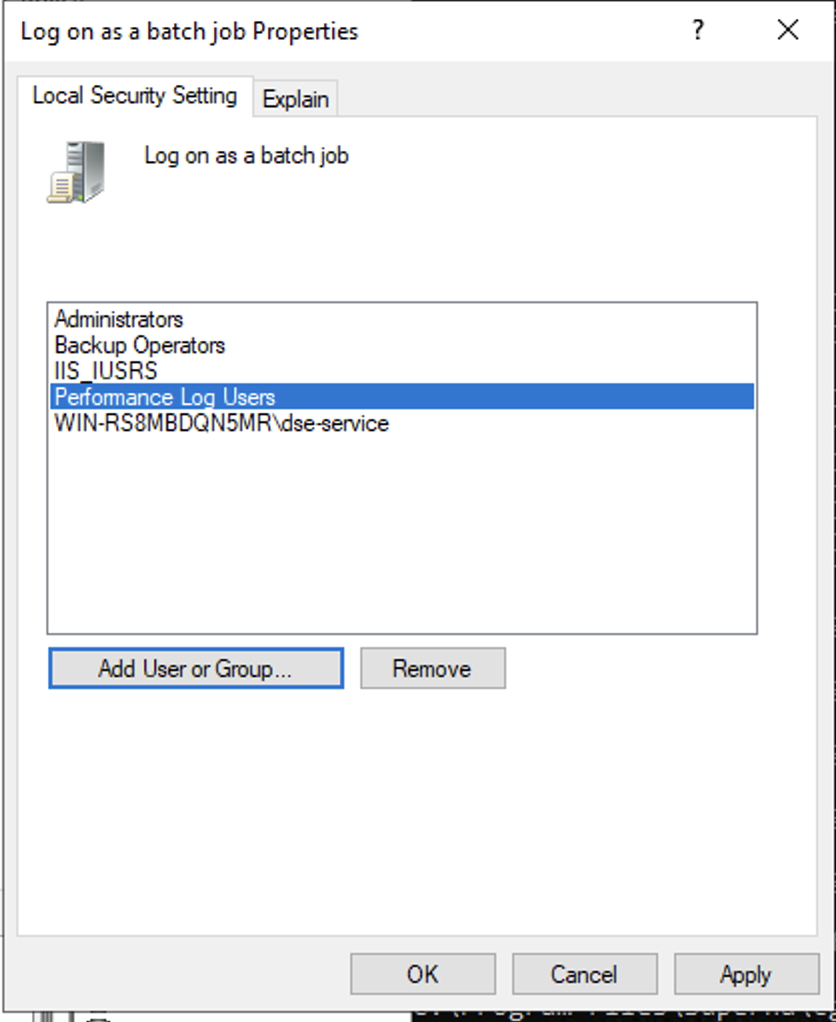
- Steps to Schedule sync alerts into Crowdstrike Security Incidents
- Open secpol.msc, Local policies
- Give the Data security essentials AD service account the "Logon as a batch job" OS permission.
- Create a file
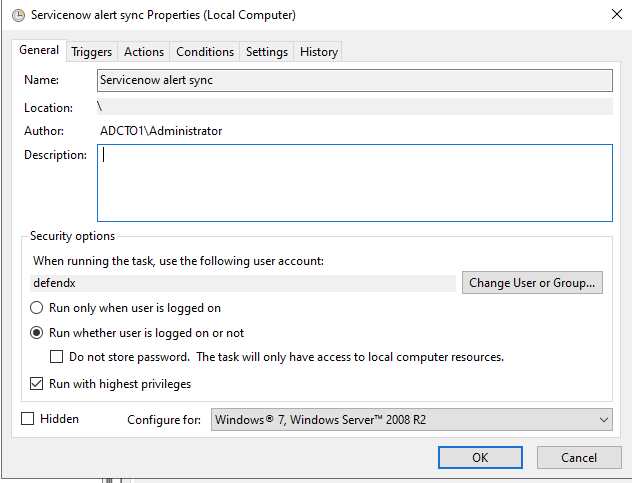
- Right click this link to save to a file. The task scheduler XML file to import into Task Scheduler
- You can rename the xml from Servicenow alert sync.xml to Crowdstrike integration.xml.
- NOTE: if the xml will not import to your version of windows, you will need to create the scheduled task manually.
- Open Task Scheduler
- Run taskschd.msc, right click task schedule library

- Import the xml file
- You will be prompted with the task definition, you will need to change the service account to match your service account name and domain and re-enter the password to save the task scheduler. All other settings are configured and match the path and settings used above. Adjust any parameters that you changed if you did not use all the steps above.
- Edit the name "Crowdstrike Integration"
- Click the Actions tab and browse to select the file C:\Program Files\Superna\cgi-bin\crowdstrike-ngsiem-dse.py
- Click ok to save
- done.
