Operations Guides
InPlace Appliance Open Suse OS Upgrade
Home
© Superna Inc
Open Suse to SUSE Linux Enterprise Server (SLES) Migration
Summary
This procedure allows customers to convert Open Suse to a licensed and supported SLES OS and allows inplace upgrade options using the YAST GUI for simplified OS patch management and major release upgrades. This subsription to SLES includes patches, upgrades and access to OS technical support if required.
Prerequisites
- Open Suse 15.4 or 15.5.
- How to check.
- Login as admin over ssh
- cat /etc/os-release
- How to check.
- A SLES subscription purchased from Suse
- Internet repository firewall configuration or proxy that allows https over port 443 to https://updates.suse.com
How to Migrate Open Suse to SLES Licensed Subscription OS
- Purchase an OS subscription from https://www.suse.com/shop/
- Select

- Select
- You will need to retain the email address used to purchase and the Activation Code
- Login to the Eyeglass vm as admin user over ssh.
- sudo -s
- zypper in yast2-migration-sle
- Once the installation is completed
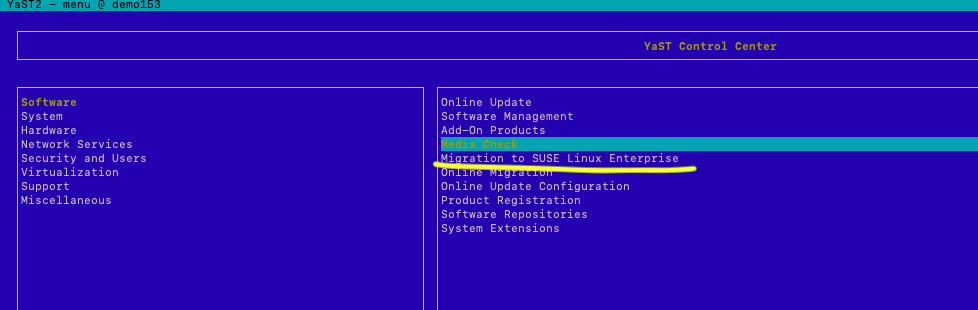
- yast
- select the menu on the right for Migrate to SUSE Linux Enterprise
- Follow the on screen steps to enter your email address and activation code.
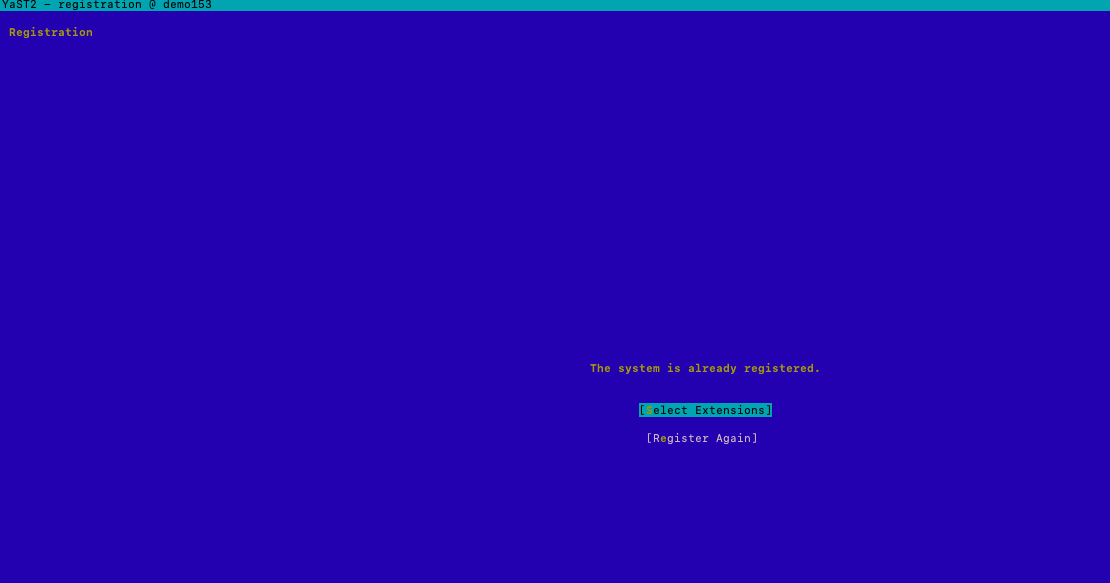
- Once this above steps are complete you should have a registered licensed SLES operating system, confirm this using this command
- cat /etc/os-release
- You will look for OS ID of SLES
- Verify your VM is registered using the Product Registration menu
- Done
How to Inplace OS Upgrade SLES licensed OS from 15.4 to 15.x
- NOTE: Only licensed SLES appliances offer the GUI upgrade inplace.
- Login as admin over ssh
- sudo -s
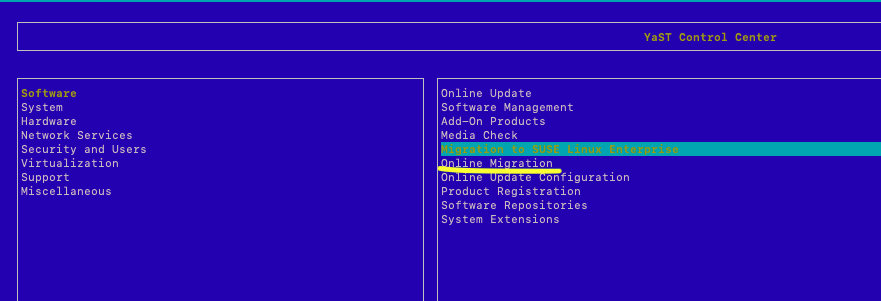
- yast
- Select the menu option on the right Online Migration
- Follow the online GUI steps to upgrade to 15.5,
- NOTE: During the upgrade 2 conflicts will be raised for dependencies, choose continue the upgrade.
- NOTE: The upgrade can take 30-60 minutes depending on download speeds. A reboot will be completed at the end of the upgrade.
- Run Superna Eyeglass 15.5 installer run file after the OS upgrade to repair dependancies.
- Prepare for upgrade
- nano /etc/os-release
- Change ID_LIKE from "suse" to "suse opensuse"
- press control+x to save and exit
- nano /etc/os-release
- Download the Eyeglass upgrade installer file (for 15.5) from support.superna.net portal and scp to Eyeglass appliance
- Change mode of the upgrade installer file
- chmod 777 <name of upgrade file>
- Execute the upgrade file
- ./<name of upgrade file
- Once completed, login to Eyeglass Web UI to verify
- Prepare for upgrade