Post Eyeglass Microsoft DFS Mode Failover Checklist
After a DFS failover we recommend the following steps to confirm everything was successful.
IMPORTANT: If the failover was done with the Controlled failover option unchecked (a real DR event failover), this means the share rename step on source was not executed. The source cluster should NOT be allowed to be reachable on the network until the shares are renamed using onefs UI OR DFS referrals are edited to disable the folder target pointing to the source cluster. Consult Failover Recovery Guide.
- Open DR Dashboard and select DFS Readiness tab.
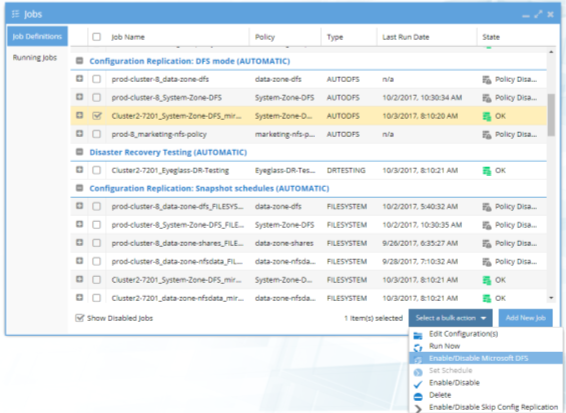
- Make sure the two jobs are shown 1) one for the Mirror policy which should be active and 2) for the original policy which should be disabled now.

- Login to the source cluster (the one that you failed over from) and verify that all shares that are part of the failover are renamed with DFS prefix on the cluster. (See DFS Feature changes table for read-only share version behaviour) .
- You can get a list of shares that should have been failed over using this procedure.
- Open the jobs window.
- Select the DFS Mode SyncIQ policy job and select the check box then bulk actions and edit configuration option.
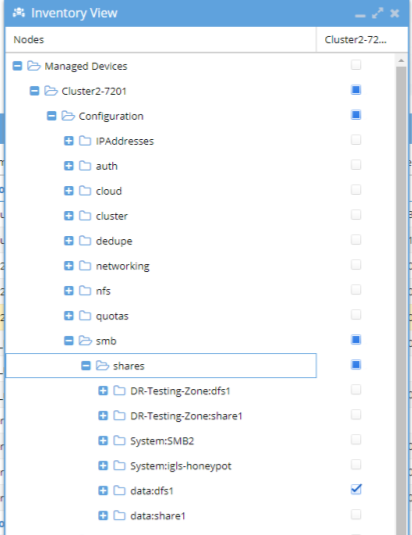
- Expand the cluster configuration to look in the SMB folder. All Shares that were part of the failover will have a blue check mark next to them.
- For Eyeglass Release 1.5 and higher, check the Failover Log. Look for the lines:
- INFO Renamed <number> shares on source cluster.
- INFO Renamed <number> shares on target cluster.
- ERROR Policy: <policy name> Step: "Renaming shares on source and target clusters" Result: FAILURE: Failed to rename SMB shares for policy <policy name>. Failover not complete.
- ERROR Cluster: <cluster name> Step: "Renaming shares on source and target clusters" Result: FAILURE: Renaming shares failed.
These numbers should be the same and should match the total number of shares protected by the SyncIQ Policy that was failed over, and there should be no ERROR related to share renaming. If this is not the case:
- Search on the failover source cluster for any shares protected by the SyncIQ Policy failed over that do not have “igls-dfs” prefix. Manually update the share name to add the” igls-dfs” prefix.
- Search on the failover target cluster for any shares protected by the SyncIQ Policy failed over that still have “igls-dfs” prefix. Manually update the share name to remove the “igls-dfs” prefix.
Procedure for Checking your SMB Clients Post DFS Failover:
Use this procedure to check that clients have picked up the change from one cluster to another.
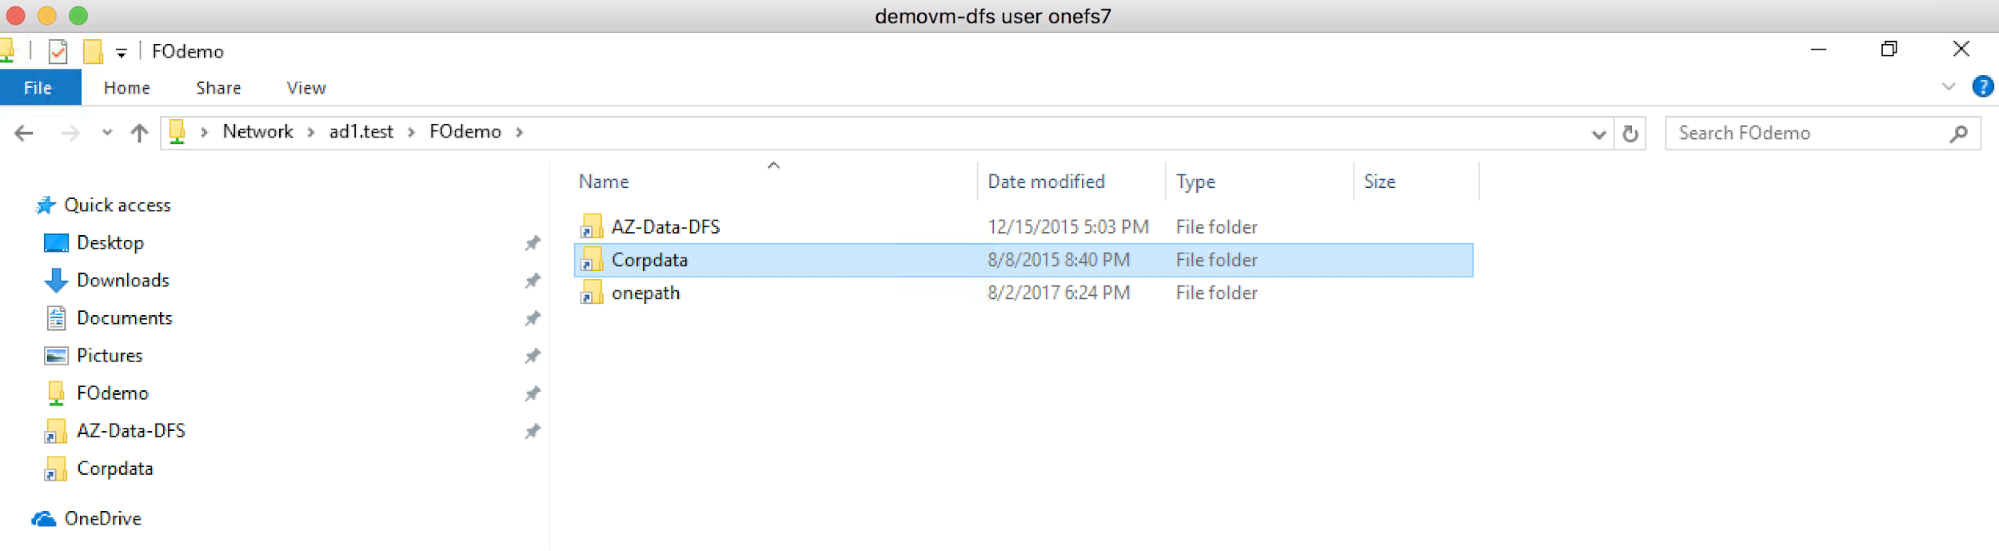
- From a Windows machine in the domain with access to the DFS mount.
- Open with explorer \\<domain name>\<dfs root name>\
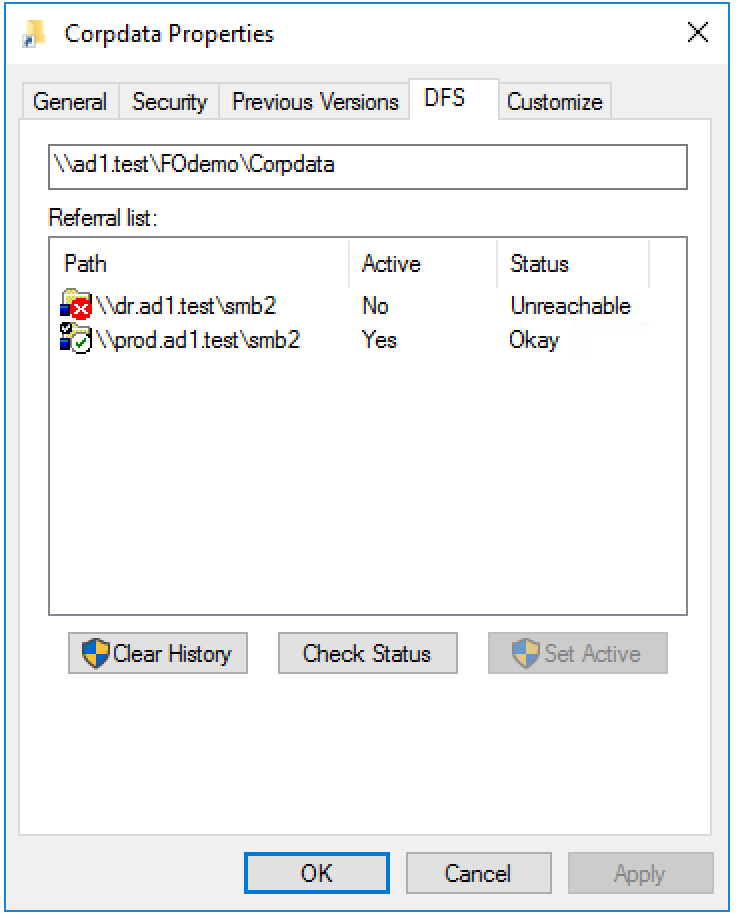
- Right click a DFS folder involved in the failover select the DFS tab. Click check status and verify the active path is ok and active. Click the 2nd path and verify its unreachable.