Post Access Zone Failover Steps
- Test Dual Delegation
- DNS SmartConnect name tests
- Check for SPN Errors
- Automated SMB Connection switch to target cluster after Failover
- Manual SMB connection switch to target cluster after Failover
- Refreshing NFS Mounts after Failover
Test Dual Delegation
Update DNS is not required with dual delegation. If NSLOOKUP testing verifies the response is from target cluster, then no extra steps are required. If not check to insure DNS configuration is correctly using target cluster SSIP in the delegation records in DNS.
See the following reference for details on Dual Delegation: Geographic Highly Available Storage solution with Eyeglass Access Zone Failover and Dual Delegation
DNS SmartConnect name tests
Verify that DNS Updates were completed correctly:
- SSH admin@eyeglass ip address.
- nslookup [enter].
- server x.x.x.x [enter] (ip of subnet service ip on the TARGET cluster).
- somesmartconnect.zone.name from the SOURCE cluster that was failed over [enter] .
- Expected response should return an IP address from the TARGET clusters ip pool that was mapped.
- If expected output is from target cluster IP pool then failover of SmartConnect delegation to the TARGET cluster is correct.
- Now repeat the server x.x.x.x command using production DNS server that has modified CNAME .
- Now repeat above tests using production DNS client ip address example “server y.y.y.y” (where is ip address of updated SOA primary DNS server where the delegation record was changed).
- Verify the output returns ip address from TARGET cluster ip pool that was mapped.
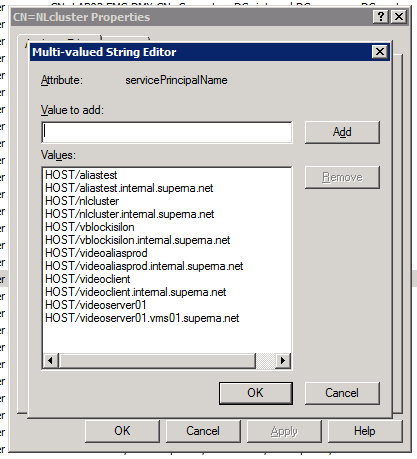
Check for SPN Errors
Review the failover log and verify all SPN steps were successful. If any SPN steps show as failed manual recovery of the SPN will be required using ADSIedit AD tool to perform delete and add of SmartConnect name or Alias names. The failover log contains all SPN smartconnect names that were included in the failover.
The Microsoft ADSIedit tool is the simplest method to make computer account SPN changes post failover. This tool requires Microsoft permissions to the computer account for the cluster being edited. Consult Microsoft documentation on ADSIedit usage.
Automated SMB Connection switch to target cluster after Failover
This procedure has been tested with specific OneFS versions and SMB protocol versions across different Windows OS's. Review the testing matrix of OS, Onefs and protocol combinations.
NOTE: You cannot use this procedure if you have disabled the SMB protocol on the cluster.
- Complete the failover as normal with Eyeglass DR Assistant.
- Complete the steps below for each Access Zone IP pool that was part of the failover AND has SMB connections that should switch to the target cluster.
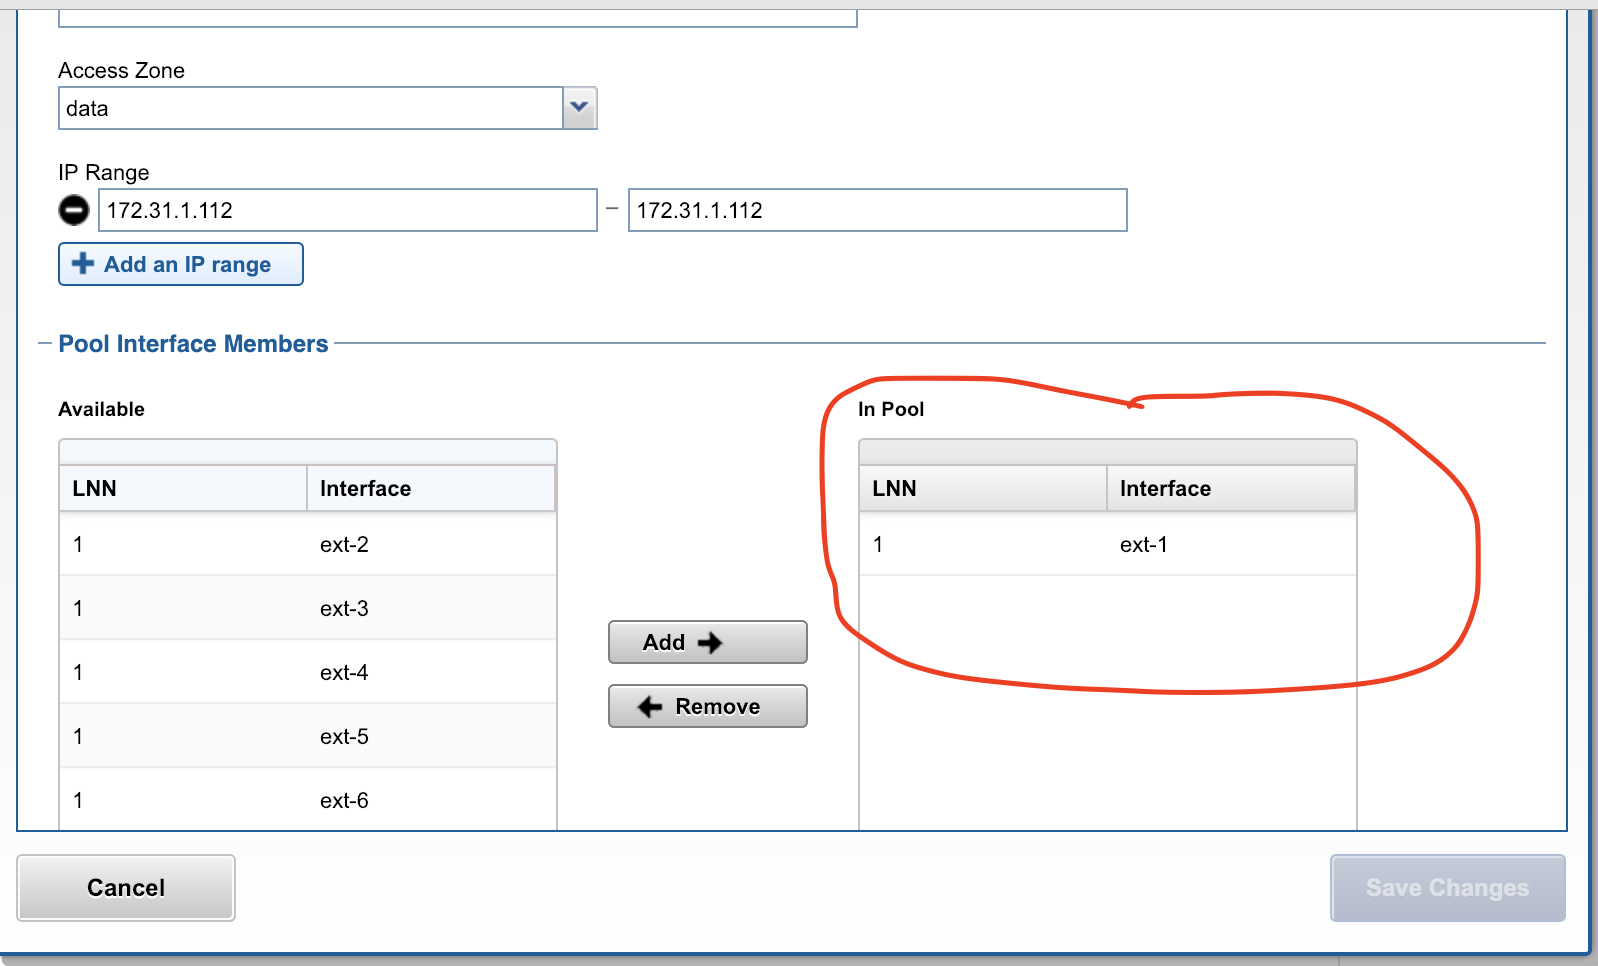
- View/edit the IP pool
- Record the Interfaces that are members of the pool, this will be required to reconfigure the pool.
- Select all interfaces and click Remove
- Save the pool with no interfaces as members.
- Once the above step is completed, any connected SMB clients will query DNS for the smartconnect name and will re-mount and re-authenticate to the target cluster.
- View/edit the same IP pool
- Re-add the interfaces that were recorded in the step above.
- Save the pool again.
- REPEAT the steps above for each IP pool included in the failover
- Test data access to the target cluster to verify SMB clients have switched and can write data. If any test access fails, use the test data access debug guide.
Manual SMB connection switch to target cluster after Failover
This section describes steps to refresh an SMB connection post failover.
- If the client was connected to the share during the failover.
- Unmount the share (disconnect).
- Remount the share (connect).
- Test read/write against newly mounted shares.
- If step 3 fails, the original connection information is likely cached on the client machine. The data in this case would continue to be available, however it would be Read-Only. Writes would fail. To remove the cached connection information reboot the pc or use net use command or Windows Explorer to unmount the share.
5. Test read/write against newly mounted share again.
6. If previous step fails, use the Test Data Access procedures to diagnose the issue.
Refreshing NFS Mounts after Failover
NFS mounts require an unmount and remount on the host.
- To unmount an export with open files use umount -fl option (force and lazy flag)
- Remount the export or if configured in fstab mount -a to remount any unmounted entries in the file.
- NOTE: For automated NFS export remounts consider using the script engine feature to ssh to hosts and remount post failover. Guide is here.