Administration Guides
Smart Archiver - Configuration
Home
- How to Configure Smart Archiver
- Summary
- Steps to Prepare the VM
- Steps to Configure a Path for User Archiving
- How to Archive data as an end user
- How to Recall Archived Data back to the File System
- How to Track Data Lifecycle Movement
How to Configure Smart Archiver
Summary
- Add a folder definition to archive data to a target S3 bucket with all required parameters including storage tier for cloud providers
- Create 2 buckets
- One for holding archived data example smartarchiver-data
- One for temporary recalled data staging example smartarchiver-staging
- trashcan bucket for deleted recalled data in the cloud example smartarchiver-trash
- Create 2 buckets
- Specify the authorized user paths that will be enabled for end user archive capabilities
- Add a pipeline configuration to present Archived data to end users for recall.
Steps to Prepare the VM
- Add the smart archiver license key
- searchctl license add --path /home/ecaadmin/<zip file name>
- add support for Smart Archiver
- nano /opt/superna/eca/eca-env-common.conf
- add this variable
- export ENABLE_SMART_ARCHIVER=true
- nano /opt/superna/eca/docker.compose.overrides.yml
- Add this text below and save the file with control+x
- ecactl cluster down
- ecactl cluster up
version: '2.4'
services:
searchmw:
environment:
- ENABLE_SMART_ARCHIVER
isilongateway:
environment:
- ENABLE_SMART_ARCHIVER
indexworker:
environment:
- ENABLE_SMART_ARCHIVER
Steps to Configure a Path for User Archiving
- Overview
- An archive definition is built using 2 folder definitions
- On premise to the cloud
- Cloud to on premise
- The folder definitions use specific types and features to enable archive and recall workflows. Security of what data is presented to users for archive and recall is also defined within the folder definitions
- The security model allows archive and recall security to be defined separately
- An archive definition is built using 2 folder definitions
- Add the folder definition and change the yellow sections below
- <cluster name> the source cluster name
- --folder - The location where archive data will be staged before it's moved to the cloud. We recommend using /ifs/tocloud
- access and secret keys
- endpoint url - See configuration guide on how to specify different target endpoint urls
- <region> - the region parameter based on the s3 target used
- cloudtype - set the cloud type to match your s3 target
- --smart-archiver-sourcepaths - This parameter is used to authorize any path in the file system to appear as an eligible path to end users to select folders to archive to S3, enter a comma separated list of paths example below
- --smart-archiver-sourcepaths /ifs/projects, /ifs/home
- --full-archive-schedule - Set a schedule that will be used to archive data selected for archive. Recommended daily archive at midnight to move the data copy to off peak hours
- example --full-archive-schedule "0 0 * * *"
- --delete-from-source - this will ensure data is deleted after it's copied, this is required for move operations, versus end user backup to S3 use case
- --smart-archiver-type Staging - This flag indicates the configuration definition is on premise to the cloud direction and data is moved here before it's archived to the cloud
- --smart-archiver-type Recall - This flag indicates the configuration definition is from the cloud to on premise when users recall data
- --storeFileHistory - This flags the lifecycle of file data with each archive or recall the history of what happened to the file is encoded into a custom s3 property to allow admins to see what has happened to the data.
- On premise to Cloud - example Smart Archiver command
- searchctl archivedfolders add --isilon gcsource --folder /ifs/tocloud --accesskey yyyy --secretkey yyyyy --endpoint s3.ca-central-1.amazonaws.com --region ca-central-1 --bucket smartarchiver-data --cloudtype aws --smart-archiver-sourcepaths /ifs/projects --full-archive-schedule "0 0 * * *" --delete-from-source --smart-archiver-recall-bucket smartarchiver-staging --smart-archiver-type staging --storeFileHistory
- Cloud to on premise - Add Pipeline from Object to File configuration for user recall jobs
- Create the staging area where recalled data will be copied during the recall process. This is a location on the cluster.
- Login the cluster with data that will be archived as root
- mkdir -p /ifs/fromcloud/sa-staging
- Add the Pipeline configuration for Smart Archiver
- searchctl archivedfolders add --isilon gcsource --folder /ifs/fromcloud/sa-staging --accesskey xxxxxxxx --secretkey yyyyyyyyy --endpoint s3.ca-central-1.amazonaws.com --region <region> --bucket smartarchiver-demo --cloudtype aws --source-path gcsource/ifs/projects --recall-schedule "*/5 * * * *" --recall-from-sourcepath --smart-archiver-type recall --trash-after-recall --recyclebucket smartarchiver-trash --storeFileHistory
- --source-path This parameter authorizes the data path in the archive bucket that will be presented to the user as recall eligible data the syntax is <clustername>/pathtoarchivedata all data under this path will be visible to end users for recall.
- In the example above gcsource is the cluster name and /ifs/projects is authorised for end user to see data in the archive and recall it.
- --bucket <bucket name> This must be the same bucket used in the folder definition above where the data is archived. This ties the two folder definitions together.
- --trash-after-recall - makes sure staging data is deleted after it's recalled
- --recyclebucket smartarchiver-trash - moves recalled data to a trash bucket with a life cycle policy to delete the data after x days.
- --storeFileHistory - This flags the lifecycle of file data with each archive or recall the history of what happened to the file is encoded into a custom s3 property to allow admins to see what has happend to the data.
- --source-path This parameter authorizes the data path in the archive bucket that will be presented to the user as recall eligible data the syntax is <clustername>/pathtoarchivedata all data under this path will be visible to end users for recall.
- done
- searchctl archivedfolders add --isilon gcsource --folder /ifs/fromcloud/sa-staging --accesskey xxxxxxxx --secretkey yyyyyyyyy --endpoint s3.ca-central-1.amazonaws.com --region <region> --bucket smartarchiver-demo --cloudtype aws --source-path gcsource/ifs/projects --recall-schedule "*/5 * * * *" --recall-from-sourcepath --smart-archiver-type recall --trash-after-recall --recyclebucket smartarchiver-trash --storeFileHistory
- Create the staging area where recalled data will be copied during the recall process. This is a location on the cluster.
How to Archive data as an end user
- Login to the Smart Archiver GUI as an Active Directory User
- Select the Smart Archiver icon
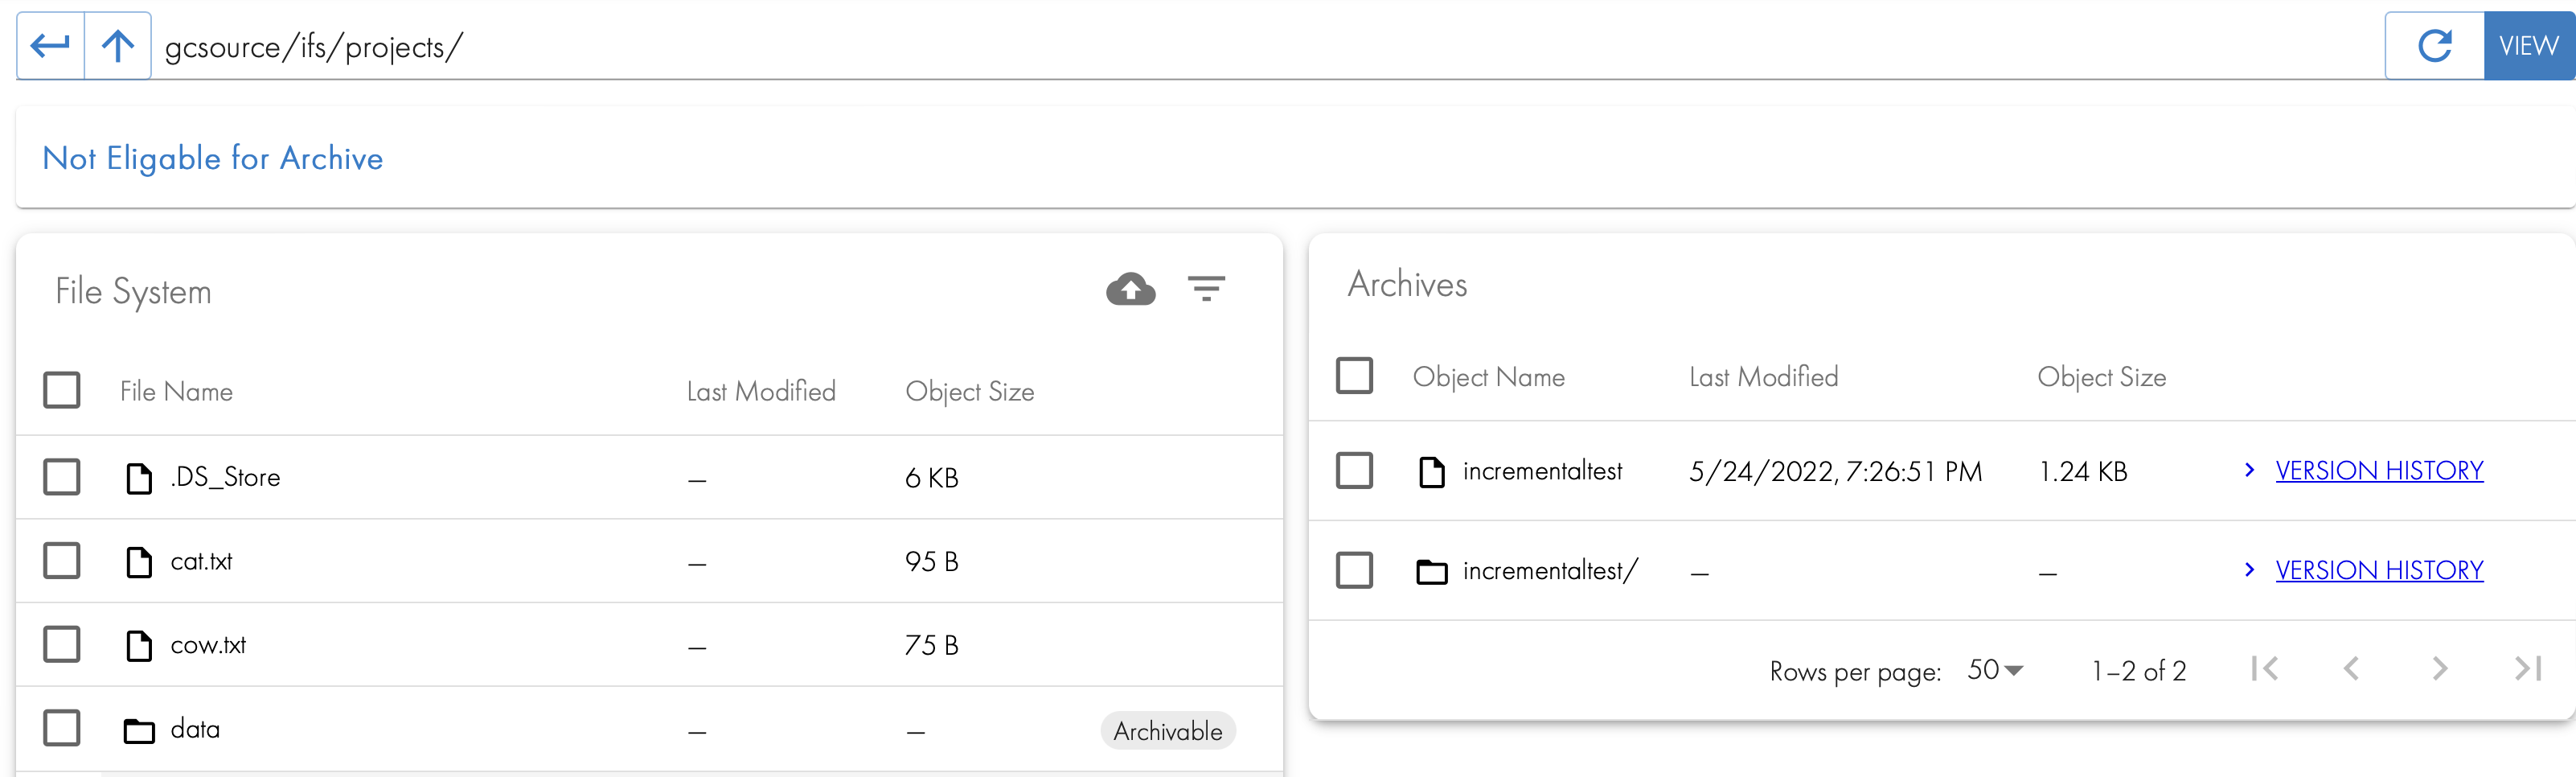
- Browse to the path entered above that was authorized for end users to archive. Folders that are eligible will show Archivable label.
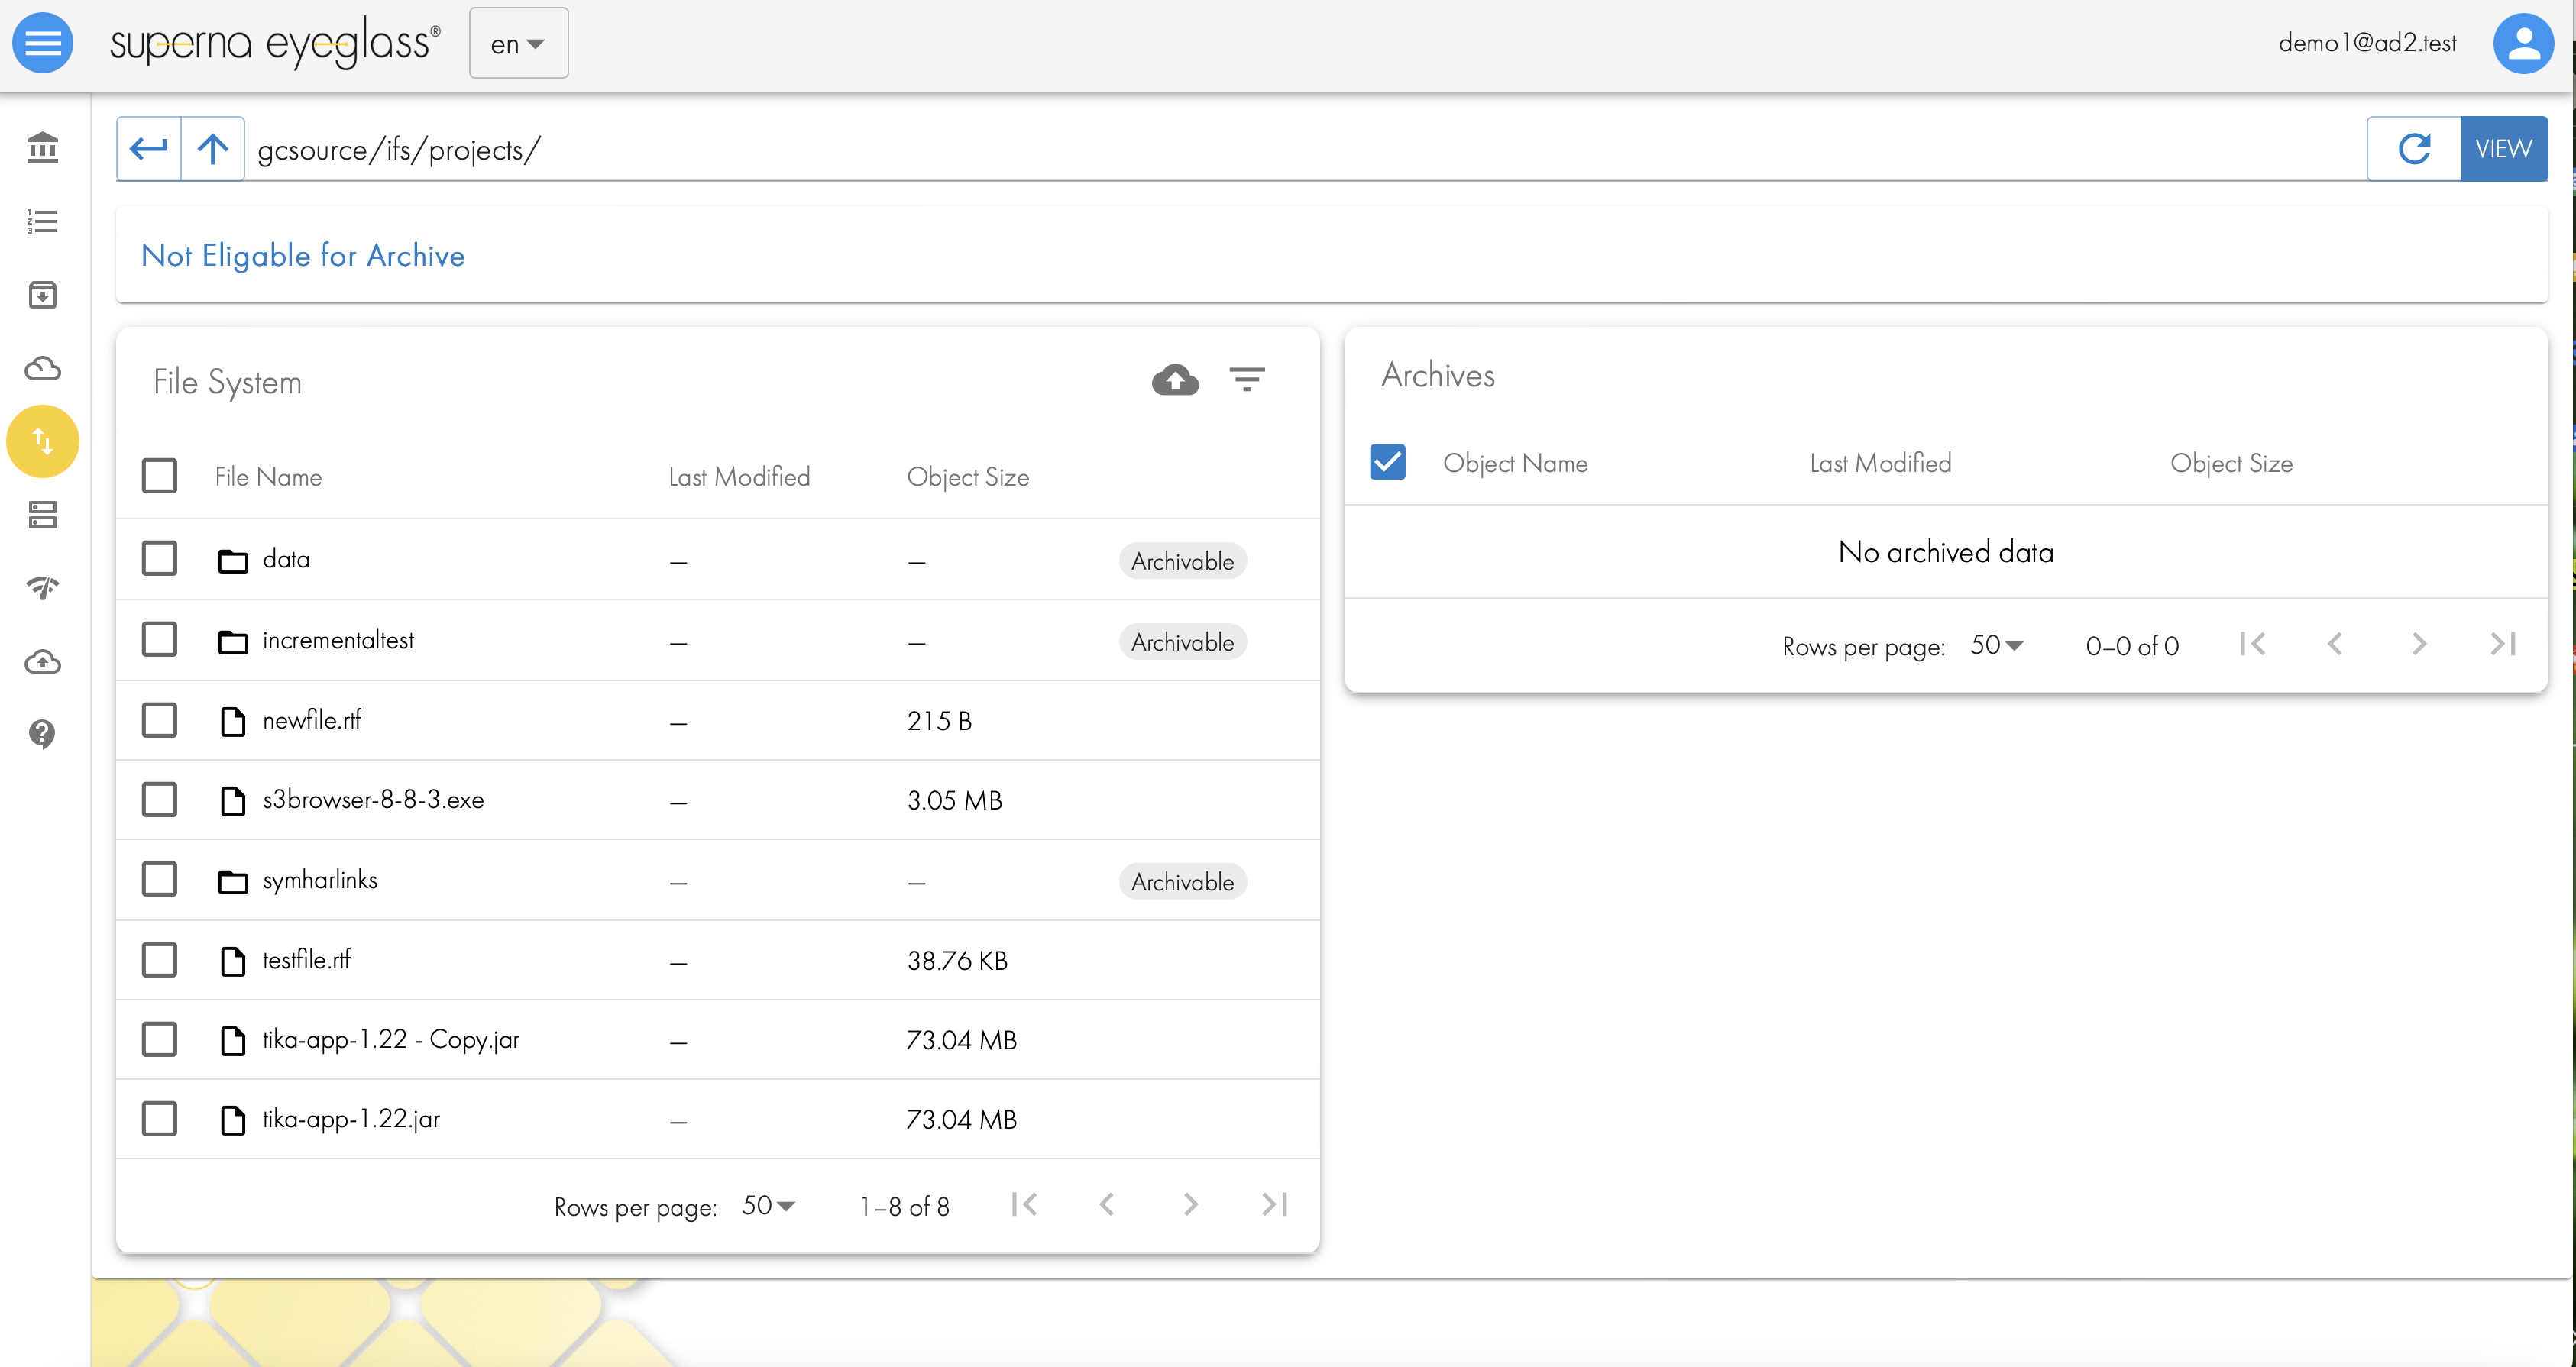
- Select a Folder
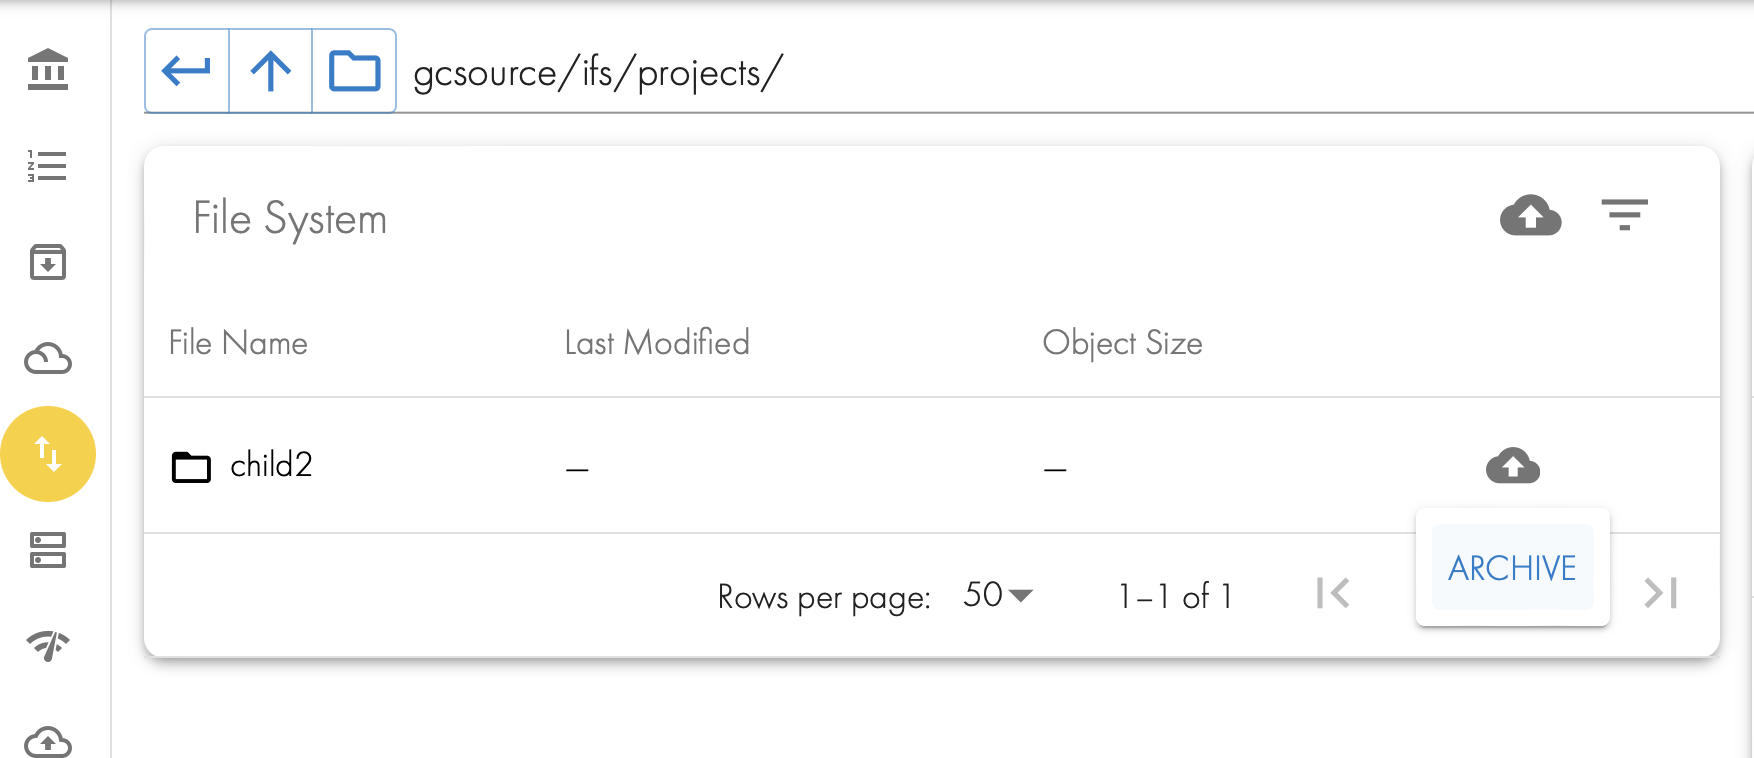
- The Up Cloud icon appears,
- Click the button to archive the data
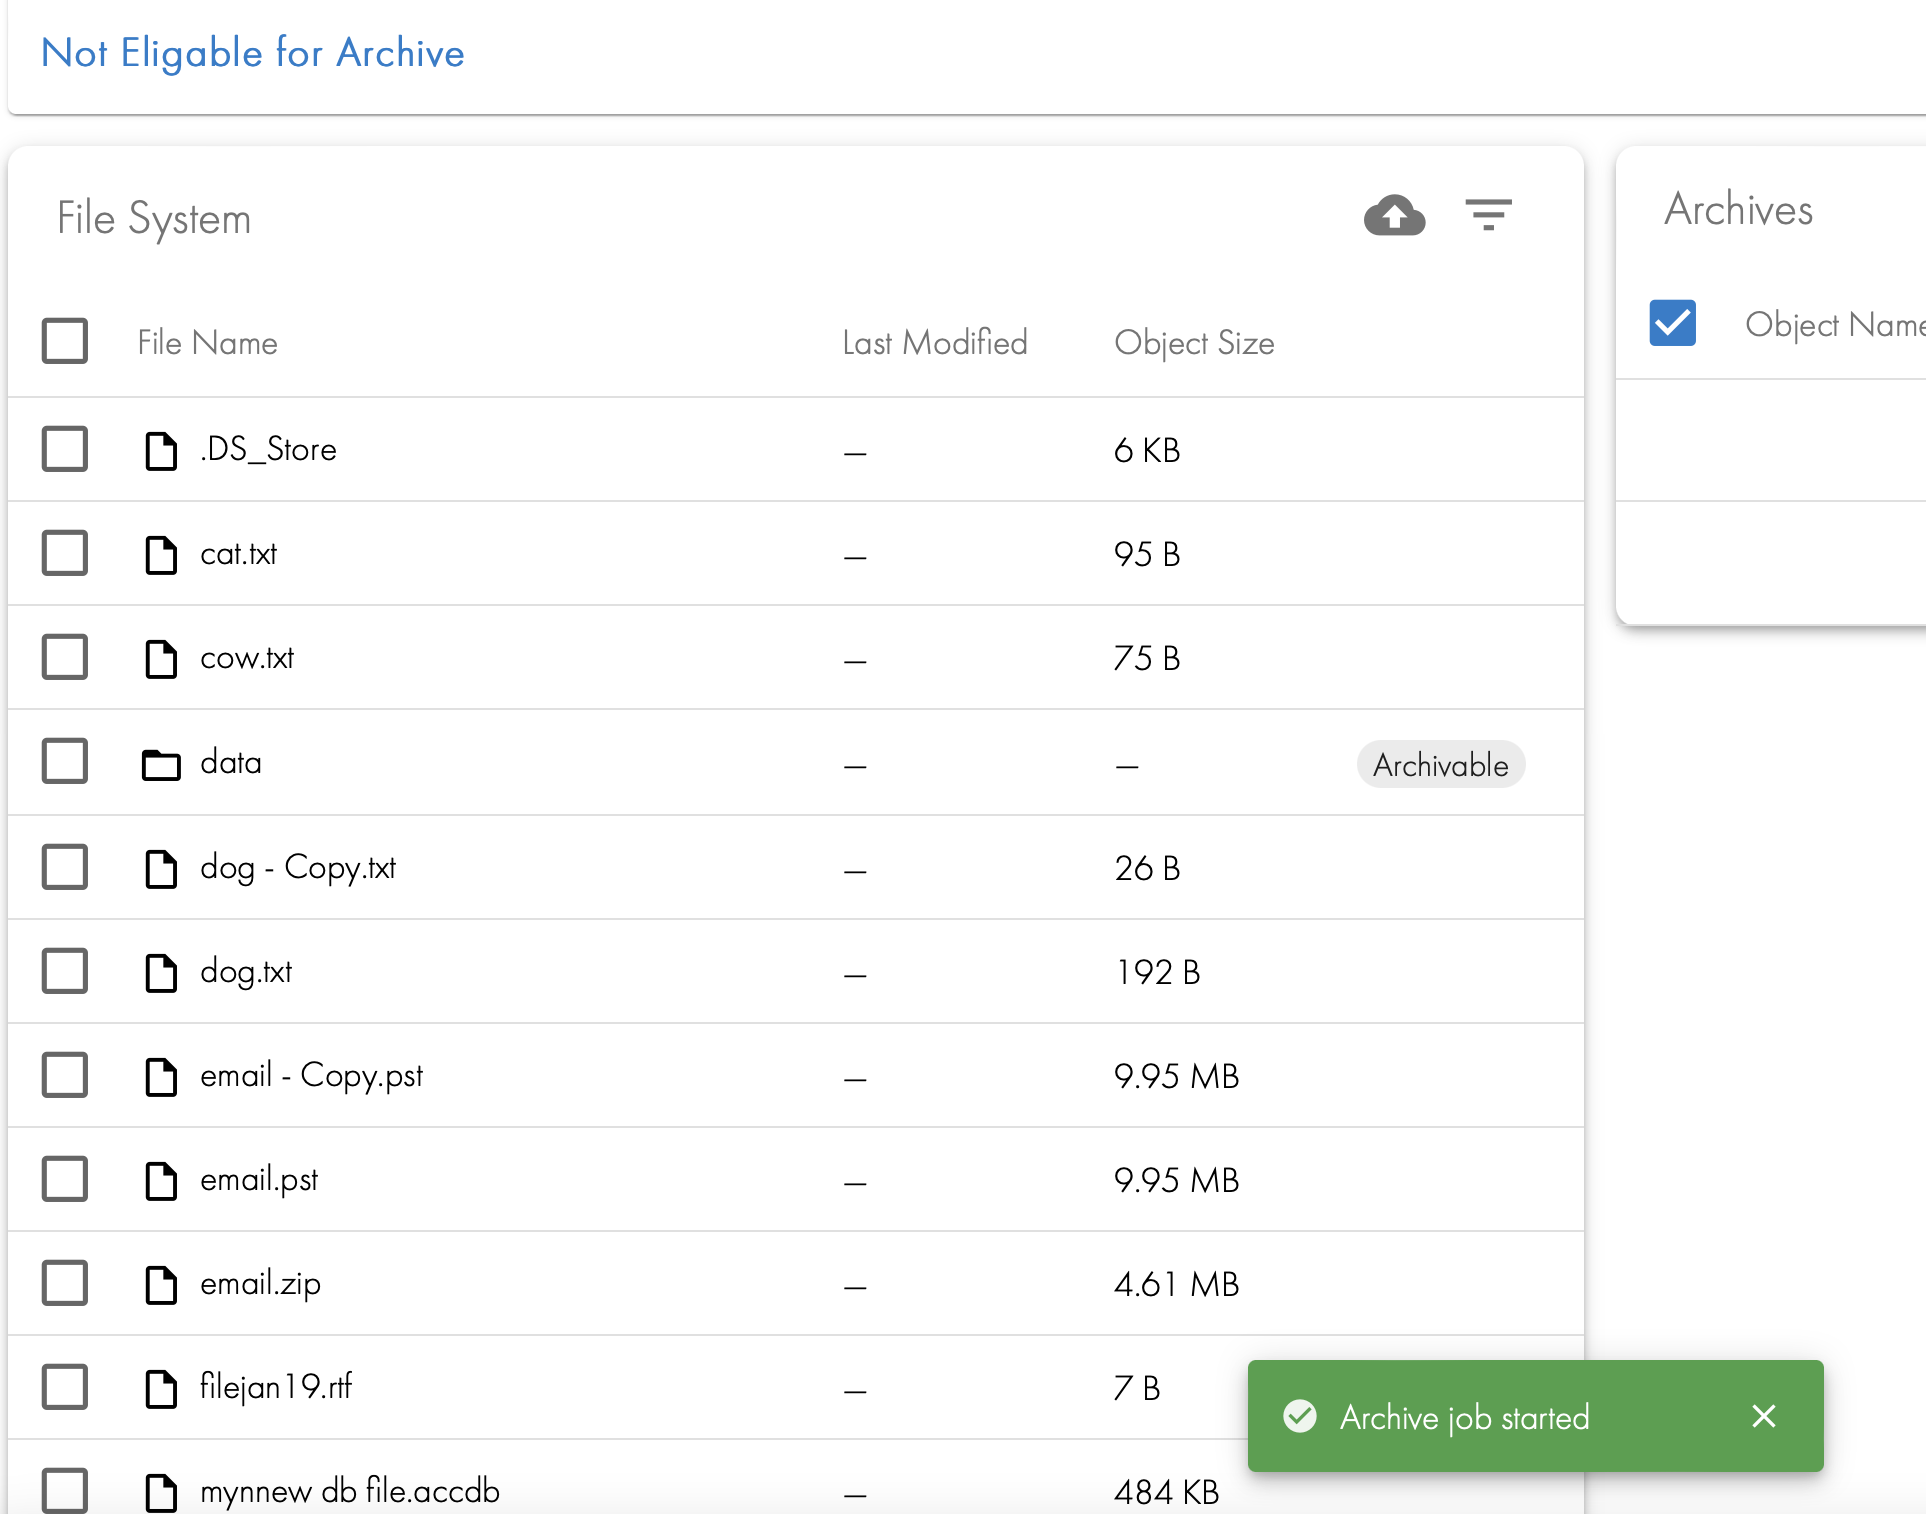
- User action is completed. The data will not be moved until the scheduled job runs.
- After the job is launched the folders will show as staged until the archive job completes. See below.
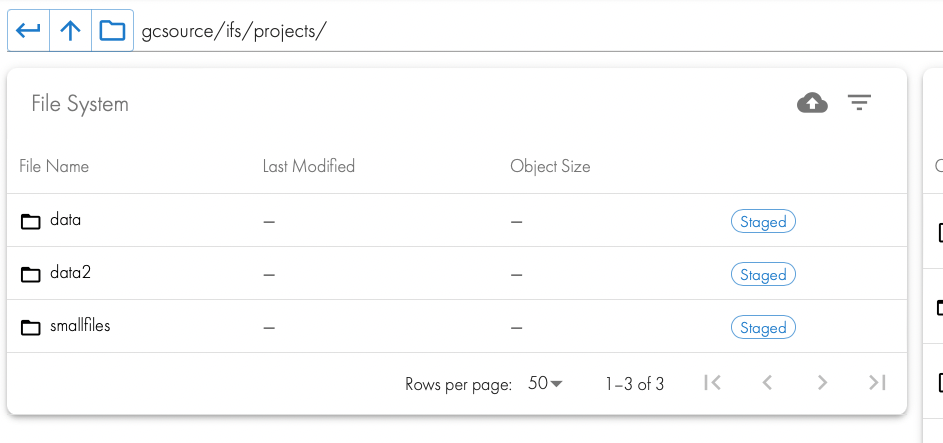
- After the job is launched the folders will show as staged until the archive job completes. See below.
- After the job completes and the user browses to the folder they will now see the archived data on the right hand screen.
How to Recall Archived Data back to the File System
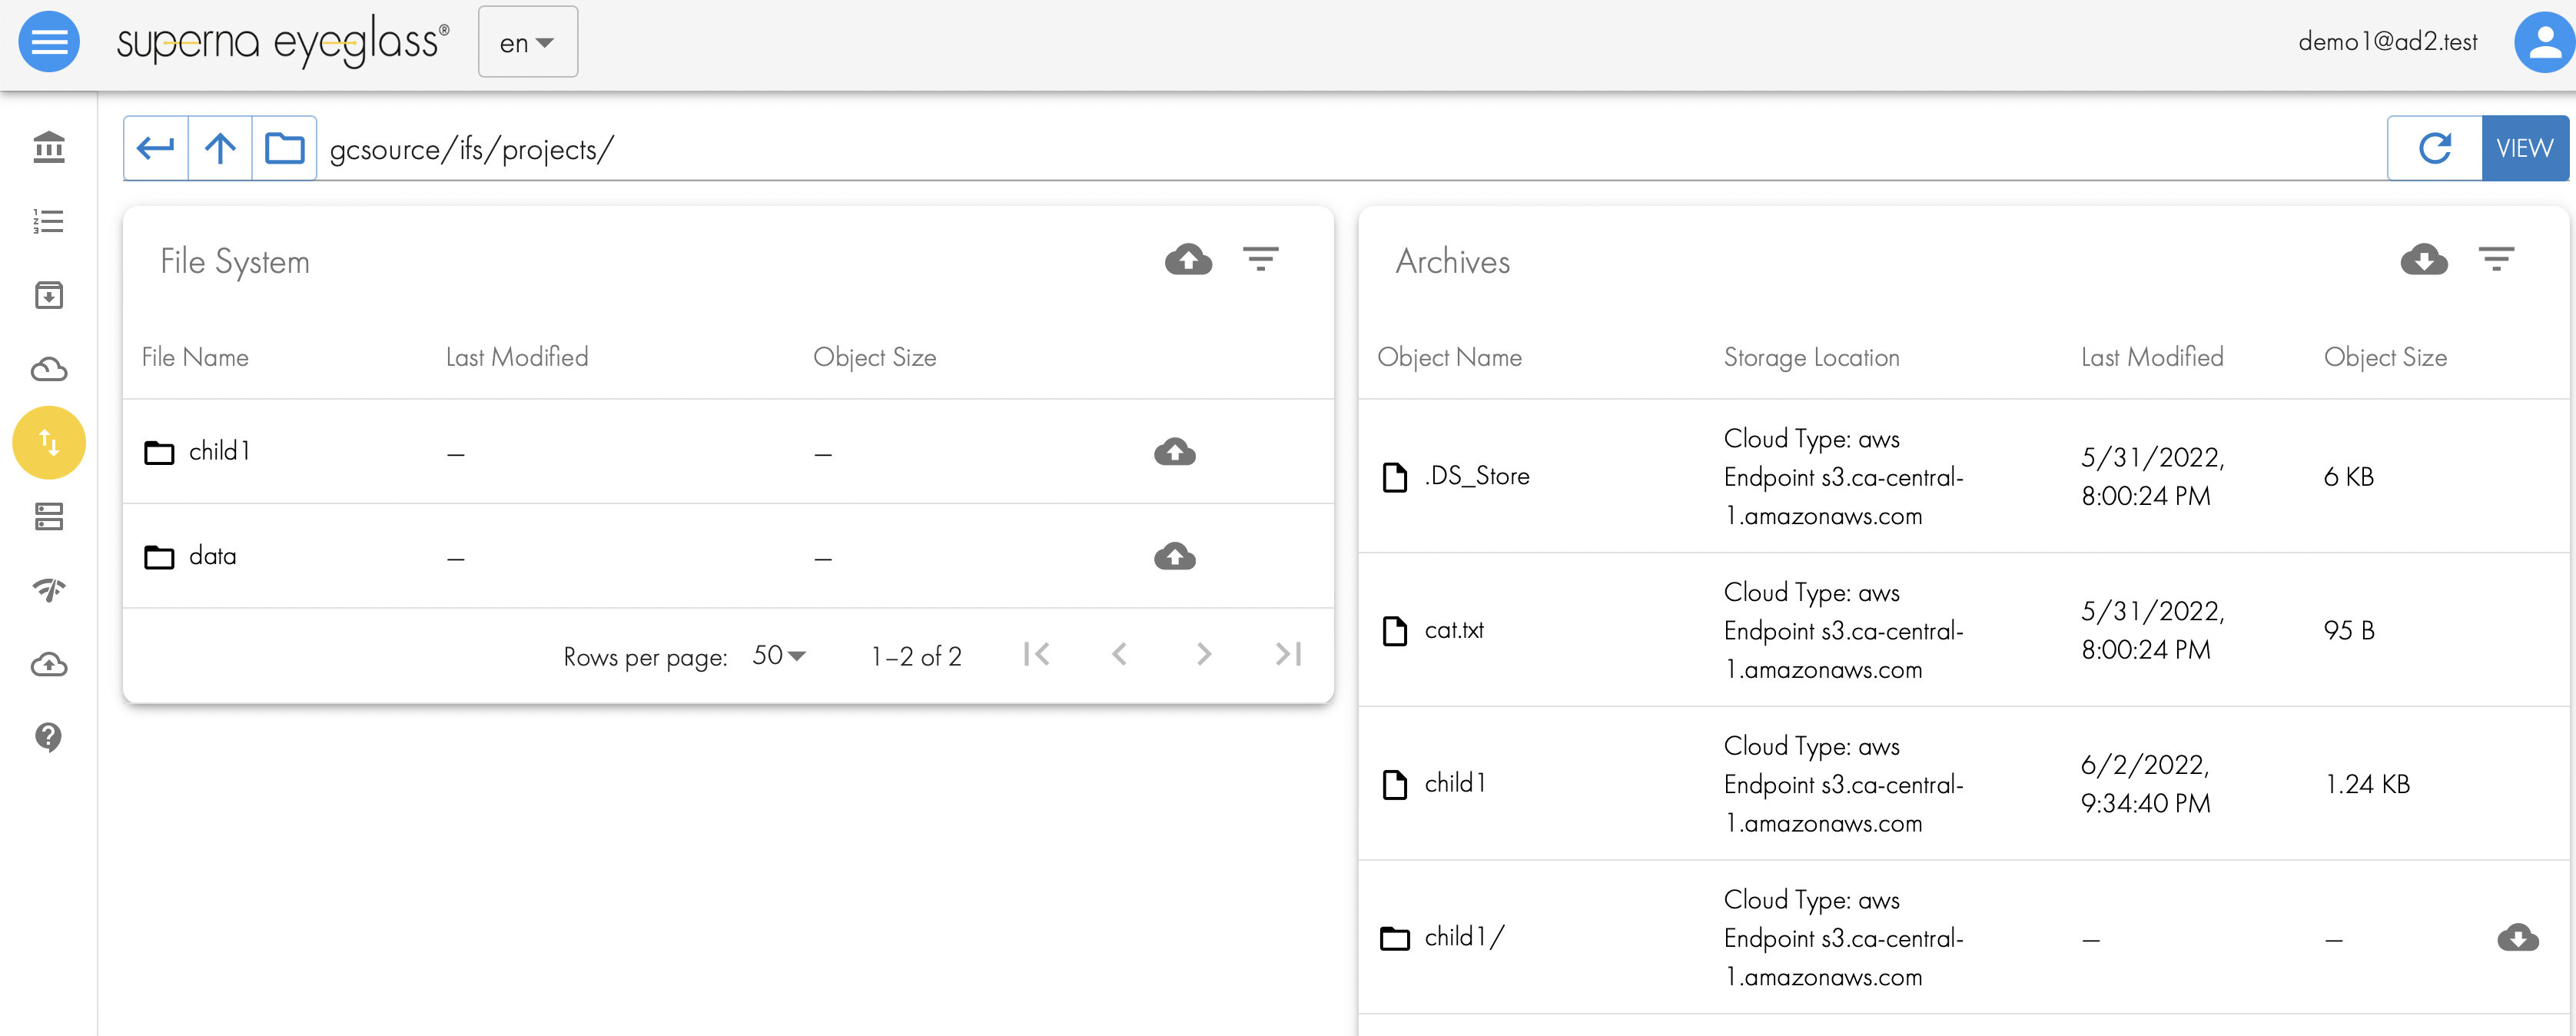
- A user can login to Smart Archiver portal and view the file system on the left hand pane and in the right they will see data that was archived from the currently selected folder on the right side. In the screenshot below, the child1 folder is visible on the left pane but also visible on the right side. This is because the data was recalled back to the file system. The cloud down arrow button on the right is used to recall data with a single click.
- NOTE: If the folder name already exists in the file system a collision will occur. This is handled by renaming the folder before it's restored. The folder will be renamed <original folder name>-smart-archiver-recall-collision-<month>-<day>-<time>-<year>
- To recall data click the button next to the folder on the right pane.

- This will launch a recall job that will be processed on the next scheduled recall job.
- done
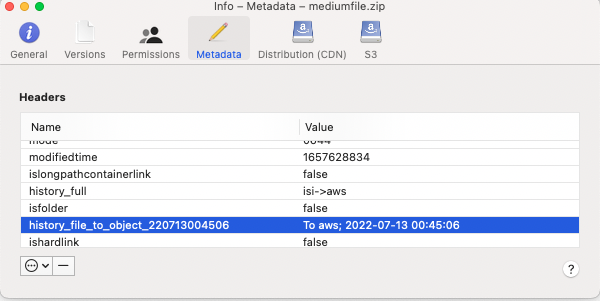
How to Track Data Lifecycle Movement
- The --storeFileHistory flag adds tracking data to each files movement from file to object and object back to file. This provides full traceability of all data movement within the Smart Archiver system. This is encoded directly in the objects making inspection easy and simple to see what happened to data. Future releases will use this metadata to report on data movement across the file and object systems.
- In this example the data is moved from PowerScale (isi) to AWS storage target. The tag shows the date and time the object was moved from file to object.