Ransomware Defender Security Event Workflow for Warning Severity Detections
Ransomware Defender Security Event Workflow for Warning Severity Detections
Under normal working state, it will be normal to see some user behaviors detected as warnings in the active events window. These events will stay in active monitoring state for a period of time (settable in the settings tab). To continue to monitor this user behavior for new threat detectors and rates of detection, promote the event to Major or Critical.
If the user's activity continues to fire threat detectors at or below the Warning rate, the security event will remain in Active monitoring state and will not be Auto Archived. If the signal threshold cross Major or Critical thresholds then actions will be applied to the user behavior. If the severity of the detection stays at the warning level, the event will be auto archived to history. See the steps below to change the default 30 minute expiry settings.
Auto Archive Warning Security Events
This feature simplifies the monitoring of low-grade security events. Warning security events will stay active, as long as new threat detectors for this user continue to be detected, during the auto-archive timeout period. This feature will auto-archive of the event if no new threat detectors fire for this user’s security event. The expires column can be used to monitor which events will auto-archive in X minutes from the Active Events window.
How to change the default Auto Archive Expired Warning Events
Use this procedure to set the time period a warning event will stay visible in the active event window before it's archived to the history tab. A longer time period allows for tracking a user's behavior for a longer time period.
- Open the Ransomware Defender window.
- Select the Settings tab --> Thresholds
- Change the auto-archive timeout from the default of 3 minutes to another value in minutes. See screenshot below (Ransomware Defender> Settings > Thresholds> Warning > Expiry (minutes) box).
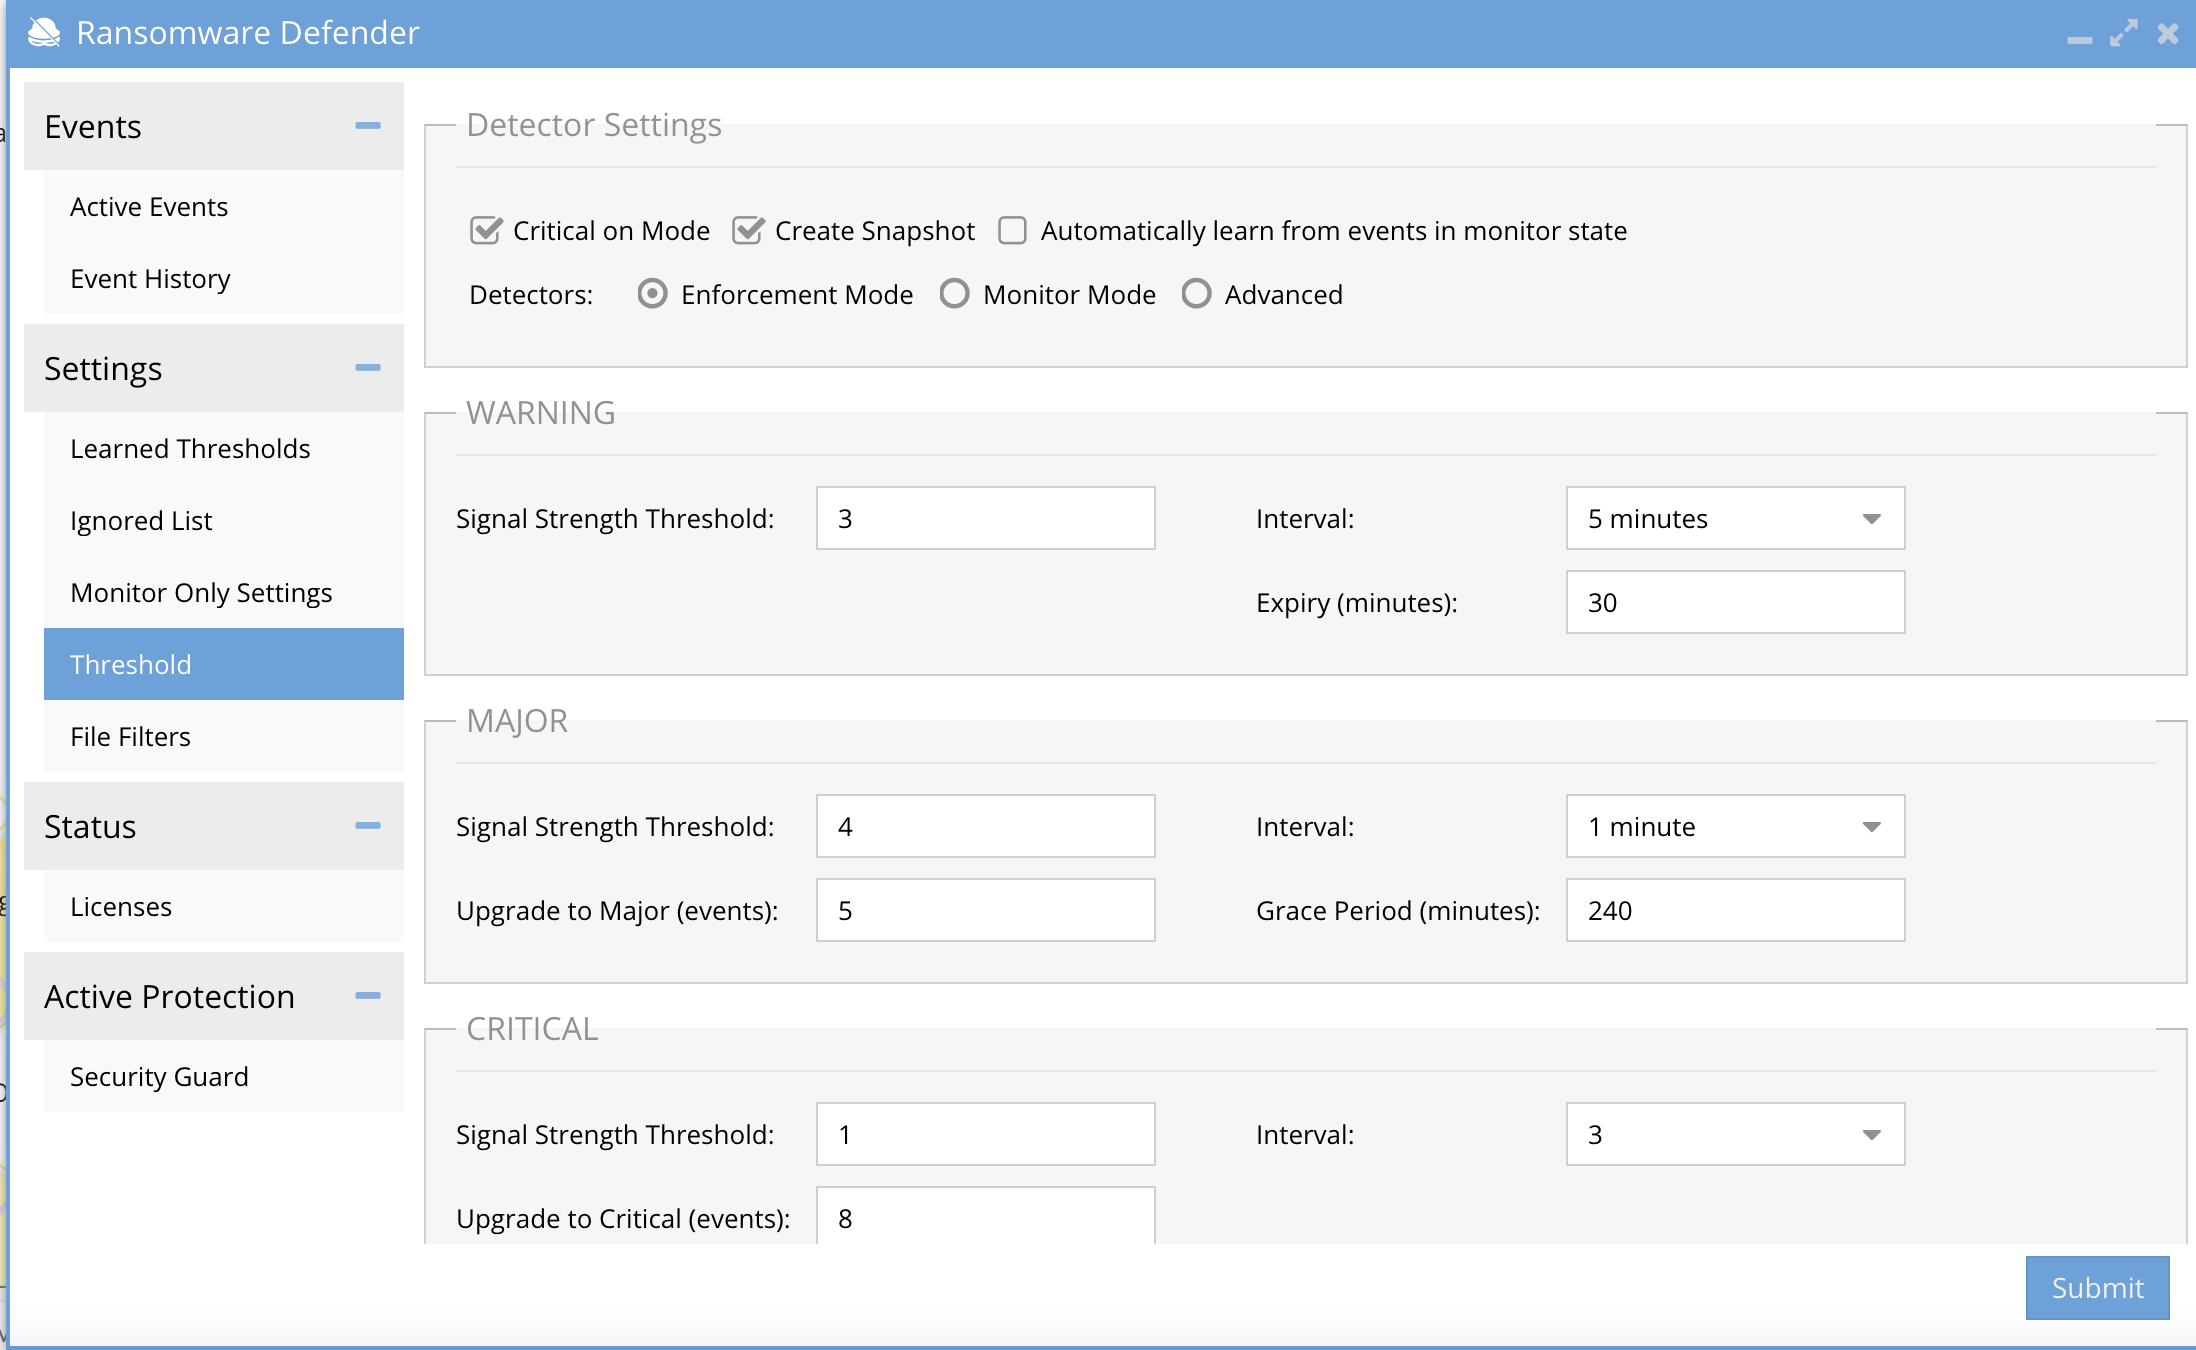
- Click submit button
- Note: In the diagram above in the Warnings section the auto-archive timeout has been changed to 30 minutes in the Expiry Box