Monthly Index Backup Solution Guide
To protect the index we recommend a monthly or bi-weekly back to NFS export on the PowerScale. This provides a recovery point of a large index stored within the Search & Recover cluster.
BACKUP: Backup Index
The BACKUP command will backup Search & Recover indexes and configurations for a specified Index. The BACKUP command takes one copy from each shard for the indexes. For configurations, it backs up the configSet that was associated with the collection and metadata. Use the following command to back up igls Search & Recover collection and associated configurations to PowerScale over NFS: /admin/collections?action=BACKUP&name=iglssearchbackup1&collection=igls&location=/opt/superna/mnt/backup/&async=task-id
Procedure:
- Create NFS export on PowerScale for this backup. Example: Create NFS export with path "/ifs/searchindexbackup", and configure to let Search & Recover nodes to have read and write permission to this NFS export by adding the Search and Recover ip to the read/write client list on the export.
- ssh to the cluster as root
- mkdir -p /ifs/searchindexbackup
- Create the user named "eyeglasshdfs" in the local system provider, no password is required when creating this user. This user will own the files on PowerScale.
- Configure ownership of that NFS export path on PowerScale: chown -R eyeglasshdfs:"PowerScale Users" /ifs/searchindexbackup .
- Change mode of this directory: chmod -R 777 /ifs/searchindexbackup .
- ssh to the cluster as root
- On each of the Search & Recover cluster nodes:
- Mount the NFS export to the mount point on each solr node. Replace yellow with SmartConnect name. Example: mount -t nfs -o nfsvers=3 <dns name of smartconnect>:/ifs/searchindexbackup /opt/superna/mnt/solr-backup .
- Repeat these steps on each node starting at node 2 to 4 or 7 depending on the Search cluster size.
- To ensure the NFS mount persists a reboot:
- Complete these steps on nodes 2 - X (X is the last node in the cluster, depending on the size of your Search & Recover cluster)vim /etc/fstab .
- Replace yellow highlight with the correct values for your cluster. NOTE: the FQDN should be a SmartConnect name for a pool in the System Access Zone IP Pool SmartConnect.
- FQDN:/ifs/searchindexbackup /opt/superna/mnt/solr-backup nfs ro 0 0 .
- Save the file.
- Restart the cluster to allow new mount to be visible:
- SSH to node 1 of the cluster as ecaadmin.
- ecactl cluster down (wait for this to finish).
- ecactl cluster up .
- Verify that the NFS mounted directory is in the mount list of solr container.
- ecactl containers exec solr mount .
- Execute the backup command:
- location=/opt/superna/mnt/backup (this is a the local location in the VM that is mounted to the PowerScale export).
- Task-id = 1 (any integer can be used to monitor task (will be used to check the status with REQUESTSTATUS command).
- Login to node 2 using ssh and ecaadmin user account.
- Run this command:
- curl ‘http://node2-IP:8983/solr/admin/collections?action=BACKUP&name=iglssearchbackup1&collection=igls&location=/opt/superna/mnt/backup/&async=1’
- Then use this command to monitor progress:
- Once that task has been completed, the action=REQUESTSTATUS will return the status of backup (success/failed).
- Note for a large index this backup can take hours.
- Once completed login via ssh to the PowerScale and verify the backup directory contains files.
- The size of the index backup will be smaller than the index size on the cluster.
RESTORE: Restore Index
The RESTORE command will create a Index with the specified name in the collection parameter. Use the following command to restore igls Search & Recover index and associated configurations:
/admin/collections?action=RESTORE&name=iglssearchbackup1&collection=igls&location=/opt/superna/mnt/backup&async=task-id
The target collection should not be present at the time the API is called, as Search & Recover will create this collection. In order to restore with the same collection name, we should delete the existing collection with DELETE Command.
Procedure:
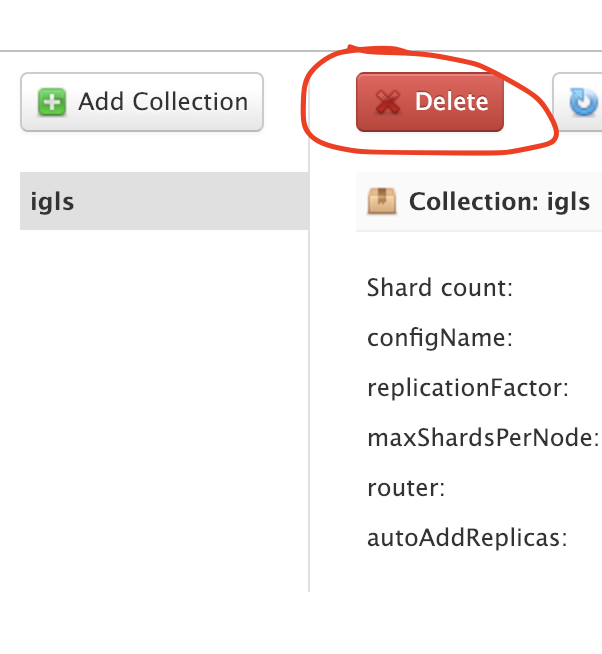
- Delete existing Index from the Collection screen in the GUI:
- Restore collection:
- Login to node 2 of the cluster and execute this command:
- Example: "curl ‘http://node2-ip:8983/solr/admin/collections?action=RESTORE&name=iglssearchbackup1&collection=igls&location=/opt/superna/mnt/backup/&async=1’"
- Check the status of the request task for that task-id:
- curl ‘http://node1-IP:8983/solr/admin/collections?action=REQUESTSTATUS&requestid=task-id’
- NOTE: This process can take hours on a large restore
- Once that task has been completed, the action=REQUESTSTATUS will return the status of backup (success/failed).
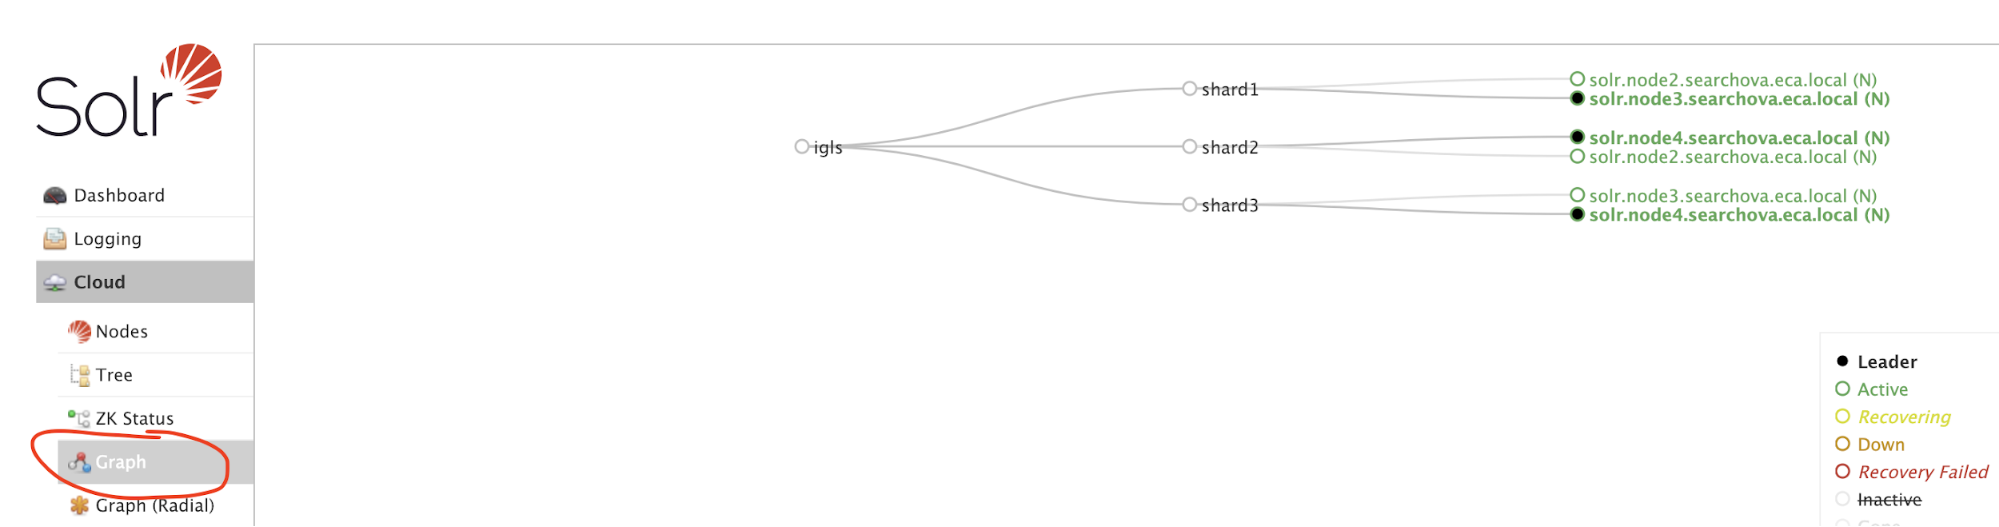
- Use GUI to verify the collection after the restore that everything is green:
- Done.
- Verify ingestion tasks are functioning be creating new files and verify you can search for new files.
- Use health check process to verify ingestion and stats command to see that files are being added to the index successfully. See Configuration section.