How to convert VMware Eyeglass appliance and Migrate to Microsoft Azure
How to convert VMware Eyeglass appliance and Migrate to Microsoft Azure
- Limitations of 3rd party products within this solution Example
- Overview
- Pre Setup Steps and Tools for upload to Azure
- Steps to Convert Eyeglass VMware appliance to VHD and automatically upload to Azure
- How to convert VHD to Managed Disk for Use in Azure
- How to Connect to Eyeglass and configure firewall ports on Eyeglass VM
- Optional - How to copy an existing VHD directly to a resource group storage blob
Limitations of 3rd party products within this solution Example
References to PowerShell and Microsoft tools is provided as reference only and not included in product support.
- Issues with exact PowerShell examples or Azure procedures require a support case with Microsoft
- Reference links are provided "as is" with no support
- NOTE: this document is not covered by support contract and is provided "as is" with 3rd party product expertise required
Overview
This solutions guide assists with examples of how to move a VMware Eyeglass appliance into Azure to use Azure as a 3rd site. This solution example provides examples that must be changed to apply to your environment. It is expected that Azure expertise and PowerShell expertise is known to complete these steps.
Pre Setup Steps and Tools for upload to Azure
Install certificate remote management software:
Download here https://azure.microsoft.com/en-gb/resources/samples/resource-manager-powershell-certificate-authentication/
Install certificate authentication package for VM convert tool
Open PowerShell as administrator on PC OS that has PowerShell installed
Run these commands:
Import-Module AzureRM.Resources
Set-ExecutionPolicy RemoteSigned
Create Azure management certificate to allow remote tools to connect to Azure:
Copy and paste below to PowerShell prompt (NOTE: the cert file will be created in your temp folder in your profile C:\Users\username\AppData\Local\Temp>)
Import-Module PKI ## This will import public key infrastructure modules into Powershell
New-SelfSignedCertificate -DnsName "MVMC" -CertStoreLocation "Cert:\CurrentUser\My" ## Creates private cert in the current user’s Personal certificate store
Export-Certificate -Cert (Get-ChildItem Cert:\CurrentUser\My\ -DnsName MVMC) -FilePath $env:TEMP\MVMC.cer ## Exports public cert created above using New-SelfSignedCertificate
Import-Certificate -FilePath $env:TEMP\MVMC.cer -CertStoreLocation Cert:\CurrentUser\Root ## Imports the cert into the current user’s Trusted Root Certification Authorities store
Reference this link to if you need additional information http://adriank.org/generating-azure-management-certificate-microsoft-virtual-machine-converter-3-1/
Upload the certificate file .cer to Azure
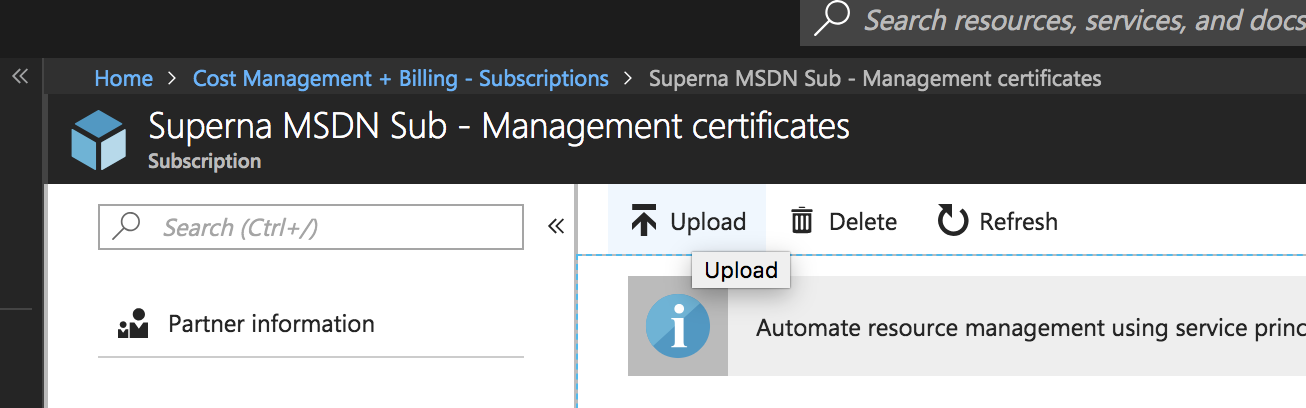
- Record the Azure subscription id
- Notice the hash value needed and record this value
- Download VMware to azure conversion tool and install it https://www.microsoft.com/download/details.aspx?id=42497
- You will need azure subscription id and management key hash to authenticate to Azure to use this tool

Steps to Convert Eyeglass VMware appliance to VHD and automatically upload to Azure
- You will need the following to complete these steps:
- Azure subscription id
- Management certificate hash
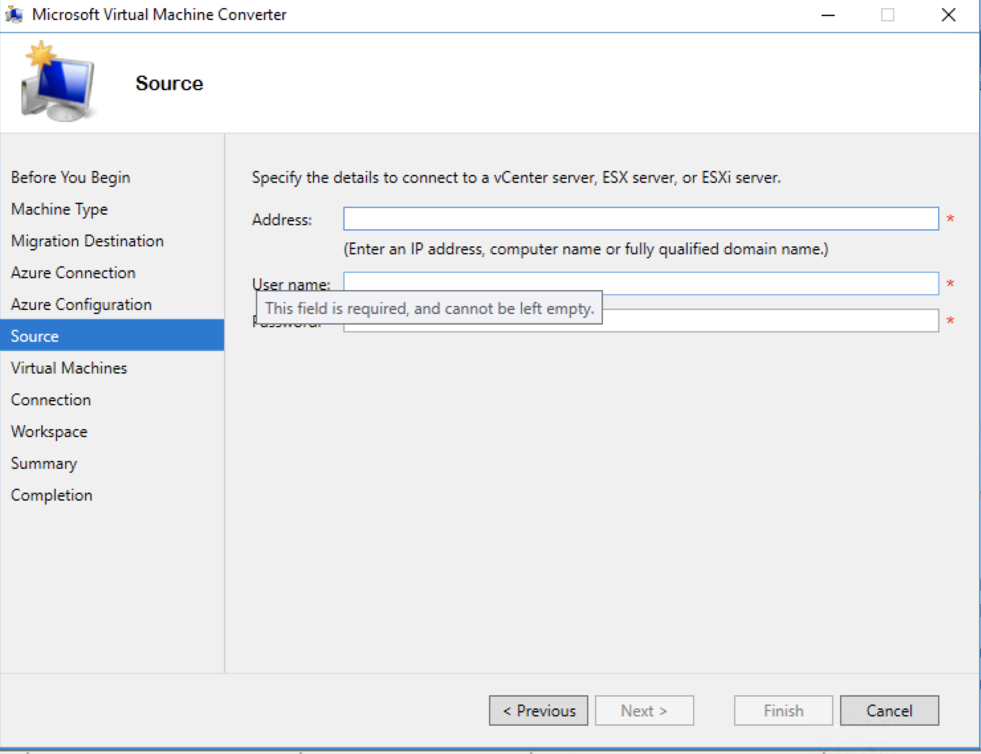
- Ip address for vCenter where Eyeglass VM is running
- IMPORTANT: Configure Eyeglass VM for DHCP before converting
- Connect to the VM Console from VMware vCenter management interface:
- Login as admin user
- Type sudo -s
- Enter admin password
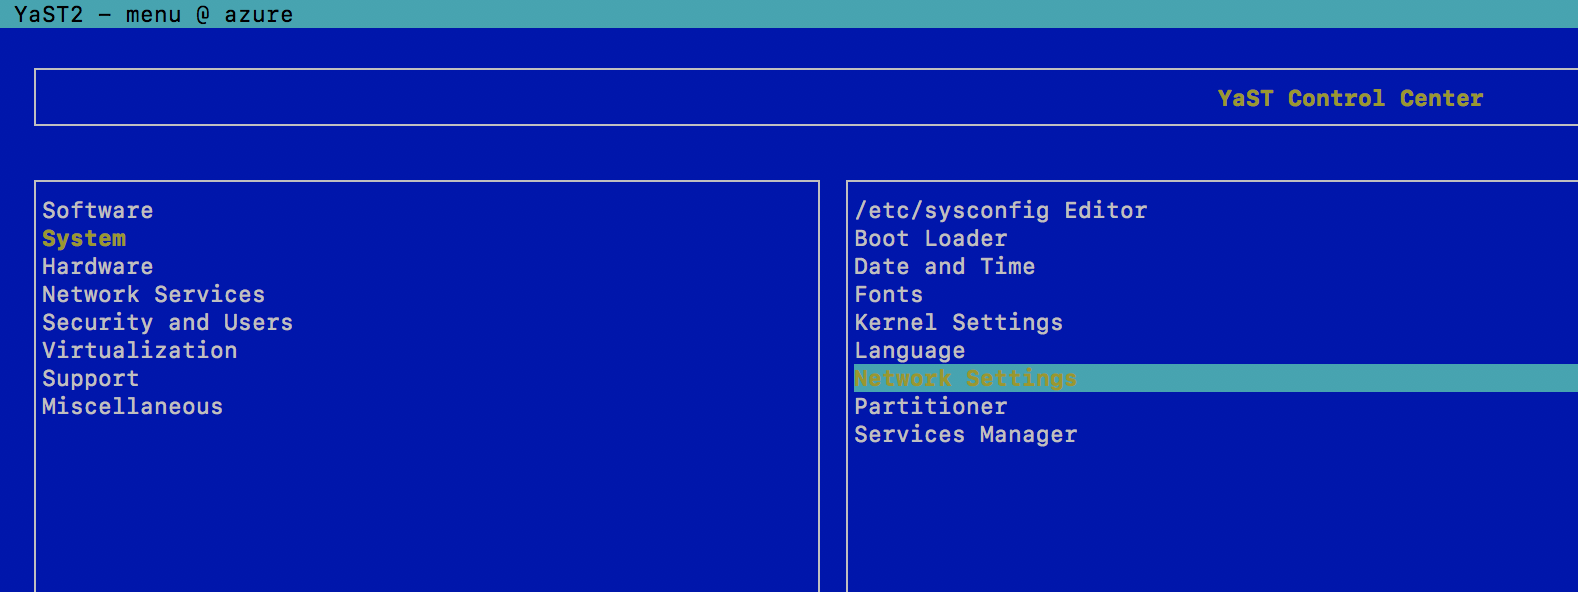
- Type yast
- Go to networking section edit Ethernet settings and switch to DHCP
- Edit the Ethernet adapter (use tab key)
- Set to DHCP
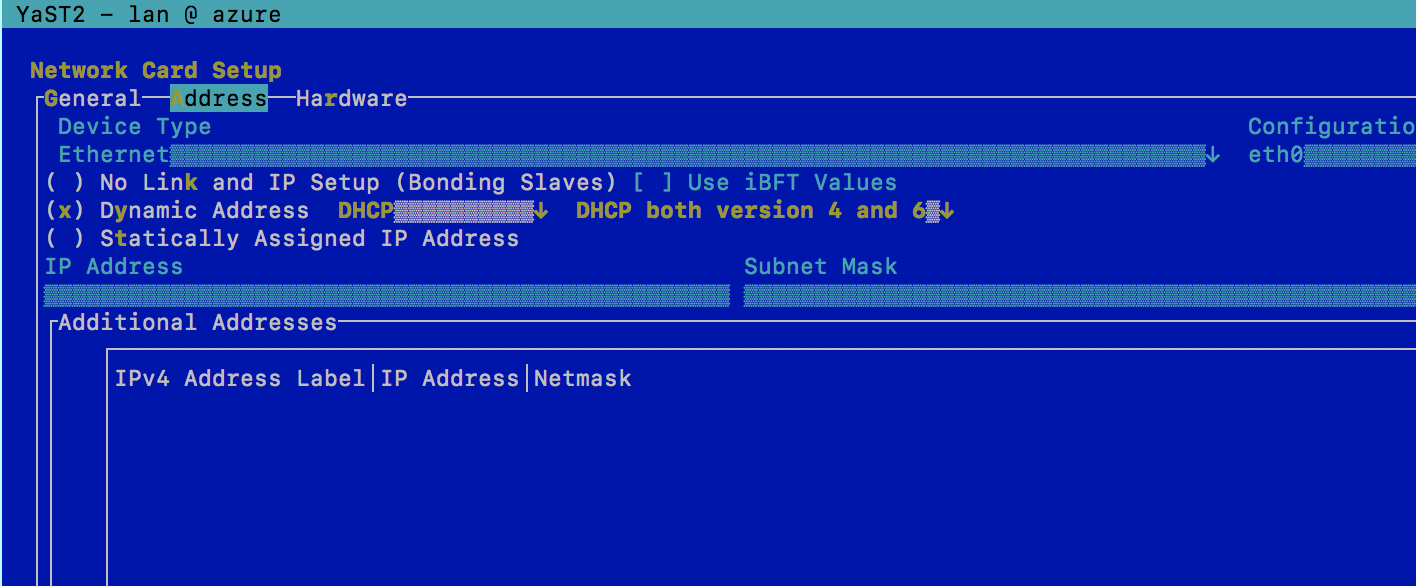
- Save each screen and exit yast
- Shutdown the Eyeglass VM
- Type shutdown
- Verify its shutdown in vCenter
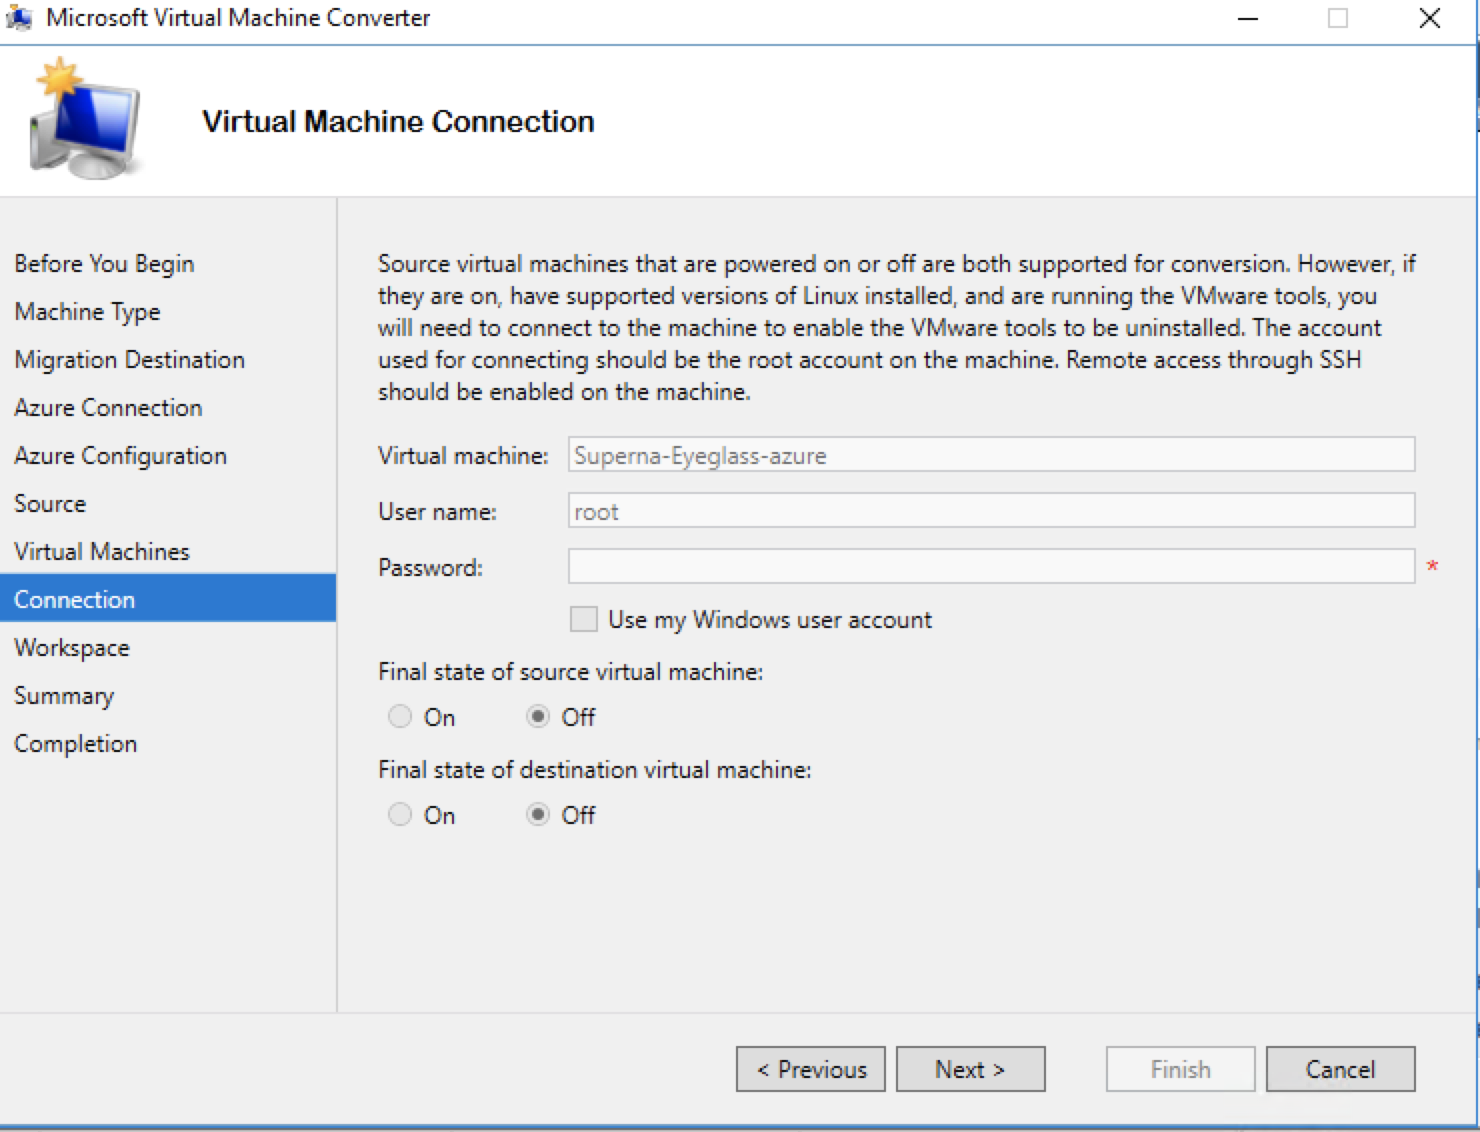
- Open Microsoft Virtual Machine Converter
- NOTE: Some VMDK's may require updates depending on the VMware version used (references are information only , support with Microsoft is required Reference)
- Additional tools for editing VMDK if required. Reference.
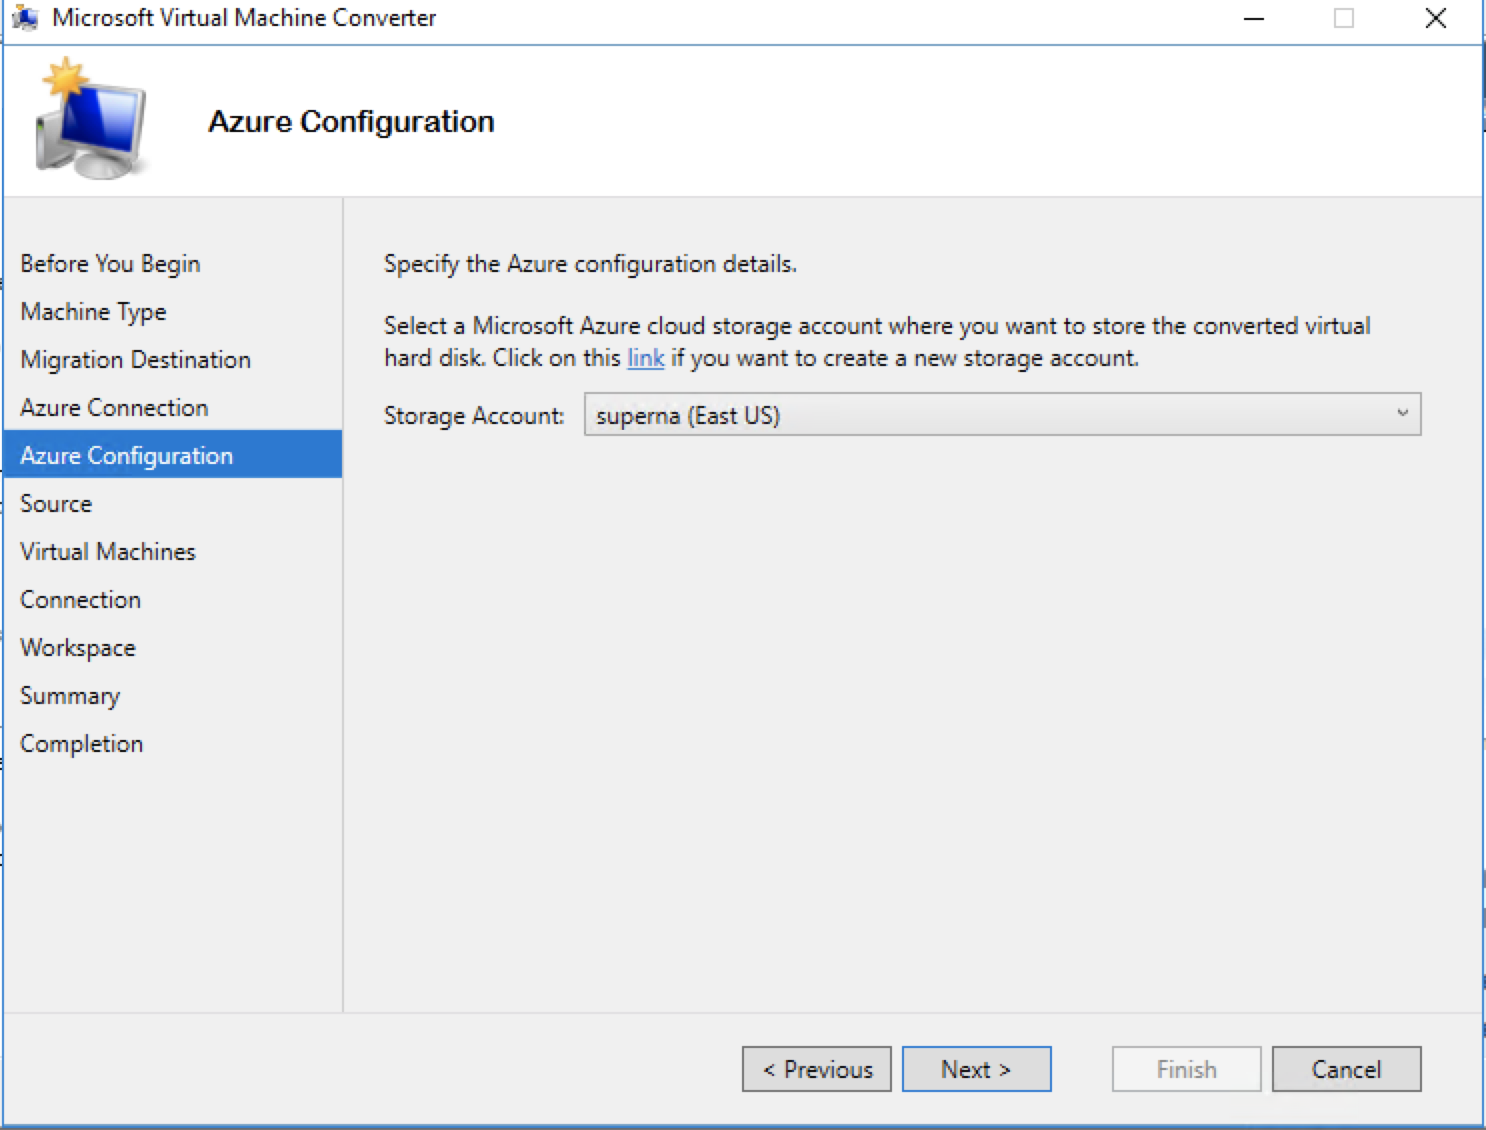
- When selecting a location to convert ensure you have the disk space for the entire disk size of 80Gb.
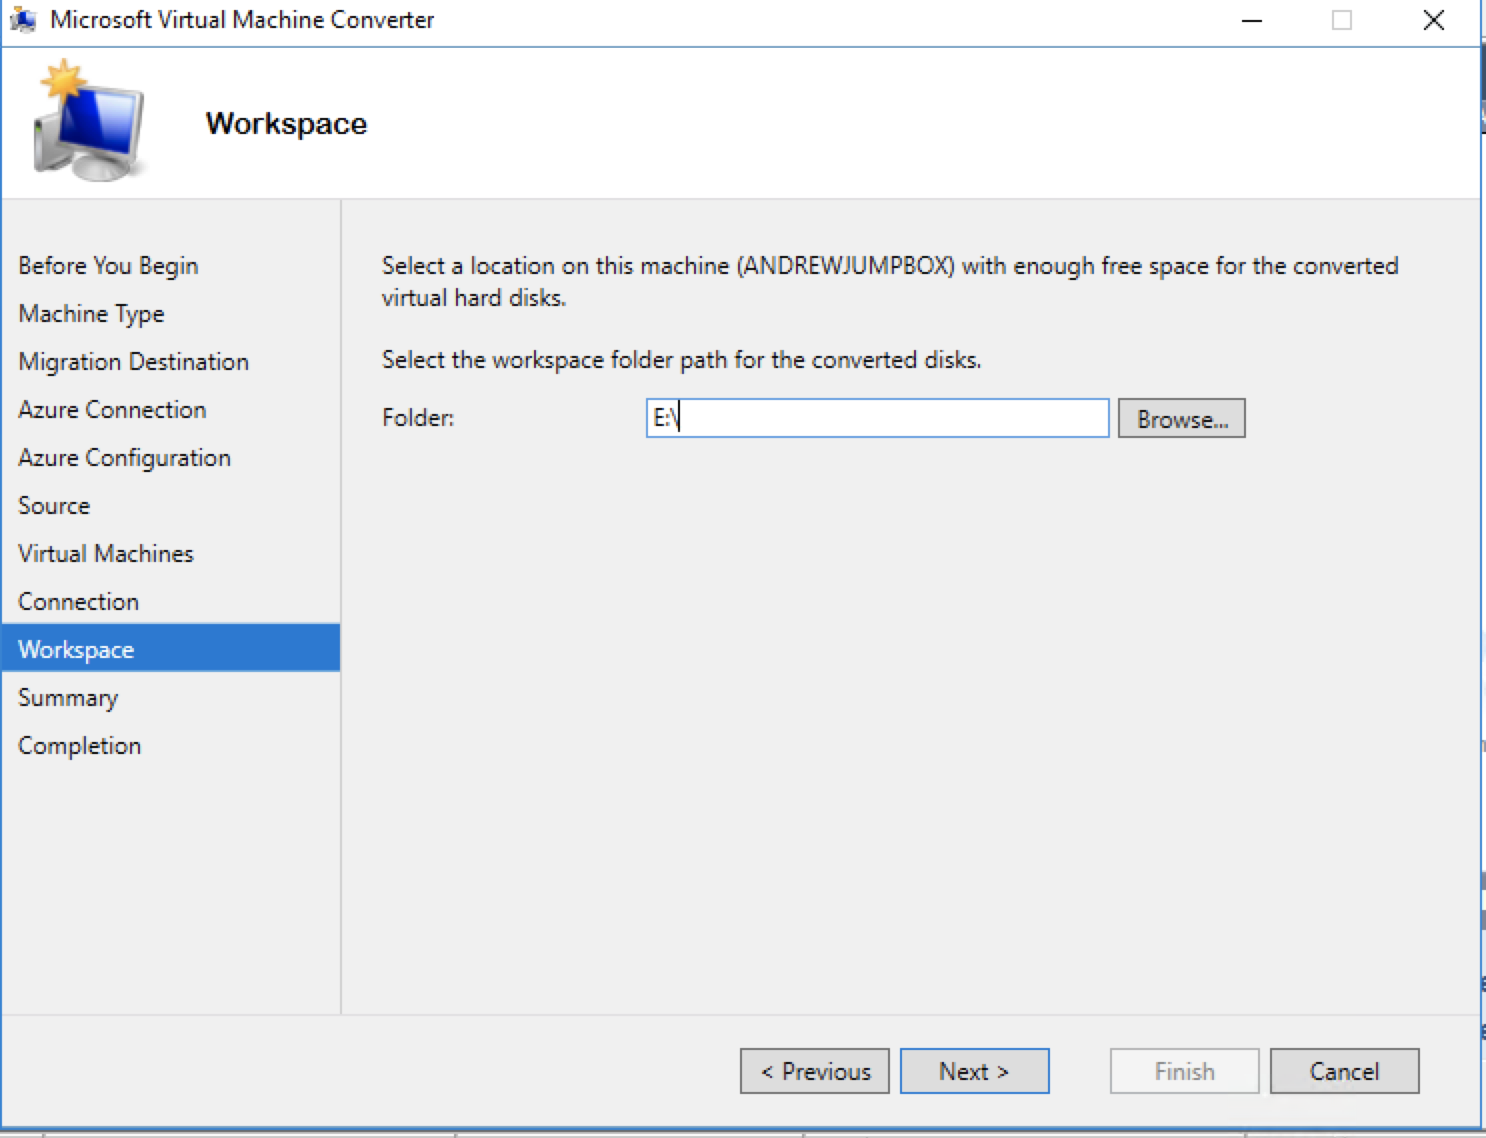
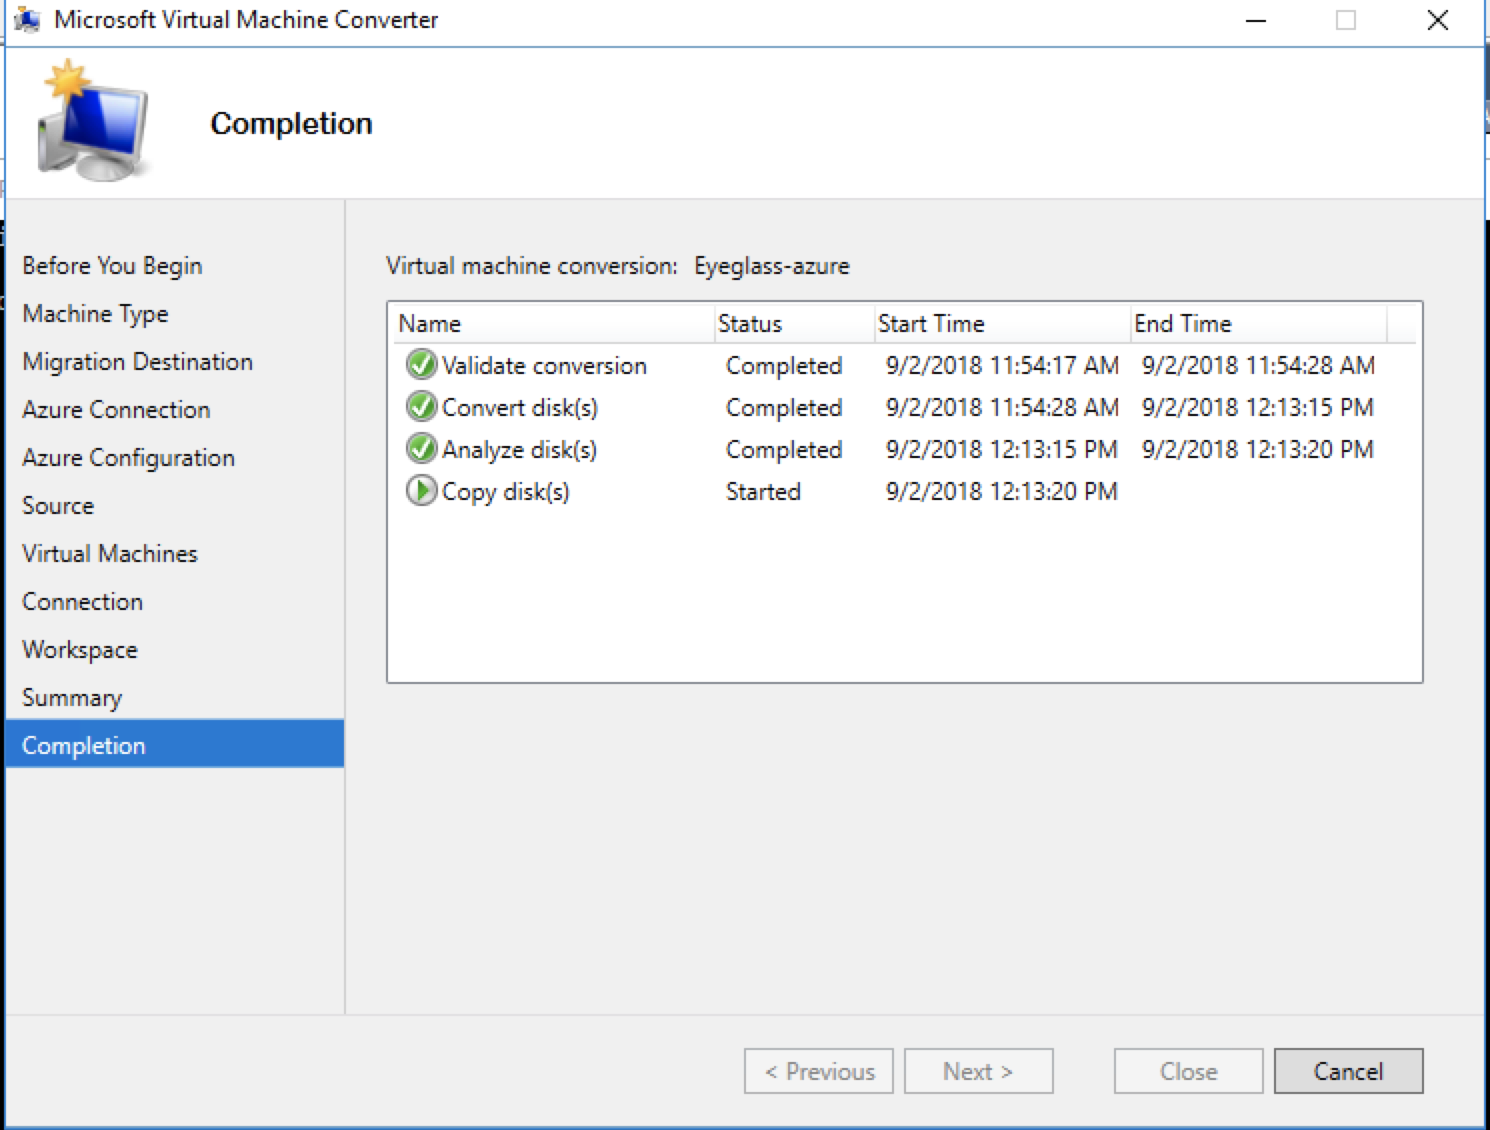
- Wait for the last step copy Disks to complete. This step copies the VHD to a storage blob in Azure. NOTE: This will take a long time to copy to Azure no progress is shown and can take an hour or more.
- Done.
How to convert VHD to Managed Disk for Use in Azure
- After the previous step completes find the VHD in the storage blob (note the VHD will be in a storage bucket named after the VM in VMware)
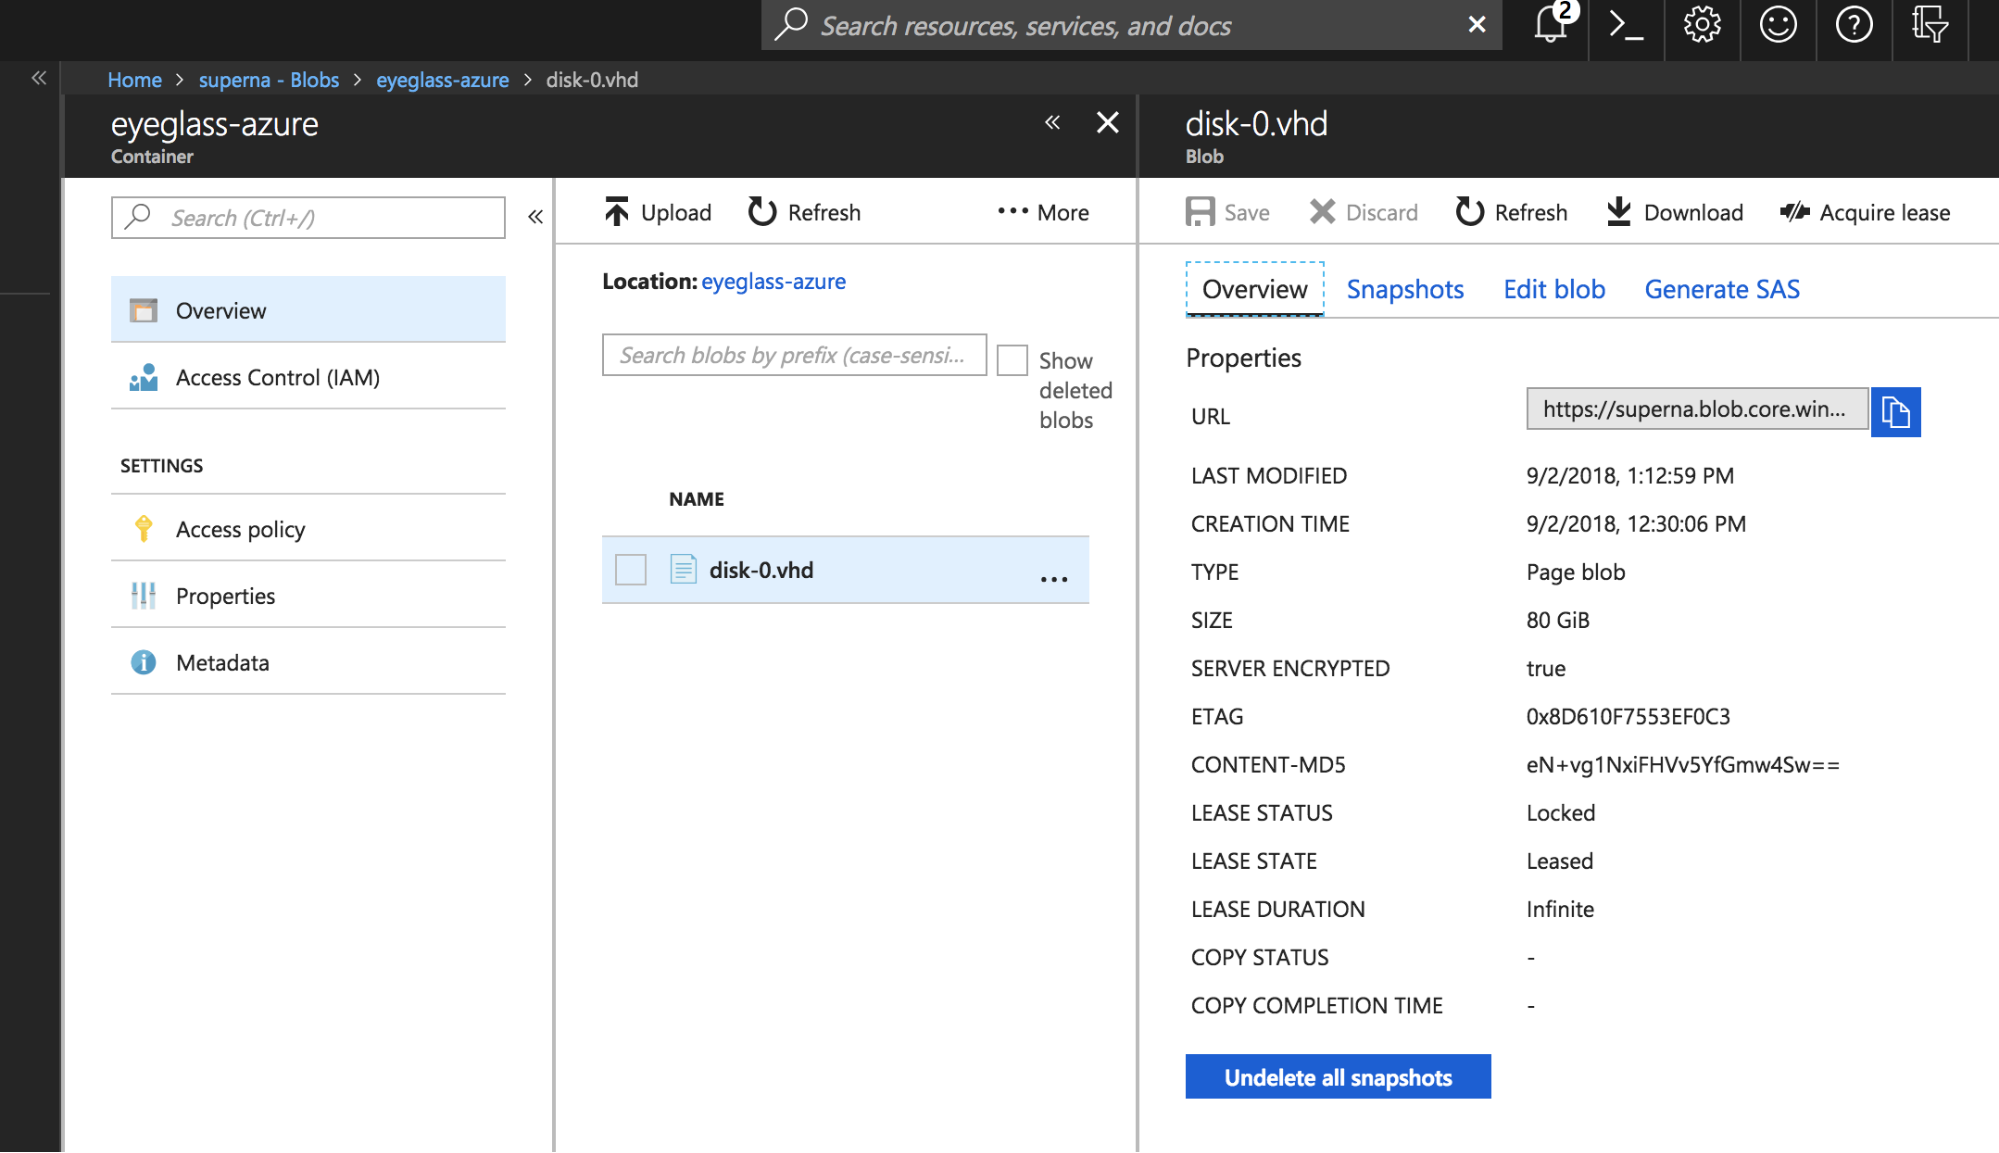
- Copy the url of the VHD object from the overview screen to use with the command below.
- Now execute the PowerShell commands to convert the VHD to managed disk in Azure. Copy and paste each line to PowerShell.
- Replace yellow highlights with options that make sense for your Azure environment (You will require Azure login account to complete this step) Reference link
- Connect-AzureRmAccount
- Install-Module AzureRM -RequiredVersion 6.0.0
- New-AzureRmResourceGroup -Location “East US” -Name RG01
- New-AzureRmDisk -DiskName eyeglass2 -Disk (New-AzureRmDiskConfig -AccountType Standard_LRS -Location 'East US' -CreateOption Import -SourceUri https://xxx.blob.core.windows.net/eyeglass-azure-2/disk-0.vhd) -ResourceGroupName 'RG01'
- Now create the vm from Azure console (reference commands link)
- Login to the Azure portal (https://portal.azure.com/)
- Open the Cloud Shell from the menu top right shows Azure CLI.

- Paste this command into the shell (command reference) NOTE: VM Size must be supported configuration shown in blue highlight)
- NOTE: Ensure you use the same resource group, location and disk name from the previous steps, yellow highlighted. The green highlight is the name of the VM once created you can change this name to anything you like.
- az vm create --resource-group RG01 --location eastus --name eyeglass-vm2 --os-type linux --attach-os-disk eyeglass2 --size standard_D4s_v

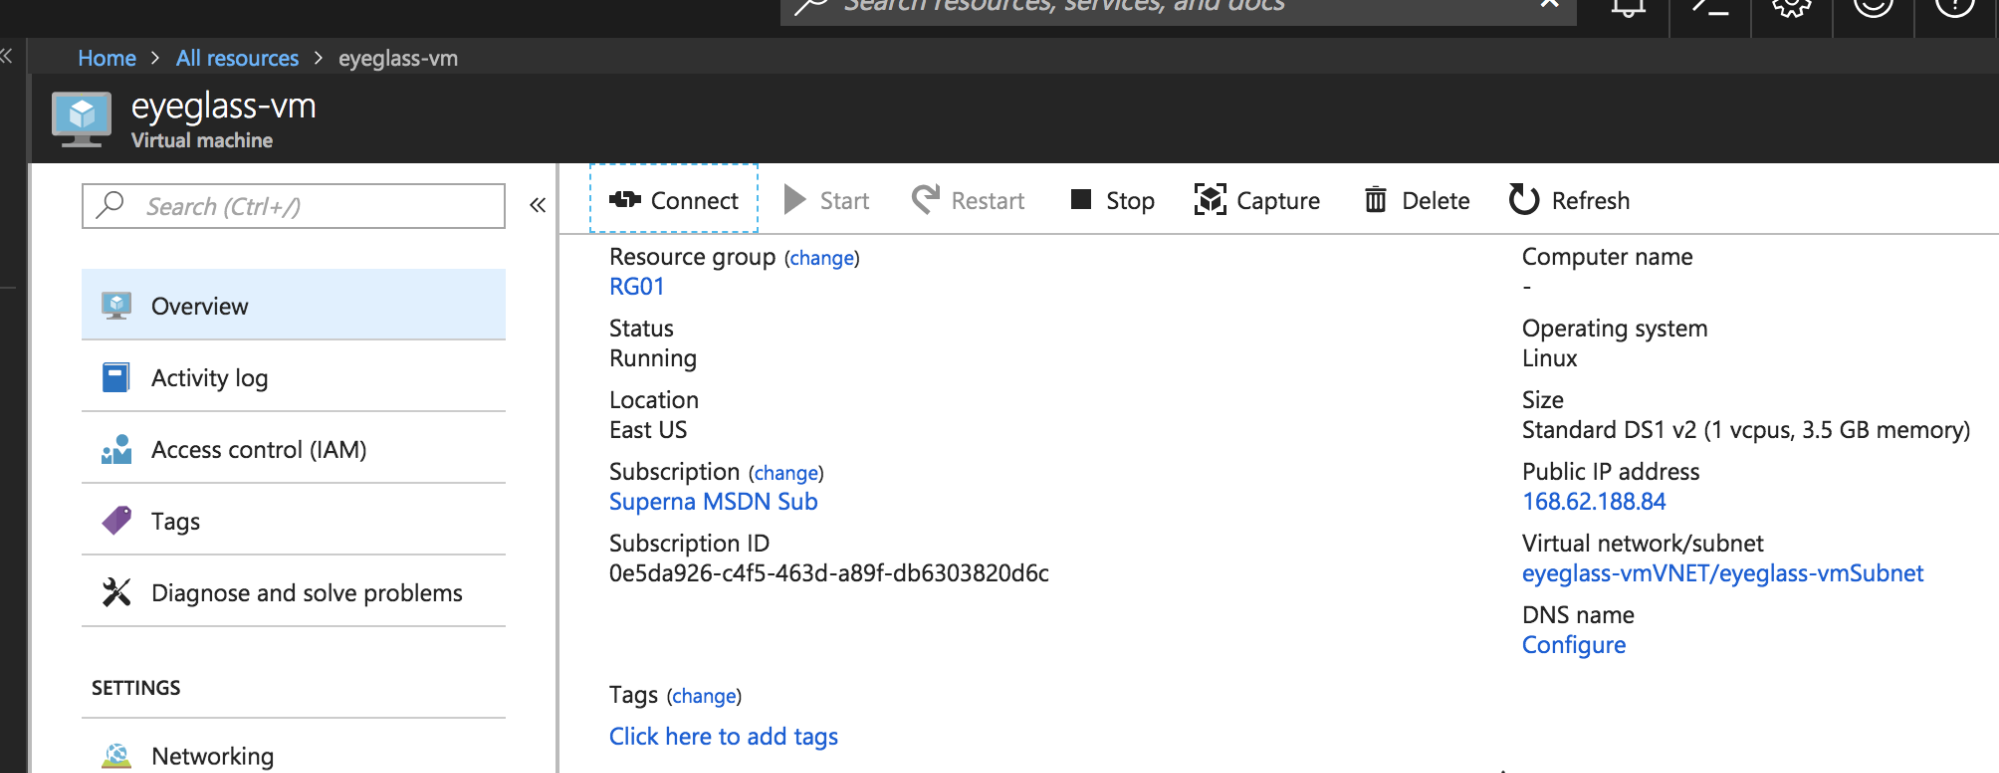
- Command completes with output showing the id of the VM that was created. This step can take 1-2 minutes to complete.
- Done create VM from managed disk steps.
How to Connect to Eyeglass and configure firewall ports on Eyeglass VM
- NOTE: The previous step also starts the VM. Verify it is in a running status in the Azure Portal. DHCP option will pickup the private ip address from Azure, and map a public IP address to this VM, after running the command above.
- ssh is enabled by default test access to the VM by getting the public IP that was assigned on VM creation
- Click the connect button and get the ssh ip address from the pop up window
- ssh admin@x.x.x.x where x.x.x.x is the public ip address
- If successful ssh connection, login as the admin user to Eyeglass. This confirms the VM booted successfully and DHCP was assigned a private IP in Azure.
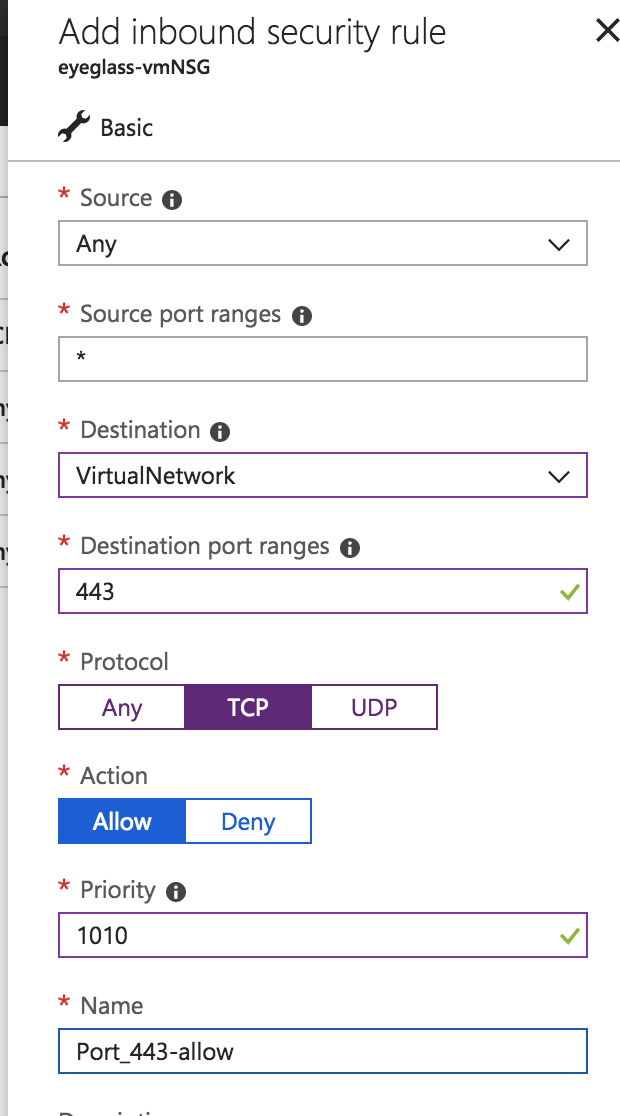
- Now configure inbound GUI access over https port 443 TCP
- Open the Network Security Group associated to the Eyeglass VM.
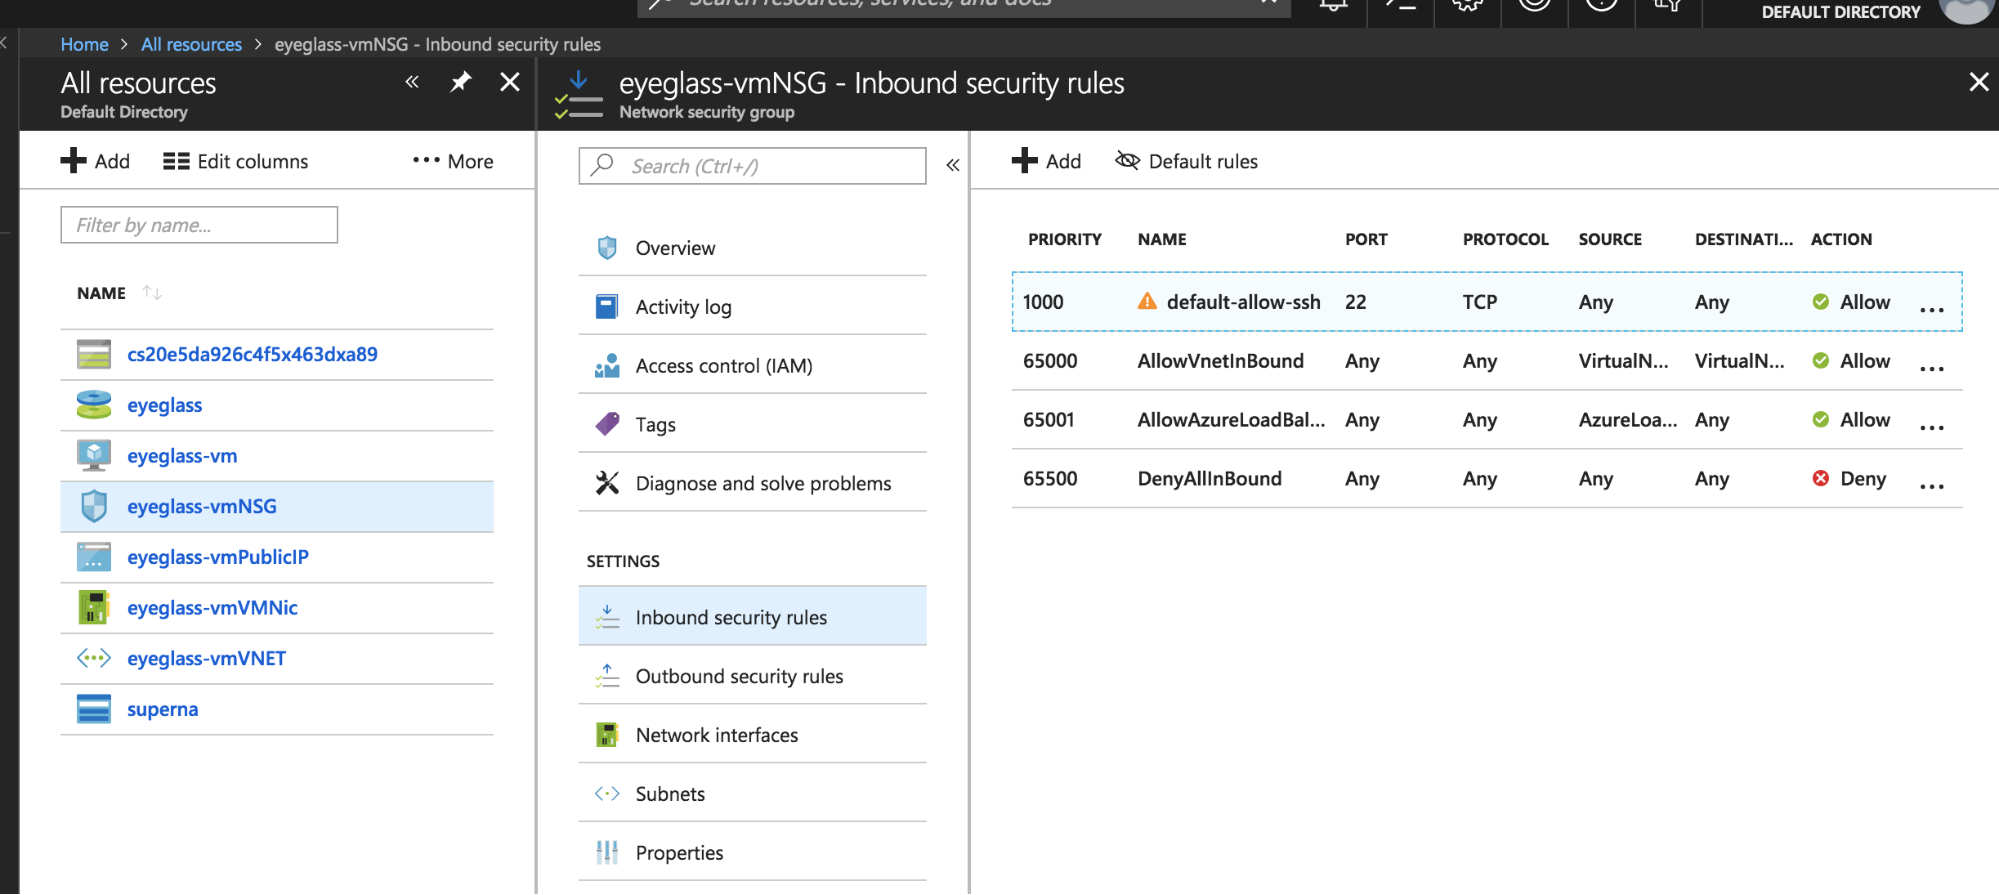
- Add the inbound firewall rule as shown below (or customize for your security requirements) NOTE: Firewall example below is for testing only. You must factor in your security requirements. This example rule should be deleted after testing.
- Test access to the web GUI
- https://x.x.x.x the webUI should load successfully, where x.x.x.x is the public ip address
- Now follow the firewall port configuration is required to allow Eyeglass to manage PowerScale and allow Eyeglass administrators to access the WebUI.
- This setup requires all ports and ip addresses required for Eyeglass are allowed. All ports and directions are outlined below.
- The scope to complete this in Azure is outside the scope of this guide and not covered by product support. Consult with an Asure system administrator.
- See the firewall ports guide here.
- Done.
Optional - How to copy an existing VHD directly to a resource group storage blob
Add-AzureRmVhd -ResourceGroupName ResourceGroup -Destination https://xxx.blob.core.windows.net/vms `
-LocalFilePath "C:\Users\Public\Documents\Virtual hard disks\myVHD.vhd"