Eyeglass Administration guides Publication
How to OCR Image Data with Search & Recover
Home
- Overview:
- Requirements:
- Summary:
- Search for OCR Input Data for Processing with Command Builder:
- Create NFS mount on ECA node 1 for image processing
- Copy Batch Script to ECA Node for processing Image Data
Overview:
This guide helps walk through how bulk OCR of image data can be done with the Search & Recover command builder and then index the results for searching. This solution depends on an open source OCR library that is available to be installed on the Search & Recover appliance.
Requirements:
Install OCR libraries on ECA node 1 as follows:
- ssh to node 1 as ecaadmin.
- sudo -s (enter ecaadmin).
- zypper install tesseract-ocr (requires Internet connection).
- Or manual download https://software.opensuse.org/download.html?project=Publishing&package=tesseract-ocr .
Summary:
- This script example shows how command builder can help generate a script file to automate the OCR detection of images based on the Tessact Open ource OCR library, installed on the Search & Recover appliance.
- For larger quantities professional services should be purchased to assist with scripting a parallel solution to multi thread process image data. The example in this guide is quick start guide on how easy OCR solutions can be built with Search & Recover.
- Once the text files are content ingested search results will return the image file name with a txt extension to allow navigation to the folder containing the image.
Search for OCR Input Data for Processing with Command Builder:
- Using the Search & Recover GUI, locate the OCR data by using any type of search to list the files. It is common to store all OCR scanned data under a single path. This example assumes this is the case.
- Using the FIle Path option enter the path to the OCR data (i.e. /ifs/data/dfsdata/search/ocr) and add image file extensions (i.e. tif jpg) to a list with spaces to the Extension input box. Click the check box for files only.
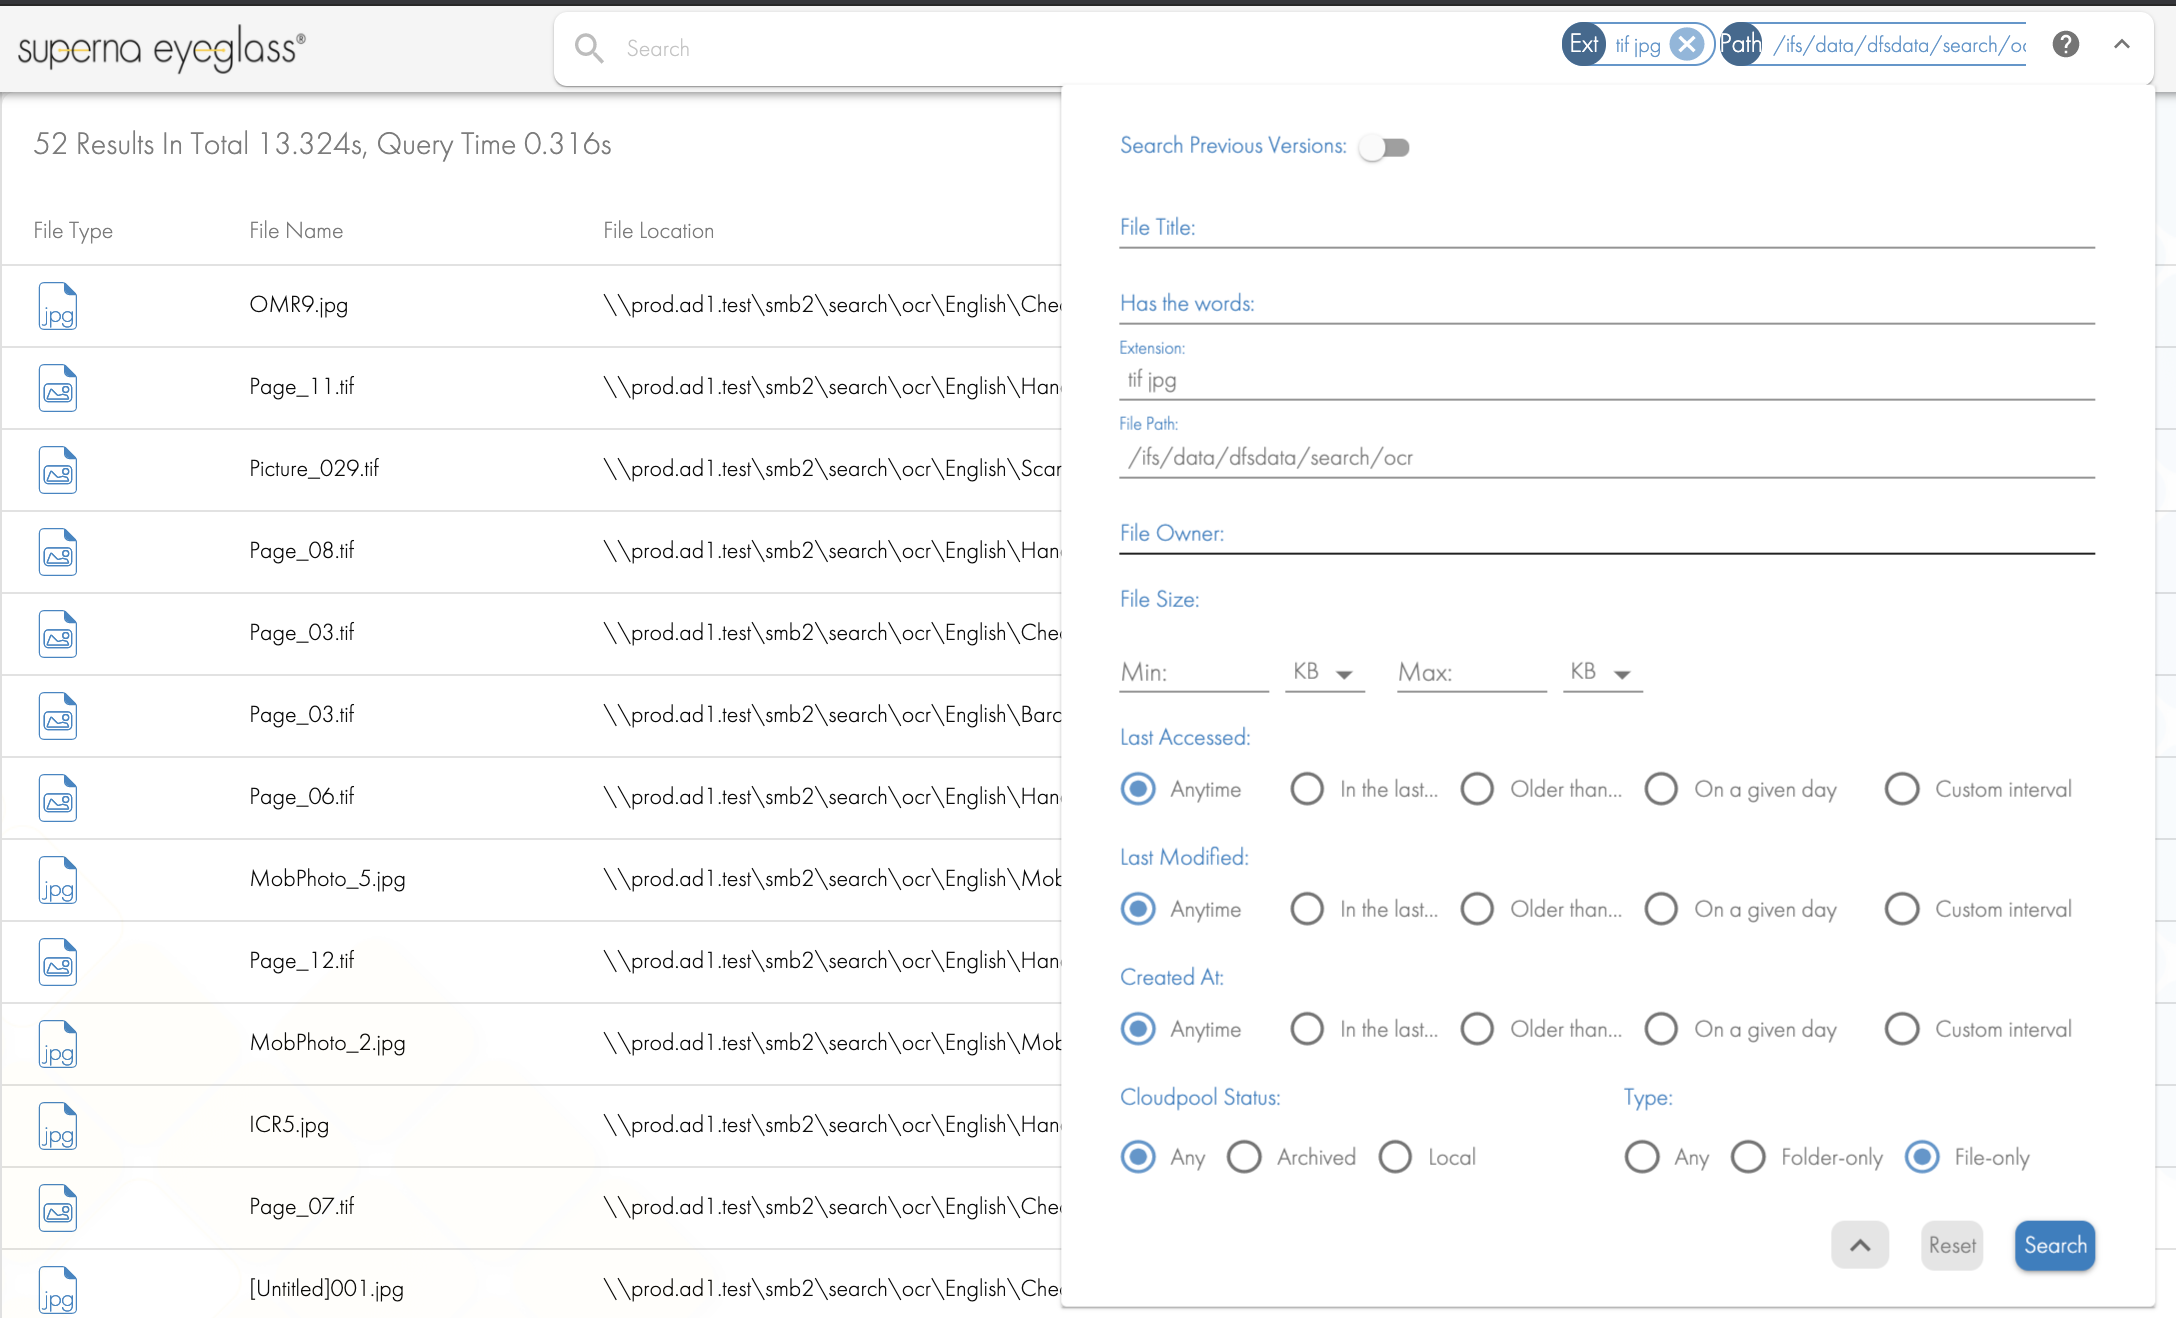
- Per the screenshot above, this will locate all files with images under the path entered and only list those files in the results.
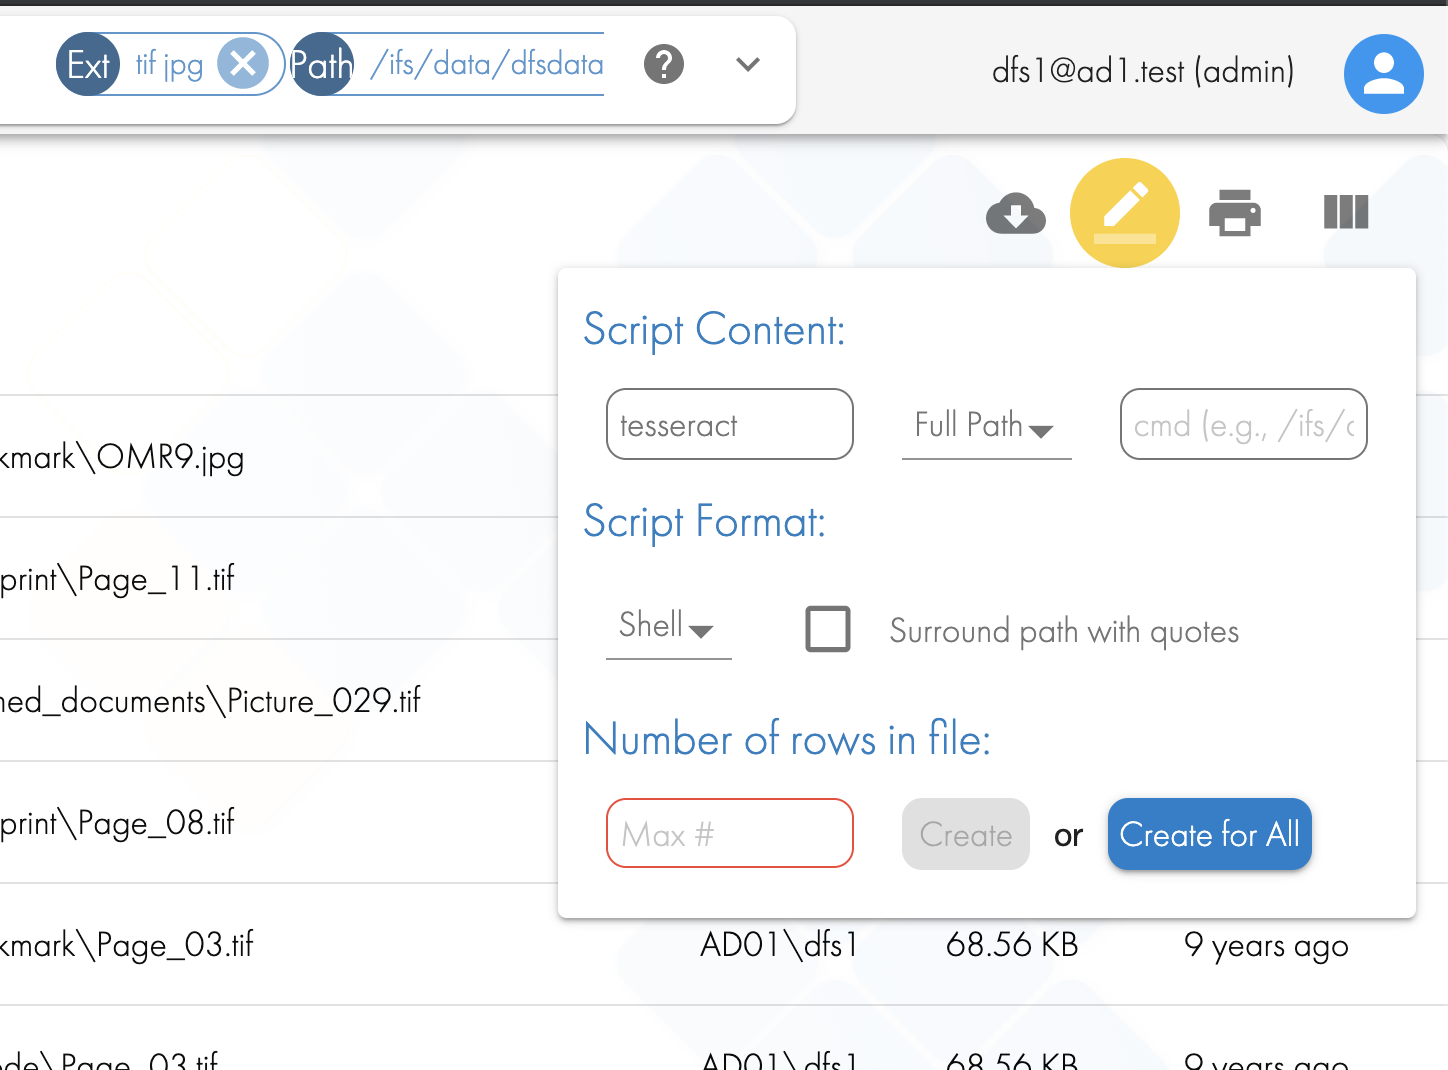
- Using the command builder icon generate the file list and enter the OCR command "tesseract" into the first dialog box.
- Excel is an easy tool to modify the script file to specify the output file name and path. Open the file in Excel and import as CSV using space as the separator. See example below. NOTE: you may need to fix file names with spaces in the path or file name.

- Now copy column B files to Column C and it should look like this image below. Save the file as .sh text file.
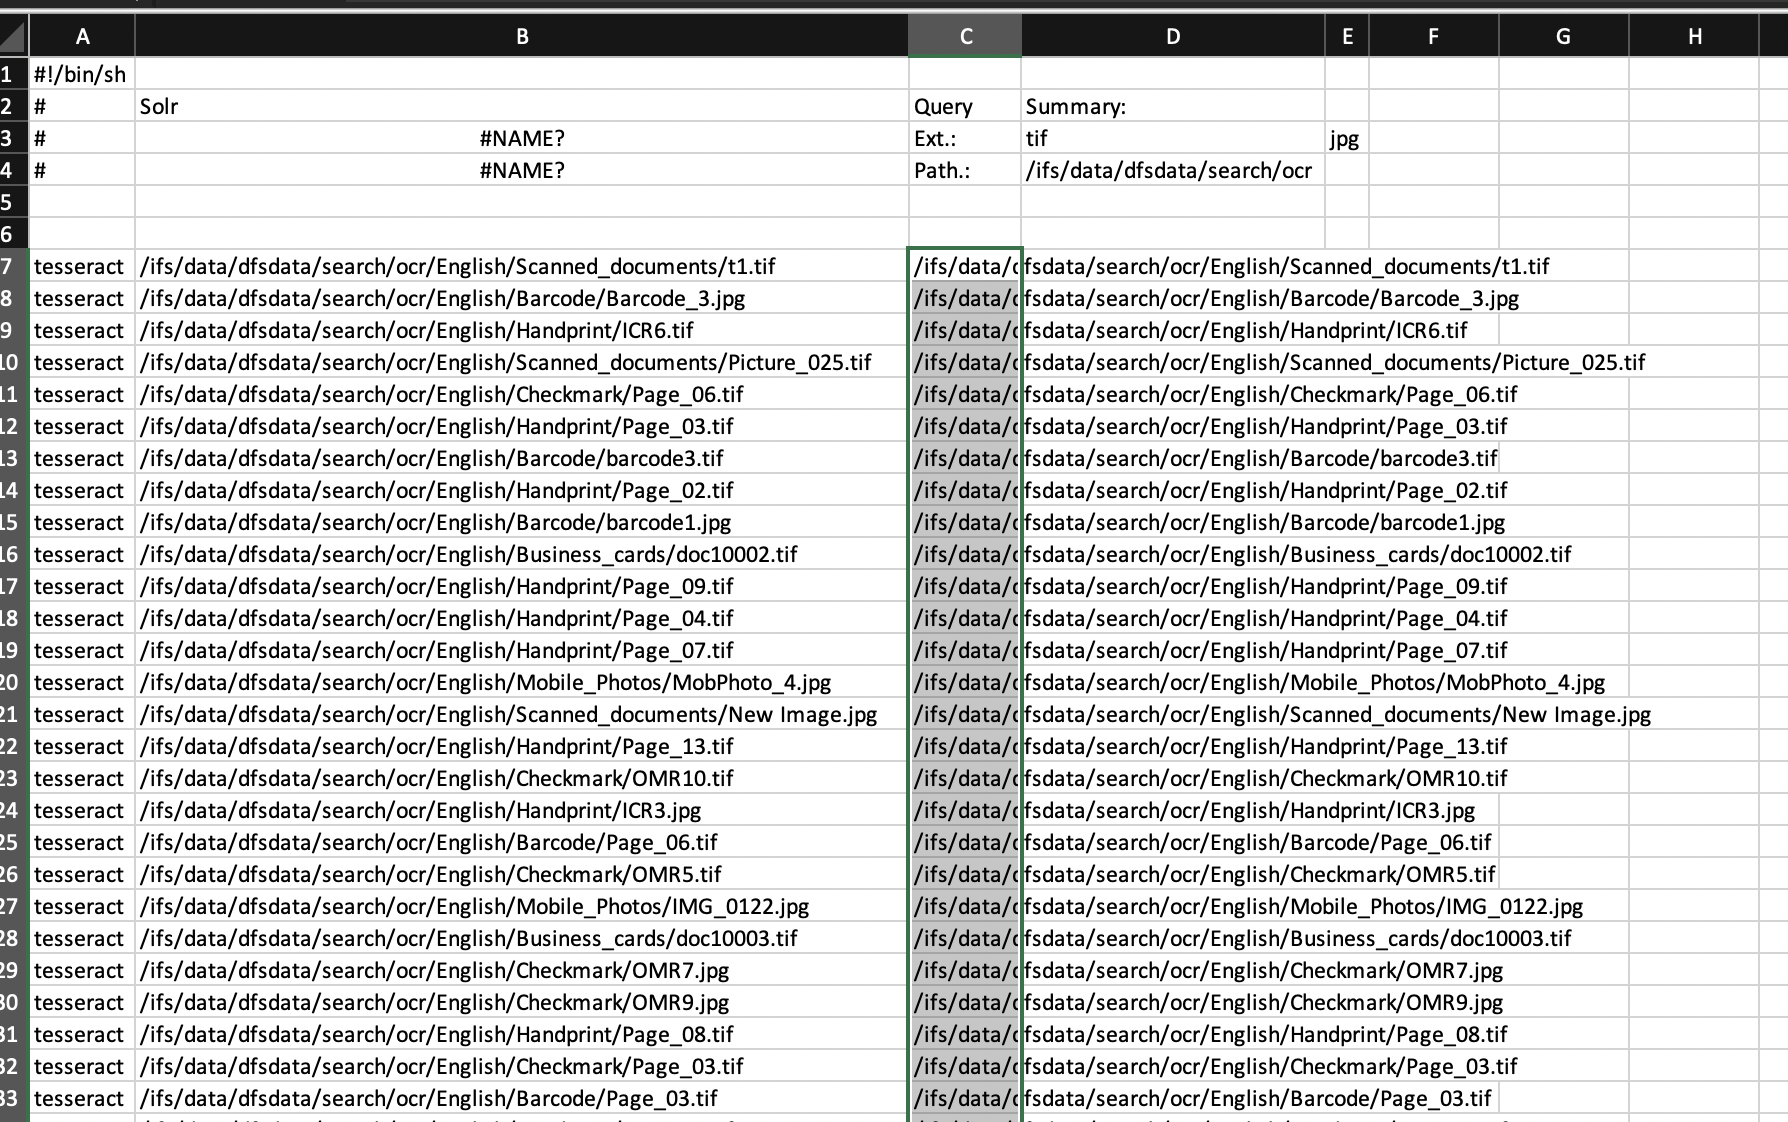
- You may need to save as CSV and then use a text editor to search and replace the comma for a space. You can also remove the comments at the top of the file.
Create NFS mount on ECA node 1 for image processing
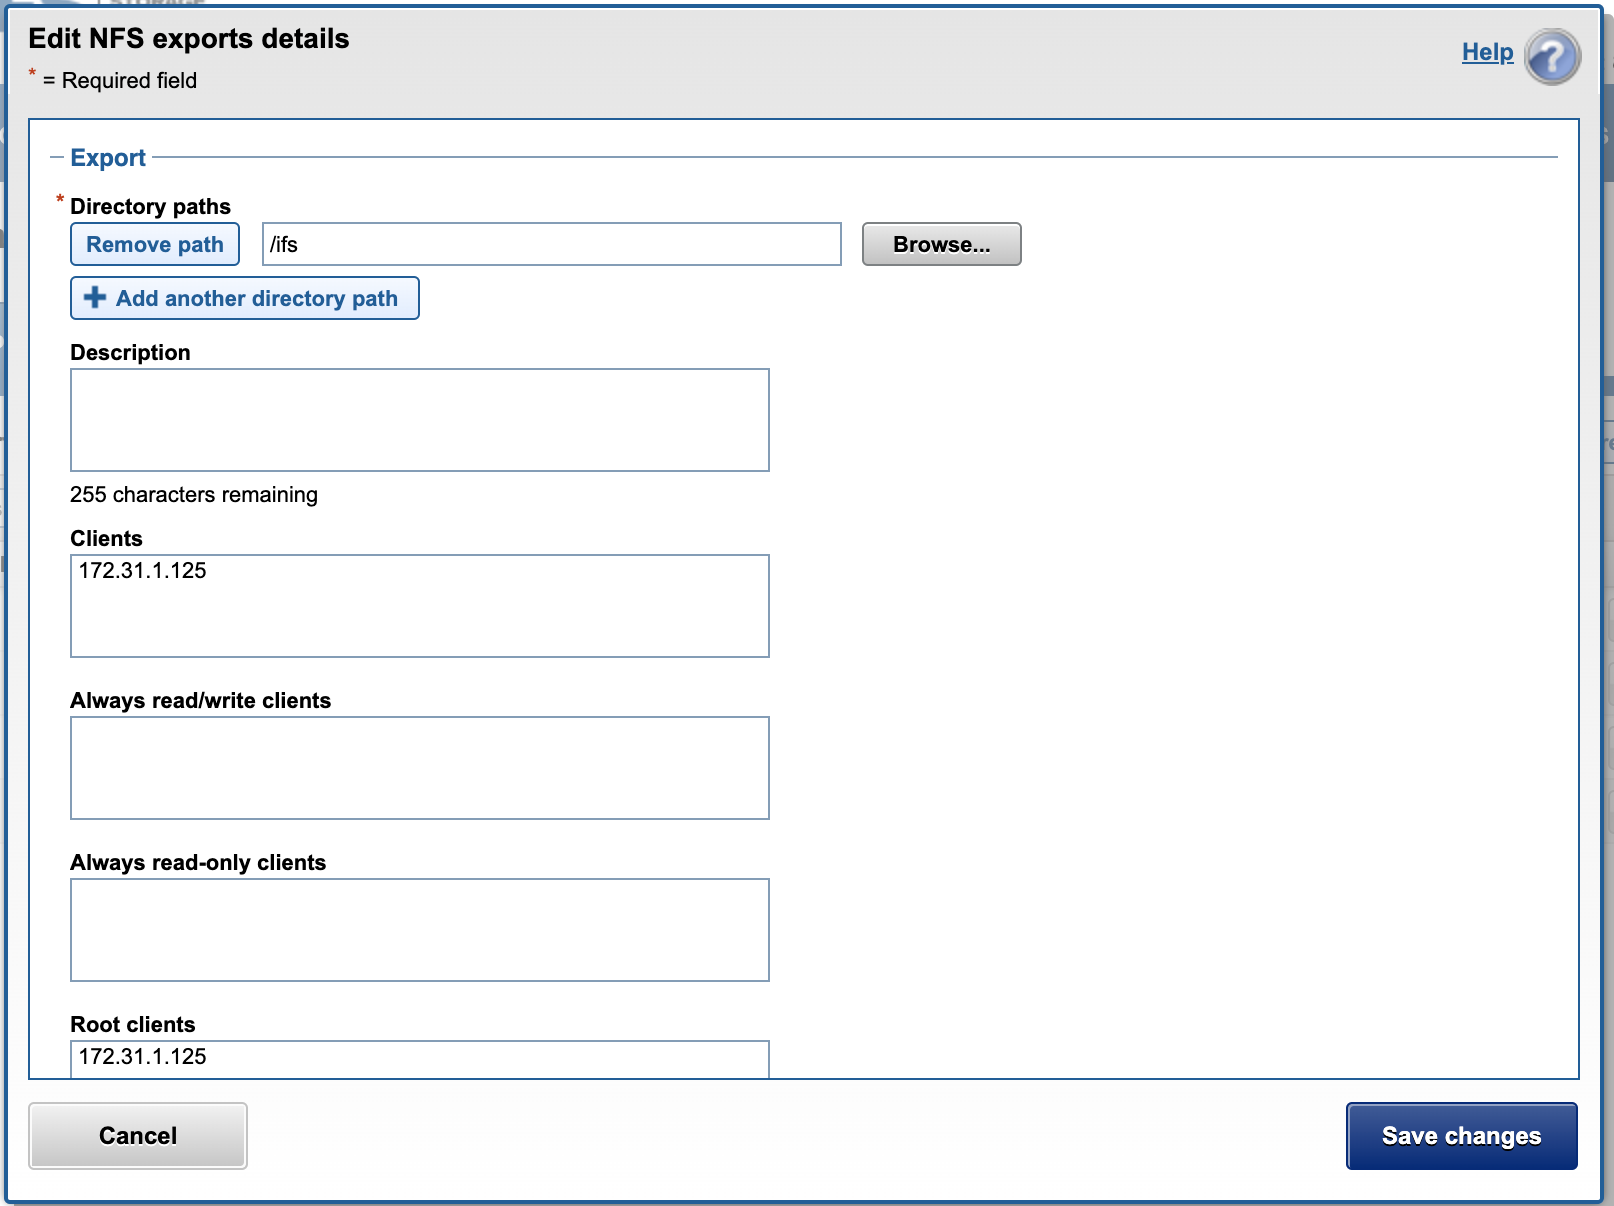
- An NFS mount is needed on the cluster to allow Search & Recover to OCR the images, and create a .txt version of the file. This mount will need root mount options. See steps below to create the NFS export on /ifs.
- The screenshot shows the NFS root client export on path /ifs/ :
- Now create the mount point on Node 1 of the Search & Recover appliance.
- ssh to ecaadmin node 1 as ecaadmin.
- sudo -s (enter ecaadmin password to become root user).
- mkdir -p /ifs .
- Mount the cluster with this command (NOTE: use /etc/fstab for a persistent mount point to handle reboots)
- mount 172.31.1.104:/ifs /ifs (Note: use SmartConnect name vs ip address used in the example)
- Verify by typing "mount".
- Verify with ls /ifs to make sure you see files and directories returned.
Copy Batch Script to ECA Node for processing Image Data
- Copy script file to Search & Recover node 1 with scp or winscp tool using ecaadmin user the file will be copied to /home/ecaadmin.
- Example with scp from the command line: scp ocr.sh ecaadmin@172.31.1.125:/home/ecaadmin/ocr.sh .
- Change permissions:
- chmod 777 /home/ecaadmin/ocr.sh
- Execute the OCR conversion (NOTE: This can take a long time to complete, potentially hours).
- cd /home/ecaadmin/ .
- ./ocr.sh &> results.txt .
- Monitor progress with this command:
- tail -f /home/ecaadmin/results.txt .
- Once your script finishes you will have a file matching the same file name with .txt added to the file. The .txt file will contain the text extracted from the image file.
- Search & Recover incremental will detect the new .txt files and index the content of the files if content ingestion is enabled on the OCR path.