Administration Guides
Configure Email, Twitter, Slack, rocket.chat, Webhooks for Notifications of Eyeglass Monitoring Events
Home


Notification Options

For advanced alarm filtering and forwarding over SNMP or Syslog, see the Eyeglass Alarm forwarding guide.  

For advanced alarm custom routing configurations, see this guide

The Steps to configure Email Notification are found in the Eyeglass PowerScale Edition Quick Start Guide for Eyeglass Installation.

Additional information for Microsoft Exchange can be found in the tech note How to Setup Email alarms with Exchange.


Limitations of Slack, Webhook, Twitter Notifications

  1. All of these options require transparent NAT to reach the Internet services.  No support for OS proxy is available for this notification option.

How to configure Slack channel PowerScale events AND Eyeglass events

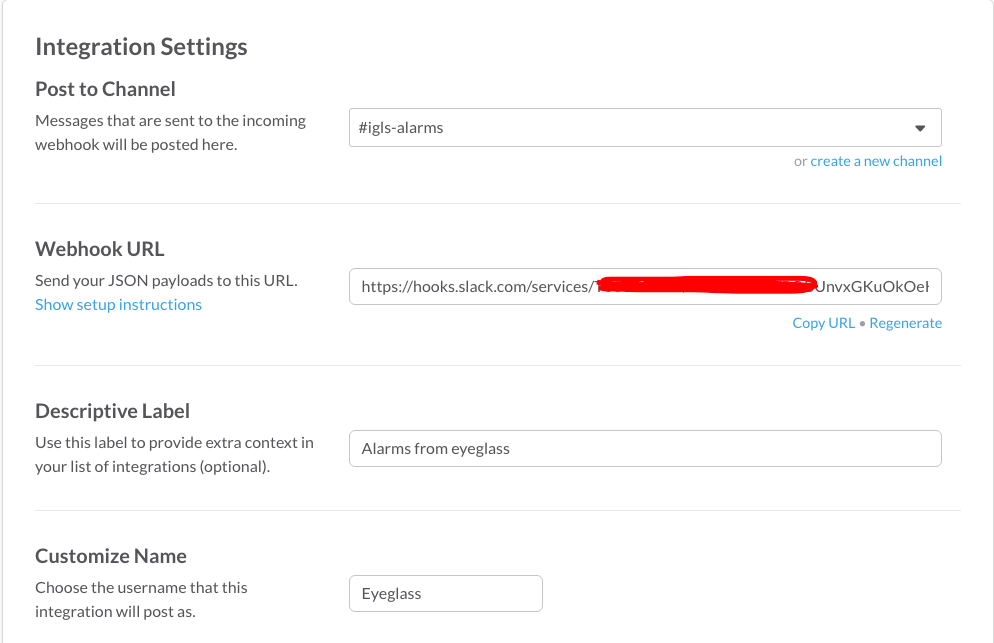
  1. Go to https://superna.slack.com/apps/manage/custom-integrations   (for your domain) as admin.
  2. Select Incoming WebHooks.
  3. Configure as per the screenshot and pick the channel to receive alarms.
  4. Cut and paste the Webhook URL for configuration in Eyeglass.

  1. Login to Eyeglass.
  2. Open notification centre.
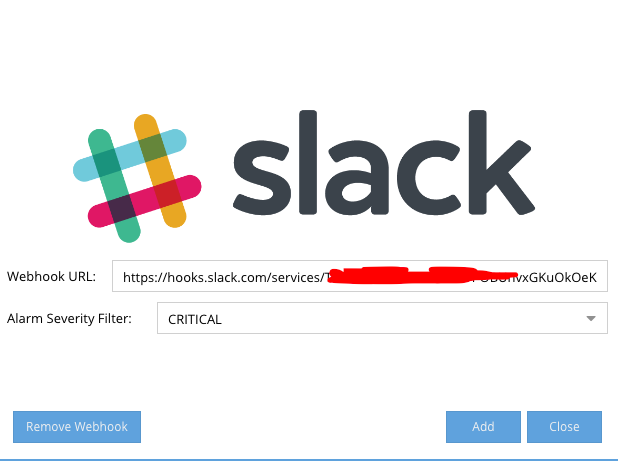
  3. Select the Slack tab.
  4. Set the Webhook URL created above.
  5. Set the level alarms that will be sent to the channel.

Note: This includes DR events from Eyeglass and PowerScale events that are polled from the cluster.

Webhooks

Webhooks use http post commands to send events to any system that supports this interface.

  1. Open notification centre.
  2. Click the Webhooks tab.

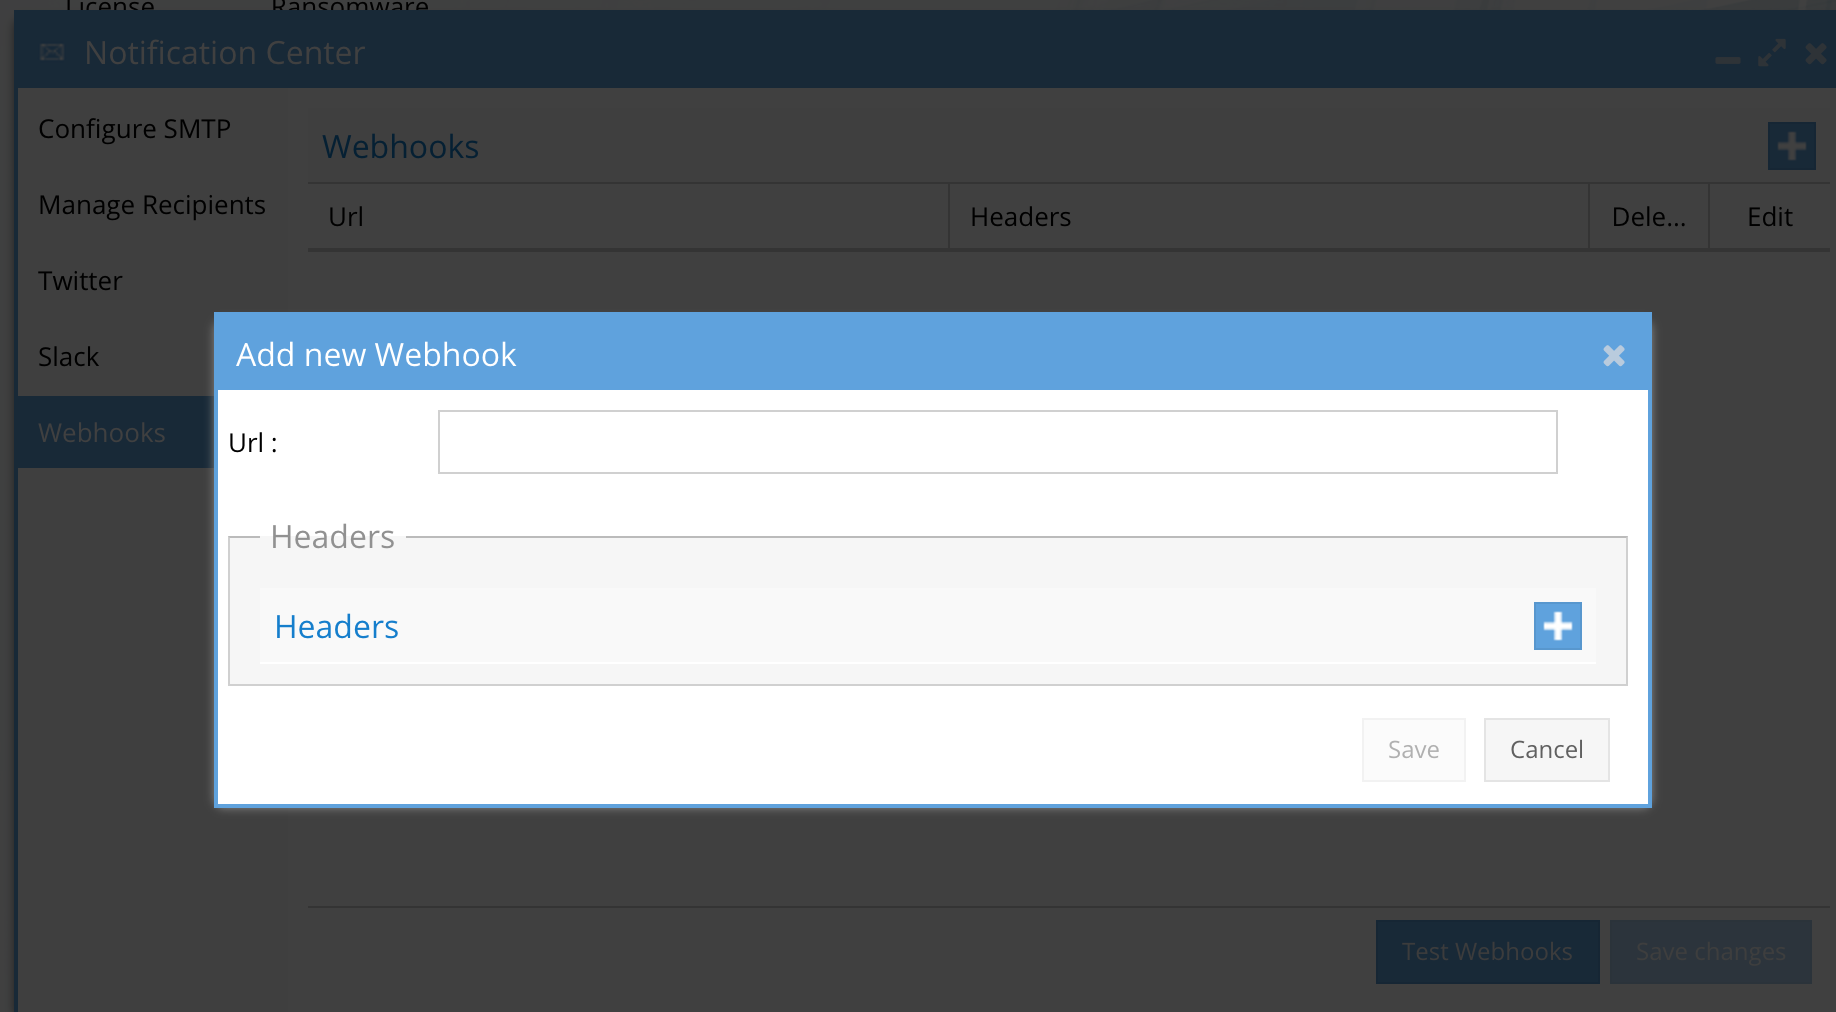
  1. Enter the URL of the target system to receive the post command.
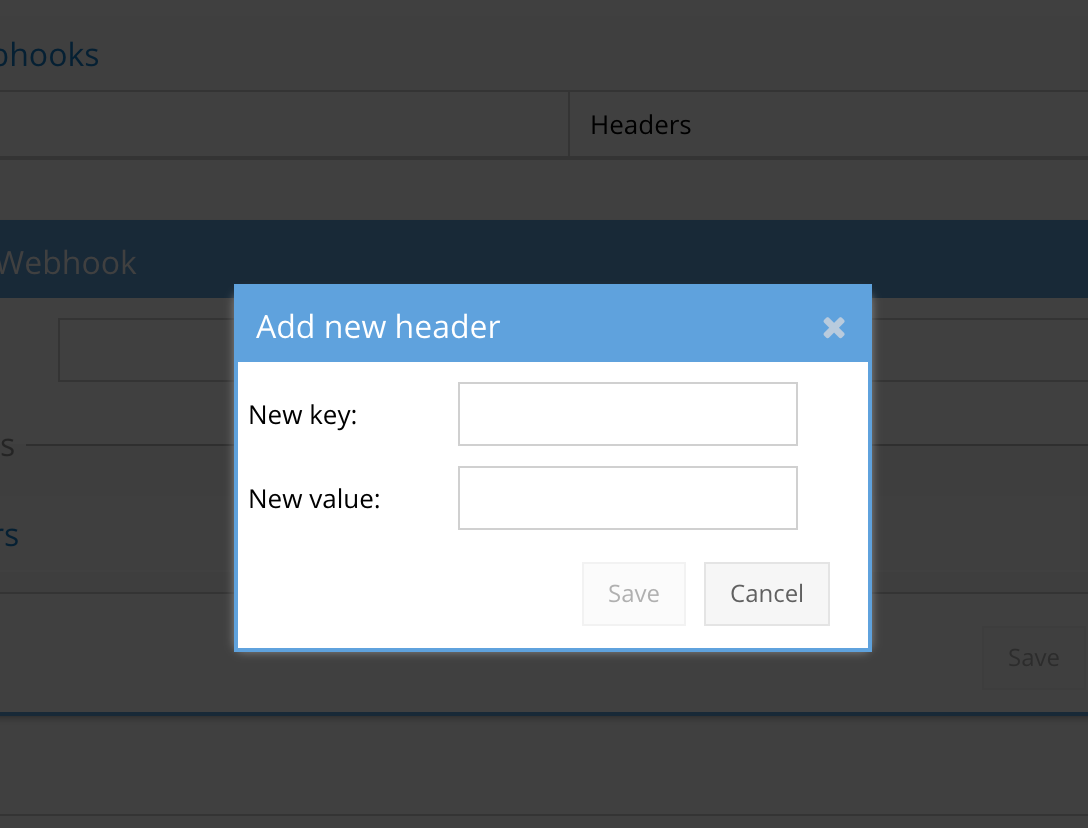
  2. Click plus headers to enter any key-value pairs needed to send to the upstream system
  3. Once completed test with the test button and verify with the upstream system the test even was sent.
  4. Now all alarms Eyeglass and PowerScale will be sent as Webhooks.


How to Configure Private Tweets of Alarms  

Twitter App Setup:

  1. https://twitter.com/signup and sign up for an account. Please note this account is the account responsible for tweeting alarms. (Best to create an eyeglass specific account from scratch).

*You don’t need to complete the 6-step introduction tutorial Twitter starts.

  1. Once created, check your inbox for the Twitter verification email and verify it.

  2. With the account verified, in order to use Twitter apps, the account must have a mobile phone number associated and verified.


  1. Go to https://apps.twitter.com/

  2. Create New App


  1. Fill in Name, Description and Website and “Create your Twitter application”.

  2. With the application created, click the “Permissions” Tab


  1. Change access to “Read and Write” and Update Settings.


  1. Click the Keys and Access Tokens tab at the bottom of the page, and click “Create my access token”.

**If you wish to have the alarm tweets private (only to those who your appliance Twitter Account allows to follow) you can select the checkbox called “Protect my tweets” here https://twitter.com/settings/security  (If selected, only those you approve will receive your Tweets. Your future Tweets will not be available publicly. Tweets posted previously may still be publicly visible in some places)


Eyeglass Twitter Setup:

  1. Eyeglass Main menu > Notification Center > Twitter

  2. Copy the Keys and Tokens from the Twitter Keys and Access Tokens page into the appropriate fields on the Eyeglass UI.

  3. Select the Alarm Severity Filter: Critical only tweets critical alarms, Major tweets Major and Critical alarms, etc.

  4. Submit

  5. Once submitted, the account will now tweet out alarms when raised in Eyeglass to the Twitter account previously created.

  6. To get real-time notifications, we recommend following the recently created appliance on Twitter with your personal Twitter accounts. You can find the follow button here: Eyeglass Main menu > Notification Center > Twitter > [Follow “name”] or by clicking the name of the eyeglasses Twitter account hyperlinked in both the splash page and the Add/Edit/Delete Twitter Account” page.

  7. Here’s a tutorial on setting up notifications with iPhone (same for most smartphones). http://www.wikihow.com/Get-Push-Notifications-for-a-Users-Tweets-on-Twitter-for-iPhone


NOTE: Twitter will apply its own logic to prevent "re" tweets of what it considers to be the same message.  This may prevent tweet alarms that are raised and cleared and raised again within the period of time that Twitter is monitoring for re-tweets.


How to Configure rocket.chat Alarms

Rocket.chat App Setup: 

  1. https://www.rocket.chat/ and sign up or create an account. 

  2. Follow the steps to integrate webhooks

Example webhook payload

Webhooks deliver the responses to your typeforms in JSON format. Let's walk through each object in a typical webhook payload. First, here's what a complete payload looks like when it's delivered to a webhook:

"Alarm": {
            "type": "object",
            "properties": {
                "source": {
                    "description": "the source of the alarm",
                    "type": "string"
                },
                "timestamp": {
                    "description": "The timestamp when alarm was raised",
                    "type": "integer",
                    "format": "int64"
                },
                "severity": {
                    "description": "severity of the alarm",
                    "type": "string"
                },
                "sync_key": {
                    "description": "sync_key",
                    "type": "string"
                },
                "sync_group": {
                    "description": "sync_group",
                    "type": "string"
                },
                "message": {
                    "description": "message",
                    "type": "string"
                },
                "code": {
                    "description": "code",
                    "type": "string"
                },
                "extra_data": {
                    "description": "alarm extra data",
                    "type": "string"
                }

Rocket.chat Webhook payload object common properties

Each webhook event payload also contains properties unique to the event. You can find the unique properties in the individual event type sections.


element

type 

description

alarm

object

The user that triggered the event. This property is included in every webhook payload


Description


Followings are the example of Eyeglass notification JSON output which gets posted on any Webhook URL. This information will help the dev/support team to integrate any third party Chat Application incoming webhooks to post messages in a specific Chat Group.

Example 1: (Maximum Values)

1{  
2 source: 'Sample Source',
3 timestamp: 1667995921023,
4 severity: 'INFORMATIONAL',
5 sync_key: 'sbeca3_3',
6 message: 'Actual Message',
7 code: 'RSW0010',
8 extra_data: '{"reason":"Node sbeca3_3 version does not correspond to eyeglass version"}'
9}


Example 2: (Minimal Values)

1{  
2 source: '',
3 timestamp: 1667995921023,
4 severity: 'INFORMATIONAL',
5 sync_key: '',
6 message: '',
7 code: 'RSW0010',
8 extra_data: '{}'
9}

These fields can be mapped to respective webhook message schema to construct useful message events.

For example, Rocket.Chat application incoming webhook configuration script below uses these fields to send incoming messages in a specific group:

1class Script {
2  /**
3   * @params {object} request
4   */
5  process_incoming_request({ request }) {
6    console.log(request.content);
7
8 let msg = request.content.message;
9 let severity = request.content.severity;
10 let code = request.content.code;
11 let sk = request.content.sync_key || 'No Source';
12 let reason = request.content.extra_data === '{}' ? '': JSON.parse(request.content.extra_data).reason;
13 let txt = severity + ' | ' + code + ' | ' + sk;
15 if(msg !== ''){
16 txt += ' | ' + msg;
17 }
18
19 if(reason !== ''){
20 txt += ' | ' +  reason;
21 }
22
23    return {
24      content:{
25        text: txt
26       }
27    };
28  }
29}


 © Superna Inc