Bulk Loading Data with AWS Snowball
- Overview
- When to use
- Major steps to order Snowball, install, load data and return
- Create an Export Job
- Receive the AWS Snowball device
- Connect the AWS Snowball device to Your Local Network
- Transfer Data
- Follow Golden Copy Steps below
- Return the Device
- How to Load data onto a Snowball Device with Golden Copy
- Configure a profile
- Unlock
- Get Access key id
- Get Secret access key
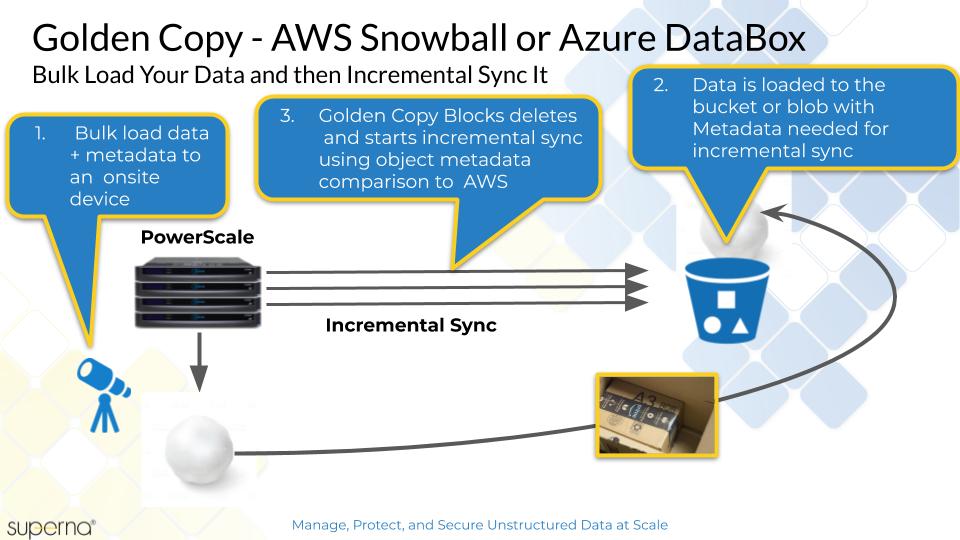
Overview
AWS Snowball is an on-site device used to bulk load data into Amazon S3 that is faster than using an Internet connection. This section provides high level explanation of how to use Golden Copy to load file system data onto an AWS Snowball. This process ensures the file system metadata is maintained on the objects copied to the Snowball device. Once the data is imported to your AWS storage bucket, Golden Copy can maintain an incremental update of the data over the Internet.
When to use
- This option should only be used for very large files and when Internet bandwidth is limited to veery low rates. This option is not faster for small files or when 100 Mbps or more of Internet bandwidth is available. Consult with support before using this option. In most cases sending data directly over the Internet will always be faster.
The AWS Snowball end to end process is explained here.
Major steps to order Snowball, install, load data and return
Topics
Create an Export Job
Receive the AWS Snowball device
Connect the AWS Snowball device to Your Local Network
Transfer Data
Follow Golden Copy Steps below
Return the Device
How to Load data onto a Snowball Device with Golden Copy
- Start here with AWS Guide to create an import job, and have a Snowball device shipped to your location https://docs.aws.amazon.com/snowball/latest/ug/create-import-job-steps.html
- Setup the Snowball device on your network low latency to the PowerScale cluster.
- Get prepared to authenticate to the Snowball Edge:
- Get manifest file and unlock code:
- Login to AWS- go to the Snowball service, expand job, get credentials and unlock key:
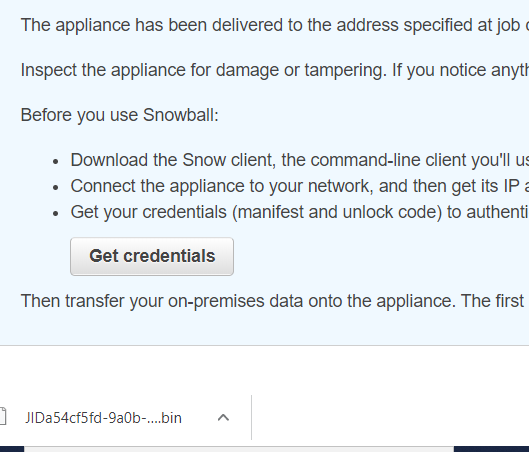
- Save the manifest file locally. This example uses: g:\snowball\ :
Configure a profile
This prevents you from having to enter manifest and unlock code in subsequent commands. Profile named gcsnowball in this case - could have been anything - gcsnowball chosen to match snowball in AWS.
C:\Program Files (x86)\SnowballClient\bin>snowballEdge.bat configure --profile gcsnowball
Configuration will stored at C:\Users\dmanning\.aws\snowball\config\snowball-edge.config
Snowball Edge Manifest Path: g:\snowball\JIDa54cf5fd-9a0b-426e-8873-a05c556e4c3b_manifest.bin
Unlock Code: xxxx-0b5bf-b4859-492aa-yyyy
Default Endpoint: https://192.168.1.11 (IP of the snowball device on your network)
Unlock
C:\Program Files (x86)\SnowballClient\bin>snowballEdge.bat unlock-device --endpoint https://192.168.1.11 --manifestfile g:\snowball\xxxxxxxxx-9a0b-426e-8873-yyyyyy_manifest.bin --unlock-code xxxx-0b5bf-b4859-492aa-yyyy
Get Access key id
C:\Program Files (x86)\SnowballClient\bin>snowballEdge.bat list-access-keys --profile gcsnowball
{
"AccessKeyIds" : [ "AKIACEMGU3DCNBEEIYYSGGA5XPBW" ]
}
Get Secret access key
C:\Program Files (x86)\SnowballClient\bin>snowballEdge.bat get-secret-access-key --access-key-id AKIACEMGU3DVEEIYYSGGA5XPBW --profile gcsnowball
- Save the AccessID and Secret key to add archive folder to Golden Copy.
- Add the Snowball device to Golden Copy using the "searchctl archivefolder add" command, and using the "--force" flag that is required to disable validations used with AWS.
- NOTE: You specify the bucket name configured when the Snowball device was ordered. example command
- NOTE: incremental mode is disabled on the folder since the data is shipped back and takes time to load into the container. This can be switched on again with the steps below.
- searchctl archivedfolders add --folder /ifs/data/archivedata --isilon <cluster name> --accesskey xxxxxx --secretkey yyyyyy --endpoint http://x.x.x.x:8080 --bucket <bucket name> --region snow --disable-incremental true --cloudtype other --force
- The "Access key ID" and "Secret access key" are created using the create local user process documented AWS Snowball Edge create local user and summarized above. Replace the yellow highlighted sections to match your installation when you created the Snowball Edge order.
- Start the archive job to copy data to the SnowBall Edge:
- Get the folder id from the add folder command using searchctl archivedfolders list:
- searchctl archivedfolders archive --id xxxxxxx --force (NOTE: Use the force flag to by pass AWS checks that do not apply to Snowball devices)
- Monitor the archive copy job with:
- searchctl jobs running (get the job name)
- searchctl jobs view --id jobname
- Get the folder id from the add folder command using searchctl archivedfolders list:
- Archive job completes .
- Return AWS Snowball device (see steps above).
- Done.