DR Design Guides
How to Validate and troubleshoot A Successful Failover WHEN Data is NOT Accessible on the Target Cluster
Home
- Quick and Simple Debug Data Access Steps for Access Zone or IP Pool Failover Modes:
- Detailed Steps to Debug SmartConnect and DNS Resolution failures for Access Zone or IP Pool modes:
- Detailed Steps to test Mounting a DFS protected Share with DFS failover mode:
- Detailed steps to test NFS export remount for Access Zone, IP pool or SyncIQ mode
Quick and Simple Debug Data Access Steps for Access Zone or IP Pool Failover Modes:
NOTE: follow the order below to find root cause quickly.
- READ ME FIRST: Have you rebooted the PC you are testing SMB share access? Do not proceed if you have not already done this! Number issue when testing data access.
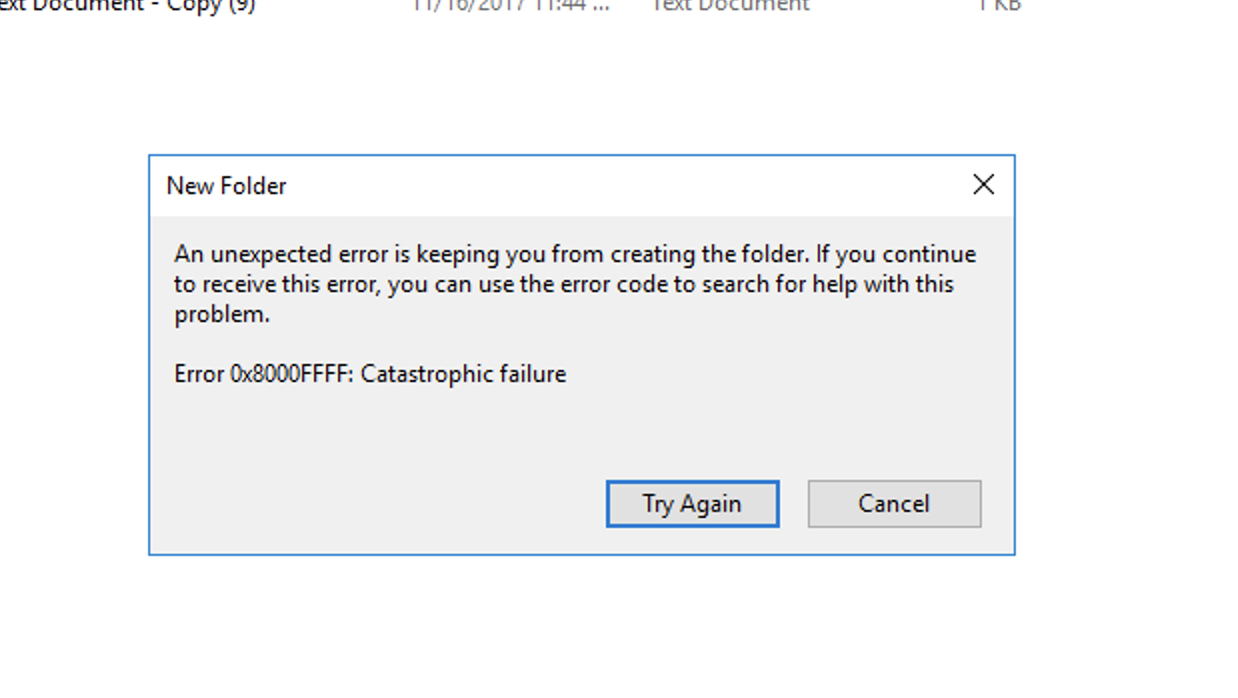
- Did you get this error message below? This means your PC is connected to the source cluster that is read only and locked by SyncIQ. Reboot PC test again.
- Check your firewall/network is not blocking the SMB protocol from your test PC and the Target Cluster SMB share
- Open a powershell prompt on the pc you are using to test data access. Replace yellow with the FQDN smartconnect name used to mount the SMB share.
- Test-NetConnection -ComputerName "example.smartconnect.test" -Port 445
- A successful test should return the output below.
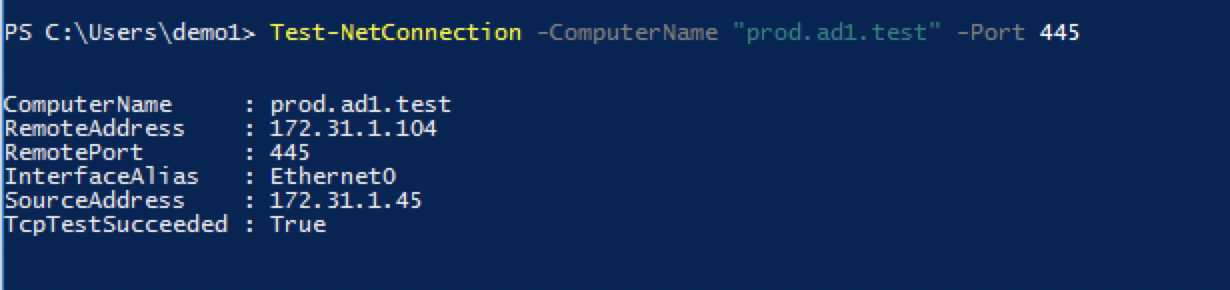
- IMPORTANT: If the test fails, escalate to your firewall team to resolve the blocked SMB port to the target cluster. Do not proceed until this test passes.
- Check DNS and SmartConnect by pinging the FQDN SmartConnect name (NEVER USE SHORT NAME TO PING) and verify the IP address returned is from the target cluster.
- If you get DNS failed to resolve error message continue with detailed nslookup steps below to check DNS resolution of SmartConnect names. If IP is correct check next steps below.
-
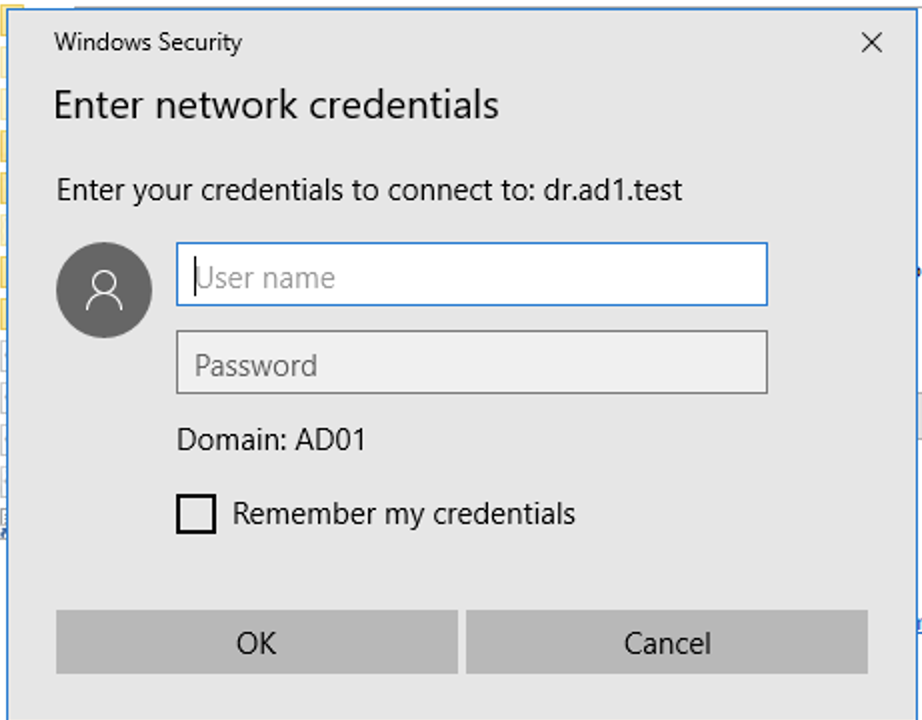
Mount share from client (DFS or non DFS) with password login popup Error
- Did you get this popup message to login with a user name and password? This is mostly likely an Active Directory SPN missing on the target cluster AD computer object. Use ADSI Edit to verify the HOST\<FQDN SmartConnect name> is present on the SPN property of the target cluster. See animated GIF example of how to check.
- Enter an administrator account to authenticate and test data access before fixing the SPN to verify this the only issue
- Did you get this popup message to login with a user name and password? This is mostly likely an Active Directory SPN missing on the target cluster AD computer object. Use ADSI Edit to verify the HOST\<FQDN SmartConnect name> is present on the SPN property of the target cluster. See animated GIF example of how to check.
- Done. If none of these steps resolve data access. Then proceed into the detailed debugging steps below.
Detailed Steps to Debug SmartConnect and DNS Resolution failures for Access Zone or IP Pool modes:
Test DNS response on the clusters: This test verifies that SmartConnect names were failed over successfully and also can verify if dual delegation in your DNS environment is setup correctly. This test also eliminates any issues with your internal DNS and verifies PowerScale SmartConnect zones failed over successfully.
-
If you get failed Ping or name does not resolve name to correct IP address of the TARGET cluster. Continue with steps below to debug DNS.
- From any Windows client machine type “nslookup” <press enter key> .
-
Source Cluster DNS Test:
- Then type "server x.x.x.x" <enter key> (where x.x.x.x is the Subnet service ip of the source cluster ).
- Type "FQDN of SmartConnect Zone used in failover" <press enter key> . Hint: Refer to the failover log from DR Assistant for the full list of SmartConnect names that were failed over.
- The expected response is a failed resolution since failover disables the SOURCE cluster DNS response. It is important clients do not receive an IP from the source cluster.
- Example of a failed nslookup on the cluster you failed away from “** server can't find userdata.ad1.test: REFUSED”
- NOTE: if lookup does NOT return REFUSED response, then SmartConnect name did not failover correctly AND consult recovery guide Networking section. To fix SmartConnect names.
- Target Cluster DNS Test:
- Test TARGET cluster SSIP (subnet service IP ) with DNS.
- Type "server y.y.y.y" <enter key> (where y.y.y.y is the subnet service ip of the target cluster).
- Type "FQDN of SmartConnect Zone used in failover". Refer to the failover log for list of SmartConnect names that were failed over
- Expected response SUCCESSFUL NAME RESOLUTION RETURNING IP OF THE TARGET CLUSTER. This means SmartConnect was failed over correctly to the target cluster.
- If DNS test fails this step OR IP fails to resolve OR is the wrong IP address. Consult recovery guide Networking section to fix SmartConnect names.
- Double check dual delegation is configured correctly.
- On a Windows PC type "nslookup" at the command prompt.
- Type "set type=ns" <enter key> .
- Type "FQDN of smartconnect name" .
- You should receive two name server IP in the response, and each should be the SSIP on source and target cluster. If you do not receive 2 name server records in the response, Dual DNS delegation is not configured correctly. Escalate to your DNS administrator.
- Root Cause: Your internal DNS is not setup correctly for dual delegation is not configured correctly, since SSIP on the cluster correctly answers DNS queries. Stop here and correct using guide and video below.
Detailed Steps to test Mounting a DFS protected Share with DFS failover mode:
- From a Windows client machine connected to Active Directory mount a dfs folder. Example: \\<domain name>\<dfs root name>\<DFS folder name>
- Verify file write access by creating a file.
- If successful - done.
- If write test fails OR mount fails or mount error:
- Login to the source cluster and verify the SMB share used for the DFS referral UNC has been renamed igls-dfs-xxx, where xxx is the name of the share used for the referral UNC on the DFS folder. If the share name does not have the igls-dfs prefix, add the prefix and save the share.
- Common error when DFS client is still connected to the source cluster.
- Retest data access.
- If data write still fails, login to the target cluster and verify the SMB share name DOES NOT have igls-DFS prefix. If it does remove the prefix and save the SMB share.
- Retest data access.
- Ask support for a list of SMB Shares that failed to rename during failover to get a complete list of shares that need to repeat the above steps to remediate failed rename steps.
- Login to the source cluster and verify the SMB share used for the DFS referral UNC has been renamed igls-dfs-xxx, where xxx is the name of the share used for the referral UNC on the DFS folder. If the share name does not have the igls-dfs prefix, add the prefix and save the share.
- Double Check DFS Folder is setup correctly.
- If the above steps did not show a rename step failed on source or target cluster, continue below to double check DFS folder configuration.
- DFS Folder Configuration Validation:
- Verify DFS referrals are correctly configured in Microsoft DFS Management snapin.
- Check each item below to verify configuration:
- Open DFS manager snapin, right click the DFS folder you are validating
- See example
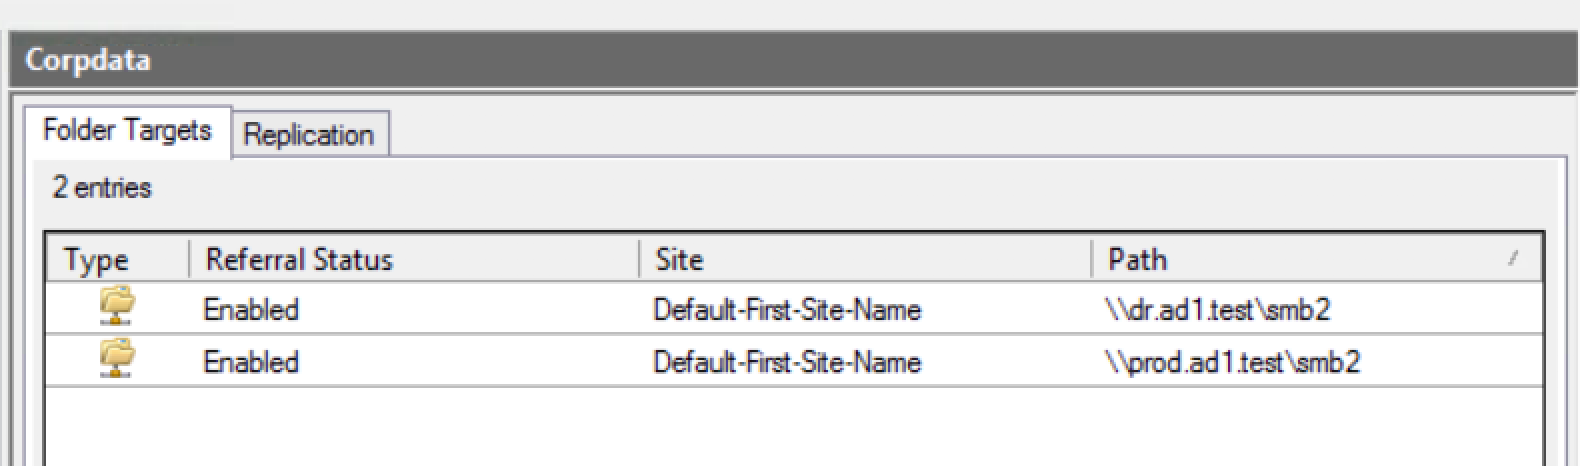
- Verify if both DFS referrals exist and are pointing at source and target cluster SmartConnect names and the share name is the same name as the screenshot example shows. Continue to next step. MAKE SURE DFS REFERRALS USE FQDN SMARTCONNECT NAME, NEVER USE SHORT DNS NAMES.
- Test each referral mount UNC path DIRECTLY :
- Example from above tested from a Windows client \\dr.ad1.test\smb2 (failover target cluster SmartConnect name used in this test).
- If the share mounts and data is visible, verify you can write data.
- This test verifies DNS and SmartConnect is configured correctly and AD authentication to the SMB share is correctly configured.
- If this step fails continue below.
- Follow steps above in this section How to Validate and troubleshoot A Successful Failover WHEN Data is NOT Accessible on the Target Cluster.
- If the above steps find a DNS resolution issue, fix the issue and retest direct share referral UNC mount to DR target cluster or mount the DFS folder again.
Detailed steps to test NFS export remount for Access Zone, IP pool or SyncIQ mode
- NFS exports must be remounted to allow the Linux host to resolve the name to ip and connect to the export.
- Command to unmount an export if a file is open is "umount -fl \<export-path-here>" (the flags are force and lazy to un mount if an open file exists).
- Command to re-read /etc/fstab and mount any export that is not already mounted "sudo mount -a" (Run as root user).
- If a mount error occurs review the error message for reason.
- Type "mount".
- Find the export in the output and verify the ip address showing in the output is from the target cluster, if not follow SmartConnect debugging steps.
- To test data write access:
- Change directory to the mount point created in /etc/fstab .
- example only if mount point was /mnt/appdata:
- cd /mnt/appdata
- touch test.txt
- The above command should complete without error. If a read- only filesystem error is returned, it means DNS returned the source cluster ip address, follow SmartConnect steps here.
- Verify the file was created "ls test.txt"
- If the file is present data access is confirmed.
- Clean up test file:
- rm test.txt
- NOTE: IF YOU CHANGED THE TARGET PATH TO REPLICATE AN EXPORT THE REMOUNT PATH WILL NEED TO BE UPDATED. EXAMPLE: source path /ifs/data/export is replicated to /ifs/data/dr/export will require the host to change the mount path to /ifs/data/dr/export.
- To avoid this issue do not change the target cluster path when creating the SyncIQ policy