Eyeglass All Product Installation and Upgrade Guides Publication
Nutanix - Eyeglass and ECA Install Guide - Information Only
Home
Superna Eyeglass or ECA or Eyeglass Installation Procedure
Installation on Nutanix Acropolis Hypervisor (AHV)
- Pre-requisites
- Installation
- Create ECA or Eyeglass image for nutanix
- Create ECA or Eyeglass VM in nutanix
- Powering on ECA or Eyeglass VM
- Additional steps post nutanix deployment
- Remove vm-tools from ECA or Eyeglass nodes
- Manually configure ECA nodes
NOTE: This is un-tested, unsupported document. We do not formally support Nutanix. This document is provided as is without any support of these procedures.
Pre-requisites
- Nutanix account with image create and deploy permission
- ECA or Eyeglass VMDK file - download ECA or Eyeglass
Installation
Create ECA or Eyeglass image for nutanix
- Login to your nutanix account
- Create and upload an ECA or Eyeglass image by going to
 → Image Configuration [Top right hand corner]
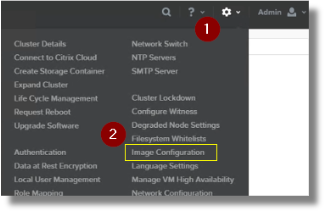
- Upload the image
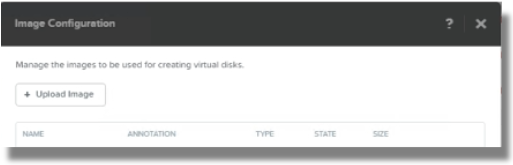
- Enter detail to create the image

Use the following:
1. NAME: Enter a name for image [keep it simple]
2. IMAGE TYPE: DISK
3. STORAGE CONTAINER: VMStorage
4. Upload a file → Choose File → select the VMDK file the zip file download for Eyeglass or ECA
5. Hit Save - Nutanix will start creating the image - wait for it to complete - may take up to 15 minutes

- Check image uploading status
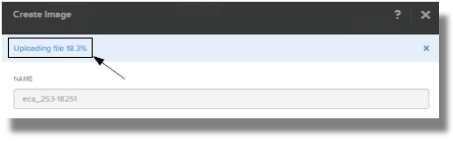
- When done make sure the new image shows ACTIVE status by going to → Image Configuration
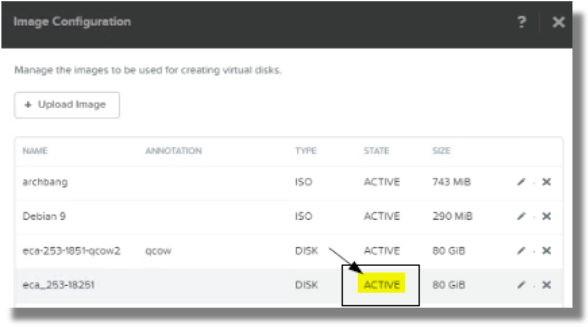
- Image creation completed
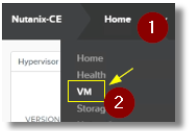
Create ECA or Eyeglass VM in nutanix
So we have the image now. We are ready to create our ECA or Eyeglass VM now
- Open VM by going to Home → VM [Top left hand corner]
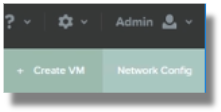
- Click Create VM [Top right hand corner]
- Enter information to create VM
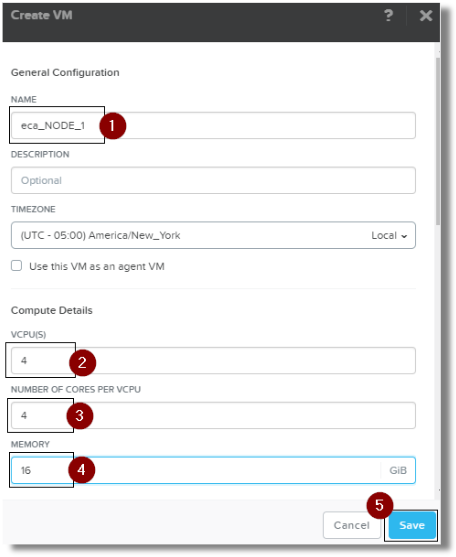
Use the following:
1. NAME: Assign a name
2. VCPU(S) - 4
3. NUM OF CORES - 4
4. MEMORY 16
5. Click Save
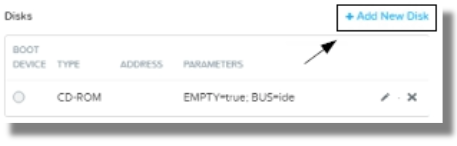
- IMPORTANT: Add a disk [Select SATA BUS TYPE]
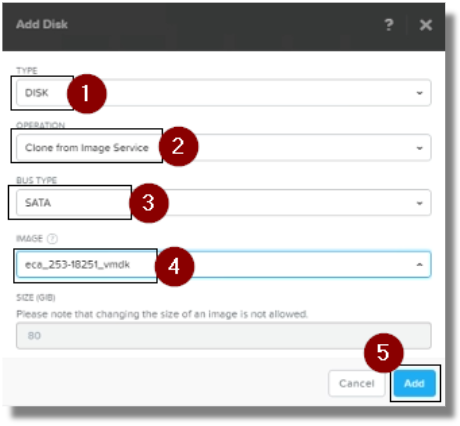
1. TYPE: DISK
2. OPERATION: Clone from Image Service
3. BUS TYPE: SATA [IMPORTANT]
4. IMAGE: Select the ECA or Eyeglass image
5. Click Add
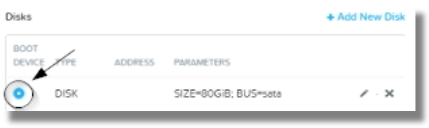
Also! Add a second 80 GB data disk to each VM for /dev/sdb - Click BOOT DEVICE radio button to activate it
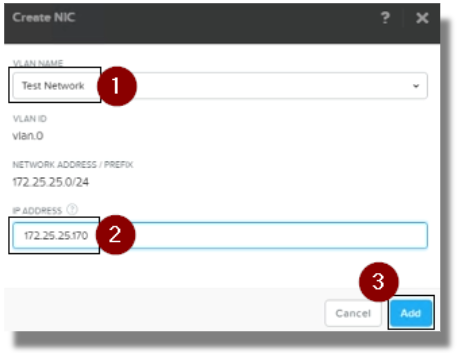
- Select Network Adapters (NIC)
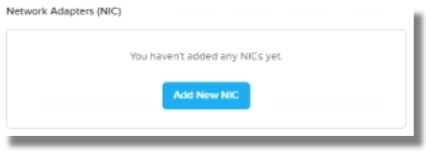
- Enter NIC information. Enter IP address then click Add.
- Check Recent Tasks for status

- Repeat Repeat step #2 → #8 for ECA or Eyeglass node 2 - 6 deployment
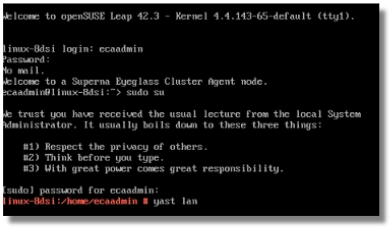
Powering on ECA or Eyeglass VM
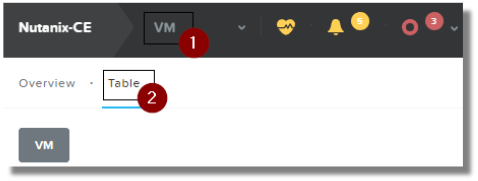
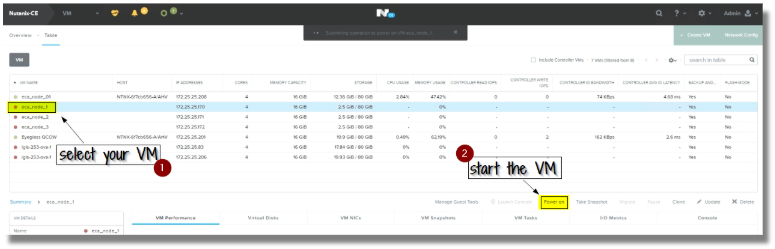
- Go to Home → VM → Table tab
- Power ON the VM
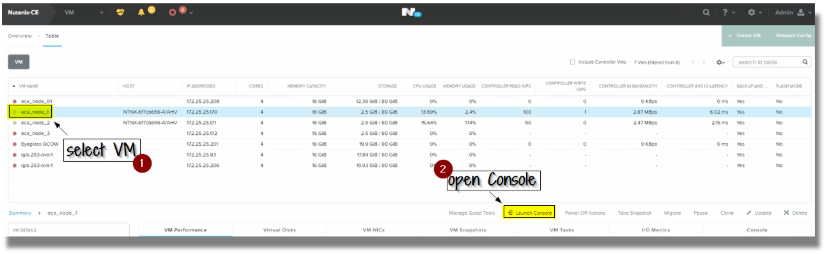
- Once Powered up, Launch Console
- Once logged into console, configure network manually using yast lan
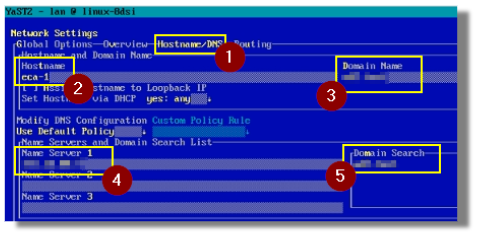
- Change IP and hostname under Overview → Edit [Use TAB key to navigate]
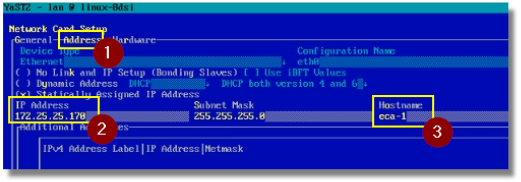
- Change Hostname, Domain Name, Name Server IP and Domain Search
- Enter default gateway information by using Routing
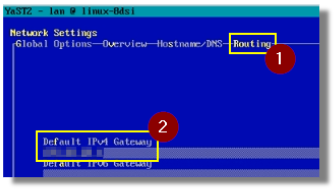
- Press F10 to save
- Reboot appliance now
reboot now - Repeat these steps for ECA or Eyeglass node 2 - 6
- Check ECA or Eyeglass connectivity using putty session
Additional steps post nutanix deployment
Remove vm-tools from ECA or Eyeglass nodes
Once powered up, remove the vm-tools from ALL ECA or Eyeglass nodes
- Login to ECA or Eyeglass node
- Elevate user account
sudo su - Look for installed vm-tool rpm
rpm -qa | grep vm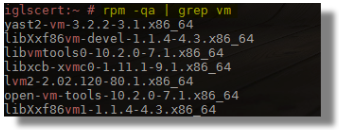
- Remove the rpm package for open-vm-tools
rpm -e open-vm-tools-version-he.re.x86_64
NOTE: Run steps on ALL ECA or Eyeglass nodes
Manually configure ECA nodes
- Manually configure eca-env-common.conf file - add ECA IP, name, Eyeglass IP, TOKEN and HBase path
nano /opt/superna/eca/eca-env-common.conf - Run components install
ecactl components install ECA
NOTE: If you receive VMWare related exception - disregard - it is expected