Eyeglass Installation Procedure - Proxmox kvm qcow
Support Statement
This guide is as is and not supported by the support contract. This is provided as a guide example only to be used as a reference for the Proxmox hypervisor that uses qcow and KVM. These steps only apply to this hypervisor but is an example of how a OVF/OVA can be converted.
Superna Eyeglass OVx Conversion Procedure
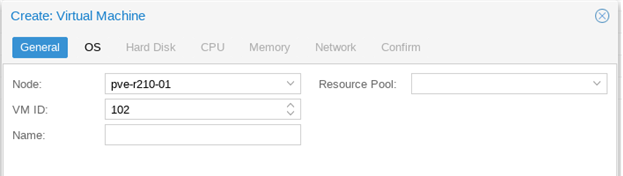
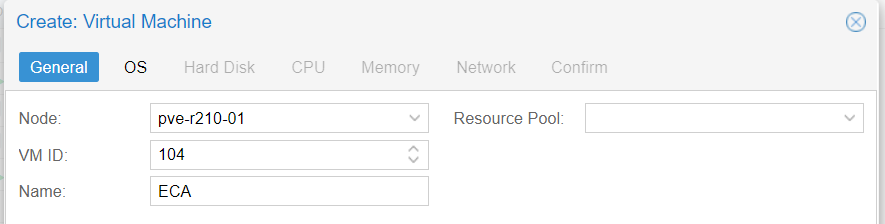
Create a new VM in Proxmox, taking note of VM ID, you can give it a name for your ease.
General:
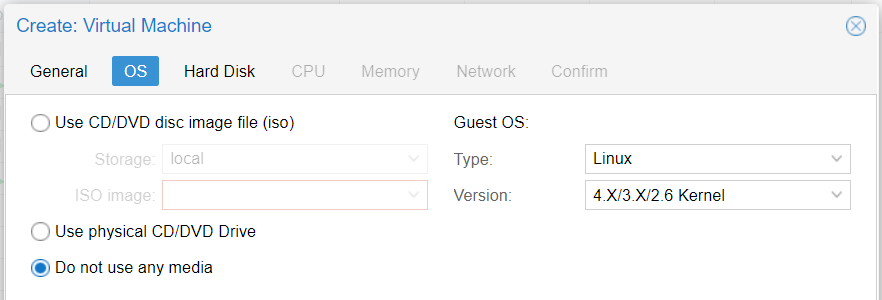
OS: Don’t Use any any media, OS : Linux 4.x/3.x Kernel
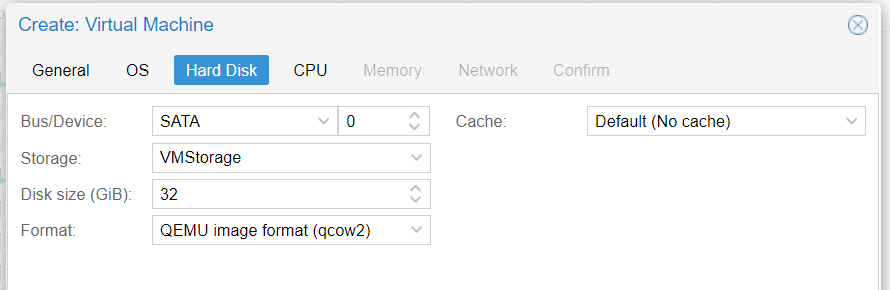
Hard Disk: Change ‘Bus/Device’ to SATA, Everything else can be left as defaults, this HD will be removed in a later step.
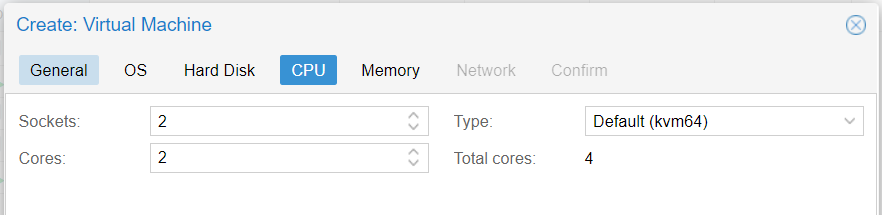
CPU: 2 Sockets, 2 Cores. Default (kvm64) type was tested

Memory: 16384MB Ram (16G)

Network: Add an Ethernet adapter (VirtIO Paravirtualized was tested), and a VLAN tag if required.

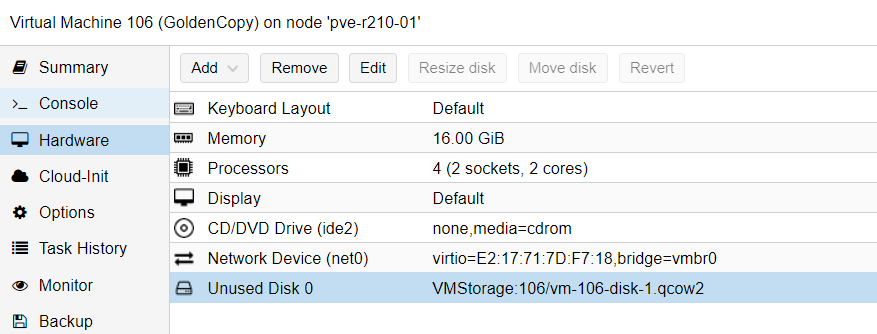
Click on the newly created VM, click Hardware, and then select Hard Disk (scsi0), then click Detach and Yes when asked to confirm.

The Hard Disk will drop into an Unused Disk state. Select this Unused Disk and select Remove
Option 1: OVF/VMDK only
Download the VMDK from repo. IF OVA, extract the vmdk from the OVA using an archive program. (7zip, winzip winrar all work).
Transfer the VMDK to Proxmox VE images folder (/var/lib/vz/images)
E.g.
scp Superna_Eyeglass.2.5.7-20285-lp15.1.x86_64-disk1-pve.vmdk root@proxmoxip:/var/lib/vz/images |
SSH over to the Proxmox HV to perform the following steps.
Convert the image to qcow2:
qemu-img convert -f vmdk Superna_Eyeglass.2.5.7-20285-lp15.1.x86_64-disk1.vmdk -O qcow2 Superna_Eyeglass.2.5.7-20285-lp15.1.x86_64.qcow2 |
You can now copy (or move) this qcow to the VMID subfolder from above.
At this point, Proxmox should populate the WebUI with the new drive so it can be simply attached. If it doesn’t, manually add the drive by editing the VM config file, stored by default at /etc/pve/qemu-server and add the following line to the end of the config file:
unused0: local:<id>/<filename> |
Where <ID> is the VMID noted above and <filename> is the name of qcow2 disk to be attached to the VM. E.g.
unused0: local:102/Superna_Eyeglass.2.5.3-18251.x86_64-disk1-pve.qcow2 |
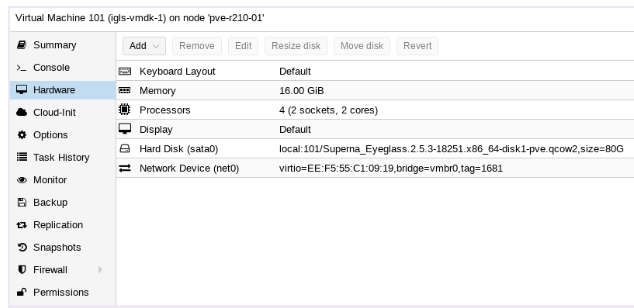
Return to the Proxmox WebUI where you will find the eyeglass boot disk, designated as ‘unused’.
Double click on the unused disk to Attach it to the VM:
Bus/Device: SATA 0

Click Add.
The configuration should look similar to this:
Start the VM, Connect to Console; you can login with user ecaadmin and default password 3y3gl4ss and proceed with normal post install configuration.
ECA OVx Conversion Procedure
Create a new VM in Proxmox, taking note of VM ID, you can give it a name for your ease.
General:
OS: Don’t Use any any media, OS : Linux 4.x/3.x Kernel

Hard Disk: Change ‘Bus/Device’ to SATA, Everything else can be left as defaults, this HD will be removed in a later step.

CPU: 2 Sockets, 2 Cores. Default (kvm64) type was tested
Memory: 16384MB Ram (16G)

Network: Add an Ethernet adapter (VirtIO Paravirtualized was tested), and a VLAN tag if required.

Click on the newly created VM, click Hardware, and then select Hard Disk (scsi0), then click Detach and Yes when asked to confirm.

The Hard Disk will drop into an Unused Disk state. Select this Unused Disk and select Remove

Option 1: OVF/VMDK only
Download the VMDK from repo. IF OVA, extract the vmdk from the OVA using an archive program. (7zip, winzip winrar all work).
Transfer the VMDK to Proxmox VE images folder (/var/lib/vz/images)
E.g.
scp Superna_ECA.2.5.7-20285-lp15.1.x86_64-disk1-pve.vmdk root@proxmoxip:/var/lib/vz/images |
SSH over to the Proxmox HV to perform the following steps.
Convert the image to qcow2:
qemu-img convert -f vmdk Superna_ECA.2.5.7-20285-lp15.1.x86_64-disk1.vmdk -O qcow2 Superna_ECA.2.5.7-20285-lp15.1.x86_64.qcow2 |
You can now copy (or move) this qcow to the VMID subfolder from above.
At this point, Proxmox should populate the WebUI with the new drive so it can be simply attached. If it doesn’t, manually add the drive by editing the VM config file, stored by default at /etc/pve/qemu-server and add the following line to the end of the config file:
unused0: local:<id>/<filename> |
Where <ID> is the VMID noted above and <filename> is the name of qcow2 disk to be attached to the VM. E.g.
unused0: local:102/Superna_Eyeglass.2.5.3-18251.x86_64-disk1-pve.qcow2 |
Return to the Proxmox WebUI where you will find the eyeglass boot disk, designated as ‘unused’.
Double click on the unused disk to Attach it to the VM:
Bus/Device: SATA 0
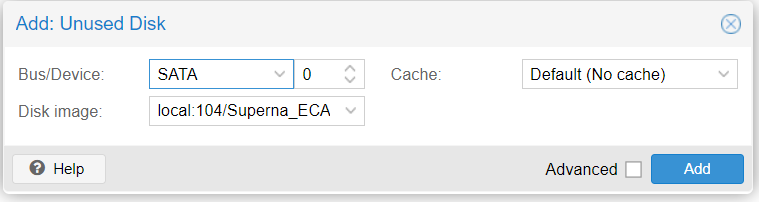
Click Add.
Select the boot order for adjusted device 1 to sata0. In addition to this we require a completely empty second disk. From UI Add > Hard Disk; make sure to choose SATA 1 and disk size minimum 80 GB.
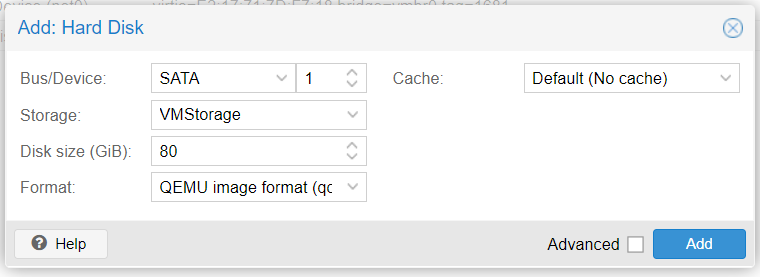
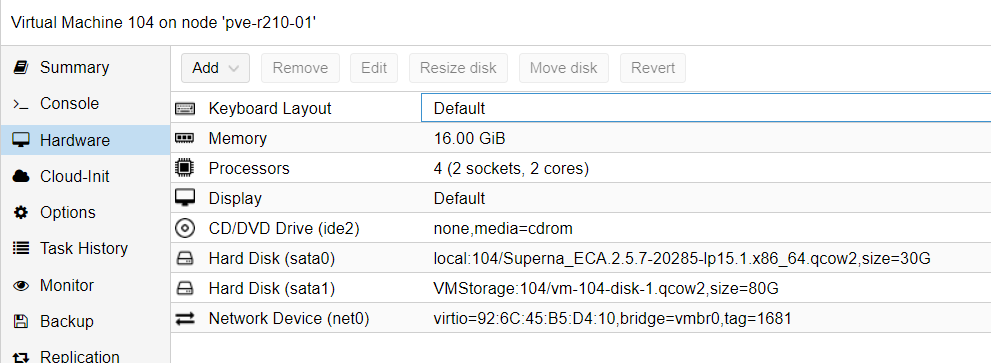
The configuration should look similar to this:
Start the VM, Connect to Console; you can login with user ecaadmin and default password 3y3gl4ss and proceed with post install configuration as follows.
Now, configure the networking setting by specifying an IP Address, Subnet Mask, Default Gateway, Cluster Name and comma-separated DNS Nameservers manually with
| /opt/superna/bin/ovf set-value [-h] KEY=VALUE [KEY=VALUE ...] |
For e.g.
| /opt.superna.bin/ovf set-value net.eth0.ipv4.ip=192.168.2.227 net.eth0.ipv4.gateway=192.168.1.1 net.eth0.ipv4.netmask=255.255.255.0 vm.clustername=ecatest net.nameservers=172.16.80.7 |
You can run /opt/superna/bin/ovf definitions to show what properties are supported by this deployment. However you need a separate call for mode and hostname (which should be same name as vm.clustername)
| /opt/superna/bin/ovf set-value --force net.hostname=’ecatest' mode='eca' |
Once the OVF values are set, check the on boot log on
| /var/log/superna_on_boot.log |
If the tail message appearing like “Waiting for node communication keys from master node …”, you have to manually create /tmp/install-done
Then run the following commands
| touch /opt/superna/.firstboot echo '3y3gl4ss' > /tmp/ecaadmin_pw sudo /opt/superna/bin/on_boot.sh |
Let’s wait for the firstboot script to complete. You can check the current progress on the screen or on
| /var/log/superna_on_boot.log |
During this on-boot process, the script will create a data filesystem on the second disk. Also, sets the networking properties and distributes the configurations and SSH/SSL keys.
Note: If the tail message appearing like “Waiting for node communication keys from master node …”, you have to manually create /tmp/install-done
Now, you can verify the installed version with
| ecactl version |
You’ll see something like this:
![]()
You might need to configure /opt/superna/eca/eca-env-common.conf as determined by the environment like the Isilon IP address, etc.